1、在Windows系统使用libavdevice抓取屏幕数据有两种方法:gdigrab和dshow。
(1)、使用dshow进行屏幕抓取首先要安装:screen capture recorder,下载地址:https://sourceforge.net/projects/screencapturer/files/
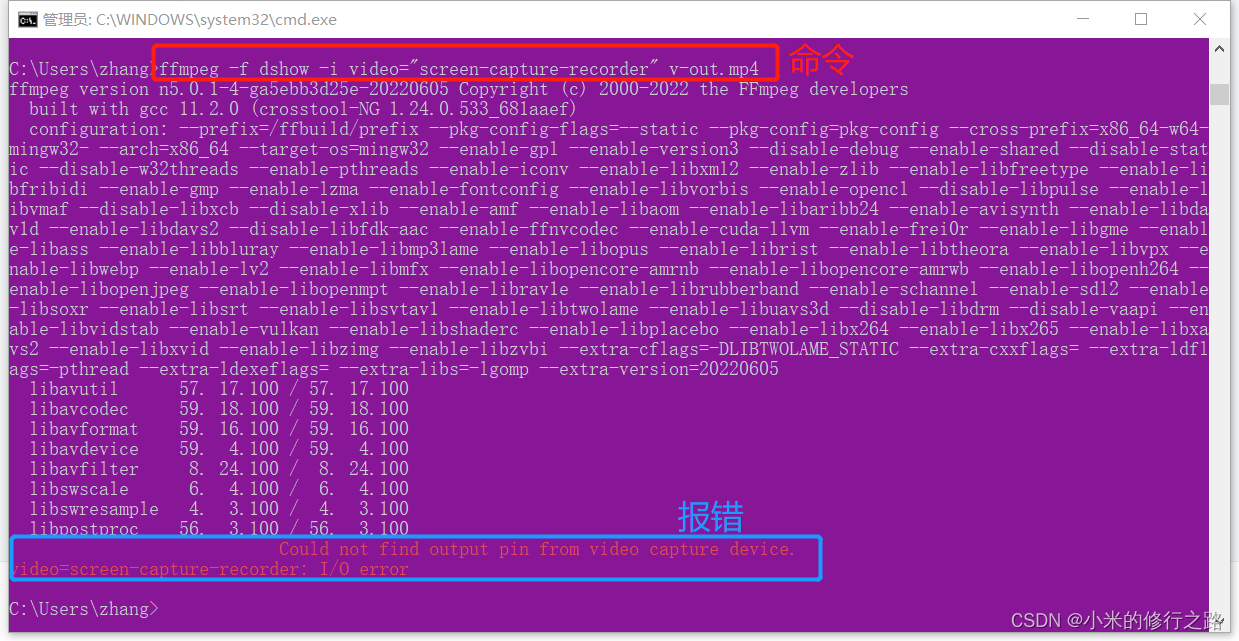
我的电脑是win10家庭中文版,使用dshow进行屏幕抓取时失败,报错如下:

if(nullptr == (pInFmt = const_cast<AVInputFormat*>(av_find_input_format("dshow")))){qDebug() << "find AVInputFormat failed." << endl;break;}//打开输入设备if(avformat_open_input(&pFmtCtx, "video=screen-capture-recorder", pInFmt, nullptr) != 0){qDebug() << "avformat_open_input failed." << endl;break;}音频可以获取成功,一直也没有找到问题原因,我看别人博客貌似都可以成功!
(2)使用dgigrab可以进行屏幕抓取成功:
if(nullptr == (pInFmt = const_cast<AVInputFormat*>(av_find_input_format("gdigrab")))){qDebug() << "find AVInputFormat failed." << endl;break;}AVDictionary* options = NULL;//Set some options://1、grabbing frame rate//av_dict_set(&options,"framerate","5",0);//2、The distance from the left edge of the screen or desktop//av_dict_set(&options,"offset_x","20",0);//3、The distance from the top edge of the screen or desktop//av_dict_set(&options,"offset_y","40",0);//4、Video frame size. The default is to capture the full screen//av_dict_set(&options,"video_size","640x480",0);//打开输入设备if(avformat_open_input(&pFmtCtx, "desktop", pInFmt, &options) < 0){qDebug() << "avformat_open_input failed." << endl;break;}2、主要实现代码:
(1)、屏幕抓取操作放在单独线程中执行:
signals://发送抓取的图像帧void sig_sendQImage(QImage);public slots://抓取操作void slot_slog_screenRecord();void videoThread::slog_screenRecord()
{AVFormatContext* pFmtCtx = nullptr;AVInputFormat* pInFmt = nullptr;int nVideoIndex = -1;AVCodecParameters* pCodecParam = nullptr;AVCodecContext * pCodecCtx = nullptr;AVCodec * pCodec = nullptr;AVFrame* pFrame = av_frame_alloc();AVFrame* pFrameRGB = av_frame_alloc();AVPacket* pkt = nullptr;do{//注册组件:libavdeviceavdevice_register_all();avformat_network_init();//创建设备上下文if(nullptr == (pFmtCtx = avformat_alloc_context())){qDebug() << "create AVFormatContext failed." << endl;break;}//查找摄像头设备//1.gdigrab//2.dshow:if(0)//dshow{if(nullptr == (pInFmt = const_cast<AVInputFormat*>(av_find_input_format("dshow")))){qDebug() << "find AVInputFormat failed." << endl;break;}QList<QCameraInfo> cameras = QCameraInfo::availableCameras();QString urlString = QString("video=") + cameras.at(1).description();//打开输入设备if(avformat_open_input(&pFmtCtx, "video=screen-capture-recorder", pInFmt, nullptr) != 0){qDebug() << "avformat_open_input failed." << endl;break;}}else //vfwcap{if(nullptr == (pInFmt = const_cast<AVInputFormat*>(av_find_input_format("gdigrab")))){qDebug() << "find AVInputFormat failed." << endl;break;}AVDictionary* options = NULL;//Set some options://1、grabbing frame rate//av_dict_set(&options,"framerate","5",0);//2、The distance from the left edge of the screen or desktop//av_dict_set(&options,"offset_x","20",0);//3、The distance from the top edge of the screen or desktop//av_dict_set(&options,"offset_y","40",0);//4、Video frame size. The default is to capture the full screen//av_dict_set(&options,"video_size","640x480",0);//打开输入设备if(avformat_open_input(&pFmtCtx, "desktop", pInFmt, &options) < 0){qDebug() << "avformat_open_input failed." << endl;break;}}//查找流信息if(avformat_find_stream_info(pFmtCtx, NULL) < 0){qDebug() << "cannot find stream info." << endl;break;}for(size_t i = 0;i < pFmtCtx->nb_streams;i++){if(pFmtCtx->streams[i]->codecpar->codec_type==AVMEDIA_TYPE_VIDEO){nVideoIndex = i;break;}}if(nVideoIndex == -1){qDebug() << "cannot find video stream." << endl;break;}//查找编码器pCodecParam = pFmtCtx->streams[nVideoIndex]->codecpar;if(nullptr == (pCodec = const_cast<AVCodec*>(avcodec_find_decoder(pCodecParam->codec_id)))){qDebug() << "cannot find codec." << endl;break;}//创建编码器上下文if(nullptr == (pCodecCtx = avcodec_alloc_context3(pCodec))){qDebug() << "cannot alloc codecContext." << endl;break;}if(avcodec_parameters_to_context(pCodecCtx, pCodecParam) < 0){qDebug() << "cannot initialize codecContext." << endl;break;}//打开编码器if(avcodec_open2(pCodecCtx, pCodec, NULL) < 0){qDebug() << "cannot open codec." << endl;break;}//设置帧数据转换上下文struct SwsContext *img_convert_ctx = nullptr;img_convert_ctx = sws_getContext(pCodecCtx->width, pCodecCtx->height, pCodecCtx->pix_fmt,pCodecCtx->width, pCodecCtx->height, AV_PIX_FMT_RGB24,SWS_BICUBIC, NULL, NULL, NULL);qDebug() << pCodecCtx->width << "---" << pCodecCtx->height << endl;int numBytes = av_image_get_buffer_size(AV_PIX_FMT_RGB24, pCodecCtx->width, pCodecCtx->height, 1);uint8_t* out_buffer = (unsigned char*)av_malloc(static_cast<unsigned long long>(numBytes) * sizeof(unsigned char));//绑定内存块if(av_image_fill_arrays(pFrameRGB->data, pFrameRGB->linesize,out_buffer, AV_PIX_FMT_RGB24, pCodecCtx->width, pCodecCtx->height, 1) < 0){qDebug() << "av_image_fill_arrays failed." << endl;break;}int ret;pkt = av_packet_alloc();av_new_packet(pkt, pCodecCtx->width * pCodecCtx->height);while(av_read_frame(pFmtCtx, pkt) >= 0){if(pkt->stream_index == nVideoIndex){if(avcodec_send_packet(pCodecCtx, pkt)>=0){while((ret = avcodec_receive_frame(pCodecCtx, pFrame)) >= 0){if (ret == AVERROR(EAGAIN) || ret == AVERROR_EOF)return;else if (ret < 0) {return;}//将解码后数据转换为Rgb格式数据sws_scale(img_convert_ctx,pFrame->data, pFrame->linesize,0, pCodecCtx->height,pFrameRGB->data, pFrameRGB->linesize);//将img发送给界面进行显示QImage img(out_buffer, pCodecCtx->width, pCodecCtx->height, QImage::Format_RGB888);emit sig_sendQImage(img);QThread::msleep(50);}}av_packet_unref(pkt);}}}while(0);av_packet_free(&pkt);avcodec_close(pCodecCtx);avcodec_parameters_free(&pCodecParam);av_frame_free(&pFrame);av_frame_free(&pFrameRGB);if(pFmtCtx){avformat_close_input(&pFmtCtx);avformat_free_context(pFmtCtx);}
}(1)、线程的创建,信号槽的绑定等操作:
void MainWindow::createWorkThread()
{videoThread* pVideoThread = new videoThread;pVideoThread->moveToThread(&m_workThread);//线程结束后销毁videoThread对象connect(&m_workThread, &QThread::finished, pVideoThread, &QObject::deleteLater);//绑定相关信号槽connect(this, &MainWindow::sig_screenRecord, pVideoThread, &videoThread::slog_screenRecord);connect(pVideoThread, &videoThread::sig_sendQImage, this, &MainWindow::slot_displayImage);m_workThread.start();}void MainWindow::releaseWorkThread()
{m_workThread.quit();m_workThread.wait();
}void MainWindow::slot_displayImage(QImage img)
{ui->labDisplay->setPixmap(QPixmap::fromImage(img).scaled(ui->labDisplay->width(), ui->labDisplay->height()));
}void MainWindow::on_btnPlay_clicked()
{emit sig_screenRecord();
}
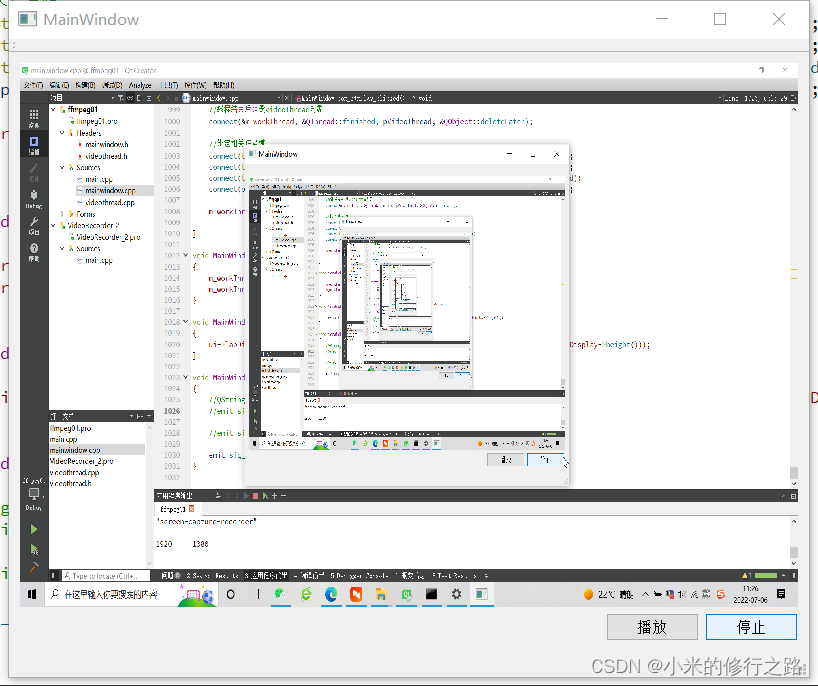
(3)、抓取效果:


