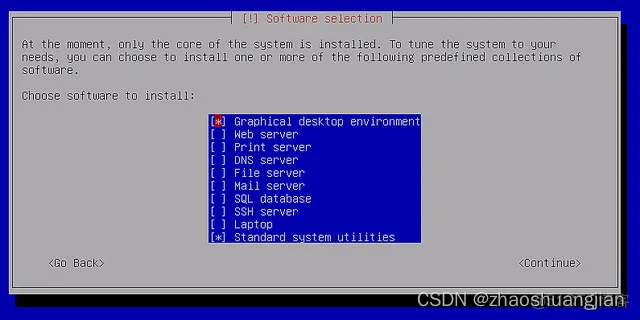
当你在终端环境下安装新的软件时,你可以经常看到信息对话框弹出,需要你的输入,比如:RHEL/CentOS自带的setup,对话框的类型有密码箱、检查表、菜单等等。他们可以引导你以一种直观的方式输入必要的信息,使用这样的用户友好的对话框的好处是显而易见的。如下图所示:
当你写一个交互式shell脚本,你可以使用这样的对话框来接受用户的输入。whiptail可以在shell脚本中创建基于终端的对话框,消息框的过程,类似于Zenity或xdialog GUI脚本代码。whiptail预先安装在所有的Linux发布版本中。
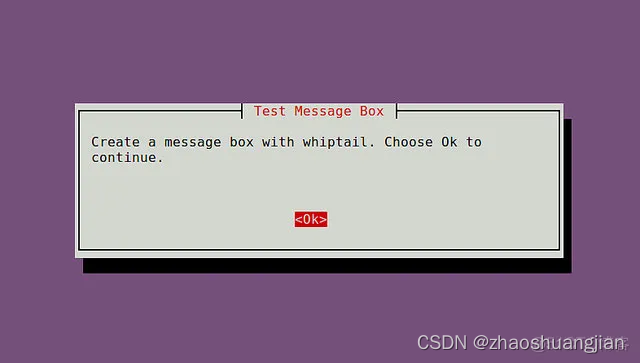
1. 创建一个消息框中显示一个确认按钮继续任意的文本消息。
语法:
whiptail --title "<message box title>" --msgbox "<text to show>" <height> <width>
实例:
#!/bin/bash
whiptail --title "Test Message Box" --msgbox "Create a message box with whiptail. Choose Ok to continue." 10 60
2. 创建一个yes/no对话框用户输入yes或no的对话框。
语法:
whiptail --title "<dialog box title>" --yesno "<text to show>" <height> <width>
实例:
#!/bin/bash
if (whiptail --title "Test Yes/No Box" --yesno "Choose between Yes and No." 10 60) thenecho "You chose Yes. Exit status was $?."
elseecho "You chose No. Exit status was $?."
fi
或者,你可以是“–yes-button” ,"–no-button"选项。
#!/bin/bash
if (whiptail --title "Test Yes/No Box" --yes-button "Skittles" --no-button "M&M's"  --yesno "Which do you like better?" 10 60) thenecho "You chose Skittles Exit status was $?."
elseecho "You chose M&M's. Exit status was $?."
fi
3. 创建一个表单输入框如果你想用户输入任意的文本
语法:
whiptail --title "<input box title>" --inputbox "<text to show>" <height> <width> <default-text>
实例:
#!/bin/bash
PET=$(whiptail --title "Test Free-form Input Box" --inputbox "What is your pet's name?" 10 60 Wigglebutt 3>&1 1>&2 2>&3)exitstatus=$?
if [ $exitstatus = 0 ]; thenecho "Your pet name is:" $PET
elseecho "You chose Cancel."
fi
4. 创建一个密码框当用户需要输入敏感信息时密码框是有用的。
语法:
whiptail --title "<password box title>" --passwordbox "<text to show>" <height> <width>
实例:
#!/bin/bash
PASSWORD=$(whiptail --title "Test Password Box" --passwordbox "Enter your password and choose Ok to continue." 10 60 3>&1 1>&2 2>&3)exitstatus=$?
if [ $exitstatus = 0 ]; thenecho "Your password is:" $PASSWORD
elseecho "You chose Cancel."
fi
5. 创建一个菜单栏当你想让用户选择一个任意数量的选择中,你可以使用菜单框。
语法:
whiptail --title "<menu title>" --menu "<text to show>" <height> <width> <menu height> [ <tag> <item> ] . . .
实例:
#!/bin/bash
OPTION=$(whiptail --title "Test Menu Dialog" --menu "Choose your option" 15 60 4 \
"1" "Grilled Spicy Sausage" \
"2" "Grilled Halloumi Cheese" \
"3" "Charcoaled Chicken Wings" \
"4" "Fried Aubergine"  3>&1 1>&2 2>&3)exitstatus=$?
if [ $exitstatus = 0 ]; thenecho "Your chosen option:" $OPTION
elseecho "You chose Cancel."
fi
6. 创建radiolist对话框
语法:
whiptail --title "<radiolist title>" --radiolist "<text to show>" <height> <width> <list height> [ <tag> <item> <status> ] . . .
实例:
#!/bin/bash
DISTROS=$(whiptail --title "Test Checklist Dialog" --radiolist \
"What is the Linux distro of your choice?" 15 60 4 \
"debian" "Venerable Debian" ON \
"ubuntu" "Popular Ubuntu" OFF \
"centos" "Stable CentOS" OFF \
"mint" "Rising Star Mint" OFF 3>&1 1>&2 2>&3)exitstatus=$?
if [ $exitstatus = 0 ]; thenecho "The chosen distro is:" $DISTROS
elseecho "You chose Cancel."
fi
7. 创建一个表对话框当你想让用户选择一个列表中选择多个选项的清单对话框是有用的,radiolist对话框,只允许选择一个。
语法:
whiptail --title "<checklist title>" --checklist "<text to show>" <height> <width> <list height> [ <tag> <item> <status> ] . . .
实例:
#!/bin/bash
DISTROS=$(whiptail --title "Test Checklist Dialog" --checklist \
"Choose preferred Linux distros" 15 60 4 \
"debian" "Venerable Debian" ON \
"ubuntu" "Popular Ubuntu" OFF \
"centos" "Stable CentOS" ON \
"mint" "Rising Star Mint" OFF 3>&1 1>&2 2>&3)exitstatus=$?
if [ $exitstatus = 0 ]; thenecho "Your favorite distros are:" $DISTROS
elseecho "You chose Cancel."
fi
8. 创建一个进度条进度条是一个用户友好的对话框。whiptail从标准输入读取一个百分数(0~100),显示一个表内相应的计数。
语法:
whiptail --gauge "<test to show>" <height> <width> <inital percent>
实例:
#!/bin/bash
{for ((i = 0 ; i <= 100 ; i+=20)); dosleep 1echo $idone
} | whiptail --gauge "Please wait while installing" 6 60 0