首先从train.py文件开始阅读
trian.py
args = parse_args()
调用parse_args()函数为解析命令行参数进行配置
def parse_args():parser = argparse.ArgumentParser(description='Train a detector')parser.add_argument('config', help='train config file path')parser.add_argument('--work-dir', help='the dir to save logs and models')parser.add_argument('--resume-from', help='the checkpoint file to resume from')parser.add_argument('--validate',#action - 当参数在命令行中出现时使用的动作基本类型。action='store_true',help='whether to evaluate the checkpoint during training')#创建一个互斥组。 argparse 将会确保互斥组中只有一个参数在命令行中可用group_gpus = parser.add_mutually_exclusive_group()group_gpus.add_argument('--gpus',type=int,help='number of gpus to use ''(only applicable to non-distributed training)')group_gpus.add_argument('--gpu-ids',type=int,nargs='+',help='ids of gpus to use ''(only applicable to non-distributed training)')parser.add_argument('--seed', type=int, default=None, help='random seed')parser.add_argument('--deterministic',action='store_true',help='whether to set deterministic options for CUDNN backend.')parser.add_argument('--options', nargs='+', action=DictAction, help='arguments in dict')parser.add_argument('--launcher',choices=['none', 'pytorch', 'slurm', 'mpi'],default='none',help='job launcher')parser.add_argument('--local_rank', type=int, default=0)parser.add_argument('--port', type=int, default=123123)parser.add_argument('--autoscale-lr',action='store_true',help='automatically scale lr with the number of gpus')#解析参数args = parser.parse_args()if 'LOCAL_RANK' not in os.environ:os.environ['LOCAL_RANK'] = str(args.local_rank)return args
通过parser设置的参数若未在函数中指定,则需要使用命令行运行该程序时指定,否则会报错
上述参数需要通过.sh脚本进行初始化
slurm_test.sh
此bash脚本为超算资源分配脚本
#!/usr/bin/env bash
#指定接受的第几个参数
PARTITION=$1
JOB_NAME=$2
DATASET=$3
CONFIG=$4
CHECKPOINT=$5
GPUS=${GPUS:-8}
GPUS_PER_NODE=${GPUS_PER_NODE:-8}
CPUS_PER_TASK=${CPUS_PER_TASK:-5}
PY_ARGS=${@:6}
SRUN_ARGS=${SRUN_ARGS:-""}PYTHONPATH="$(dirname $0)/..":$PYTHONPATH \
srun -p ${PARTITION} \ #指定分区cpu--job-name=${JOB_NAME} \#指定GPU卡数--gres=gpu:${GPUS_PER_NODE} \--ntasks=${GPUS} \--ntasks-per-node=${GPUS_PER_NODE} \--cpus-per-task=${CPUS_PER_TASK} \--kill-on-bad-exit=1 \${SRUN_ARGS} \#python命令加上-u参数后会强制其标准输出也同标准错误一样不通过缓存直接打印到屏幕python -u ganet/${DATASET}/test_dataset.py \../configs/${DATASET}/${CONFIG}.py \${CHECKPOINT} \${PY_ARGS}
cfg = Config.fromfile(args.config)
再从刚刚定义的参数设置中读取参数
测试时运行的命令
# For example, model = ganet-small
sh slurm_test.sh [PARTITION] [JOB_NAME] tusimple final_exp_res18_s8 [CHECKPOINT]
sh dist_test.sh tusimple final_exp_res18_s8 [CHECKPOINT]
命令中的参数对照着test.py看
第一行为slurm平台对应的管理命令,我认为在我的电脑上本地跑可以不执行
第二行
- 第一个参数是选择要测试的数据集
- 第二个参数是测试集对应的参数py文件
- 第三个是存放测试集对应模型的地址
注意在加载数据集时要修改对应的参数py文件(例如final_exp_res18_s8)中的data_root地址改为数据集所在目录
首次运行时我选择最小的resnet18模型,将命令改为
sh dist_test.sh culane final_exp_res18_s8 ganet_culane_resnet18
第一次尝试运行失败
失败原因
No CUDA runtime is found, using CUDA_HOME='C:/Program Files/NVIDIA GPU Computing Toolkit/CUDA\v9.0'
Traceback (most recent call last):File "./ganet/culane/test_dataset.py", line 305, in <module>main()File "./ganet/culane/test_dataset.py", line 267, in maininit_dist(args.launcher, **cfg.dist_params)File "D:\Anaconda3\envs\ganet\lib\site-packages\mmcv\runner\dist_utils.py", line 18, in init_dist_init_dist_pytorch(backend, **kwargs)File "D:\Anaconda3\envs\ganet\lib\site-packages\mmcv\runner\dist_utils.py", line 31, in _init_dist_pytorchtorch.cuda.set_device(rank % num_gpus)
ZeroDivisionError: integer division or modulo by zero
ERROR:torch.distributed.elastic.multiprocessing.api:failed (exitcode: 1) local_rank: 0 (pid: 12320) of binary: D:\Anaconda3\envs\ganet\python.exe
百度后发现是之前默认装的是cpu版本的torch,返回false后作为0除数失败了。需要卸载重新安装gpu版本。
第二次运行失败
重新安装GPU版本后继续报错
Traceback (most recent call last):File "./ganet/culane/test_dataset.py", line 17, in <module>from mmcv.runner import get_dist_info, init_dist, load_checkpointFile "D:\Anaconda3\envs\ganet\lib\site-packages\mmcv\runner\__init__.py", line 3, in <module>from .base_runner import BaseRunnerFile "D:\Anaconda3\envs\ganet\lib\site-packages\mmcv\runner\base_runner.py", line 13, in <module>from .checkpoint import load_checkpointFile "D:\Anaconda3\envs\ganet\lib\site-packages\mmcv\runner\checkpoint.py", line 14, in <module>import torchvisionFile "D:\Anaconda3\envs\ganet\lib\site-packages\torchvision\__init__.py", line 7, in <module>from torchvision import modelsFile "D:\Anaconda3\envs\ganet\lib\site-packages\torchvision\models\__init__.py", line 2, in <module>from .convnext import *File "D:\Anaconda3\envs\ganet\lib\site-packages\torchvision\models\convnext.py", line 8, in <module>from ..ops.misc import Conv2dNormActivation, PermuteFile "D:\Anaconda3\envs\ganet\lib\site-packages\torchvision\ops\__init__.py", line 18, in <module>from .drop_block import drop_block2d, DropBlock2d, drop_block3d, DropBlock3dFile "D:\Anaconda3\envs\ganet\lib\site-packages\torchvision\ops\drop_block.py", line 2, in <module>import torch.fx
ModuleNotFoundError: No module named 'torch.fx'
没有找到torch.fx模块,尝试直接使用conda安装,提示在源上没有找到该模块。
尝试使用搜索命令在其他原上寻找,并没有找到该模块。
核对一下安装的模块版本,发现torchvision版本远低于要求,尝试卸载后装一个对应版本的,解决该报错
第三次运行失败
Traceback (most recent call last):File "./ganet/culane/test_dataset.py", line 18, in <module>from mmdet.datasets import build_dataloader, build_datasetFile "e:\pythonproject\ganet-master\mmdet\datasets\__init__.py", line 2, in <module>from .custom import CustomDatasetFile "e:\pythonproject\ganet-master\mmdet\datasets\custom.py", line 7, in <module>from mmdet.core import eval_map, eval_recallsFile "e:\pythonproject\ganet-master\mmdet\core\__init__.py", line 5, in <module>from .mask import *  # noqa: F401, F403File "e:\pythonproject\ganet-master\mmdet\core\mask\__init__.py", line 2, in <module>from .structures import BitmapMasks, PolygonMasksFile "e:\pythonproject\ganet-master\mmdet\core\mask\structures.py", line 8, in <module>from mmdet.ops.roi_align import roi_alignFile "e:\pythonproject\ganet-master\mmdet\ops\__init__.py", line 3, in <module>from .dcn import (DeformConv, DeformConvPack, DeformRoIPooling,File "e:\pythonproject\ganet-master\mmdet\ops\dcn\__init__.py", line 1, in <module>from .deform_conv import (DeformConv, DeformConvPack, ModulatedDeformConv,File "e:\pythonproject\ganet-master\mmdet\ops\dcn\deform_conv.py", line 12, in <module>from . import deform_conv_ext
ImportError: DLL load failed: 找不到指定的程序。
尝试重新使用使用开源的build.txt安装一次依赖的包
pip install -r requirements/build.txt
结果把我装的gpu版本torch卸载重新装了cpu版本的,回到之前的报错。
将build.txt中关于torch部分注释掉重新安装一次,提示都已安装。
感觉可能是setup部分时报错导致的,先解决setup报错的问题。
D:\Anaconda3\envs\ganet\lib\site-packages\torch\utils\cpp_extension.py:270: UserWarning: Error checking compiler version for cl: [WinError 2] 系统找不到指定的文件。warnings.warn('Error checking compiler version for {}: {}'.format(compiler, error))
building 'mmdet.ops.utils.compiling_info' extension
https://blog.csdn.net/goodgoodstudy___/article/details/121577651
按照这篇文章中的说法进行修改,无效
看到github上issue上有人说要注意cuda的版本问题,我自己的cuda是11.6.58

issue里面推荐安装10.1.243 版本的,正常向下兼容是没有问题的,但是由于这篇文章中的代码是C++和Python混编的,会引起以外的bug。
放弃在windows平台上运行这个程序了,重新在Ubuntu上配环境。
在Ubuntu上配置环境到运行
python setup.py develop
报错
raise ValueError("Unknown CUDA arch ({}) or GPU not supported".format(arch))
ValueError: Unknown CUDA arch (8.6) or GPU not supported
按照这篇文章提供的方法成功解决,注意要修改的cpp文件地址在报错中有
https://blog.csdn.net/ng323/article/details/116940299
改完之后继续报错
utils/cpp_extension.py", line 1529, in _run_ninja_buildraise RuntimeError(message)
RuntimeError: Error compiling objects for extension
百度发现主要是因为cuda版本和pytorch不对应报的错,实验室服务器上用的是3080只能使用11.0以上的cuda,github上安装的三件套版本较老,我感觉之前的大部分报错都是因为这个。
conda install pytorch==1.7.0 torchvision==0.8.0 cudatoolkit=11.3 -c pytorch -y
重新安装了三件套后成功运行setup.py
测试时运行的命令
/bin/bash dist_test.sh culane final_exp_res18_s8 /checkpoint/ganet_culane_resnet18
运行时报错发现之前装的是CPU版本的pytorch,卸载后重新装一个GPU版本的,运行setup.py失败,报错如下
“subprocess.CalledProcessError: Command ‘[‘ninja‘, ‘-v‘]‘ returned non-zero exit status 1”
解决方法如下
将setup.py中的“cmdclass={‘build_ext’:
BuildExtension}”这一行改为“cmdclass={‘build_ext’:
BuildExtension.with_options(use_ninja=False)}”,pytorch默认使用ninjia作为backend,这里把它禁用掉就好了;
继续报错如下
nvcc fatal : Unsupported gpu architecture ‘compute_86’
解决方法如下
https://blog.csdn.net/qq_31347869/article/details/123348901
成功运行setup.py
测试时报错
I
/home/liuzezheng/anaconda3/envs/ganet/lib/python3.7/site-packages/torch/distributed/launch.py:186: FutureWarning: The module torch.distributed.launch is deprecated
and will be removed in future. Use torchrun.
Note that --use_env is set by default in torchrun.
If your script expects `--local_rank` argument to be set, please
change it to read from `os.environ['LOCAL_RANK']` instead. See
https://pytorch.org/docs/stable/distributed.html#launch-utility for
further instructionsFutureWarning,
Traceback (most recent call last):File "./ganet/culane/test_dataset.py", line 18, in <module>from mmdet.datasets import build_dataloader, build_datasetFile "/home/liuzezheng/ganet/mmdet/datasets/__init__.py", line 2, in <module>from .custom import CustomDatasetFile "/home/liuzezheng/ganet/mmdet/datasets/custom.py", line 7, in <module>from mmdet.core import eval_map, eval_recallsFile "/home/liuzezheng/ganet/mmdet/core/__init__.py", line 5, in <module>from .mask import *  # noqa: F401, F403File "/home/liuzezheng/ganet/mmdet/core/mask/__init__.py", line 2, in <module>from .structures import BitmapMasks, PolygonMasksFile "/home/liuzezheng/ganet/mmdet/core/mask/structures.py", line 8, in <module>from mmdet.ops.roi_align import roi_alignFile "/home/liuzezheng/ganet/mmdet/ops/__init__.py", line 3, in <module>from .dcn import (DeformConv, DeformConvPack, DeformRoIPooling,File "/home/liuzezheng/ganet/mmdet/ops/dcn/__init__.py", line 1, in <module>from .deform_conv import (DeformConv, DeformConvPack, ModulatedDeformConv,File "/home/liuzezheng/ganet/mmdet/ops/dcn/deform_conv.py", line 12, in <module>from . import deform_conv_ext
ImportError: /home/liuzezheng/ganet/mmdet/ops/dcn/deform_conv_ext.cpython-37m-x86_64-linux-gnu.so: undefined symbol: _ZNK2at6Tensor6deviceEv
ERROR:torch.distributed.elastic.multiprocessing.api:failed (exitcode: 1) local_rank: 0 (pid: 1522355) of binary: /home/liuzezheng/anaconda3/envs/ganet/bin/python
Traceback (most recent call last):File "/home/liuzezheng/anaconda3/envs/ganet/lib/python3.7/runpy.py", line 193, in _run_module_as_main"__main__", mod_spec)File "/home/liuzezheng/anaconda3/envs/ganet/lib/python3.7/runpy.py", line 85, in _run_codeexec(code, run_globals)File "/home/liuzezheng/anaconda3/envs/ganet/lib/python3.7/site-packages/torch/distributed/launch.py", line 193, in <module>main()File "/home/liuzezheng/anaconda3/envs/ganet/lib/python3.7/site-packages/torch/distributed/launch.py", line 189, in mainlaunch(args)File "/home/liuzezheng/anaconda3/envs/ganet/lib/python3.7/site-packages/torch/distributed/launch.py", line 174, in launchrun(args)File "/home/liuzezheng/anaconda3/envs/ganet/lib/python3.7/site-packages/torch/distributed/run.py", line 755, in run)(*cmd_args)File "/home/liuzezheng/anaconda3/envs/ganet/lib/python3.7/site-packages/torch/distributed/launcher/api.py", line 131, in __call__return launch_agent(self._config, self._entrypoint, list(args))File "/home/liuzezheng/anaconda3/envs/ganet/lib/python3.7/site-packages/torch/distributed/launcher/api.py", line 247, in launch_agentfailures=result.failures,
torch.distributed.elastic.multiprocessing.errors.ChildFailedError:
============================================================
./ganet/culane/test_dataset.py FAILED
------------------------------------------------------------
Failures:<NO_OTHER_FAILURES>
------------------------------------------------------------
Root Cause (first observed failure):
[0]:time      : 2022-09-28_23:22:47host      : Athenarank      : 0 (local_rank: 0)exitcode  : 1 (pid: 1522355)error_file: <N/A>traceback : To enable traceback see: https://pytorch.org/docs/stable/elastic/errors.html
============================================================
代码的测试集目前已经能够运行了,之后有时间整理一下环境配置的问题
代码阅读
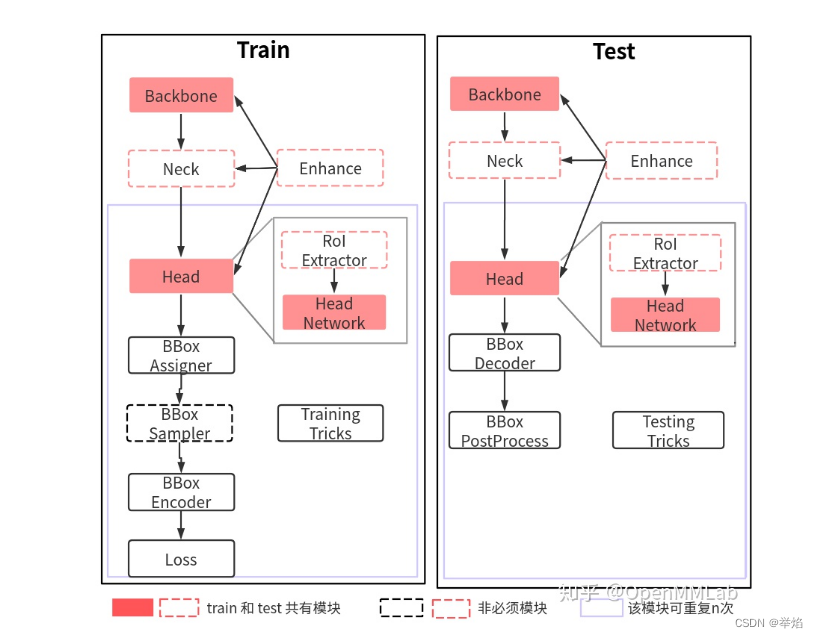
因为测试时只需要考虑前向传播,比较简单,所以我先从测试流程看起

根据MMdet的流程,会使用config文件来完成数据,模型和优化器的设置,我加载的是fianl_exp_res18_s8 这套设置。
模型的配置
model = dict(type='GANet',pretrained='torchvision://resnet18',train_cfg=train_cfg,test_cfg=test_cfg,num_classes=num_lane_classes,sample_gt_points=sample_gt_points,use_smooth=use_smooth,point_scale=point_scale,backbone=dict(type='ResNet',depth=18,#backbone使用18层的resnetstrides=(1, 2, 2, 2),num_stages=4,out_indices=(0, 1, 2, 3),# 输出ResNet18第1~4阶段的feature map,供后续FPN做多尺度特征融合frozen_stages=1,norm_cfg=dict(type='BN', requires_grad=True),#归一化层配置norm_eval=True,style='pytorch'),neck=dict(type='DeformFPN',#Neck使用DeformFPNin_channels=[128, 256, 512],# 输入通道数应该对应的是经过SA模块后的特征图通道数out_channels=64,#输出的特征维度为64dcn_point_num=dcn_point_num,deconv_layer=deconv_layer,deconv_before=deconv_before,trans_idx=-1,dcn_only_cls=dcn_only_cls,trans_cfg=dict(in_dim=512,attn_in_dims=[512, 64],attn_out_dims=[64, 64],strides=[1, 1],ratios=[4, 4],pos_shape=(1, 10, 25),),),head=dict(type='GANetHeadFast',heads=dict(hm=num_lane_classes),in_channels=64,#FPN层输出的特征维度为64维branch_in_channels=64,num_classes=num_lane_classes,hm_idx=0,joint_nums=joint_nums,),loss=dict(type='LaneLossAggress'),loss_weights=loss_weights
)
数据的配置
data = dict(samples_per_gpu=batch_size,# batch_size大小workers_per_gpu=8,#每个gpu线程数,影响dataload的速度train=dict(type=dataset_type,data_root=data_root,data_list=data_root + '/list/train.txt',pipeline=train_pipeline,test_mode=False,),val=dict(type=dataset_type,data_root=data_root,data_list=data_root + '/list/test.txt',pipeline=val_pipeline,test_mode=False,),# 测试集配置test=dict(type=dataset_type,#数据集类型data_root=data_root,data_list=data_root + '/list/test.txt',test_suffix='.jpg',pipeline=val_pipeline,test_mode=True,))
上述配置都会从est_dataset.py文件的主函数中读取
在主函数中解析了命令行中发送过来的参数,调用了tools/test.py,在对命令行参数解析后,,并实例化了dataset,data_loader,model(detector实例),随后加载了checkpoint参数dict。在将model用MMDataParallel类包裹后,调用single_gpu_test函数进行测试。
single_gpu_test函数核心代码如下:
def single_gpu_test(seg_model,data_loader,show=None,hm_thr=0.3,kpt_thr=0.4,cpt_thr=0.4,points_thr=4,result_dst=None,cluster_thr=4,cluster_by_center_thr=None,group_fast=False,crop_bbox=(0, 270, 1640, 590)):#Sets the module in evaluation modeseg_model.eval()dataset = data_loader.datasetpost_processor = PostProcessor(use_offset=True,cluster_thr=cluster_thr,cluster_by_center_thr=cluster_by_center_thr,group_fast=group_fast)prog_bar = mmcv.ProgressBar(len(dataset))for i, data in enumerate(data_loader):with torch.no_grad():sub_name = data['img_metas'].data[0][0]['sub_img_name']img_shape = data['img_metas'].data[0][0]['img_shape']sub_dst_name = sub_name.replace('.jpg', '.lines.txt')dst_dir = result_dst + sub_dst_namedst_folder = os.path.split(dst_dir)[0]mkdir(dst_folder)output = seg_model(return_loss=False, rescale=False, thr=hm_thr, kpt_thr=kpt_thr, cpt_thr=cpt_thr, **data)downscale = data['img_metas'].data[0][0]['down_scale']lanes, cluster_centers = post_processor(output, downscale)result, virtual_center, cluster_center = adjust_result(lanes=lanes, centers=cluster_centers, crop_bbox=crop_bbox,img_shape=img_shape, points_thr=points_thr)out_result(result, dst=dst_dir)通过以下函数来调用模型
output = seg_model(return_loss=False, rescale=False, thr=hm_thr, kpt_thr=kpt_thr, cpt_thr=cpt_thr, **data)
执行seg_model(x)语句时,会首先调用GANet的forward函数,是因为GANet的父类Module中的__call__函数:首先Module中有__call__方法,因此seg_model(x)这条语句可以正常执行。Module中并没有直接给出__call__的实现体,而是__call__后紧跟冒号,此冒号表示类型注解;后面的Callable和Any是typing模块中的,Callable表示可调用类型,即等号右边应该是一个可调用类型,此处指的是_call_impl;Any是一种特殊的类型,它与所有类型兼容;Callable[…, Any]表示_call_impl可接受任意数量的参数并返回Any。这里__call__实际指向了_call_impl函数,因此调用__call__实际是调用_call_impl。
_call_impl函数体内会调用forward,Module中的forward的实现方式与__call__相同,但是_forward_unimplemented函数并没有实现体,调用它会触发Error即NotImplementedError。
GANet会通过forward选择,进入test情况下的forward_test
GANet中的forward_test函数,
再输入网络前,图片会被统一处理成800 * 300* 3的格式,resnet18对应的输入不是这个,这里还是有问题。
#**会以键/值对的形式解包一个字典
def forward_test(self, img, img_metas,hack_seeds=None,**kwargs):"""Test without augmentation."""output = self.backbone(img.type(torch.cuda.FloatTensor))output = self.neck(output)if self.head:seeds, hm = self.bbox_head.forward_test(output['features'], output.get("aux_feat", None), hack_seeds,kwargs['thr'], kwargs['kpt_thr'],kwargs['cpt_thr'])return [seeds, hm]
通过resnet18的backbone输出0 1 2 3层的特征图

将特征图继续输入到下一层的neck中,输出依旧是特征层面上的,大小为:

继续输入到核心的head部分,这里会跳转到ganet_head里面的forward_test
def forward_test(self,inputs,aux_feat=None,hack_seeds=None,hm_thr=0.3,kpt_thr=0.4,cpt_thr=0.4,
):
首先进行对于起点的预测
对于起点的预测使用的是《CondLaneNet:a Top-to-down Lane Detection Framework Based on Conditional Convolution》论文中提出的Ctnet。
对于车道线heatmap的预测问题,文章分析了两种情况:使用车道线的中点(类似于CondInst)与使用车道线的起点,经过分析车道线在起点位置处的特征更加具有表征性,因而选择的是预测车道线的起点。
车道线起点heat-map是直接在FPN输出特征图上使用上面提到的CtnetHead模块完成对应的预测任务
# center points hm
#f_hm是fpn层输出的第1层的特征图 大小是64 40 100 得到的关于起点的特征向量Z的大小是1 40 100的
z = self.centerpts_head(f_hm)
hm = z['hm']
#将起点的特征图限制到 min=1e-4, max=1 - 1e-4
hm = torch.clamp(hm.sigmoid(), min=1e-4, max=1 - 1e-4)
cpts_hm = hm
然后是对于关键点的检测头,和上面对于起点的预测一样,都使用了CtnetHead模块
# key points hm
z_ = self.keypts_head(f_hm)
kpts_hm = z_['hm']
kpts_hm = torch.clamp(kpts_hm.sigmoid(), min=1e-4, max=1 - 1e-4)
对于起点和车道线上的关键点都选用focal loss

引入focal loss的主要目的是解决样本不均衡,对于车道线检测问题,组成车道的groundTruth是图像中仅有一个像素宽的几条线,对于整副图像来说,负样本数量太大,占总的loss的大部分,而且多是容易分类的,因此使得模型的优化方向并不是我们所希望的那样。
上述公式中Yyx是对应(x,y)坐标下是否为车道线的概率,标注中只有0或1,但作者通过非归一化的 高斯核将groundTruth的值扩散到周围的像素中,这样产生了0,1中的值。

当一个样本被分错的时候,pt是很小的,那么调制因子(1-Pt)接近1,损失不被影响;当Pt→1,因子(1-Pt)接近0,那么分的比较好的(well-classified)样本的权值就被调低了。因此调制系数就趋于1,也就是说相比原来的loss是没有什么大的改变的。当pt趋于1的时候(此时分类正确而且是易分类样本),调制系数趋于0,也就是对于总的loss的贡献很小。
接下来进行起点偏移量和由于向下取整带来的关键点误差的回归,输入是DeformFPN产生的辅助特征,输出的大小和上述是一样的,
继续输入到ctnet中,产生的o和o_的大小是2 * 40 *100,对应x轴和y轴上的偏移量
 if aux_feat is not None:f_hm = aux_feat
o = self.offset_head(f_hm)
pts_offset = o['offset_map']
o_ = self.reg_head(f_hm)
int_offset = o_['offset_map']
回归偏移量和误差时,使用的是L1loss。

将上面得到的关于关键点,关键点关于起点的偏移量,关键点自己的误差的特征图送入到解码器中
cpt_seeds, kpt_seeds = self.ktdet_decode_fast(kpts_hm, pts_offset, int_offset, thr=kpt_thr,root_thr=self.root_thr)
解码器中,首先用一个长条形的kerenl对关键点特征图进行最大池化,目的是筛选出选出y轴上响应较大的点,返回的特征图大小依然是1 40 100
def _nms(heat, kernel=3):hmax = nn.functional.max_pool2d(heat, (1, 3), stride=(1, 1), padding=(0, 1))keep = (hmax == heat).float() # false:0 true:1return heat * keep # type: tensorheat_nms = _nms(heat)
通过偏移量筛选出可能的起点的坐标
# generate root centers array from offset map parallel
offset_split = torch.split(offset, 1, dim=1)
#限幅,取偏移量小于1和keypoint置信度大于0.3的点
mask = torch.lt(offset_split[1], root_thr)  # offset < 1
mask_nms = torch.gt(heat_nms, thr)  # key point score > 0.3
mask_low = mask * mask_nms
mask_low = mask_low[0, 0].transpose(1, 0).detach().cpu().numpy()
#找到这些点在tensor中的索引 索引是点在特征图中的x,y坐标
idx = np.where(mask_low)
#产生车道线起点的坐标
root_center_arr = np.array(idx, dtype=int).transpose()
计算关键点相关的坐标
# generate roots by coord add offset parallel
#取转置
# generate roots by coord add offset parallel
heat_nms = heat_nms.squeeze(0).permute(1, 2, 0).detach()
offset = offset.squeeze(0).permute(1, 2, 0).detach()
error = error.squeeze(0).permute(1, 2, 0).detach()
coord_mat = make_coordmat(shape=heat.shape[1:])  # 0.2ms
coord_mat = coord_mat.permute(1, 2, 0)
# print('\nkpt thr:', thr)
heat_mat = heat_nms.repeat(1, 1, 2)
#root_mat =关键点坐标+偏移量
root_mat = coord_mat + offset
#align_mat =关键点坐标+向下采样错误补偿量
align_mat = coord_mat + error
#通过thr阈值过滤结果
inds_mat = torch.where(heat_mat > thr)
root_arr = root_mat[inds_mat].reshape(-1, 2).cpu().numpy()
align_arr = align_mat[inds_mat].reshape(-1, 2).cpu().numpy()
#加上偏移量的keypoints与加上错误补偿量的keypoints整合到一个数组当中
kpt_seeds = []
for (align, root) in (zip(align_arr, root_arr)):kpt_seeds.append((align, np.array(root, dtype=float)))
#最后返回的是起始点,和加上偏移量的keypoints与加上错误补偿量的keypoints
return root_center_arr, kpt_seeds
至此,在网络中的工作结束,下面开始进行后处理来把线拟合成直线。
对返回的点集进行聚类,group_points_fast会返回两个列表,一个是车道线的起始点,另外一个是被分好类的关键点,每个类都对应一条由起点确认的车道线。返回的这些点依然是在特征层面上的。
kpt_groups, cpt_groups = group_points_fast(kpt_seeds,cpt_seeds,self.cluster_thr,self.cluster_by_center_thr)
获得分组的点后,开始构建车道线,车道线上的点由对应组别内的关键点×下采样率获得
for lane_idx, group in enumerate(kpt_groups):points = []centers = []if len(group) > 1:for point in group:points.append([point[1][0] * downscale, point[1][1] * downscale])centers.append([point[-1][0] * downscale, point[-1][1] * downscale])# points = ploy_fitting_cube(points, h=320, w=800, sample_num=150)lanes.append(dict(id_class=lane_idx,points=points,centers=centers,))
最后调整这些点的坐标,打印到原图上
参考:
https://blog.csdn.net/fengbingchun/article/details/122331018


