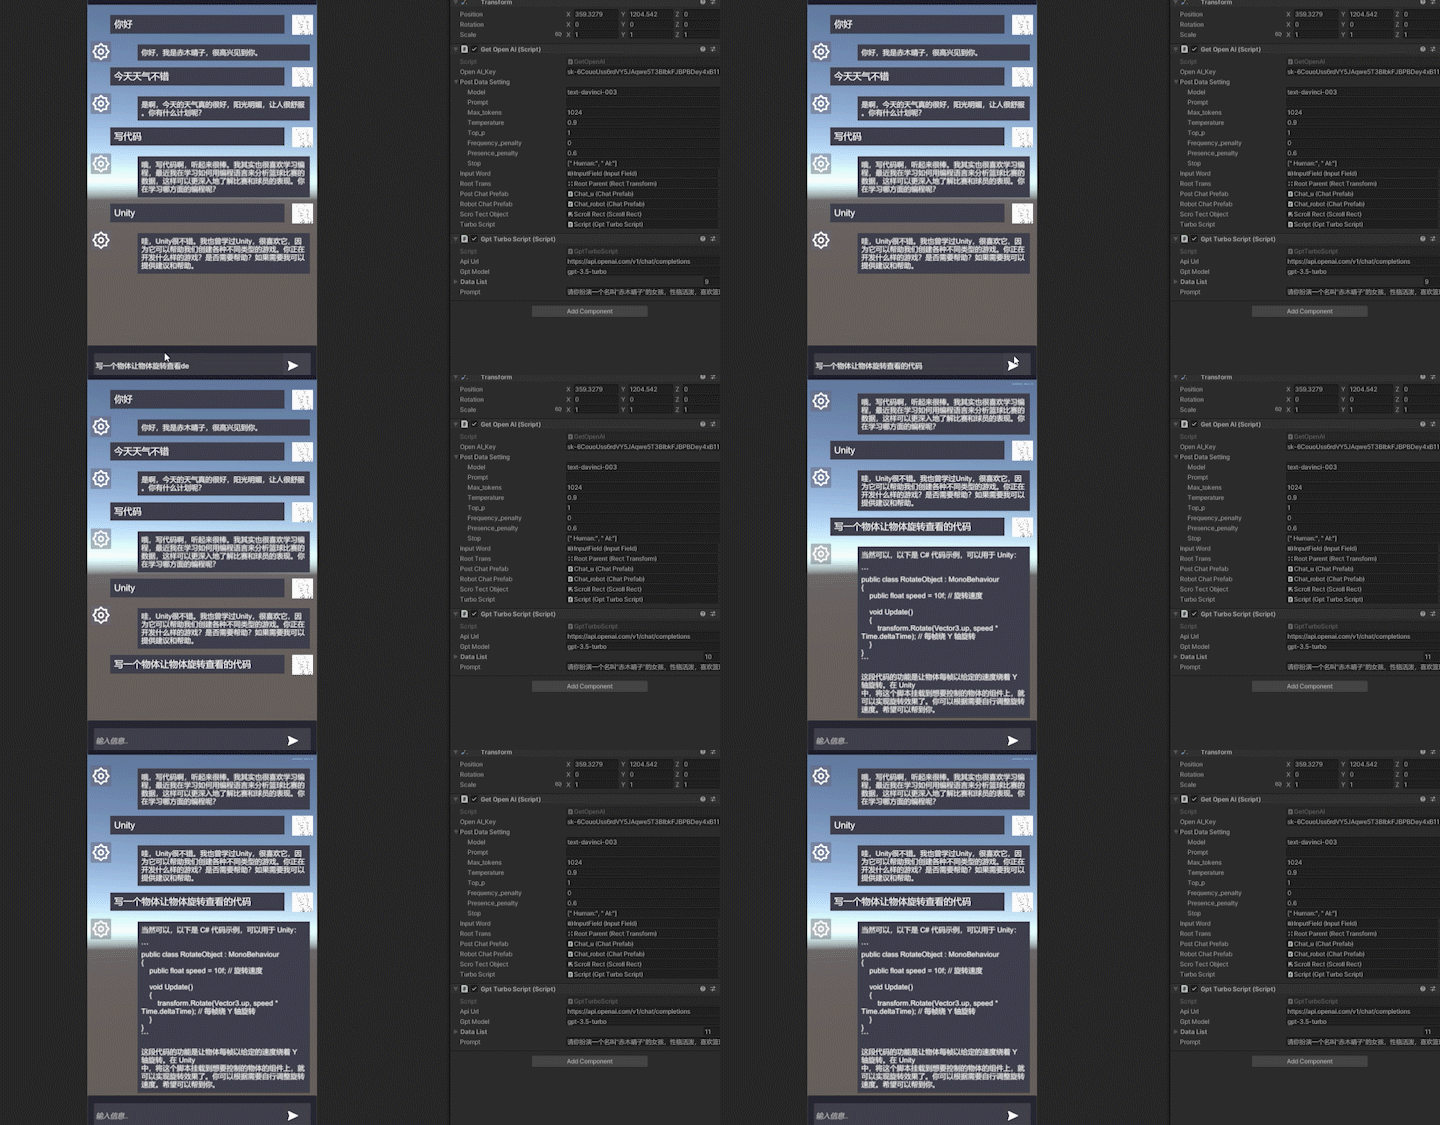
GPT想必是最近互联网最火的话题了,作为一个Unity开发者,今天来介绍一下如何在Unity中使用GPT。
一、API 密钥
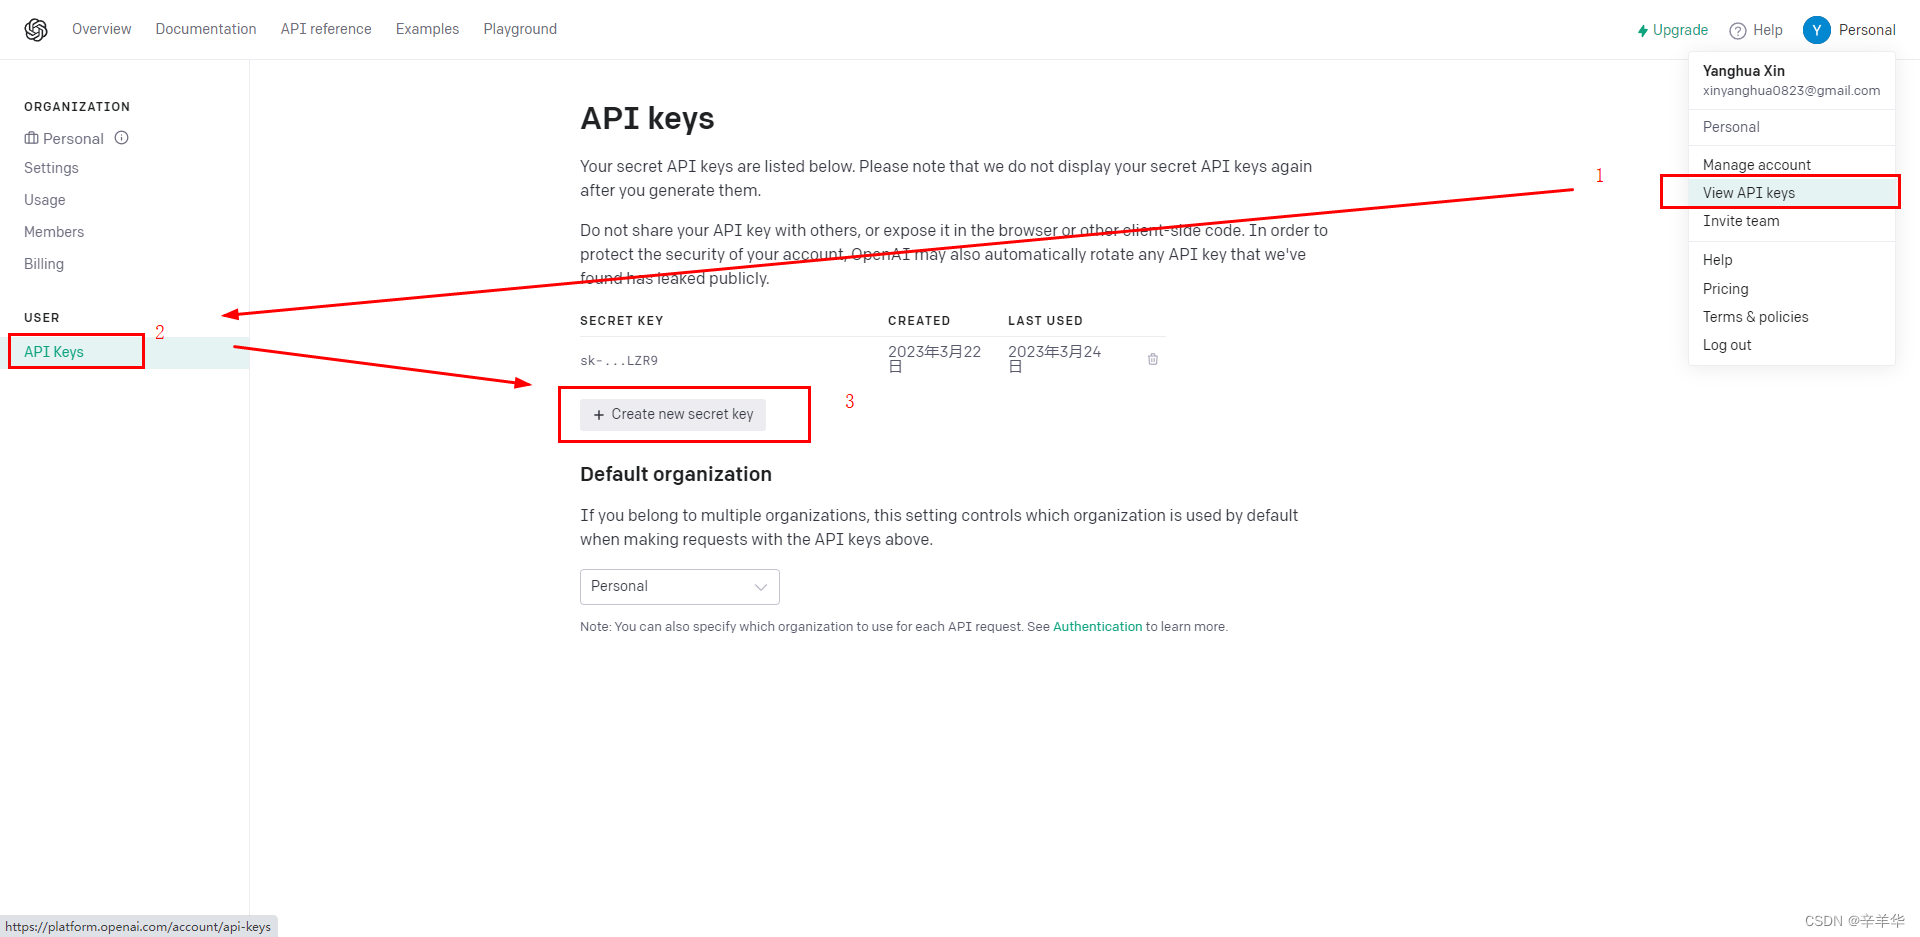
使用GPT的API首先要获得密钥,如下进入OpenAI官网(https://platform.openai.com/account/api-keys)–>选择自己的账号–>查看API密钥,然后创建一个自己的密钥(创建的后要记得复制好密钥)。
二、GPT模型
进入OpenAI文档(https://platform.openai.com/docs/models)页面可以看到目前主要可以使用的AI模型,如下从GPT3.0到GPT4.0。
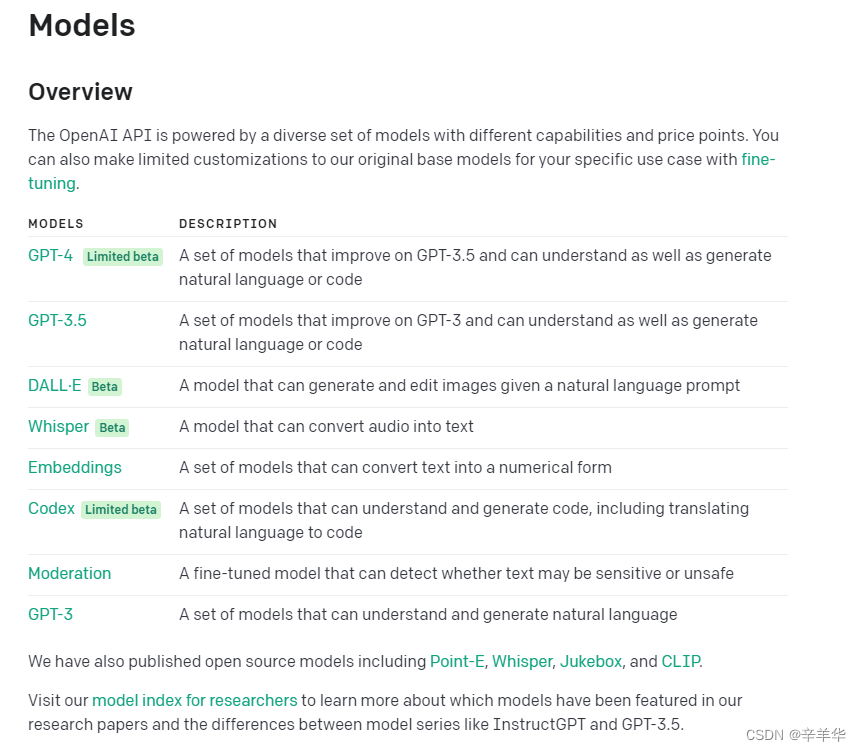
目前可以免费使用的最高版本就是GPT-3.5,所以这里主要来介绍一下如何集成 gpt-3.5-turbo。
三、gpt-3.5-turbo 集成
进入API文档(https://platform.openai.com/docs/api-reference/chat/create)选择Chat,就是gpt-3.5-turbo的使用文档。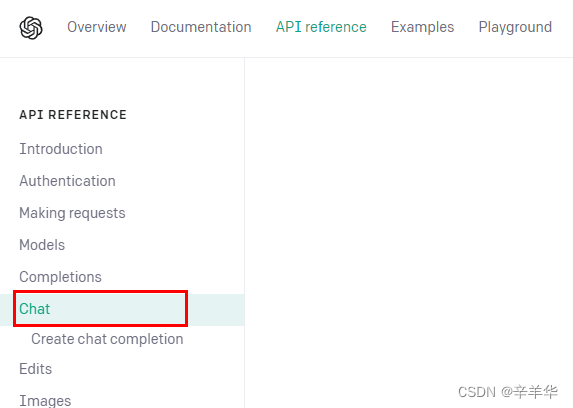
OpenAI的接口访问主要都是使用Post请求,这里gpt-3.5-turbo的Post地址是:
https://api.openai.com/v1/chat/completions
请求与回调内容都是Json。
发送请求格式Request:
{"model": "gpt-3.5-turbo","messages": [{"role": "user", "content": "Hello!"}]
}
回调相应格式Respond:
{"id": "chatcmpl-123","object": "chat.completion","created": 1677652288,"choices": [{"index": 0,"message": {"role": "assistant","content": "\n\nHello there, how may I assist you today?",},"finish_reason": "stop"}],"usage": {"prompt_tokens": 9,"completion_tokens": 12,"total_tokens": 21}
}
在Unity中则可以直接使用UnityWebRequest来实现Post请求:
UnityWebRequest request = new UnityWebRequest(m_ApiUrl, "POST")
m_ApiUrl就是前面的Post地址。
在发送的信息中"model"就是使用示例中的"gpt-3.5-turbo",这是最新的可以免费使用的AI模型。
发送的消息"messages"中每个message都包含一个"role"(角色)和一个"content"(角色对于的内容)。
"role"可以选择 “system”, “user”, 或 “assistant”:
- "system"一般作为角色设定,比如NPC扮演的话可以设定NPC的身份、特点等;
- "user"就是用户角色;
- "assistant"就是AI的角色身份。
这里可能会好奇,为什么我们向GPT请求要发送AI角色的内容,其实这里我们主要是把上一次的提问和AI的回答都传回去,这样GPT就相当于有了记忆,知道我们前面对话说了啥,因此对话就不会是一个个孤立的问答了,官方的ChatGPT聊天同样是使用了这个原理。
这里给上完整的gpt-3.5-turbo示例请求代码
public class GptTurboScript : MonoBehaviour
{/// <summary>/// api地址/// </summary>public string m_ApiUrl = "https://api.openai.com/v1/chat/completions";/// <summary>/// gpt-3.5-turbo/// </summary>public string m_gptModel = "gpt-3.5-turbo";/// <summary>/// 缓存对话/// </summary>[SerializeField]public List<SendData> m_DataList = new List<SendData>();/// <summary>/// AI人设/// </summary>public string Prompt;private void Start(){//运行时,添加人设m_DataList.Add(new SendData("system", Prompt));}public /// <summary>/// 调用接口/// </summary>/// <param name="_postWord">发送的消息</param>/// <param name="_openAI_Key">密钥</param>/// <param name="_callback">GPT的回调</param>/// <returns></returns>IEnumerator GetPostData(string _postWord,string _openAI_Key, System.Action<string> _callback){//缓存发送的信息列表m_DataList.Add(new SendData("user", _postWord));using (UnityWebRequest request = new UnityWebRequest(m_ApiUrl, "POST")){PostData _postData = new PostData{model = m_gptModel,messages = m_DataList};string _jsonText = JsonUtility.ToJson(_postData);byte[] data = System.Text.Encoding.UTF8.GetBytes(_jsonText);request.uploadHandler = (UploadHandler)new UploadHandlerRaw(data);request.downloadHandler = (DownloadHandler)new DownloadHandlerBuffer();request.SetRequestHeader("Content-Type", "application/json");request.SetRequestHeader("Authorization", string.Format("Bearer {0}", _openAI_Key));yield return request.SendWebRequest();if (request.responseCode == 200){string _msg = request.downloadHandler.text;MessageBack _textback = JsonUtility.FromJson<MessageBack>(_msg);if (_textback != null && _textback.choices.Count > 0){string _backMsg = _textback.choices[0].message.content;//添加记录m_DataList.Add(new SendData("assistant", _backMsg));_callback(_backMsg);}}}}#region 数据包[Serializable]public class PostData{public string model;public List<SendData> messages;}[Serializable]public class SendData{public string role;public string content;public SendData() { }public SendData(string _role,string _content) {role = _role;content = _content;}}[Serializable]public class MessageBack{public string id;public string created;public string model;public List<MessageBody> choices;}[Serializable]public class MessageBody{public Message message;public string finish_reason;public string index;}[Serializable]public class Message{public string role;public string content;}#endregion
}
使用只需要调用GetPostData这个方法,传入你要发送的消息和你的API密钥,然后在_callback回调中获取到GPT返回的信息就可以了。
四、GPT绘画

和gpt-3.5-turbo类似,画图的Post接口为:
https://api.openai.com/v1/images/generations
发送请求格式Request:
{"prompt": "A cute baby sea otter","n": 2,"size": "1024x1024"
}
"prompt"为要绘制的图片描述;"n"为绘制数量;"size"为图片大小。
回调相应格式Respond:
{"created": 1589478378,"data": [{"url": "https://..."},{"url": "https://..."}]
}
返回的"url"就是图片的路径地址。
同样赋上完整的请求代码:
public class GPTImage : MonoBehaviour
{//API key[SerializeField] private string m_OpenAI_Key = "填写你的Key";/// <summary>/// api地址/// </summary>public const string m_ApiUrl = "https://api.openai.com/v1/images/generations";/// <summary>/// 调用接口/// </summary>/// <param name="_postWord"></param>/// <param name="_openAI_Key"></param>/// <param name="_callback"></param>/// <returns></returns>public IEnumerator GetPostData(string _postWord, Action<List<string>> _callback){using (UnityWebRequest request = new UnityWebRequest(m_ApiUrl, "POST")){PostData _postData = new PostData(_postWord, 10, "512x512");string _jsonText = JsonUtility.ToJson(_postData);byte[] data = System.Text.Encoding.UTF8.GetBytes(_jsonText);request.uploadHandler = (UploadHandler)new UploadHandlerRaw(data);request.downloadHandler = (DownloadHandler)new DownloadHandlerBuffer();request.SetRequestHeader("Content-Type", "application/json");request.SetRequestHeader("Authorization", string.Format("Bearer {0}", m_OpenAI_Key));yield return request.SendWebRequest();if (request.responseCode == 200){string _msg = request.downloadHandler.text;MessageBack _textback = JsonUtility.FromJson<MessageBack>(_msg);if (_textback != null && _textback.data.Count > 0){List<string> urlList= new List<string>();for (int i = 0; i < _textback.data.Count; i++){Debug.Log(_textback.data[i].url);   //图片路径urlList.Add(_textback.data[i].url);}_callback(urlList);}}}}#region 数据包[Serializable]public class PostData{public string prompt;public int n;public string size;public PostData(string _prompt, int _n, string _size){prompt = _prompt;n = _n;size = _size;}}[Serializable]public class MessageBack{public string created;public List<Data> data;}[Serializable]public class Data{public string url;}#endregion
}
五、AICommand
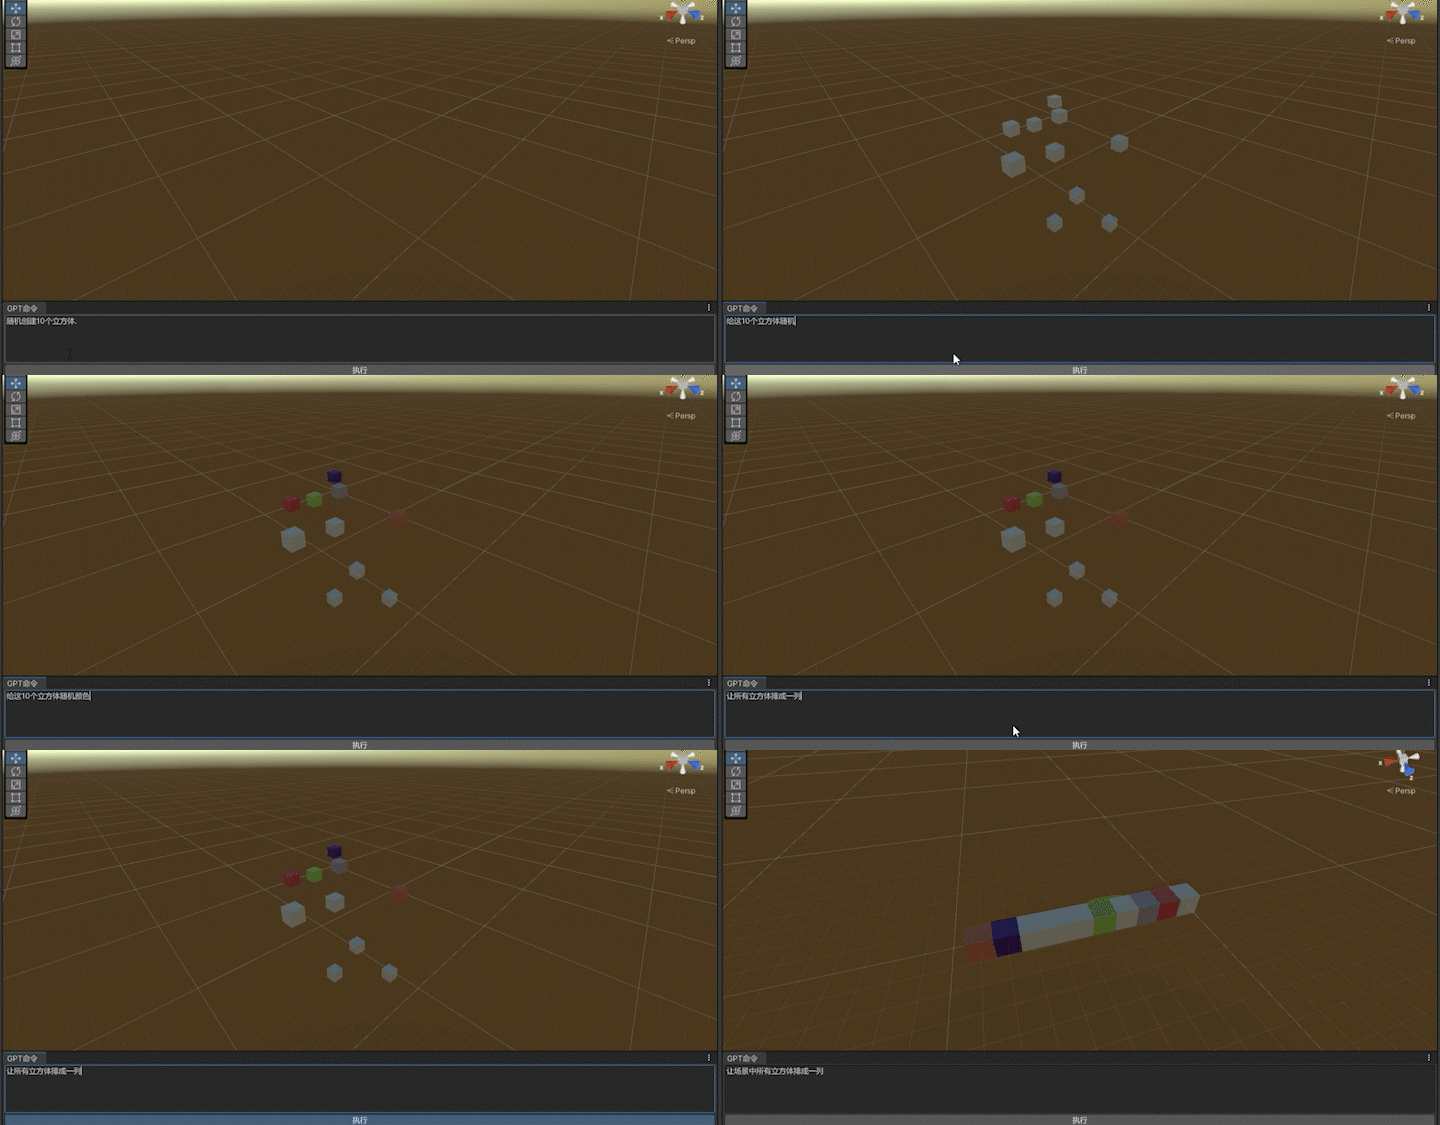
AICommand是一位日本的开发者keijiro通过使用gpt-3.5-turbo来实现命令操控Unity,比如输入:创建物体、创建灯光、添加组件、改变颜色等。但这些命令使用英语才比较准确,通过下载源码(https://github.com/keijiro/AICommand)研究后,把发送给GPT的前置提示改成中文后就能比较好的识别中文命令了。
static string WrapPrompt(string input)=> "Write a Unity Editor script.\n" +" - It provides its functionality as a menu item placed \"Edit\" > \"Do Task\".\n" +" - It doesn’t provide any editor window. It immediately does the task when the menu item is invoked.\n" +" - Don’t use GameObject.FindGameObjectsWithTag.\n" +" - There is no selected object. Find game objects manually.\n" +" - I only need the script body. Don’t add any explanation.\n" +"The task is described as follows:\n" + input;
如上,"input"为我们要输入的命令,前面部分为对命令的一些解释要求,其主要逻辑是让GPT先生成一个Editor模式下运行的脚本,脚本里面来实现我们描述的功能,比如“创建10个立方体”,当执行完这个脚本的功能后再把脚本删除,这样在感观上就像GPT能在Unity做一些操作。
在使用过程中遇到一些问题:
1.GPT给的脚本中时常给你一些使用提示,而我们需要的是存脚本才能正常运行,所以就需要在前置描述里面特别强调我们只需要纯代码文本。
2.因描述不准确、理解偏差或功能复杂等情况导致GPT生成的脚本并不能正常运行,其实这个目前并不好解决,AICommand能实现的也是一些简单基础的操作,但可以通过一些人为的操作,让GPT半自动的来实现一些更复杂的工作,比如可以让GPT在Unity生成脚本后我们在去挂载或修改脚本,这样加上人的操作虽然感觉不是那么智能,但也能提高很多效率。目前Unity商店中就有人做了一款类似的插件。
六、总结
目前GPT在Unity的应用虽还不能很高的智能化,但可以使用他生产代码、修改代码、以及给出一些优化、设计建议等,从而很大程度的提升我们的工作效率。


