目录
方案一:图片均分
方案二:寻找轮廓并截取
方案三:聚类算法
方案四:垂直投影法
源码下载
在用机器学习识别验证码的过程中,我们通常会选择把验证码中的各个字符切割出来然后单独识别,切割质量会直接影响识别精度。在本节我们就来看下如何去切割一张验证码图片。
方案一:图片均分
这种方案实现起来很简单,但只能针对一些简单的验证码,比如下面这种。这类验证码有一个特点:字符占据固定的图片宽度且位置保持不变。

代码编写如下:
import cv2 as cv
import numpy as np
import matplotlib.pyplot as plt# 读取图片
img = cv.imread("cut1.png")# 灰度化
img_gray = cv.cvtColor(img, cv.COLOR_BGR2GRAY)# 高斯模糊
img_gaussian = cv.GaussianBlur(img_gray, (9, 9), 0)# 二值化
ret, img_threshold = cv.threshold(img_gaussian, 0, 255, cv.THRESH_BINARY_INV + cv.THRESH_OTSU)# 腐蚀处理
kernel = np.ones((3, 3), np.float32)
img_erode = cv.erode(img_threshold, kernel)# 切割图像,均分成6块
height, width = img_erode.shape
x_gap = width // 6
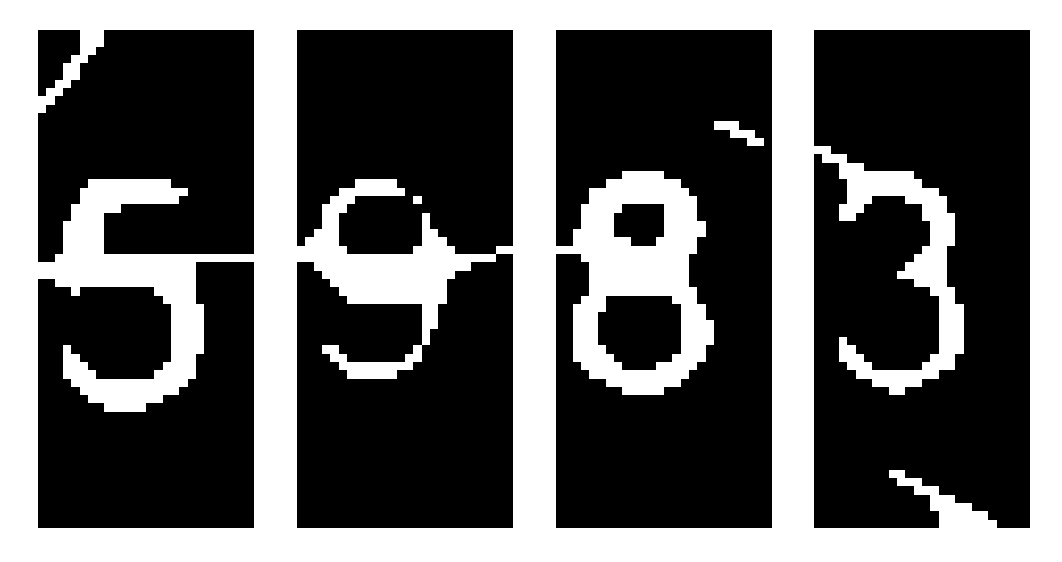
for i in range(1, 5):roi = img_erode[0:height, i*x_gap:(i+1)*x_gap]plt.subplot(1, 4, i)plt.axis("off")plt.imshow(roi, cmap="gray")
plt.show()
运行结果如下:
方案二:寻找轮廓并截取
我们可以用opencv-python的findContours()方法找到各个字符的轮廓范围,然后从图片上截图下来。采用这种方案的话,我们需要尽量将图片中的噪点和线条干扰去掉,否则返回的可能就不是字符轮廓,而是一些干扰点线的轮廓。现在我们用方案二切割以下验证码图片。
![]()
代码编写如下:
import cv2 as cv
import numpy as np
import matplotlib.pyplot as plt# 读取图片
img = cv.imread("cut2.png")# 灰度化
img_gray = cv.cvtColor(img, cv.COLOR_BGR2GRAY)# 高斯模糊
img_gaussian = cv.GaussianBlur(img_gray, (1, 1), 0)# 二值化
ret, img_threshold = cv.threshold(img_gaussian, 0, 255, cv.THRESH_BINARY_INV + cv.THRESH_OTSU)# 腐蚀处理
kernel = np.ones((1, 1), np.float32)
img_erode = cv.erode(img_threshold, kernel)# 寻找字符轮廓并截取
cnts, hiers = cv.findContours(img_erode, cv.RETR_EXTERNAL, cv.CHAIN_APPROX_SIMPLE)
cnts = sorted(cnts, key=lambda x: cv.boundingRect(x)[0])    # 根据罗阔的x坐标从左到右排列
total_num = len(cnts)
for i, cnt in enumerate(cnts):x, y, w, h = cv.boundingRect(cnt)roi = img_erode[y:y+h, x:x+w]plt.subplot(1, total_num, i+1)plt.imshow(roi, cmap="gray")
plt.show()
运行结果如下:
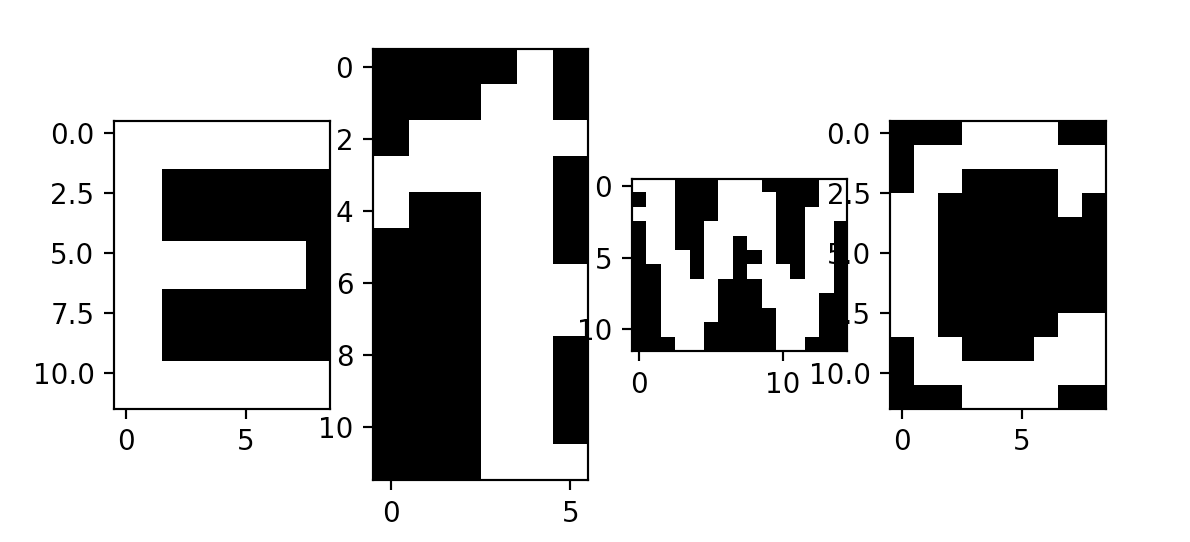
方案三:聚类算法
通过聚类算法将各个字符分组,这种方案的稳定性不高,但有时候能够带来很大的惊喜。我们来看下这张验证码图片。

很明显不能对其进行均等分割操作,寻找轮廓的话会返回0、D、KJ这三个轮廓,而不是0、D、K、J。

注:可以将0、D、KJ这三个轮廓合并起来,然后再均分成4块。这是新的一种方案,可以有效解决自负粘连问题,不过各字符字体大小不同的话,效果就不怎么好了。
我们尝试用聚类算法分割下这种验证码,代码编写如下。
import cv2 as cv
import numpy as np
import matplotlib.pyplot as plt
from sklearn.cluster import KMeans# 读取图片
img = cv.imread("cut3.png")# 灰度化
img_gray = cv.cvtColor(img, cv.COLOR_BGR2GRAY)# 高斯模糊
img_gaussian = cv.GaussianBlur(img_gray, (5, 5), 0)# 二值化
ret, img_threshold = cv.threshold(img_gray, 0, 255, cv.THRESH_BINARY_INV + cv.THRESH_OTSU)# 腐蚀处理
kernel = np.ones((3, 3), np.float32)
img_erode = cv.erode(img_threshold, kernel)# 用聚类算法切割
data = []
rows, cols = img_erode.shape
for i in range(rows):for j in range(cols):if img_erode[i, j] == 255:data.append((i, j))data = np.array(data)
model = KMeans(n_clusters=4)
model.fit(data)
print(sorted(model.cluster_centers_[:, 1]))  # 从小到大打印出各个聚类中心点的x坐标plt.scatter(data[:, 1], data[:, 0], c=model.labels_, cmap="brg")
ax = plt.gca()
ax.xaxis.set_ticks_position('top')
ax.invert_yaxis()
plt.show()
运行结果如下:
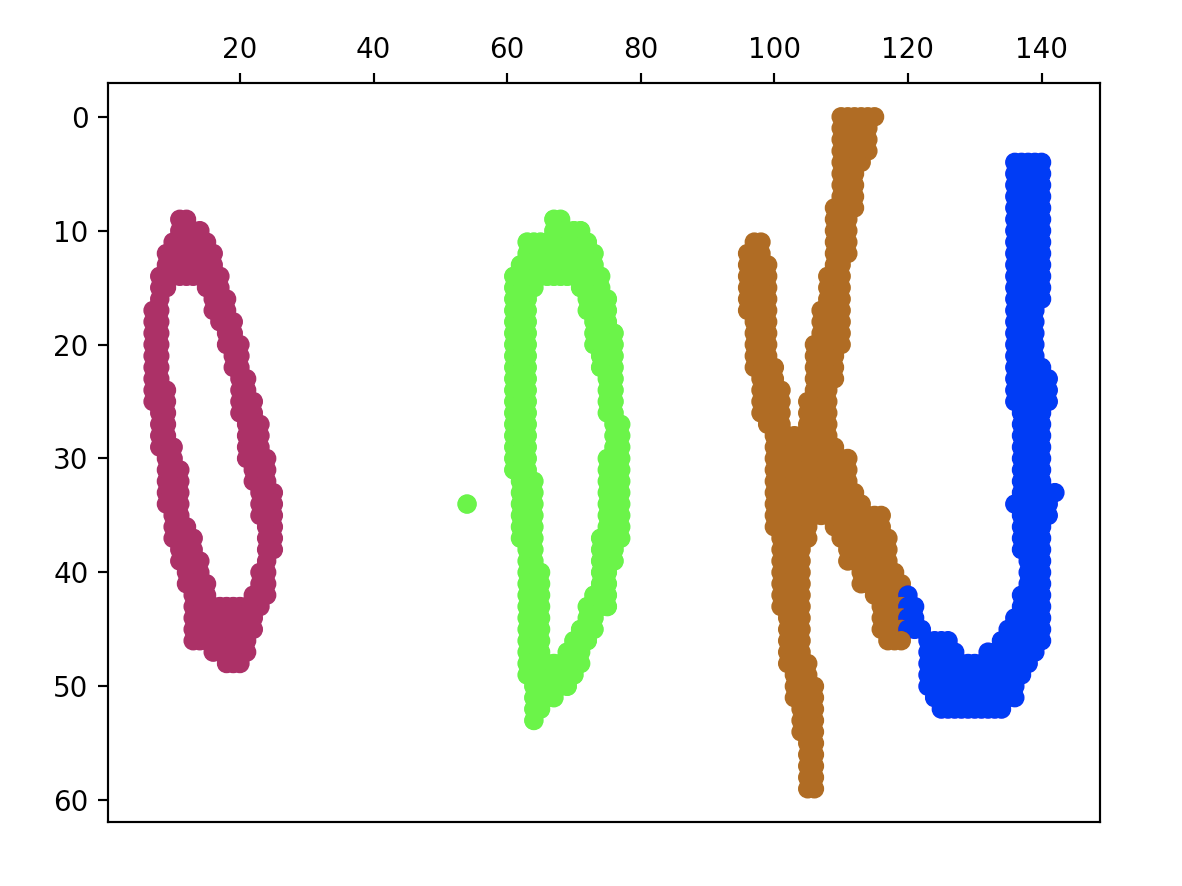
各个聚类中心点的x坐标显示如下:
有了这几个中心点的坐标,我们就可以成功截取各个字符。
方案四:垂直投影法
垂直投影法就是将图像上各列符合条件的点都下沉到图片底部,符合条件的点越多,那堆起来的高度也就越高。正常来说,在一个字符的两边,符合条件的点会比字符中间的点要少一些,通过这个原理我们就大概可以知道字符边界了。我们试着用垂直投影法分割以下验证码。

编写代码如下:
import cv2 as cv
import numpy as np
import matplotlib.pyplot as plt# 读取图片
img = cv.imread("cut3.png")# 灰度化
img_gray = cv.cvtColor(img, cv.COLOR_BGR2GRAY)# 高斯模糊
img_gaussian = cv.GaussianBlur(img_gray, (5, 5), 0)# 二值化
ret, img_threshold = cv.threshold(img_gray, 0, 255, cv.THRESH_BINARY_INV + cv.THRESH_OTSU)# 腐蚀处理
kernel = np.ones((3, 3), np.float32)
img_erode = cv.erode(img_threshold, kernel)# 使用垂直投影法
rows, cols = img_erode.shape
data = []
for i in range(cols):data.append(0)for j in range(rows):if img_erode[j, i] == 255:data[i] += 1for i in range(cols):plt.bar(i, data[i], color="black")
plt.show()
运行结果如下:
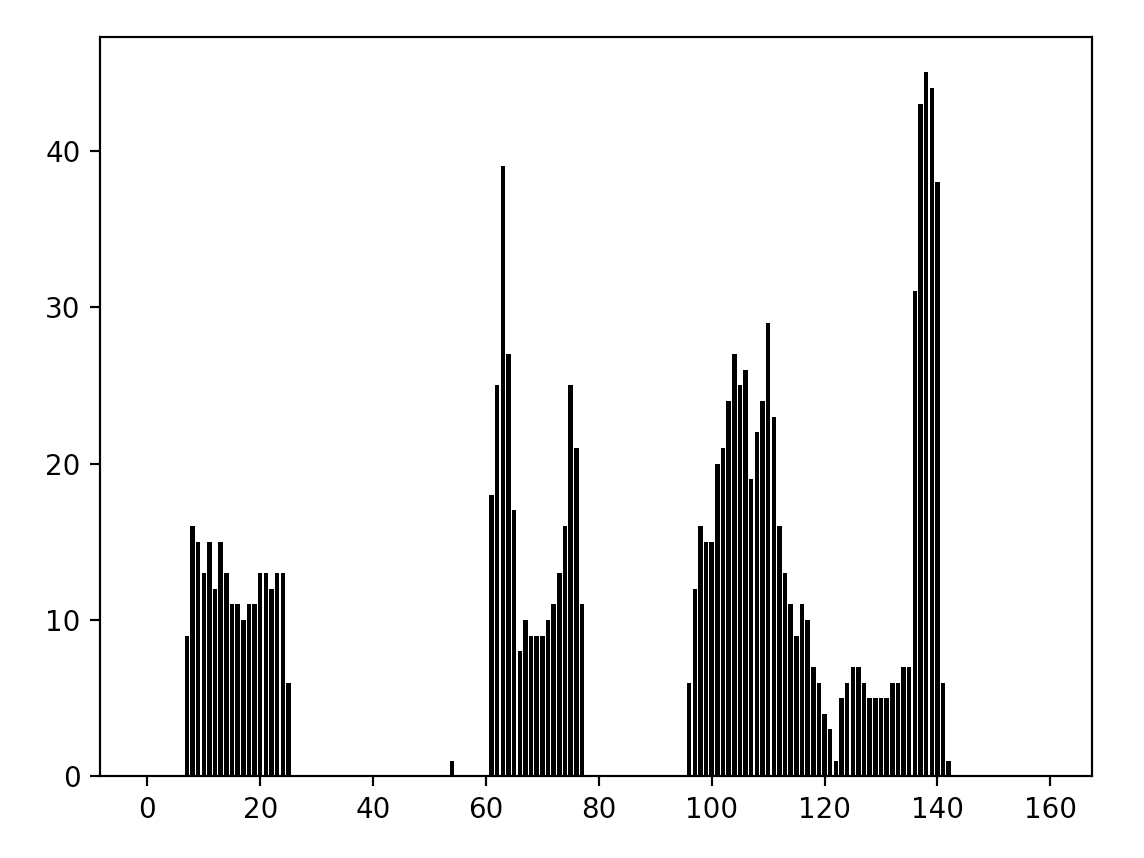
横坐标的值表示图像某一列的x坐标,纵坐标表示该列上符合条件的点。从这个柱状图中我们可以明显看到切割点,在程序中我们可以循环各个x坐标,并比较其两边的值来判断该x坐标是否是我们要找的目标点。
源码下载
链接:https://pan.baidu.com/s/1PQfevSMvvN8d_vDeN_5hGw
密码:1cj4

