AI技术年度盛会即将开启!11月8-9日,来自Google、Amazon、微软、Facebook、LinkedIn、阿里巴巴、百度、腾讯、美团、京东、小米、字节跳动、滴滴、商汤、旷视、思必驰、第四范式、云知声等企业的技术大咖将带来工业界AI应用的最新思维。
如果你是某个AI技术领域的专业人才,或想寻求将AI技术整合至传统企业业务当中,点击填写「2018 AI开发者大会注册信息表」,我们将从中挑选出20名相关性最高的幸运读者,送出单场分论坛入场券。
此外,如果你想与所有参会大牛充分交流沟通,点击阅读原文购票,使用优惠码:AI2018-DBY 购买两日通票,立减999元;此外大会还推出了1024定制票,主会+分会自由组合,精彩随心。大会嘉宾阵容和议题,请查看文末海报
作者 | Rajat
译者 | 婉清
编辑 | Jane
出品 | AI科技大本营
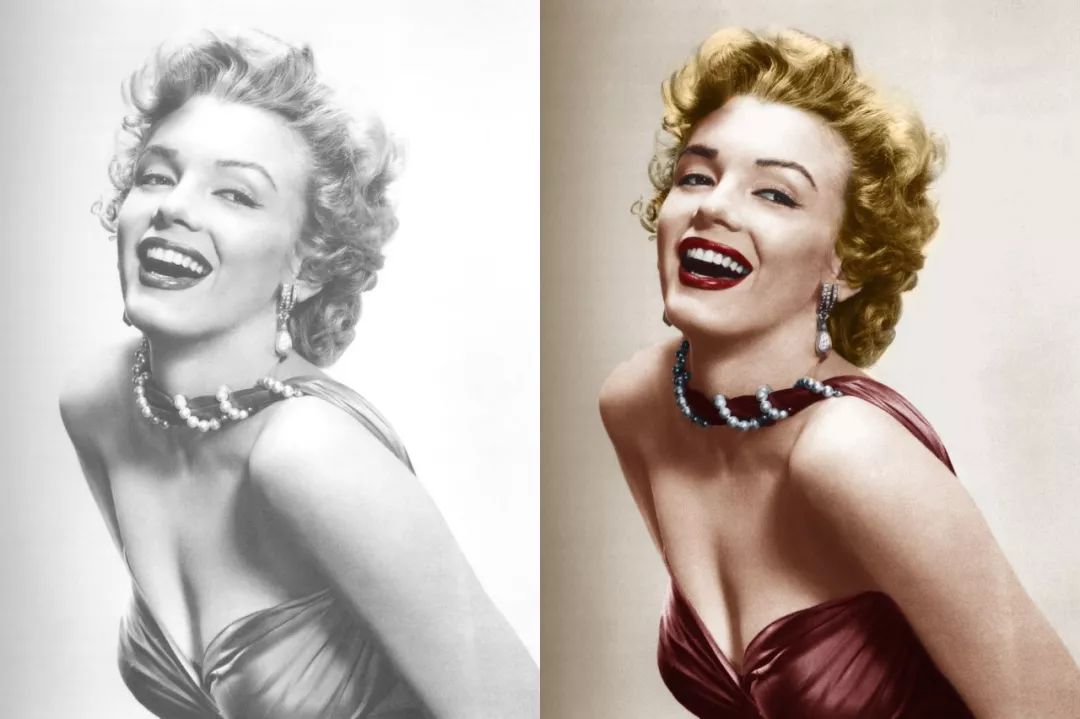
【导读】我们知道,深度学习几乎已经应用在每一个领域,但如果我们能够构建一个基于深度学习的模型,让它能够给老照片着色,重现我们童年的旧回忆,这该多么令人激动啊!那么我们要怎么做呢?本文的作者将为大家介绍一个教程,通过深度学习方法为黑白老照片自动上色,带我们重新忆起那段老时光!
虽然现在人人讨论AI,但我认为普惠AI还离我们很远,原因有三:
1. AI技术的易用性、性价比、安全性都有待考量和实验
2. AI难落地,云虽然是AI的载体,但现在的云厂商所能提供的AI能力非常有限
3. 开发者自身难转型,难适应的问题
基于此,我认为对于现阶段的云厂商还有一些生存空间,但毋庸置疑,AI+云服务才是未来云厂商大浪淘金,不被淘汰的唯一法宝。
今天,我给大家分享一个我的AI实践。
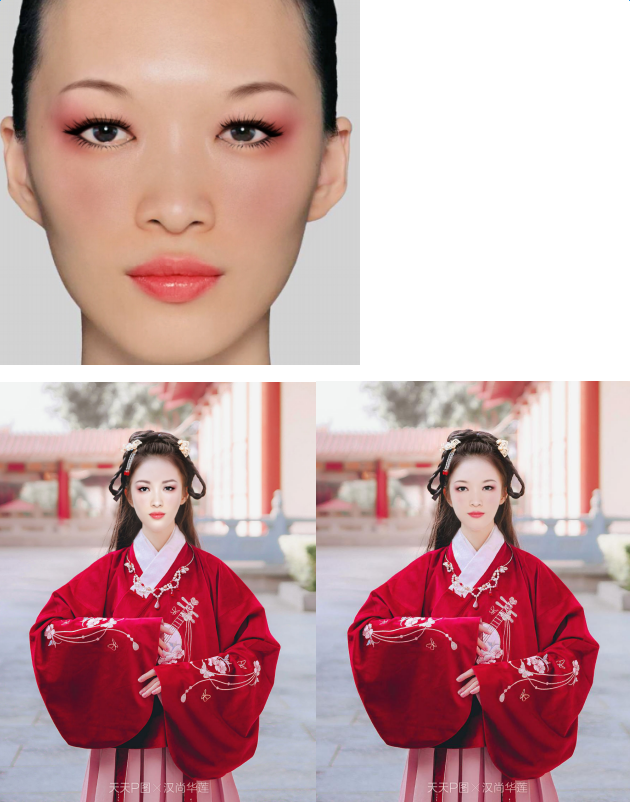
现如今,给照片着色通常是在 PS 中手工完成的。如果想知道这个着色的过程背后的工作有多么不容易,来看看下面一段视频就知道了:
所以说,如果要给一幅照片着色的话,短时间内是不可能完成的。它需要广泛的研究,要知道,单是一张脸的着色,就需要多达20层粉色、绿色和蓝色的色调才能使照片拥有恰到好处的效果。
现在,我要介绍的这个简单的神经网络——Inception Resnet V2,已经训练了120万张图像,可以帮助我们完成着色的任务。为了能够实现着色,我们将用 Unsplash 的肖像来训练这个神经网络。
介绍
在本节中,我将就如何渲染图像、数字颜色的基础知识以及神经网络的主要逻辑进行概述。
黑白图像可以用像素网格表示,每个像素都有与其亮度相对应的值。这些值的范围是0~255,对应的是从黑到白。

彩色图像是由三层组成:红色层、绿色层和蓝色层。你可以想象一下,在白色背景上将绿叶分成三个通道。直觉上,你可能会认为植物只存在于绿色层中。
但是,如下图所示,叶子在所有三个通道中都存在。这些层不仅决定了颜色,还决定了亮度。

例如,要得到白色,你需要所有的颜色均匀分布。通过增加等量的红色和蓝色,会使绿色变得更亮。因此,彩色图像使用三层来对颜色和对比度进行编码:

和黑白图像一样,彩色图像中的每一层,也有0~255的值。值0表示这个层中没有颜色。如果像素网格所有颜色通道的值都为0,那么这个图像像素就是黑色的。
神经网络在输入值和输出值之间创建了一种关系。为了能够更为准确地完成着色任务,网络需要找到能够将灰度图像和彩色图像联系起来的特征。
总的来说就是,我们需要找到能够将灰度值网格链接到三个颜色网格的特征。

f()是神经网络,[B&W]是我们的输入,[R]、[G]、[B]是我们的输出
现在,随着数据集的增加,由于我们处理的是高分辨率图像,因此我们需要更多的计算能力。为此,我个人更喜欢使用 Deep Cognition 的 Deep Learning Studio jupyter notebooks,它为Amazon 的深度学习示例提供了GPU,可用来训练模型。
如果你不熟悉如何使用Deep Learning Studio,可以看看以下这些资料:
Deep Learning made easy with Deep Learning Studio — An Introduction
Deep Learning made easy with Deep Learning Studio — Complete Guide
A video walkthrough of Deep Cognition
python代码和数据集可以从 GitHub 中下载
环境设置
Deep Learning Studio 最好的地方之一就是,只需单击 Deep Learning Studio Cloud,就可以轻松地完成安装,然后随时随地使用它们。
▌1.安装 Python 环境
要安装 Python 环境,请点击 DLS 中的 Environments 选项卡。
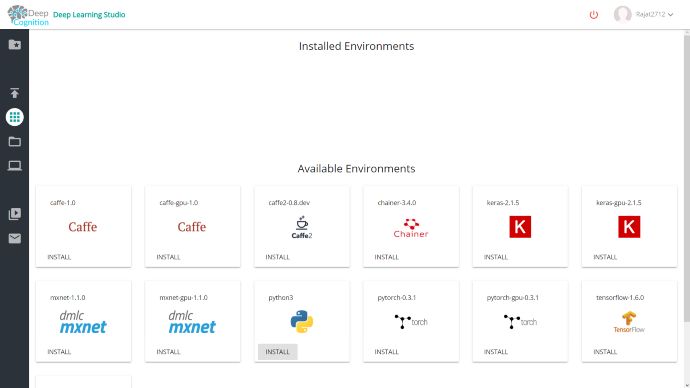
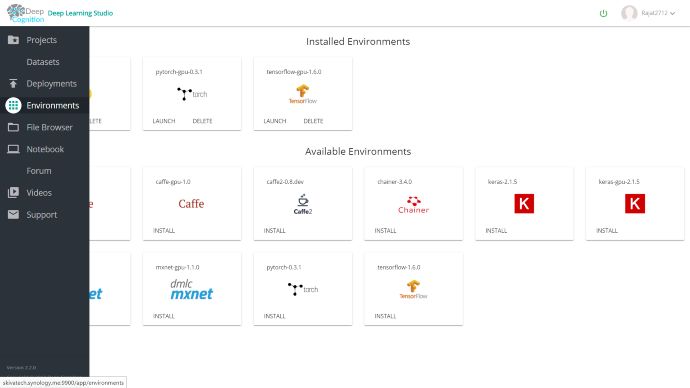
然后在 Available Environments 单击你要安装的环境。
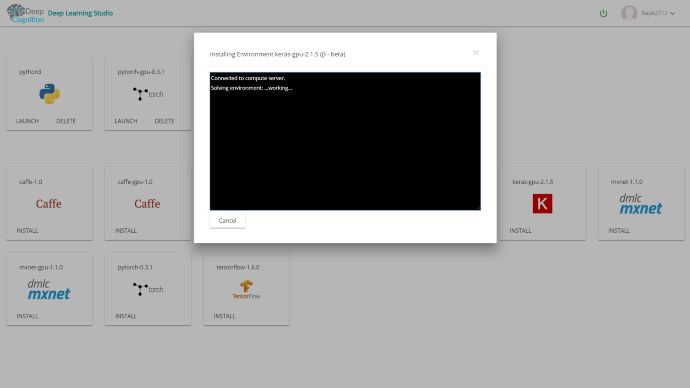
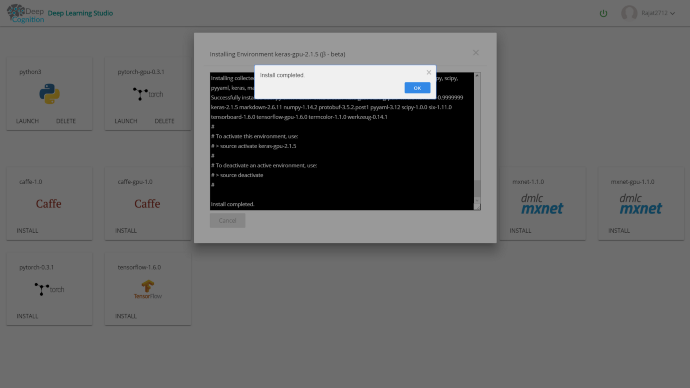
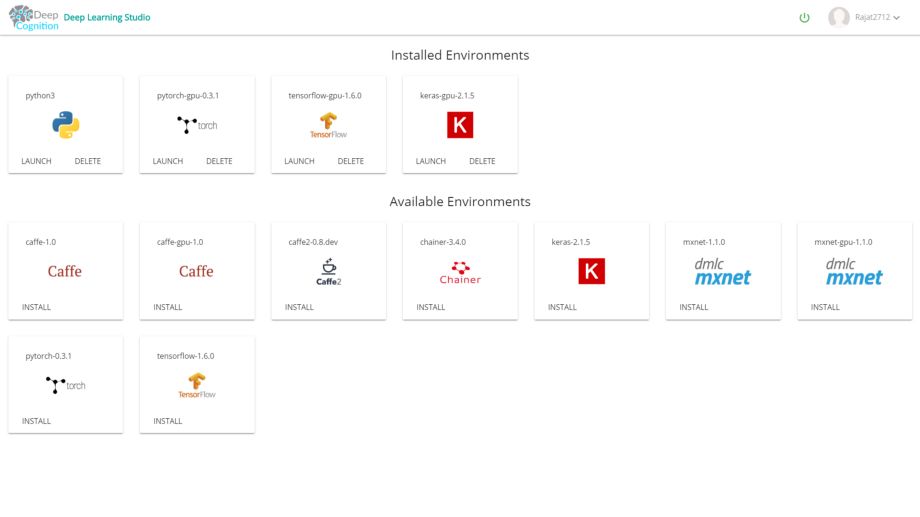
对于这项任务,我们将安装以下环境:
-
Python3
-
Tensorflow-gpu-1.6.0
-
Keras-gpu-2.1.5
▌2.安装python包
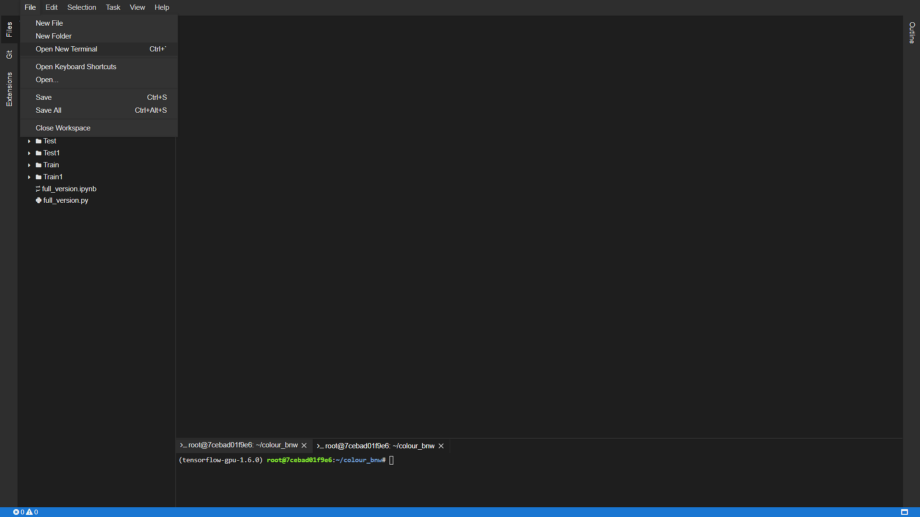
单击启动环境。然后点击菜单的 Open New Terminal 打开终端。
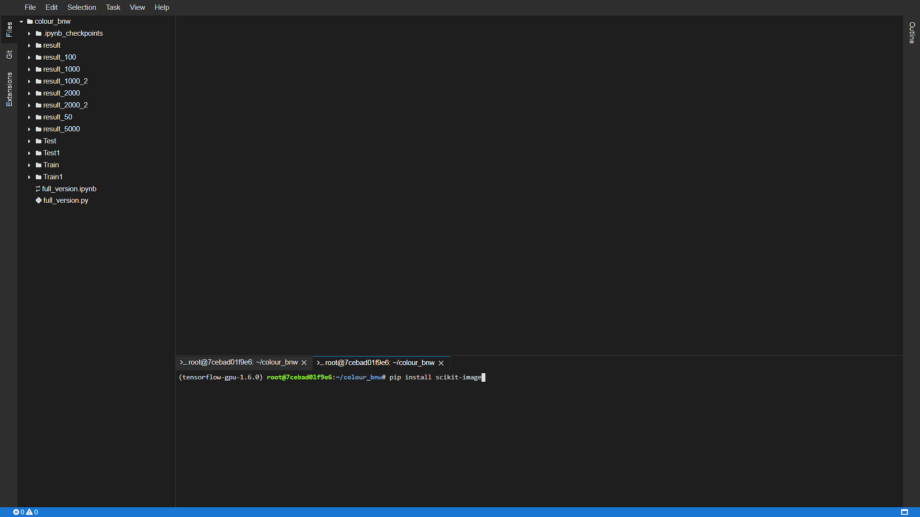
在终端中键入以下命令:
1pip install scikit-image
上传数据集
打开文件浏览器,并为这个项目创建一个新文件夹。上传在 Github 存储库中可用的数据集。
如果需要自定义数据集,可以通过在 train 文件夹中上传高分辨率的彩色图像和test文件夹中的灰度图像来创建。
接下来开始编码
▌导入所有的库
 1import keras
 2from keras.applications.inception_resnet_v2 import InceptionResNetV2
 3from keras.preprocessing import image
 4from keras.engine import Layer
 5from keras.applications.inception_resnet_v2 import preprocess_input
 6from keras.layers import Conv2D, UpSampling2D, InputLayer, Conv2DTranspose, Input, Reshape, merge, concatenate
 7from keras.layers import Activation, Dense, Dropout, Flatten
 8from keras.layers.normalization import BatchNormalization
 9from keras.callbacks import TensorBoard
10from keras.models import Sequential, Model
11from keras.layers.core import RepeatVector, Permute
12from keras.preprocessing.image import ImageDataGenerator, array_to_img, img_to_array, load_img
13from skimage.color import rgb2lab, lab2rgb, rgb2gray, gray2rgb
14from skimage.transform import resize
15from skimage.io import imsave
16import numpy as np
17import os
18import random
19import tensorflow as tf
▌从Train文件夹中读取所有图像并加载初始权重值
1# Get images
2X = []
3for filename in os.listdir('Train/'):
4    X.append(img_to_array(load_img('Train/'+filename)))
5X = np.array(X, dtype=float)
6Xtrain = 1.0/255*X
7#Load weights
8inception = InceptionResNetV2(weights='imagenet', include_top=True)
9inception.graph = tf.get_default_graph()
▌在融合层(fusion layer)两边分别创建编码器和解码器
Inception ResNet v2 是一个在120万张图像上训练的神经网络,也是现今最强大的分类器之一。与编码器并行,输入图像也通过 Inception ResNet v2 来运行。提取分类层并将其与编码器的输出合并。
通过将学习从分类转移到着色网络上,网络可以对图片中的内容有所了解。进而使网络能够将着色方案与对象表示相匹配。
将 encoder_input 输入到我们的编码器模型中,然后将编码器模型的输出与融合层中的 embed_input 融合,用融合层的输出作为解码器模型的输入,最后返回最终的输出 decoder_output。
 1embed_input = Input(shape=(1000,))
 2#Encoder
 3encoder_input = Input(shape=(256, 256, 1,))
 4encoder_output = Conv2D(64, (3,3), activation='relu', padding='same', strides=2)(encoder_input)
 5encoder_output = Conv2D(128, (3,3), activation='relu', padding='same')(encoder_output)
 6encoder_output = Conv2D(128, (3,3), activation='relu', padding='same', strides=2)(encoder_output)
 7encoder_output = Conv2D(256, (3,3), activation='relu', padding='same')(encoder_output)
 8encoder_output = Conv2D(256, (3,3), activation='relu', padding='same', strides=2)(encoder_output)
 9encoder_output = Conv2D(512, (3,3), activation='relu', padding='same')(encoder_output)
10encoder_output = Conv2D(512, (3,3), activation='relu', padding='same')(encoder_output)
11encoder_output = Conv2D(256, (3,3), activation='relu', padding='same')(encoder_output)
12#Fusion
13fusion_output = RepeatVector(32 * 32)(embed_input)
14fusion_output = Reshape(([32, 32, 1000]))(fusion_output)
15fusion_output = concatenate([encoder_output, fusion_output], axis=3)
16fusion_output = Conv2D(256, (1, 1), activation='relu', padding='same')(fusion_output)
17#Decoder
18decoder_output = Conv2D(128, (3,3), activation='relu', padding='same')(fusion_output)
19decoder_output = UpSampling2D((2, 2))(decoder_output)
20decoder_output = Conv2D(64, (3,3), activation='relu', padding='same')(decoder_output)
21decoder_output = UpSampling2D((2, 2))(decoder_output)
22decoder_output = Conv2D(32, (3,3), activation='relu', padding='same')(decoder_output)
23decoder_output = Conv2D(16, (3,3), activation='relu', padding='same')(decoder_output)
24decoder_output = Conv2D(2, (3, 3), activation='tanh', padding='same')(decoder_output)
25decoder_output = UpSampling2D((2, 2))(decoder_output)
26model = Model(inputs=[encoder_input, embed_input], outputs=decoder_output)
现在,我们必须调整图像的大小来适应 Inception 模型。然后根据模型对像素和颜色值使用预处理器进行格式化。在最后一步中,我们通过 Inception 网络运行它并提取模型的最后一层。
 1def create_inception_embedding(grayscaled_rgb):
 2    grayscaled_rgb_resized = []
 3    for i in grayscaled_rgb:
 4        i = resize(i, (299, 299, 3), mode='constant')
 5        grayscaled_rgb_resized.append(i)
 6    grayscaled_rgb_resized = np.array(grayscaled_rgb_resized)
 7    grayscaled_rgb_resized = preprocess_input(grayscaled_rgb_resized)
 8    with inception.graph.as_default():
 9        embed = inception.predict(grayscaled_rgb_resized)
10    return embed
用 ImageDataGenertor 可以调整图像生成器的设置。如此一来得到不会重复的图像,从而提高了学习率。shear_rangetilts 使图像向左或向右倾斜,其他设置为缩放、旋转和水平翻转。
1# Image transformer
2datagen = ImageDataGenerator(
3        shear_range=0.2,
4        zoom_range=0.2,
5        rotation_range=20,
6        horizontal_flip=True)
7#Generate training data
8batch_size = 10
我们使用 Xtrain 文件夹中的图像,根据上面的设置生成图像。然后,为 X_batch 提取黑色层和白色层,并为两个颜色层提取两种颜色。
为创建我们的 batch,我们使用经过调整的图像。将它们转换为黑白图像,并通过 Inception ResNet 模型运行它们。
1def image_a_b_gen(batch_size):
2    for batch in datagen.flow(Xtrain, batch_size=batch_size):
3        grayscaled_rgb = gray2rgb(rgb2gray(batch))
4        embed = create_inception_embedding(grayscaled_rgb)
5        lab_batch = rgb2lab(batch)
6        X_batch = lab_batch[:,:,:,0]
7        X_batch = X_batch.reshape(X_batch.shape+(1,))
8        Y_batch = lab_batch[:,:,:,1:] / 128
9        yield ([X_batch, create_inception_embedding(grayscaled_rgb)], Y_batch)
现在,我们将使用 “RMSProp” 优化器和均方误差作为损失函数来编译模型。
GPU 越强,得到的图像就越多。通过现在的设置,你可以使用50~100张图像。steps_per_epoch 是通过将训练图像的数量除以 batch 大小来计算的。
1#Train model
2model.compile(optimizer='rmsprop', loss='mse')
3model.fit_generator(image_a_b_gen(batch_size), epochs=50, steps_per_epoch=1)
1.0/255 表示我们使用的是 24 位 RGB 颜色空间,这意味着我们为每个颜色通道使用 0 ~ 255 之间的数字。这将会产生 1670 万种颜色的组合。
而人类只能感知 200 ~ 1000 万种颜色,因此,使用再大的颜色空间并没有多大意义。
与 RGB 颜色空间相比,LAB 颜色空间具有不同的范围。在 LAB 颜色空间中,颜色光谱 ab 范围从-128~128。通过将输出层中的所有值除以 128,将色谱范围限制在 -1 ~ 1 之间。
将它与神经网络相匹配,神经网络也返回 -1 ~ 1 之间的值。
在使用 rgb2lab 函数转换颜色空间之后,我们选择灰度层:[:,:,0],这是对神经网络的输入。[:,:,1:] 选择两个颜色层:绿-红和蓝-黄。
1color_me = []
2for filename in os.listdir('Test/'):
3    color_me.append(img_to_array(load_img('Test/'+filename)))
4color_me = np.array(color_me, dtype=float)
5gray_me = gray2rgb(rgb2gray(1.0/255*color_me))
6color_me_embed = create_inception_embedding(gray_me)
7color_me = rgb2lab(1.0/255*color_me)[:,:,:,0]
8color_me = color_me+.reshape(color_me.shape+(1,))
神经网络进行训练后,做出最终的预测,并将其转化为图像。
在这里,我们使用一个灰度图像作为输入,并通过训练好的神经网络来运行它。我们取在 -1 ~ 1 之间所有的输出值,然后乘以 128,就得到了 Lab 色谱中正确的颜色。
最后,用 三层 0 填充得到一个黑色的 RGB 画布。然后从测试图像中,复制灰度图层。然后将这两个颜色层添加到 RGB 画布上。再将这个像素值数组转换为图片。
1# Test model
2output = model.predict([color_me, color_me_embed])
3output = output * 128
4# Output colorizations
5for i in range(len(output)):
6    cur = np.zeros((256, 256, 3))
7    cur[:,:,0] = color_me[i][:,:,0]
8    cur[:,:,1:] = output[i]
9    imsave("result/img_"+str(i)+".png", lab2rgb(cur))
结果
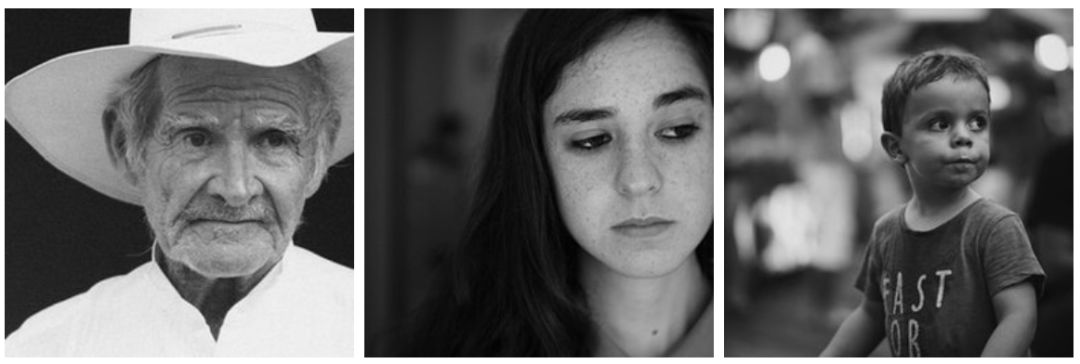
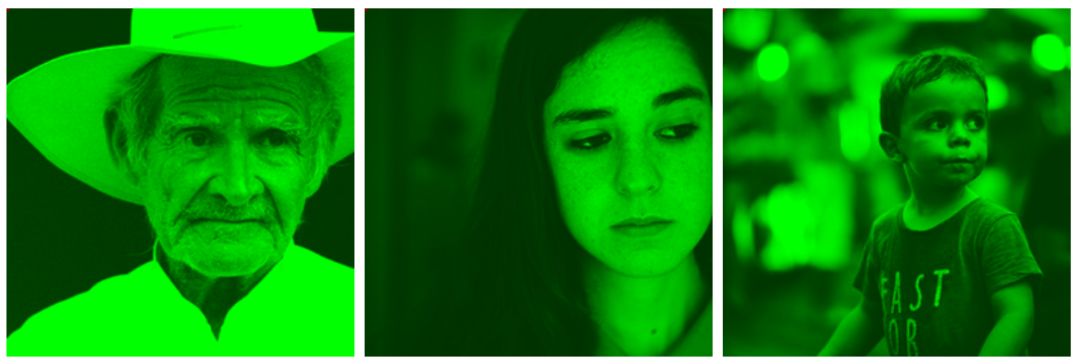
在小型数据集上的结果,训练图像数 = 10,测试图像数 = 8;
▌测试数据:
▌经过50个轮数之后:
▌经过100个轮数之后:
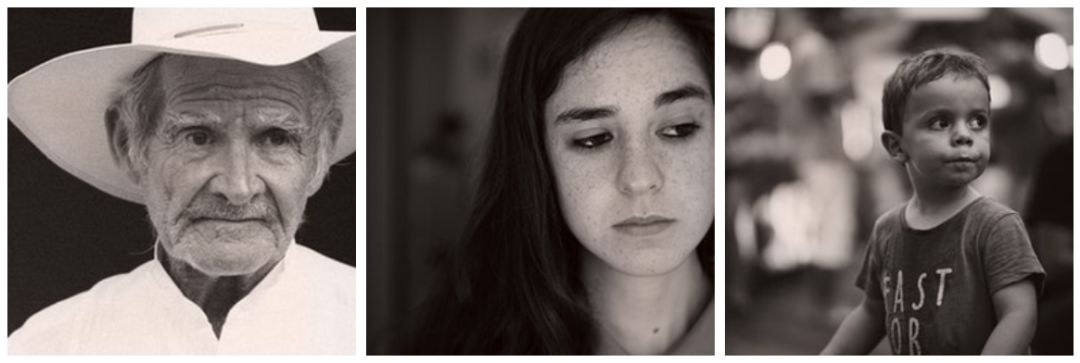
▌经过1000个轮数之后:

▌经过2000个轮数之后:

原文链接
—【完】—
2018 AI开发者大会
只讲技术,拒绝空谈
2018 AI开发者大会是一场由中美人工智能技术高手联袂打造的AI技术与产业的年度盛会!是一场以技术落地为导向的干货会议!大会设置了10场技术专题论坛,力邀15+硅谷实力讲师团和80+AI领军企业技术核心人物,多位一线经验大咖带你将AI从云端落地。
大会日程以及嘉宾议题请查看下方海报(点击查看大图)

