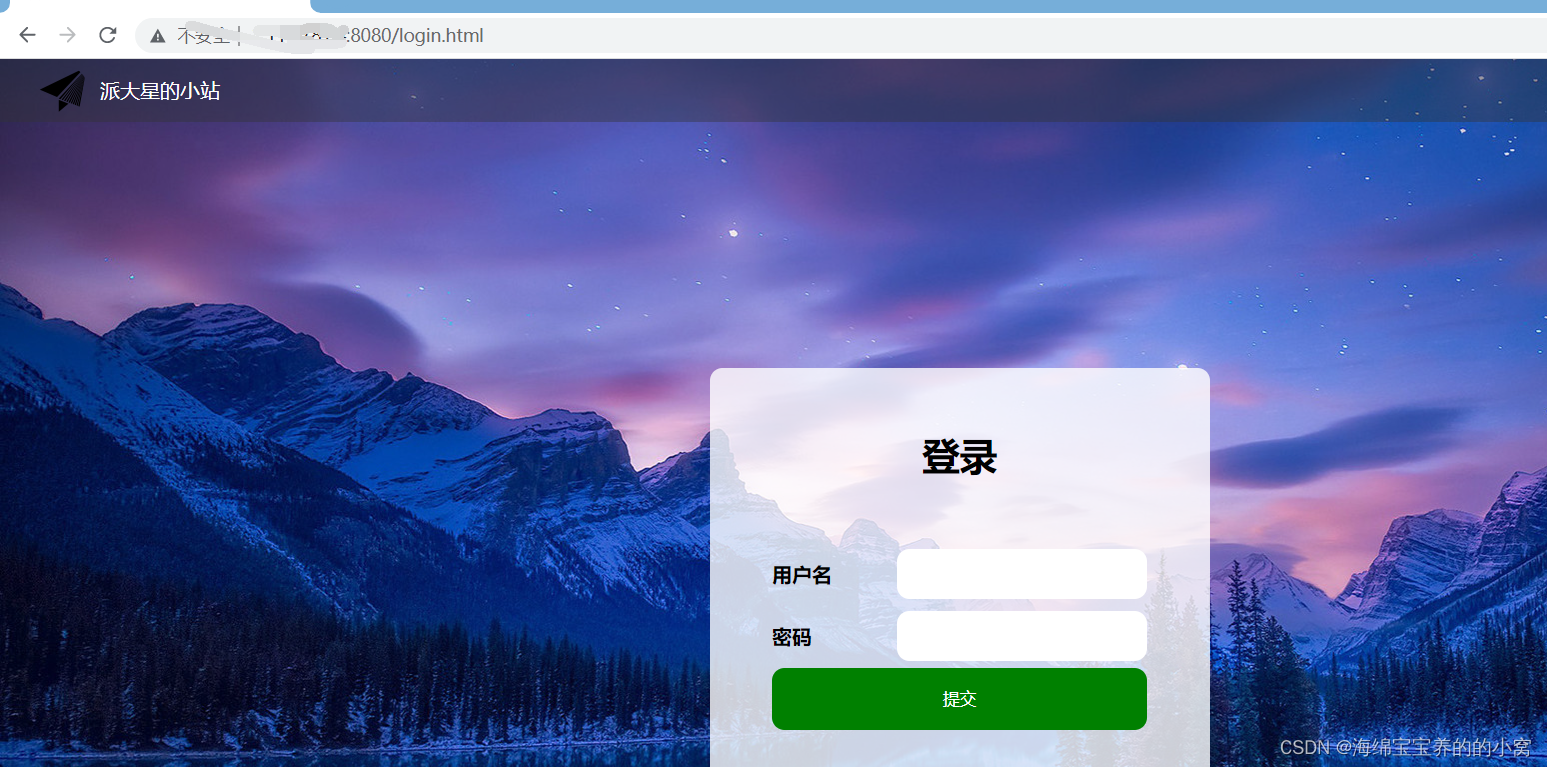
将之前写的博客项目改为SSM项目
文章目录
- 1.创建项目
- 2.数据库实现及管理
- 2.1使用MaBatis操作数据库
- 2.1.1 UserMapper.xml
- 2.1.2 BlogMapper.xml
- 2.2 实体类
- 2.2.1 Blog类
- 2.2.2 User类
- 2.3 接口类
- 2.3.1 BlogMapper
- 2.3.2 UserMapper
- 2.4 调用类
- 2.4.1 BlogService
- 2.4.2 UserService
- 3. 前后端约定
- 4. 导入前端代码
- 5. 编写后端代码
- 5.1 实现返回类
- 5.2 实现博客主页和详情页
- 5.3 实现登录页
- 5.4 实现登录判断-拦截器
- 5.4.1 实现自定义拦截器
- 5.4.2 将自定义拦截器加入到系统配置中
- 5.4.3 登录判断
- 5.5 获取博客作者信息
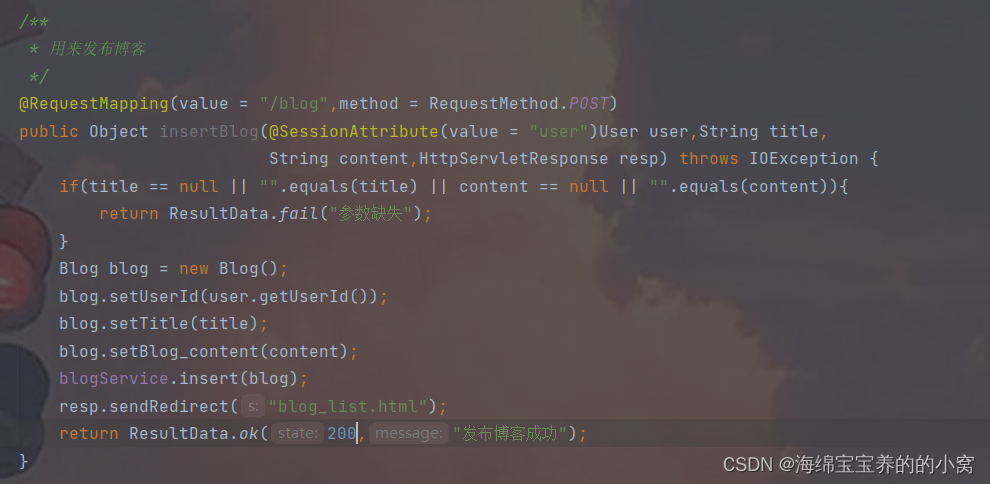
- 5.6 发布博客
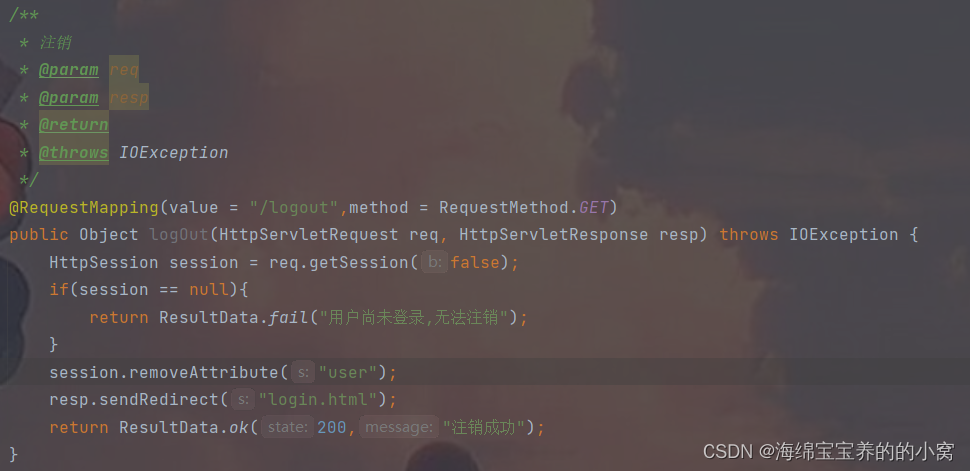
- 5.7 注销
- 5.8 删除博客
- 5.9 注册
- 6. 部署到云服务器
- 6.1打包
- 6.2 找到该包
- 6.3 拖拽发送
- 6.4 运行
1.创建项目
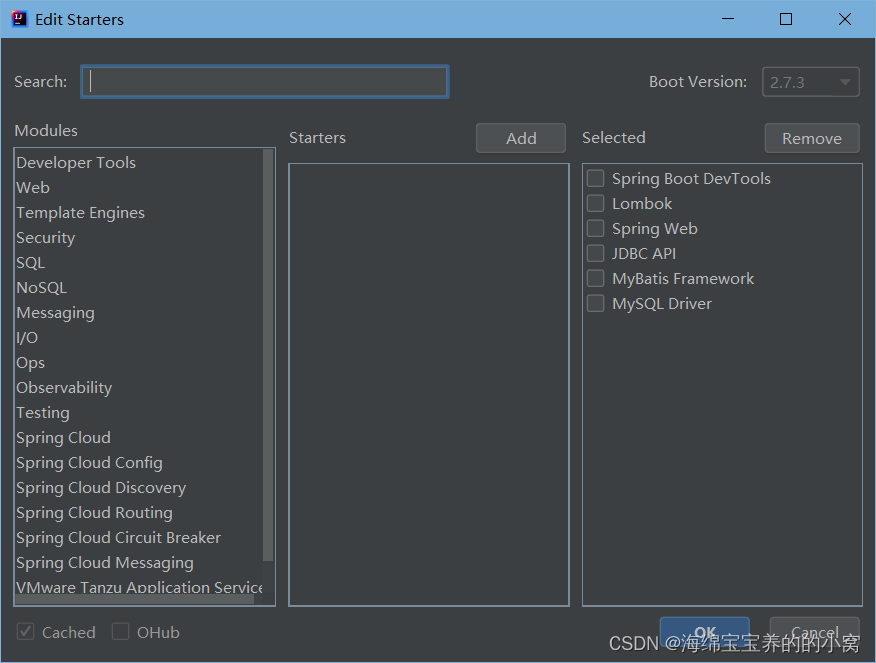
创建一个SpringBoot项目,添加如下依赖:
2.数据库实现及管理
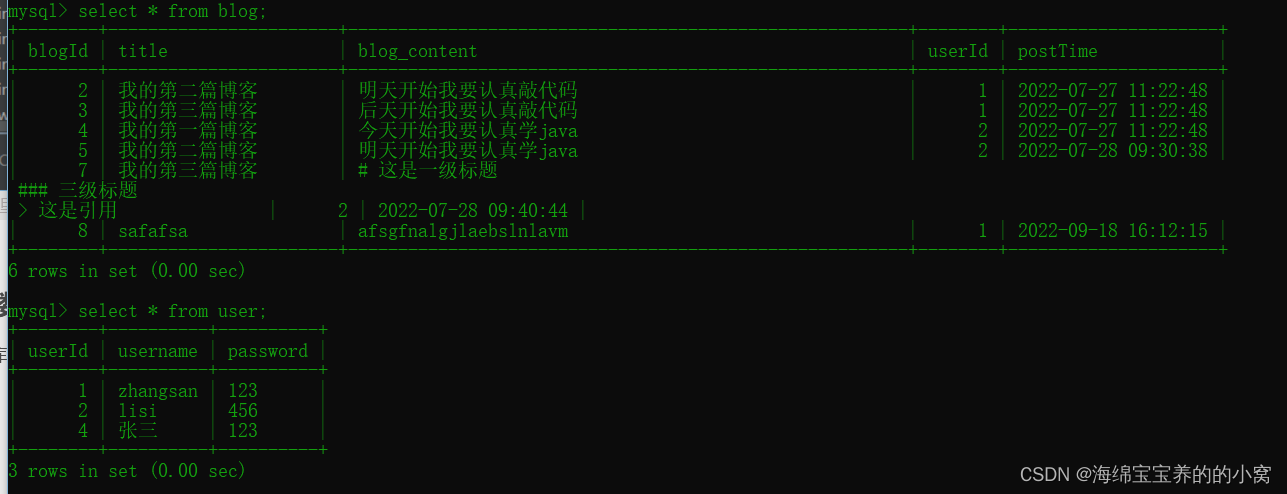
数据库使用之前的即可.
2.1使用MaBatis操作数据库
2.1.1 UserMapper.xml
<?xml version="1.0" encoding="UTF-8"?>
<!DOCTYPE mapper PUBLIC "-//mybatis.org//DTD Mapper 3.0//EN" "http://mybatis.org/dtd/mybatis-3-mapper.dtd">
<mapper namespace="com.example.demo.model.UserMapper"><insert id="insert">insert into user(username,password) values(#{username},#{password});</insert><select id="selectById" resultType="com.example.demo.model.User">select * from user where userId = #{userId}</select><select id="selectByName" resultType="com.example.demo.model.User">select * from user where username = #{username}</select></mapper>
2.1.2 BlogMapper.xml
<?xml version="1.0" encoding="UTF-8"?>
<!DOCTYPE mapper PUBLIC "-//mybatis.org//DTD Mapper 3.0//EN" "http://mybatis.org/dtd/mybatis-3-mapper.dtd">
<mapper namespace="com.example.demo.model.BlogMapper"><!-- 发布一篇博客 --><insert id="insert">insert into blog values(null,#{title},#{blog_content},#{userId},now())</insert><!-- 根据博客id查找博客 --><select id="selectByBlogId" resultType="com.example.demo.model.Blog">select * from blog where blogId = #{blogId}</select><!-- 根据用户id查找该用户所有博客 --><select id="selectByUserId" resultType="com.example.demo.model.Blog">select * from blog where userId = #{userId}</select><!-- 查询所有博客 --><select id="selectAll" resultType="com.example.demo.model.Blog">select * from blog order by postTime desc</select><!-- 根据博客id删除博客 --><delete id="deleteByBlogId">delete from blog where blogId = #{blogId}</delete>
</mapper>
2.2 实体类
2.2.1 Blog类
@Data
public class Blog {private int blogId;private String title;private String blog_content;private int userId;private Timestamp postTime;public String getPostTime() {SimpleDateFormat simpleDateFormat = new SimpleDateFormat("yyyy-MM-dd HH:mm:ss");return simpleDateFormat.format(postTime);}
}
2.2.2 User类
@Data
public class User {private int userId = 0;private String username = "";private String password = "";
}
2.3 接口类
2.3.1 BlogMapper
@Mapper
public interface BlogMapper {int deleteByBlogId(Integer blogId);Blog selectByBlogId(Integer blogId);List<Blog> selectByUserId(Integer userId);int insert(Blog blog);List<Blog> selectAll();
}
2.3.2 UserMapper
@Mapper
public interface BlogMapper {int deleteByBlogId(Integer blogId);Blog selectByBlogId(Integer blogId);List<Blog> selectByUserId(Integer userId);int insert(Blog blog);List<Blog> selectAll();
}
2.4 调用类
2.4.1 BlogService
@Service
public class BlogService {@Resourceprivate BlogMapper blogMapper;public int insert(Blog blog){return blogMapper.insert(blog);}public List<Blog> selectByUserId(Integer userId){return blogMapper.selectByUserId(userId);}public Blog selectByBlogId(Integer BlogId){return blogMapper.selectByBlogId(BlogId);}public void deleteByBlogId(Integer BlogId){blogMapper.deleteByBlogId(BlogId);}public List<Blog> selectAll(){return blogMapper.selectAll();}
}
2.4.2 UserService
@Service
public class UserService {@Resourceprivate UserMapper userMapper;public User selectById(Integer id){return userMapper.selectById(id);}public int insert(User user){return userMapper.insert(user);}public User selectByName(String username){return userMapper.selectByName(username);}
}
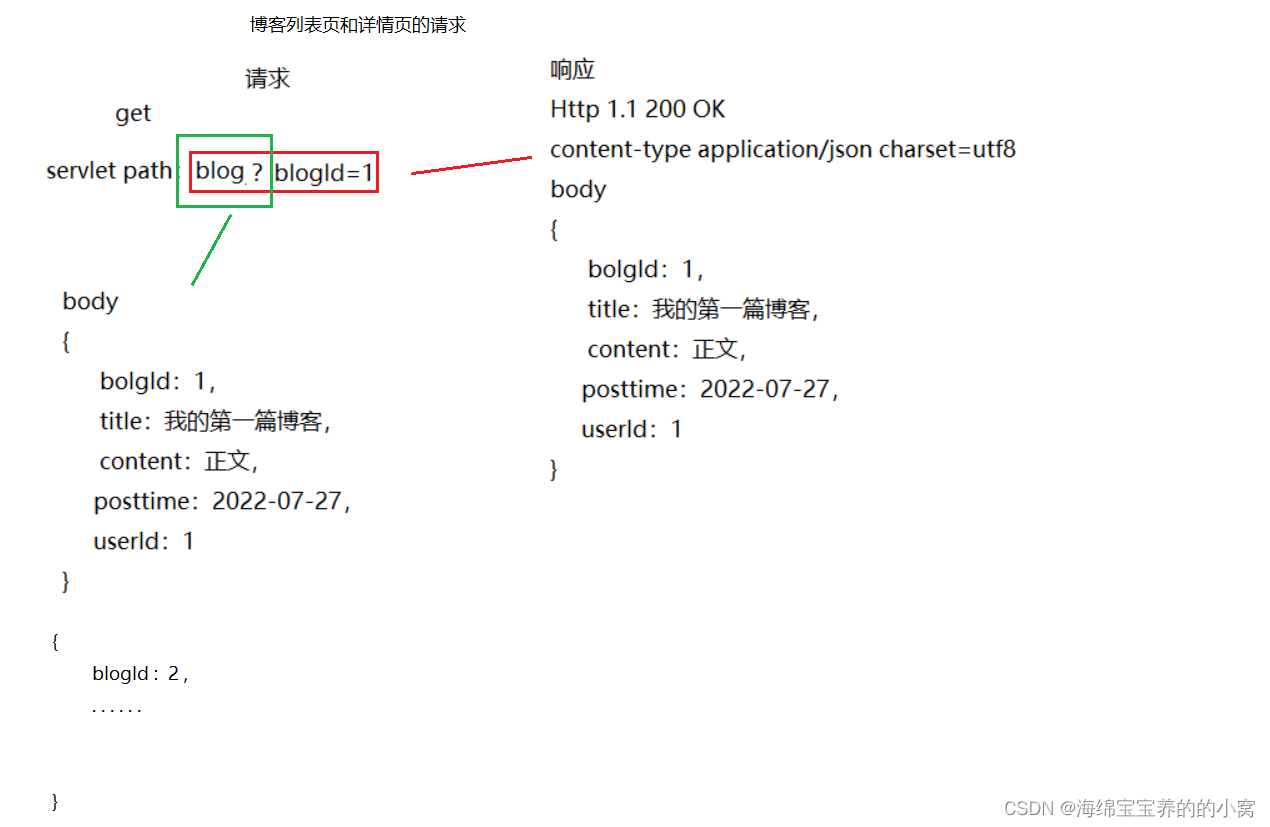
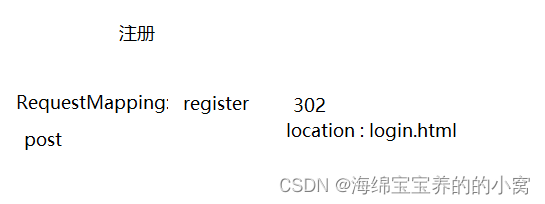
3. 前后端约定
1
2

3
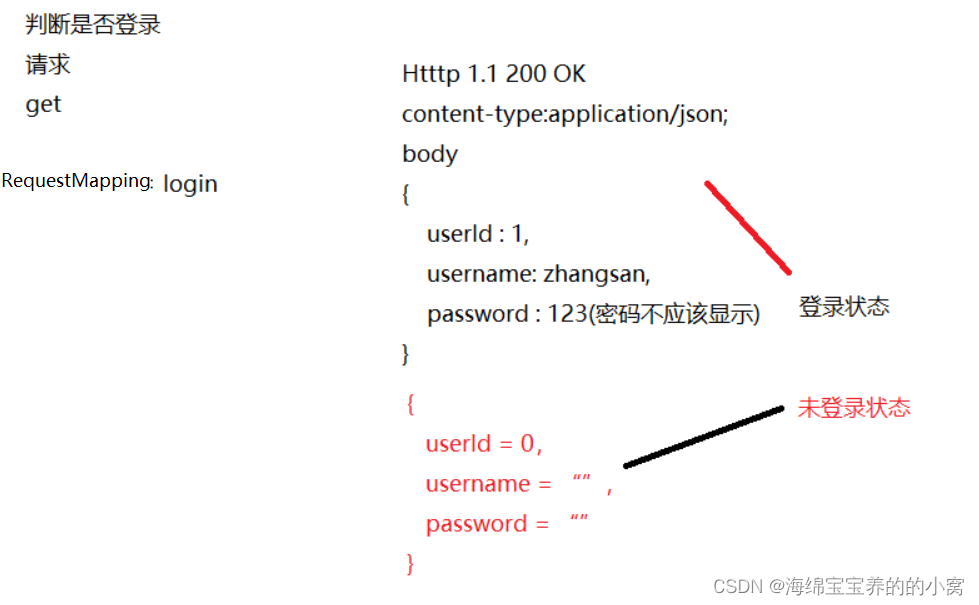
4
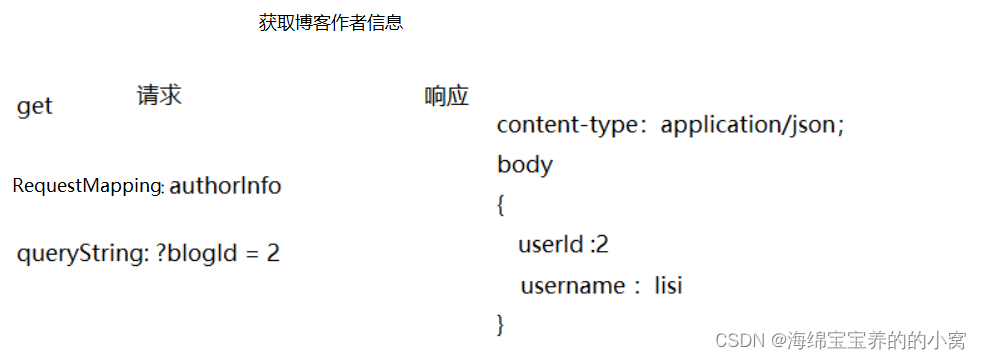
5
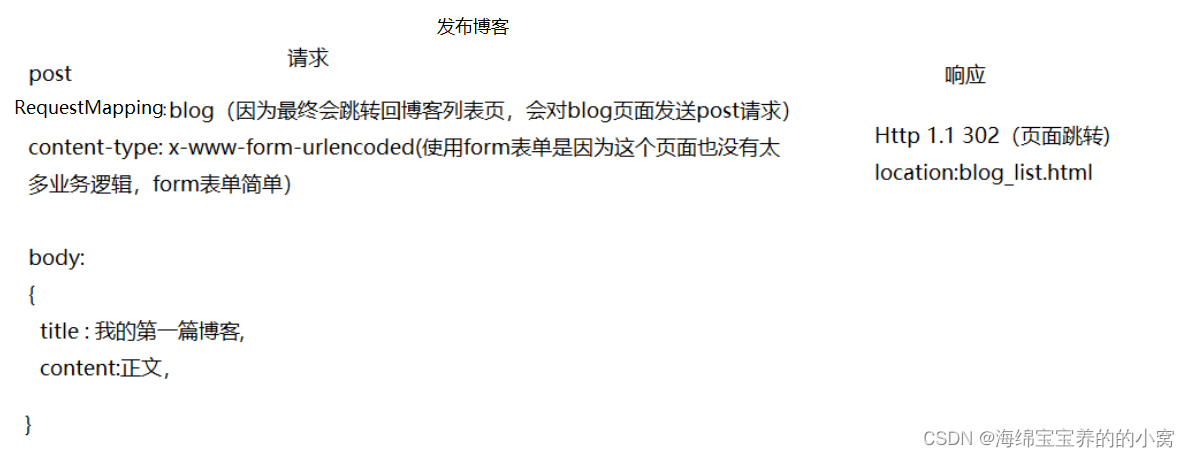
6
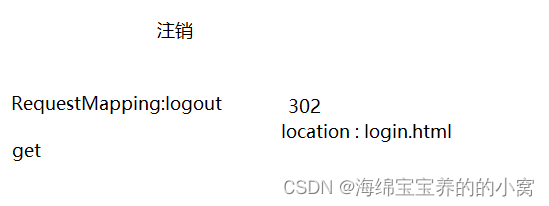
7

8
4. 导入前端代码
前端代码基本不用修改,直接引入即可
5. 编写后端代码
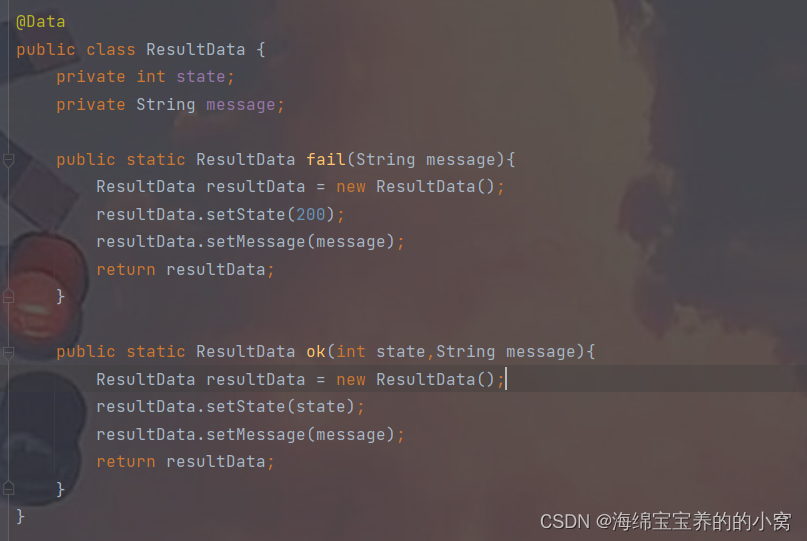
5.1 实现返回类
5.2 实现博客主页和详情页
和原来一样,我们依旧可以通过判断是否有拥有参数来实现跳转到博客主页还是详情页
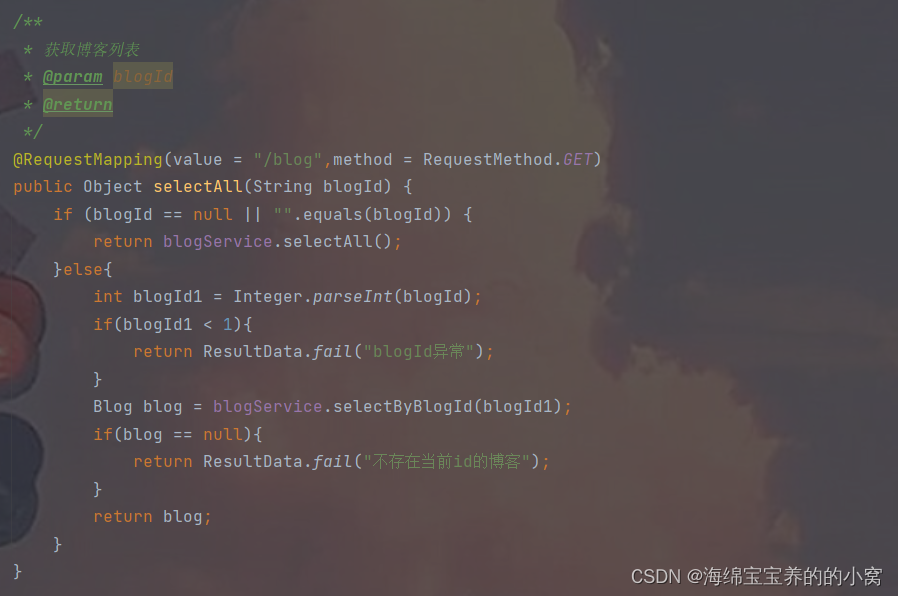
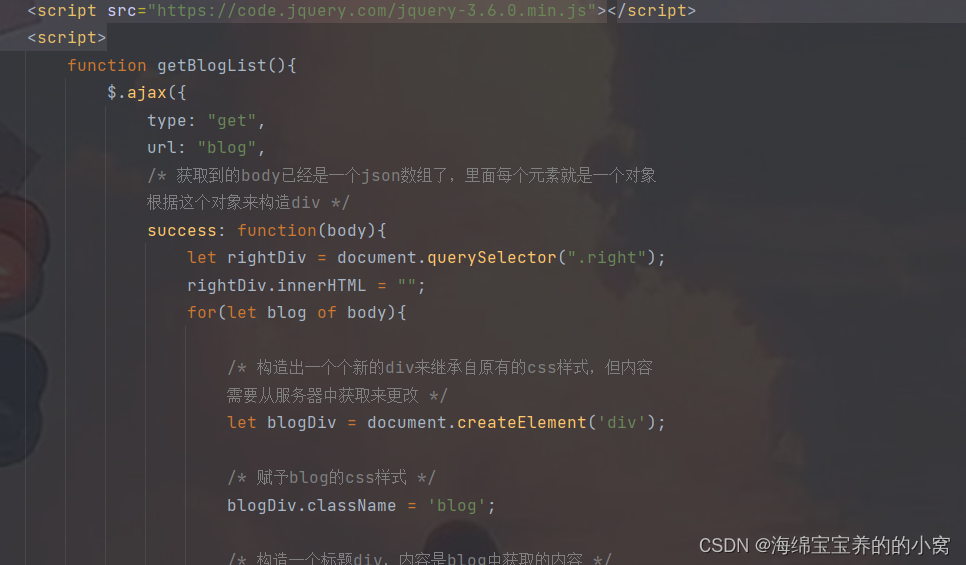
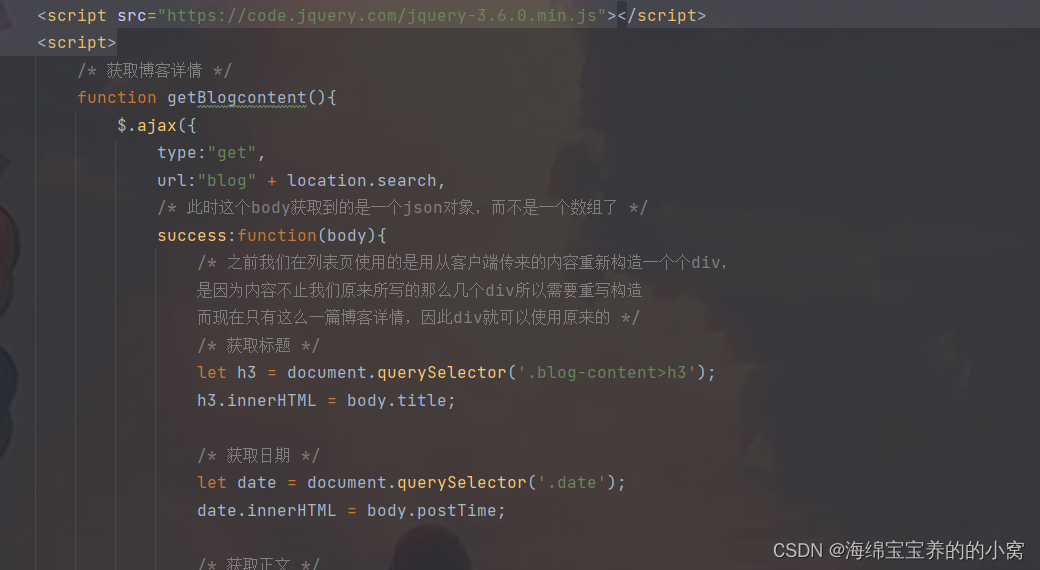
具体的可参考之前的博客: 博客系统
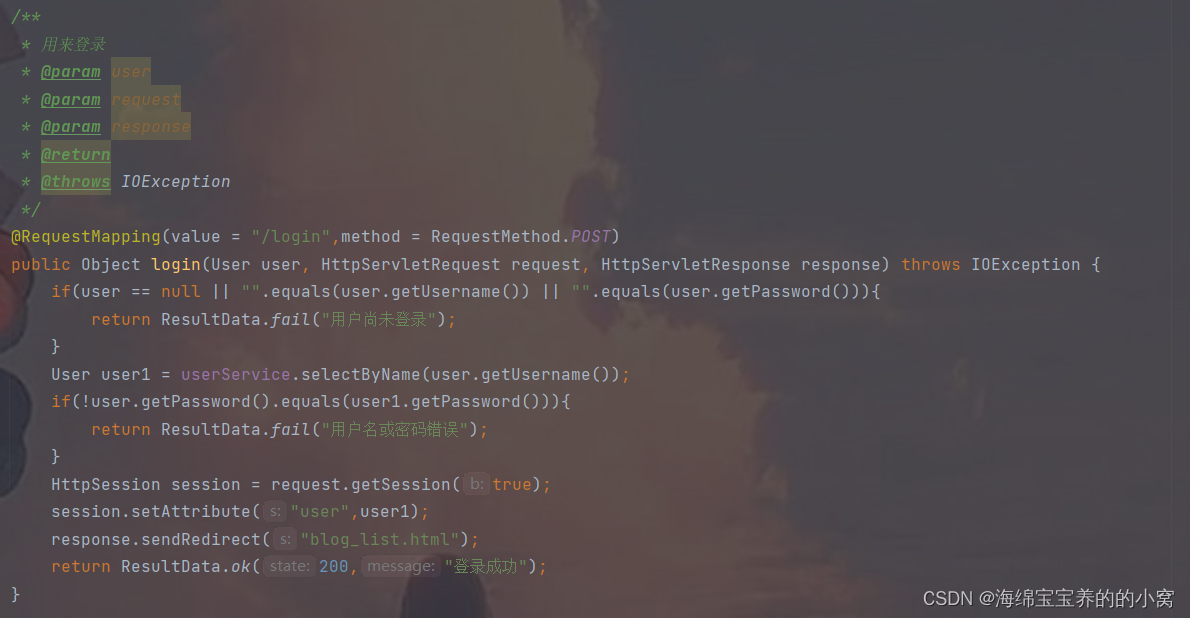
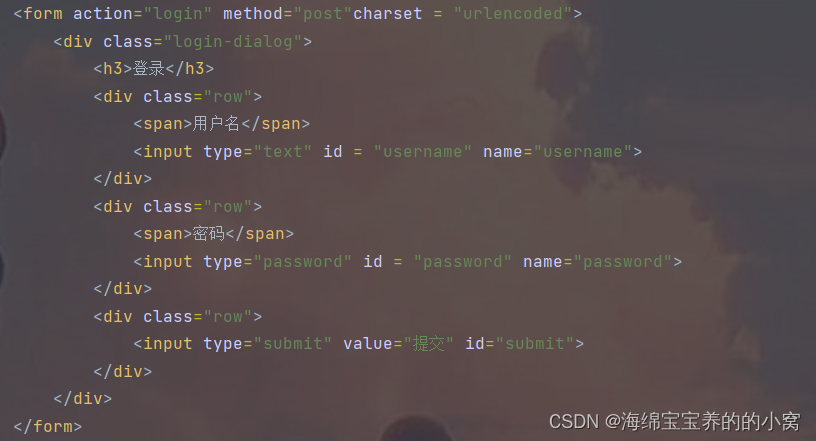
5.3 实现登录页
5.4 实现登录判断-拦截器
5.4.1 实现自定义拦截器
public class LoginIntercept implements HandlerInterceptor {@Overridepublic boolean preHandle(HttpServletRequest request, HttpServletResponse response, Object handler) throws Exception {HttpSession session = request.getSession(false);if(session != null && session.getAttribute("user") != null){return true;}response.setStatus(401);response.sendRedirect("/login.html");return false;}
}
5.4.2 将自定义拦截器加入到系统配置中
@Configuration
public class APPConfig implements WebMvcConfigurer {@Overridepublic void addInterceptors(InterceptorRegistry registry) {registry.addInterceptor(new LoginIntercept()).//所有路由都拦截addPathPatterns("/**").//不拦截这个后缀的所有文件excludePathPatterns("/**/*.css").excludePathPatterns("/**/*.js").excludePathPatterns("/**/*.png").excludePathPatterns("/**/*.jpg").//登录页和注册页也不用拦截excludePathPatterns("/**/login.html").excludePathPatterns("/**/register.html").excludePathPatterns("/**/login").excludePathPatterns("/**/register");}
}
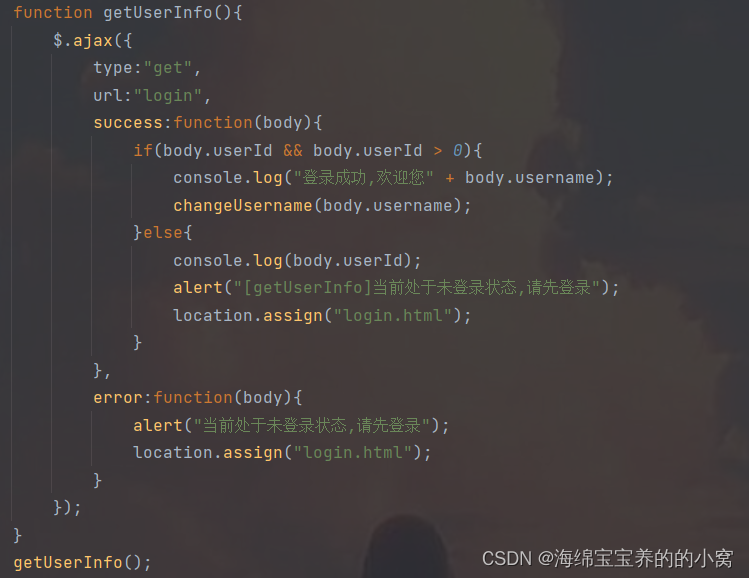
5.4.3 登录判断

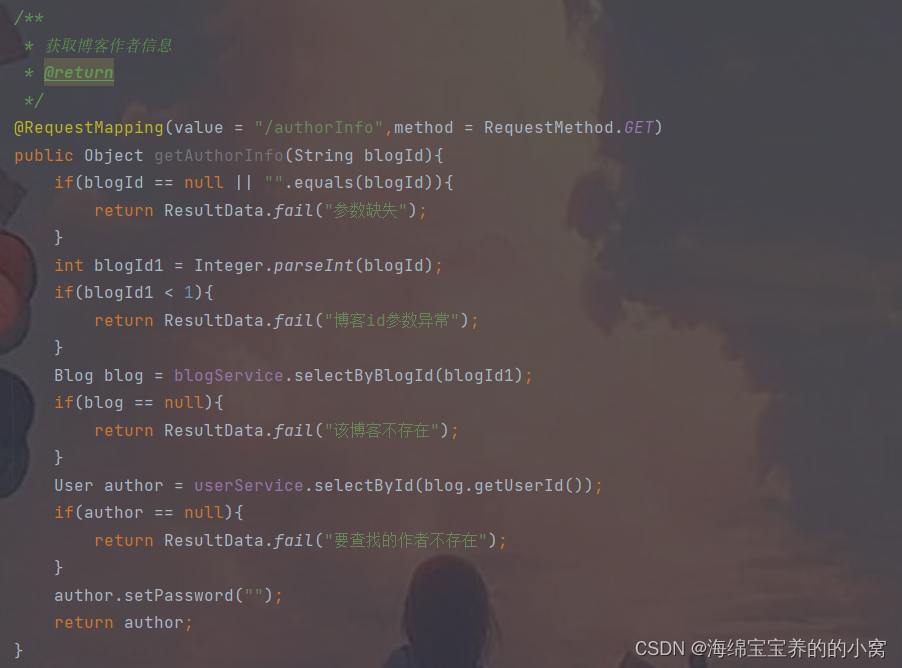
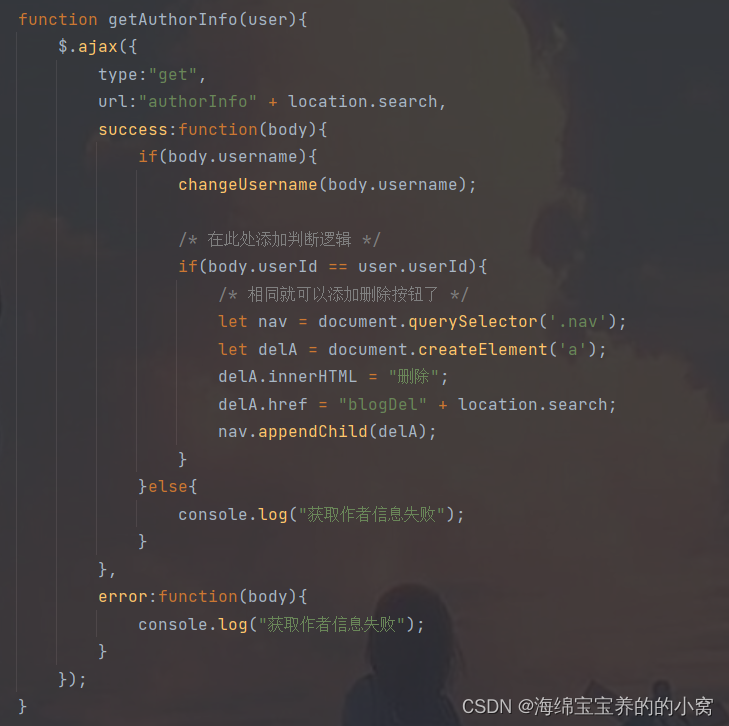
5.5 获取博客作者信息
5.6 发布博客

5.7 注销
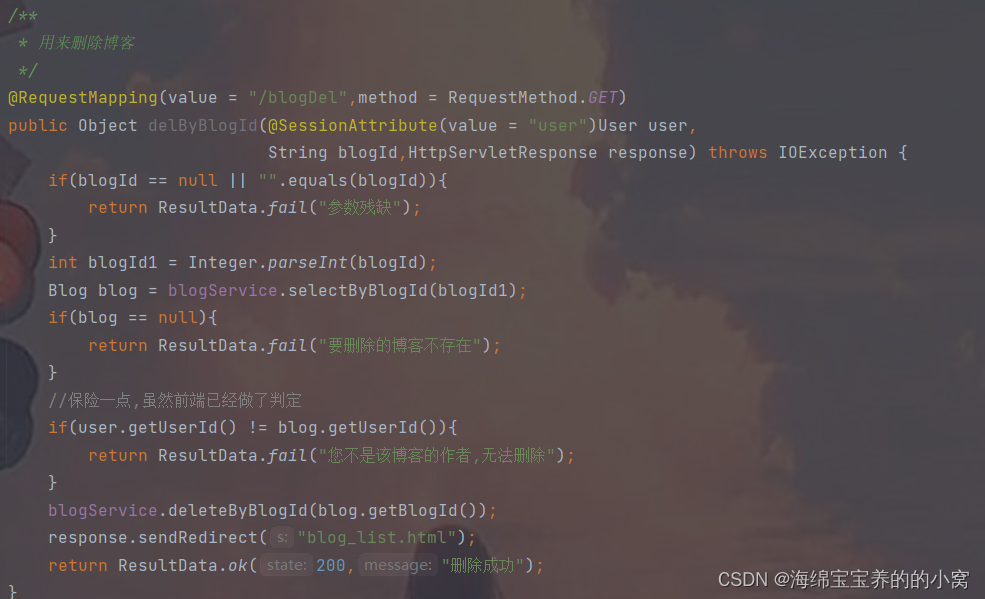
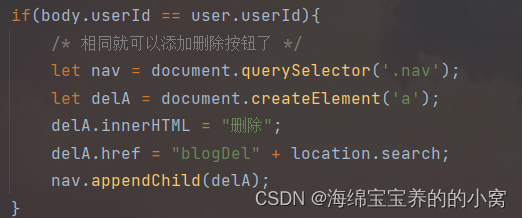
5.8 删除博客
5.9 注册
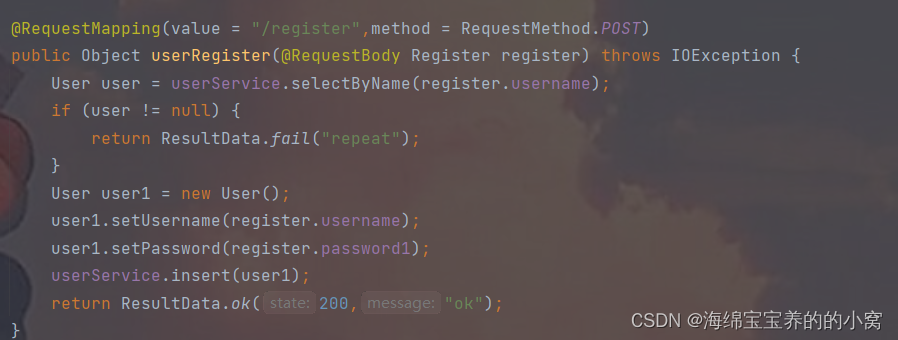
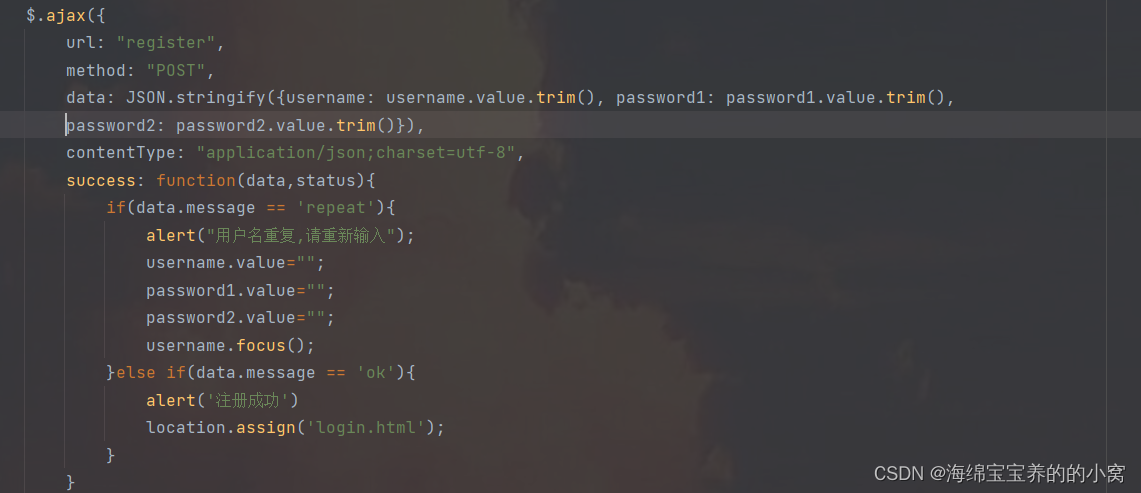
6. 部署到云服务器
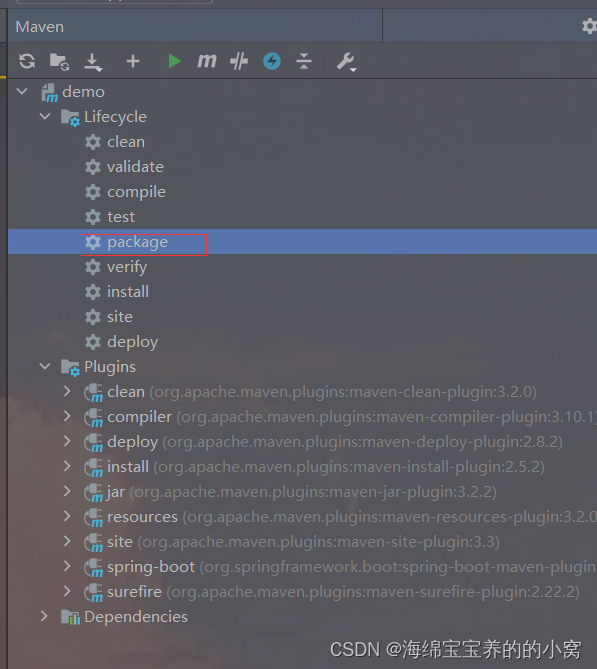
6.1打包
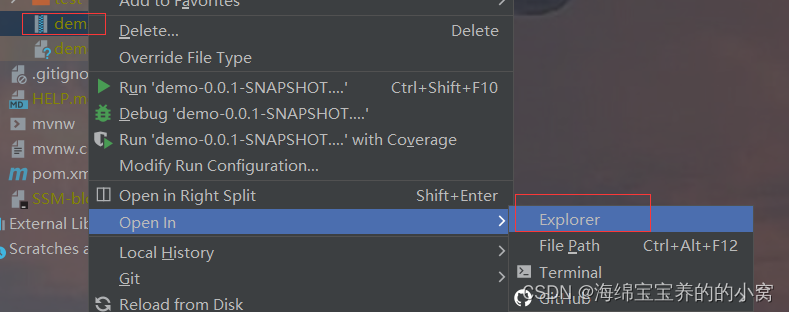
6.2 找到该包
6.3 拖拽发送

6.4 运行
java - jar 加包名即可运行
