前言
自己要做一个Android App,涉及到服务器端的用户数据管理,而网络上的的资源往往是只讲一个方面。所以自己每完成一段工作,会将开发过程记录下来,并供大家参考,相关文章放在专栏
【php + MySQL + Android】。
如果你遇到了什么问题,或者有好的建议欢迎在评论区留言大家一起交流。
--------------------------------------------------------------------------------------------------------------------------------
目录
前言
效果预览:
要点整理:
1.project下的文件夹简介
manifests
Java
res
Gradle Scripts
代码:
Activity_main.xml
colors.xml
dimens.xml
strings.xml
btn_blue.xml
btn_white.xml
edit_text.xml
需要注意的点
效果预览:

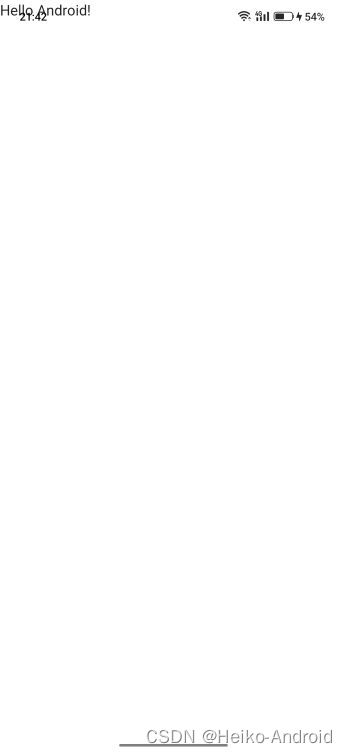
最终的效果是这样的,因为后面的好多功能还没有做,加之自己是新手,为了进度,只能先做一个较为粗糙的效果,实现基本的功能。
要点整理:
1.project下的文件夹简介
 :
:
如果你和我一样,是第一次开发Android项目,那么你对项目下的文件肯定是不太熟悉的,而这也会影响我们开发。接下来做一个超简单的介绍,后面用到某一个模块再详细赘述。
manifests

首先是mainfests,这里有一个xml文件,这是你开发的Android APP的系统清单文件,可以控制Android 应用的名称,图标,访问权限等整体属性。
Java

这里是我们写我们Activity代码的地方,我们的一些功能代码都可以写在这里,我们写的一些UI界面都可以在这里调用以及写一些相关的功能。下面的两个文件夹,与自动化测试有关,我们这里暂时不管。

同时这里还有个带小风扇的,与版本控制有关,这里暂时也不涉及。
res
这里是我们的一些资源文件,它与我们的UI界面息息相关。
- drawable:

这里主要存一些图片,以及我们自己写的一些背景样式,比如这个例子中有一个按钮的样式是我要常用的,它的圆角和颜色以及阴影效果都是固定的,这个时候我们就可以把这种样式写在这个文件夹下面,多次使用。
- layout
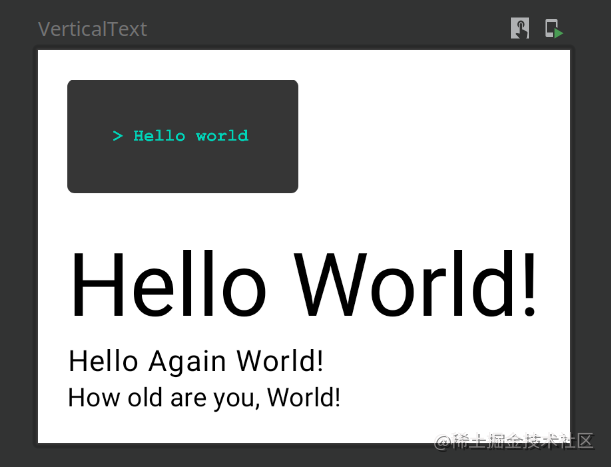
这里就是我们写的UI布局了。主要的布局都写在这里。
![]()
- mipmap
这里是我们的APP的图标,在这里的图片在缩放时提供一定的性能优化,根据不同的机型有不同的表现。

- values

这里存放一些我们用到比较频繁的值。比如一个按钮的高度,我要不停的用它,我们就可以把他存放在这里,通过@的方法引用它,还有文字 ,这里自己之前有一些小疑惑,明明很多文案只用一边为啥要写在这里,现在是明白了,原因如下:
- 面向国际化,当你的app需要推向国外的时候,只需要把这个文件里的文字翻译出来,再写一个文件存放英文字符,甚至更多的语言,之前是我格局小了,现在必须养成这个好习惯了。我们公司的项目文件也是在一开始就建了两个strings一个存放英文,一个中文,到时候就可以一键切换语言了。
- 节省内存,其实这里的所有文件都有这个效果,避免了开辟额外的内存空间,我们开发大项目的时候性能优化是一个很重要的点。
- 方便,存在这里,牵一发而动全身,方便修改和管理。
综上,我们要从一开始就养成良好的开发习惯哦。
至于thems文件是我们的系统主题。去除蓝色的顶部见我的另一篇文章---------
Android app 去除顶部蓝色导航栏(Action Bar_勇敢di牛牛的博客-CSDN博客
Gradle Scripts
这里是一些工程配置文件,同样我们暂时不会涉及。

代码:
Activity_main.xml
<?xml version="1.0" encoding="utf-8"?>
<RelativeLayoutxmlns:android="http://schemas.android.com/apk/res/android"xmlns:app="http://schemas.android.com/apk/res-auto"android:background="@color/white"android:layout_width="match_parent"android:layout_height="match_parent" ><EditTextandroid:id="@+id/edt_user"android:textColor="@color/black"android:background="@drawable/edit_text"android:textColorHint="@color/edit_hint"android:layout_width="@dimen/btn_edit_width"android:layout_height="@dimen/btn_edit_height"android:layout_centerHorizontal="true"android:layout_marginTop="250dp"android:hint="@string/login_login_user"android:inputType="text"android:shadowColor="@color/edit_shadow" /><EditTextandroid:id="@+id/edt_password"android:textColor="@color/black"android:layout_width="@dimen/btn_edit_width"android:layout_height="@dimen/btn_edit_height"android:textColorHint="@color/edit_hint"android:layout_below="@+id/edt_user"android:layout_centerHorizontal="true"android:layout_marginTop="12dp"android:background="@drawable/edit_text"android:hint="@string/login_cancel_password"android:inputType="textPassword"android:shadowColor="@color/edit_shadow" /><Buttonandroid:id="@+id/bt_login"android:background="@drawable/btn_blue"android:text="@string/login_login_text"android:layout_centerHorizontal="true"android:textSize="@dimen/btn_login_text_size"android:layout_marginTop="400dp"android:layout_width="@dimen/btn_login_width"android:layout_height="@dimen/btn_login_height"/><Buttonandroid:id="@+id/bt_register"android:layout_below="@+id/bt_login"android:layout_marginTop="40dp"android:textColor="@color/btn_blue"android:layout_centerHorizontal="true"android:background="@drawable/btn_white"android:text="@string/login_cancel_text"android:textSize="@dimen/btn_login_text_size"android:layout_width="@dimen/btn_login_width"android:layout_height="@dimen/btn_login_height"/></RelativeLayout>
colors.xml
<?xml version="1.0" encoding="utf-8"?>
<resources><color name="purple_200">#FFBB86FC</color><color name="purple_500">#FF6200EE</color><color name="purple_700">#FF3700B3</color><color name="teal_200">#FF03DAC5</color><color name="teal_700">#FF018786</color><color name="black">#FF000000</color><color name="white">#FFFFFFFF</color><color name="btn_green">#3FA162</color><color name="btn_blue">#0079FF</color><color name="red">#F44336</color><color name="edit_hint">#80343965</color><color name="edit_shadow">#001DB0</color>
</resources>
dimens.xml
<?xml version="1.0" encoding="utf-8"?>
<resources><dimen name="btn_login_width">250dp</dimen><dimen name="btn_login_height">50dp</dimen><dimen name="btn_edit_width">317dp</dimen><dimen name="btn_edit_height">52dp</dimen><dimen name="btn_green_radius">12dp</dimen><dimen name="btn_blue_radius">24dp</dimen><dimen name="btn_login_text_size">24sp</dimen></resources>
strings.xml
*注意这里空格的写法: 
<resources><string name="app_name">testApp</string><string name="login_login_text">登        录</string><string name="login_cancel_text">注        册</string><string name="login_login_user">账号</string><string name="login_cancel_password">密码</string>
</resources>btn_blue.xml
<?xml version="1.0" encoding="utf-8"?>
<layer-list xmlns:android="http://schemas.android.com/apk/res/android"><item><shape><solid android:color="@color/btn_blue" /><corners android:radius="@dimen/btn_blue_radius"/></shape></item><itemandroid:bottom="2px"android:left="2px"android:right="2px"android:top="2px"><shapeandroid:layout_width="wrap_content"android:layout_height="wrap_content"><corners android:radius="@dimen/btn_blue_radius" /><strokeandroid:width="2px"android:color="@color/btn_blue" /></shape></item>
</layer-list>
btn_white.xml
<?xml version="1.0" encoding="utf-8"?>
<layer-list xmlns:android="http://schemas.android.com/apk/res/android"><item><shape><solid android:color="@color/white" /><corners android:radius="@dimen/btn_blue_radius"/></shape></item><itemandroid:bottom="1px"android:left="1px"android:right="1px"android:top="1px"><shapeandroid:layout_width="wrap_content"android:layout_height="wrap_content"><corners android:radius="@dimen/btn_blue_radius" /><strokeandroid:width="2px"android:color="@color/btn_blue" /></shape></item>
</layer-list>
edit_text.xml
<?xml version="1.0" encoding="utf-8"?>
<layer-list xmlns:android="http://schemas.android.com/apk/res/android" ><itemandroid:left="2dp"android:top="2dp"><shape android:shape="rectangle" ><gradientandroid:angle="270"android:endColor="#0F000000"android:startColor="#0F000000" /><cornersandroid:bottomLeftRadius="6dip"android:bottomRightRadius="6dip"android:topLeftRadius="6dip"android:topRightRadius="6dip" /></shape></item><itemandroid:bottom="3dp"android:right="3dp"><shape android:shape="rectangle" ><gradientandroid:angle="270"android:endColor="#FFFFFF"android:startColor="#FFFFFF" /><cornersandroid:bottomLeftRadius="6dip"android:bottomRightRadius="6dip"android:topLeftRadius="6dip"android:topRightRadius="6dip" /></shape></item></layer-list>
需要注意的点
- 主题
这里我使用的是这个主题,其他的主题不知道会不会出现其他的问题。(有两个文件哦)

- App名字
上面的图片中我的App名字是TestApp,如果你在建项目的时候取了其他的名字,记得替换过来。比如Strings.xml文件就有,复制完要换回来。
- 自己整理的点。
1,
xmlns:android="http://schemas.android.com/apk/res/android"
xmlns:app="http://schemas.android.com/apk/res-auto"
使用这两行代码,我们就可以引用命名空间中的属性,(不可以随便删哦,即使是变灰了以后也会用到。还有一个是关于tools,用这个会在apk编译后会被统统去除,这里用不到我就删了,也可以不删的。
2,
① fill_parent
设置一个视图的布局为fill_parent将强制性地使视图扩展至父元素大小。
② match_parent
Android 中match_parent和fill_parent意思一样,但match_parent更贴切,于是从2.2开始两个词都可以
用,但2.3版本后建议使用match_parent。
③ wrap_content
自适应大小,强制性地使视图扩展以便显示其全部内容。以TextView和ImageView控件为例,设置为
wrap_content将完整显示其内部的文本和图像。布局元素将根据内容更改大小。3,关于单位:
总结一下三点:
1、对于布局的像素设置,一般要用 dip(dp),这样在更大或者更小的屏幕下展示可以自动适配,如果是 px,是物理像素,这样在小的屏幕里可能会显得大,在大的屏幕中显小。
2、对于字体的大小设置来说,建议始终使用 sp 作为文字大小的单位,可以使用户界面能够在现在和将来的显示器类型上正常显示。
3 、文字的尺寸一律用 sp 单位,非文字的尺寸一律使用 dp 单位。
老规矩,有啥问题都可以评论区留言,或者私信——————
独学而无友, 则孤陋而寡闻


![[LeetCode周赛复盘] 第 314 场周赛20221009](https://img-blog.csdnimg.cn/ccad6eb774fa48e99d158f3c53dce298.png)