nestjs超详细从零到零点五详细入门项目搭建过程
项目完整地址github,修复了一些swagger文档接口,传参显示问题
从零到有搭建一个完整的后台管理系统项目
涉及到的知识
- controller控制器provider提供者module模块middleware中间件filter过滤器pipe管道guard守卫interceptor拦截器@装饰器
- 生命周期事件onModuleInit
- TypeORM
- 热重载
- Swagger
nestjs中文文档
nestjs官方英文文档
新建项目
梦开始的地方初始化项目
npm i -g @nestjs/cli
nest new project-name
// 这里我使用pnpm作为包管理工具
cd project-name
打开.eslintrc.js注释其中两行,额,看个人喜好,我很难受这个东西,这个是用来校验语法的
module.exports = {parser: '@typescript-eslint/parser',parserOptions: {project: 'tsconfig.json',tsconfigRootDir: __dirname,sourceType: 'module',},plugins: ['@typescript-eslint/eslint-plugin'],extends: [// 'plugin:@typescript-eslint/recommended',// 'plugin:prettier/recommended',],root: true,env: {node: true,jest: true,},ignorePatterns: ['.eslintrc.js'],rules: {'@typescript-eslint/interface-name-prefix': 'off','@typescript-eslint/explicit-function-return-type': 'off','@typescript-eslint/explicit-module-boundary-types': 'off','@typescript-eslint/no-explicit-any': 'off',},
};
安装express
pnpm add express
配置项目热重载
对应用程序的引导过程影响最大的是 TypeScript 编译。但问题是,每次发生变化时,我们是否必须重新编译整个项目?一点也不。这就是为什么 webpack HMR(Hot-Module Replacement)大大减少了实例化您的应用程序所需的时间。
安装依赖
pnpm add webpack-node-externals run-script-webpack-plugin webpack
新建文件webpack-hmr.config.js
放在根目录填入一下内容
// webpack-hmr.config.js
const nodeExternals = require('webpack-node-externals');
const { RunScriptWebpackPlugin } = require('run-script-webpack-plugin');
module.exports = function (options, webpack) {return {...options,entry: ['webpack/hot/poll?100', options.entry],externals: [nodeExternals({allowlist: ['webpack/hot/poll?100'],}),],plugins: [...options.plugins,new webpack.HotModuleReplacementPlugin(),new webpack.WatchIgnorePlugin({paths: [/.js$/, /.d.ts$/],}),new RunScriptWebpackPlugin({ name: options.output.filename }),],};
};
为了启用 HMR,请打开应用程序入口文件( main.ts )并添加一些与 Webpack相关的说明,如下所示:
declare const module: any;
async function bootstrap() {const app = await NestFactory.create(AppModule);await app.listen(3000);
if (module.hot) {module.hot.accept();module.hot.dispose(() => app.close());}
}
bootstrap();
就这样。为了简化执行过程,请将这两行添加到 package.json 文件的脚本中。
"start:dev": "nest build --webpack --webpackPath webpack-hmr.config.js --watch"
现在只需打开你的命令行并运行下面的命令:
pnpm start:dev
你的项目可以快速刷新了哈哈哈
配置Swagger文档
OpenAPI(Swagger)规范是一种用于描述 RESTful API 的强大定义格式。 Nest 提供了一个专用模块来使用它。
首先安装他
pnpn add --save @nestjs/swagger swagger-ui-express
初始化 main.ts
// main.ts
import { NestFactory } from '@nestjs/core';
import { AppModule } from './app.module';
import { NestExpressApplication } from '@nestjs/platform-express';
import { DocumentBuilder, SwaggerModule } from '@nestjs/swagger';
declare const module:any;
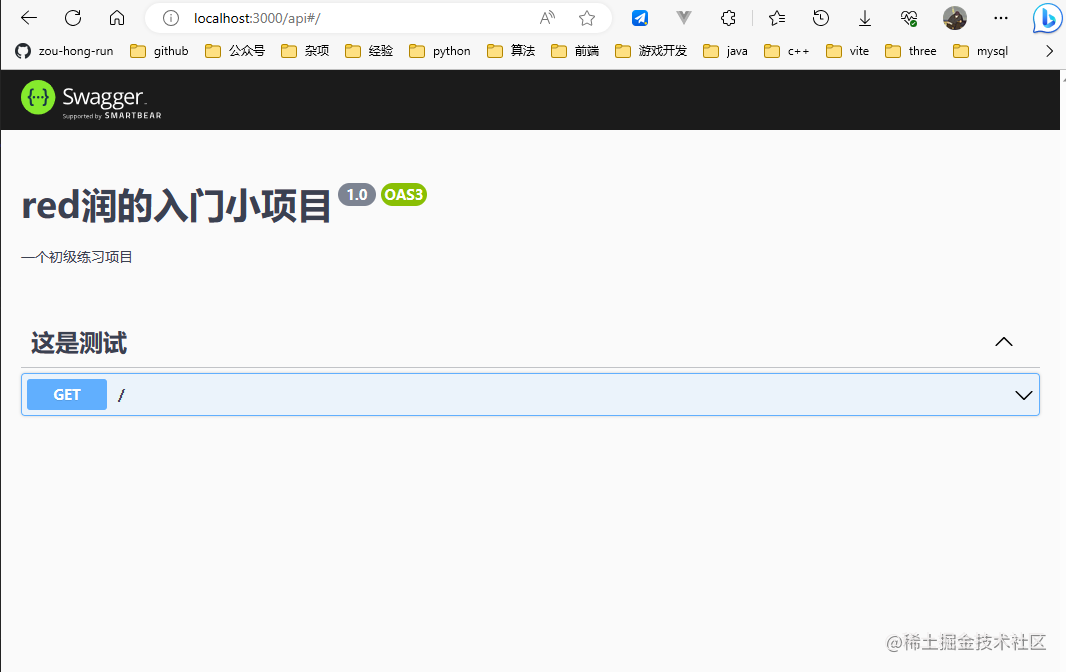
async function bootstrap() {// 使用express作为默认配置const app = await NestFactory.create<NestExpressApplication>(AppModule);// swagger配置const options = new DocumentBuilder().setTitle("red润的入门小项目").setDescription("一个初级练习项目").setVersion("1.0").build();const documents = SwaggerModule.createDocument(app,options);SwaggerModule.setup("api",app,documents);
await app.listen(3000);
// 热重载if (module.hot) {module.hot.accept();module.hot.dispose(() => app.close());}
}
bootstrap();
// app.controller.ts
import { Controller, Get } from '@nestjs/common';
import { AppService } from './app.service';
import { ApiTags } from '@nestjs/swagger';
@ApiTags("就好看")
@Controller()
export class AppController {constructor(private readonly appService: AppService) {}
@Get()getHello(): string {return this.appService.getHello();}
}
保存运行项目pnpm start:dev
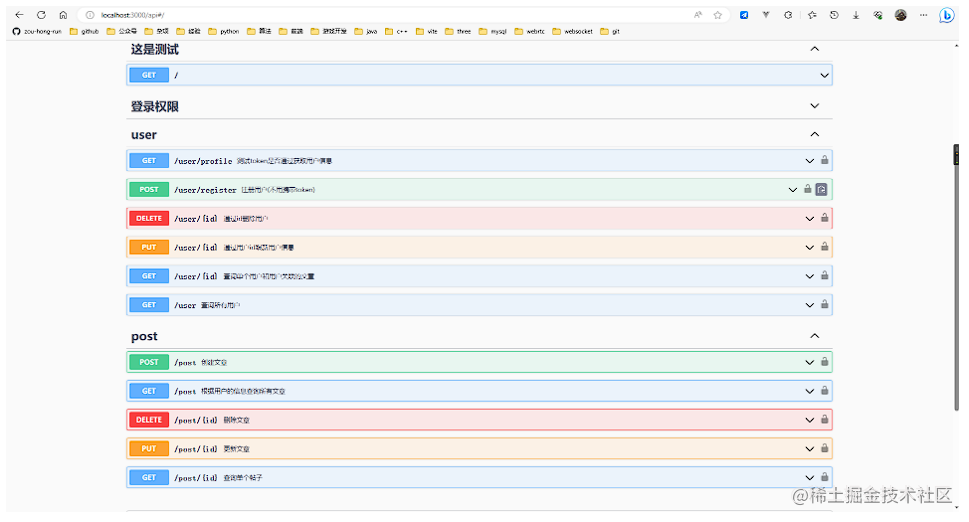
然后输入地址localhost:3000/api可以看到文档效果效果了
新建一些文件目录
搭建项目目录结构
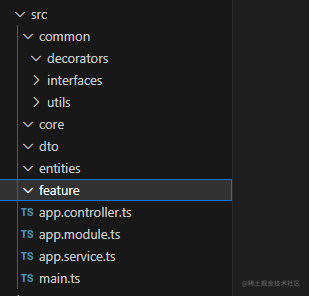
- common存放一个公共的装饰器,接口,工具类等
- core存放 守卫,过滤器,拦截器,校验器等
- dto存放dto文件定义一些请求或者返回数据结构
- entities存放typeorm要使用的文件,对应着数据库里面的表
- feature 业务主要功能都写在这里面
TypeORM 集成
TypeORM - 一个 ORM 框架 | TypeORM 中文文档 | TypeORM 中文网 (bootcss.com)
为了与 SQL和 NoSQL 数据库集成,Nest 提供了 @nestjs/typeorm 包。Nest 使用TypeORM是因为它是 TypeScript 中最成熟的对象关系映射器( ORM )。因为它是用 TypeScript 编写的,所以可以很好地与 Nest 框架集成。
安装依赖文件
pnpm add --save @nestjs/typeorm typeorm mysql2
将TypeOrmModule导入AppModule
// app.module.ts
import { Module } from '@nestjs/common';
import { TypeOrmModule } from '@nestjs/typeorm';
@Module({imports: [TypeOrmModule.forRoot({type: 'mysql',// 连接mysql数据库host: 'localhost',port: 3306,username: '用户名',password: '数据密码',database: '数据库名',// 自动加载实体autoLoadEntities:true,// 手动导入// entities: [],synchronize: true,}),],
})
export class AppModule {}
在entities目录下面新建两个文件
// entities/post.entity.ts
import { Column, Entity, ManyToMany, ManyToOne, PrimaryColumn, PrimaryGeneratedColumn } from "typeorm";
import { User } from "./user.entity";
@Entity("post")
export class Post{@PrimaryGeneratedColumn()id:number;
@Column()title:string;
@Column()content:string;
// 在 @ManyToOne 一侧,即在外键拥有者一侧,设置 onDelete,就可以使用外键的级联功能,这里设置级联删除,当删除 user 时,user 的所有 post 会被级联删除@ManyToOne(type => User, user => user.posts, {cascade: true,// 自动保存相关对象onDelete: 'CASCADE'})user:User;
}
// entities/user.entity.ts
import { Column, Entity, OneToMany, PrimaryGeneratedColumn } from "typeorm";
import { Post } from "./post.entity";
@Entity("user")
export class User{// 自增唯一主键@PrimaryGeneratedColumn()id:number;
// 账户名类型@Column()account:string;
// 密码@Column()password:string;
// 用户名@Column()name:string;
// 用户管理文章 多个文章对应一个用户@OneToMany(type=>Post,post=>post.user)posts:Post[];
@Column()roel:string;
}
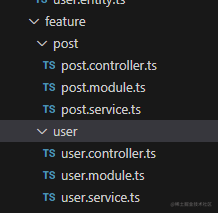
新建post和user模块
post是文章模块,user是用户信息模块
执行命令
nest g res feature/user --no-spec && nest g res feature/post --no-spec
记得选rest api然后选择No,然后就这样了
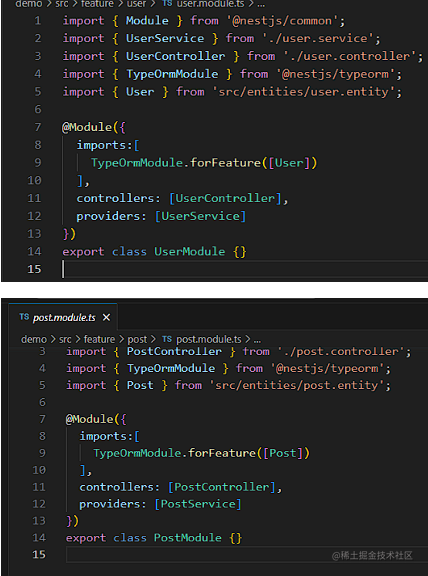
此模块使用 forFeature() 方法定义在当前范围中注册哪些存储库。这样,我们就可以使用 @InjectRepository()装饰器将 UsersRepository 注入到 UsersService 中:
所有将user和post的module文件都注册上对应的entity文件
全局过滤器拦截错误
将报错的格式,自己拦截下来,返回自己想要的样式
新建文件
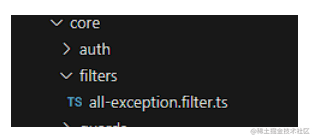
// all-exception.filter.ts
import { ExceptionFilter, Catch, ArgumentsHost, HttpException, HttpStatus } from '@nestjs/common';
import { Request, Response } from 'express';
@Catch(HttpException)
export class AllExceptionFilter implements ExceptionFilter {catch(exception: HttpException, host: ArgumentsHost) {const ctx = host.switchToHttp();const request = ctx.getRequest<Request>();const response = ctx.getResponse<Response>();const status = exception instanceof HttpException? exception.getStatus(): HttpStatus.INTERNAL_SERVER_ERRORresponse.status(status).json({code: status,message:exception.message,data:null,timestamp: new Date().toISOString(),path: request.url,success:false,tips:"自己拦截的错误请求"});}
}
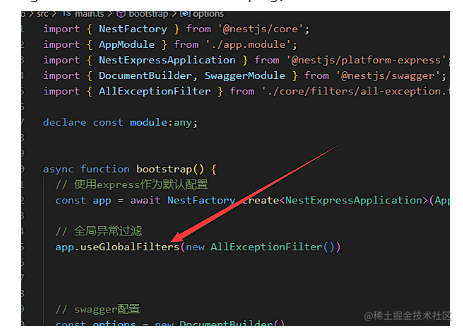
main.ts全局挂载
全局拦截器定义返回数据结构
主要实现自定义返回的数据样式
新建文件
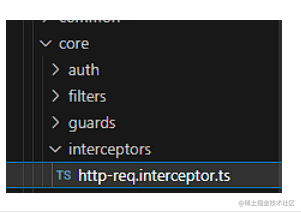
// http-req.interceptor.ts
import { CallHandler, ExecutionContext, Injectable, NestInterceptor } from '@nestjs/common';
import { Observable, map } from 'rxjs';
export interface Response<T> {data: T;
}
@Injectable()
export class HttpReqTransformInterceptor<T> implements NestInterceptor<T,Response<T>>
{intercept(context: ExecutionContext, next: CallHandler): Observable<Response<T>> {return next.handle().pipe(map(data=>{return {data,code:200,msg:"",success:true}}))}
}
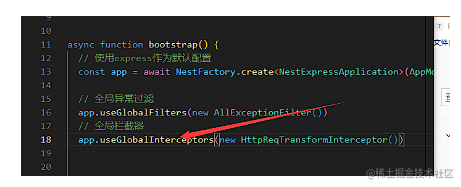
main.ts全局挂载
拦截器也可以拦截异常,可以看官方文档摸索一下
加密功能实现
主要实现用户密码的加密和解密类的封装
pnpm i bcrypt
pnpm i -D @types/bcrypt
新建文件
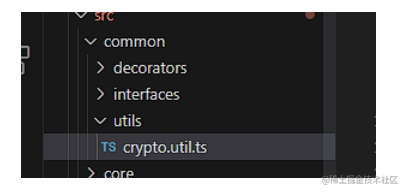
// crypto.util.ts
import { Injectable } from "@nestjs/common";
import { createHash } from "crypto";
@Injectable()
export class CryptoUtil{/*** 加密登录密码* @param password * @returns */encryptPassword(password:string):string{return createHash("sha256").update(password).digest("hex")}checkPassword(password:string,encryptedPassword:any):boolean{const currentPass = this.encryptPassword(password);if(currentPass === encryptedPassword){return true;}return false;}
}
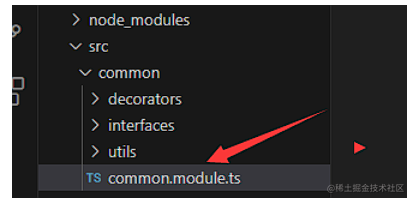
import { Module } from "@nestjs/common";
import { CryptoUtil } from "./utils/crypto.util";
@Module({providers:[CryptoUtil],exports:[CryptoUtil]
})
export class CommonModule{}
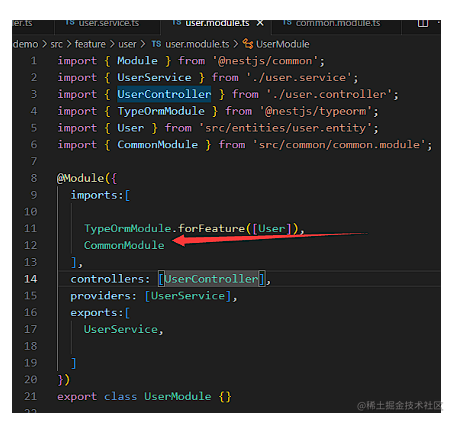
然后user.module.ts导入该模块
JWT功能实现
实现之前先梳理一下逻辑
jwt校验用户信息然后签发token的步骤
- 我们发起登录请求,请求user.controller.ts 里面的login接口(需要传入账户名和密码!!一定要传参数)
- 然后实现local.strategy.ts策略,当我们给login添加路由守卫(@UseGuards(AuthGuard(‘local’)))的时候,会自动调用该策略里面的 validate方法并拿到用户传入的账户名和密码
- 然后会执行auth.service里面的validateUser方法,该方法会userService里面查询用户信息是否合法,
- 最终校验成功之后,loca.strategy.ts的validate方法会得到用户的信息,然后会将用户的信息挂载到req.user身上。然后校验结束,
- 校验完成后才会进入login方法内部,调用authSerive里面的登录方法,拿到token并返回给用户!!!哈哈哈哈
拿到用户传入的token然后做解析
开始实现全部功能
pnpm install --save @nestjs/passport passport passport-local
pnpm install --save-dev @types/passport-local
先使用用户名和密码进行身份验证。一旦通过验证,就发出JWT,该JWT在后续的请求的授权头中作为token发送,以检验身份。我们还将创造 一个受保护的路由,该路由对包含有效JWT的请求可访问
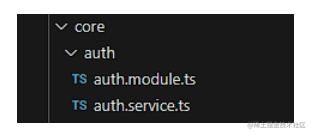
执行该命令创建两个文件
nest g mo core/auth&&nest g service core/auth --no-spec
用户信息校验
- 修改user.service.ts文件
import { Injectable } from '@nestjs/common';
import { InjectRepository } from '@nestjs/typeorm';
import { CryptoUtil } from 'src/common/utils/crypto.util';
import { User } from 'src/entities/user.entity';
import { Repository } from 'typeorm';
@Injectable()
export class UserService {async onModuleInit() {if (await this.findOneByAccount('admin')) return;// 初始化系统管理员const admin = this.userRepository.create({account:'admin',password:this.cryptoUtil.encryptPassword("admin"),username:"系统管理员",role:"admin"});await this.userRepository.save(admin);}// 注入 一个操作数据表,一个加密密码constructor(@InjectRepository(User)private readonly userRepository:Repository<User>,private readonly cryptoUtil:CryptoUtil,){}
/*** 通过登录账号查询用户** @param account 登录账号*/async findOneByAccount(account: string): Promise<User> {const user = await this.userRepository.findOne({where:{account}});return user}async findOne(account:string):Promise<User|undefined>{console.log("user service ts findone enter",account);const user = await this.userRepository.findOne({where:{account}});console.log("user service ts findone leave",user);return user;}
}
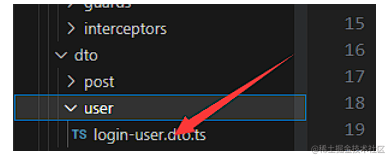
import { ApiProperty } from "@nestjs/swagger"; export class LoginUserDTO{ @ApiProperty({ example:"admin", description:"账户名" }) account:string; @ApiProperty({ example:"admin", description:"用户密码" }) password:string; }
-
然后在user.module.ts将userservice导出
// user.module.ts import { Module, forwardRef } from '@nestjs/common'; import { UserService } from './user.service'; import { UserController } from './user.controller'; import { TypeOrmModule } from '@nestjs/typeorm'; import { User } from 'src/entities/user.entity'; import { CommonModule } from 'src/common/common.module'; import { AuthModule } from 'src/core/auth/auth.module'; import { PassportModule } from '@nestjs/passport'; import { LocalStrategy } from 'src/core/auth/local.strategy'; @Module({imports:[TypeOrmModule.forFeature([User]),forwardRef(()=>AuthModule),// 处理相互循环依赖CommonModule,PassportModule],controllers: [UserController],providers: [UserService],exports:[UserService,] }) export class UserModule {} -
然后在让auth.module和user.module相互导入
// auth.module.ts import { Module, forwardRef } from '@nestjs/common'; import { AuthService } from './auth.service'; import { UserModule } from 'src/feature/user/user.module'; import { PassportModule } from '@nestjs/passport'; import { LocalStrategy } from './local.strategy'; import { JwtModule } from '@nestjs/jwt'; import { jwtConstants } from './constants'; import { CryptoUtil } from 'src/common/utils/crypto.util'; @Module({imports:[JwtModule.register({secret:jwtConstants.secret,signOptions:{expiresIn:"1h",}}),forwardRef(()=>UserModule),//避免循环导入错误PassportModule,],providers: [AuthService,LocalStrategy,CryptoUtil],exports:[AuthService] }) export class AuthModule {} -
然后在auth.service.ts中添加校验方法
import { Injectable } from '@nestjs/common'; import { UserService } from '../../feature/user/user.service'; import { JwtService } from '@nestjs/jwt'; import { CryptoUtil } from 'src/common/utils/crypto.util'; @Injectable() export class AuthService {constructor(private readonly userService:UserService,private readonly jwtService:JwtService,private readonly cryptoUtil:CryptoUtil){console.log("autservice init");} async validateUser(account:string,pass:string):Promise<any>{// 给密码加密!!! 因为我们存用户的时候 密码是加密存储的 需要将输入的密码加密后才能验证let enPassword = this.cryptoUtil.encryptPassword(pass); console.log("auth service validateUser enter",account,enPassword);const user = await this.userService.findOne(account);console.log("auth service validateUser leave",user);if(user && user.password === enPassword){const {password,...result} = user;return result;}return null} // jwt签名用async login(user:any){const payload = {username:user.username,sub:user.userId};return {access_token:this.jwtService.sign(payload)}} }
实现passport本地身份验证策略,
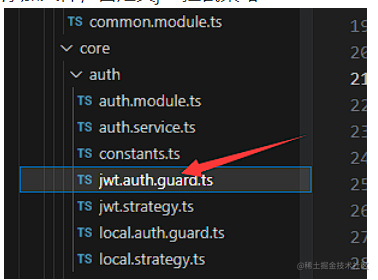
- 创建auth/local.strategy.ts
// 本地策略
import { Injectable, UnauthorizedException } from "@nestjs/common";
import { PassportStrategy } from '@nestjs/passport'
import { Strategy } from "passport-local";
import { AuthService } from "./auth.service";
@Injectable()
export class LocalStrategy extends PassportStrategy(Strategy){constructor(private readonly authService:AuthService){console.log("local strategy init");super({usernameField: 'account',passwordField: 'password',});}// 这个方法会从你的 请求参数中 拿到用户名和密码,一定要传递请求参数!!!!async validate(account:string,password:string):Promise<any>{
console.log("local strategy ts enter",account,password);
const user = await this.authService.validateUser(account,password);if(!user){throw new UnauthorizedException();}console.log("local strategy ts leave",user);// 最终结果是在 在请求对象上创建user 属性 等价于res.user = userreturn user;}
}
-
需要配置authmodule来使用上面定义的passport特性,更新auth.module.ts
import { Module, forwardRef } from '@nestjs/common'; import { AuthService } from './auth.service'; import { UserModule } from 'src/feature/user/user.module'; import { PassportModule } from '@nestjs/passport'; import { LocalStrategy } from './local.strategy'; import { JwtModule } from '@nestjs/jwt'; import { jwtConstants } from './constants'; import { CryptoUtil } from 'src/common/utils/crypto.util'; @Module({imports:[JwtModule.register({secret:jwtConstants.secret,signOptions:{expiresIn:"1h",}}),forwardRef(()=>UserModule),PassportModule,],providers: [AuthService,LocalStrategy,CryptoUtil],exports:[AuthService] }) export class AuthModule {}
-
内置passport守卫
@nestjs/passport模块为我们提供了一个内置的守卫,可以完成这一任务。这个保护调用Passport策略并启动上面描述的步骤(检索凭证、运行verify函数、创建用户属性等)自动运行local-strategy.ts中的validate()方法。-
实现登录路由 user.comtroller.ts
import { Controller, Post, Request, UseGuards } from '@nestjs/common'; import { ApiBody, ApiOperation, ApiTags } from '@nestjs/swagger'; import { LocalAuthGuard } from 'src/core/auth/local.auth.guard'; import { AuthGuard } from '@nestjs/passport'; import { AuthService } from 'src/core/auth/auth.service'; import { LoginUserDTO } from 'src/dto/user/login-user.dto'; @ApiTags('user') @Controller('user') export class UserController {constructor(private readonly authService: AuthService) {} @ApiOperation({summary:"用户登录"})@UseGuards(AuthGuard('local'))// @UseGuards(LocalAuthGuard) @Post("login")@ApiBody({type:LoginUserDTO,description:"请求体参数"})async login(@Request() req){console.log("gggggggggS",req.user); return this.authService.login(req.user);} } -
user.module.ts
import { Module, forwardRef } from '@nestjs/common'; import { UserService } from './user.service'; import { UserController } from './user.controller'; import { TypeOrmModule } from '@nestjs/typeorm'; import { User } from 'src/entities/user.entity'; import { CommonModule } from 'src/common/common.module'; import { AuthModule } from 'src/core/auth/auth.module'; import { PassportModule } from '@nestjs/passport'; import { LocalStrategy } from 'src/core/auth/local.strategy'; @Module({imports:[TypeOrmModule.forFeature([User]),forwardRef(()=>AuthModule),// 处理相互循环依赖CommonModule,PassportModule],controllers: [UserController],providers: [UserService],exports:[UserService,] }) export class UserModule {}
-
实现jwt签名
-
pnpm install --save @nestjs/jwt passport-jwt&& pnpm install @types/passport-jwt --save-dev -
import { Injectable } from '@nestjs/common'; import { UsersService } from '../users/users.service'; import { JwtService } from '@nestjs/jwt'; @Injectable() export class AuthService {constructor(private readonly usersService: UsersService, private readonly jwtService: JwtService) {} async validateUser(username: string, pass: string): Promise<any> {const user = await this.usersService.findOne(username);if (user && user.password === pass) {const { password, ...result } = user;return result;}return null;} async login(user: any) {const payload = { username: user.username, sub: user.userId };return {access_token: this.jwtService.sign(payload),};} } -
新建auth/constants.ts
export const jwtConstants = {secret: 'secretKey', }; -
更新auth.module.ts
import { Module, forwardRef } from '@nestjs/common'; import { AuthService } from './auth.service'; import { UserModule } from 'src/feature/user/user.module'; import { PassportModule } from '@nestjs/passport'; import { LocalStrategy } from './local.strategy'; import { JwtModule } from '@nestjs/jwt'; import { jwtConstants } from './constants'; import { CryptoUtil } from 'src/common/utils/crypto.util'; @Module({imports:[JwtModule.register({secret:jwtConstants.secret,signOptions:{expiresIn:"1h",}}),forwardRef(()=>UserModule),PassportModule,],providers: [AuthService,LocalStrategy,CryptoUtil],exports:[AuthService] }) export class AuthModule {} -
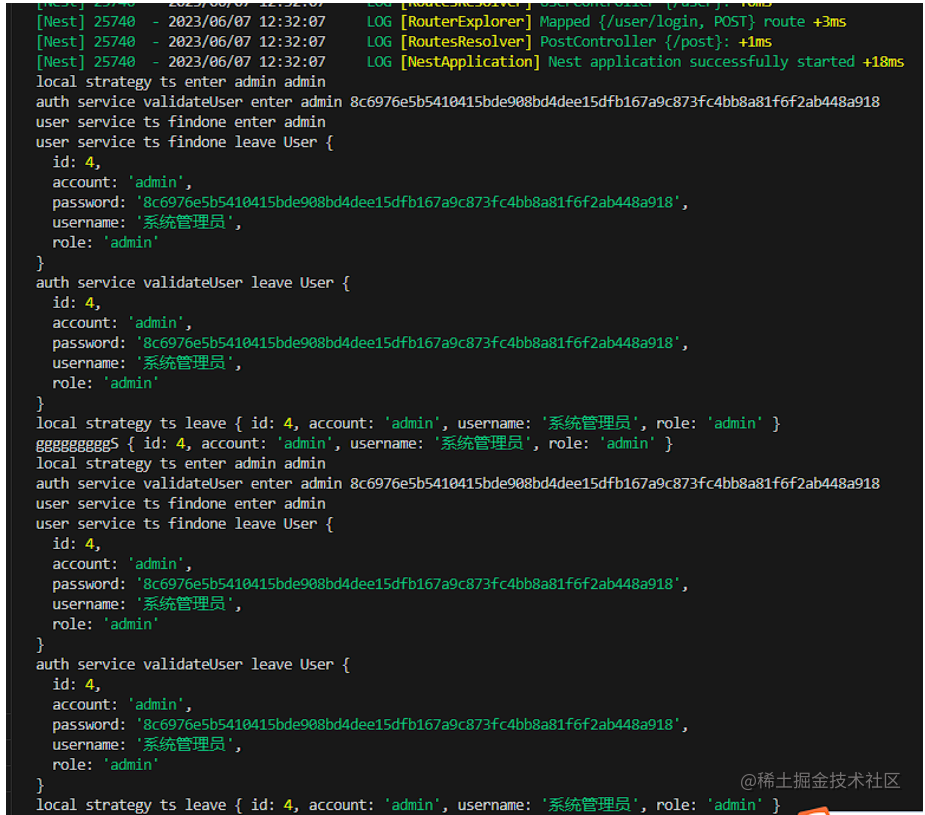
重新运行项目,可以看到token签发成功

- 同时后台打印
实现passportJWT
-
用户获取任何信息需要发送token,我们需要做校验token是否合法来保护用户信息
-
新建auth/jwt.strategy.ts
import { Injectable } from "@nestjs/common"; import { PassportStrategy } from "@nestjs/passport"; // 注意这里是jwt策略 import { ExtractJwt, Strategy } from "passport-jwt"; import { jwtConstants } from "./constants"; @Injectable() export class JwtStrategy extends PassportStrategy(Strategy){constructor(){super({jwtFromRequest: ExtractJwt.fromAuthHeaderAsBearerToken(),ignoreExpiration:false,secretOrKey:jwtConstants.secret,})}async validate(payload:any){return {account:payload.account,userId:payload.userId}} } -
更新auth.module.ts
import { Module, forwardRef } from '@nestjs/common'; import { AuthService } from './auth.service'; import { UserModule } from 'src/feature/user/user.module'; import { PassportModule } from '@nestjs/passport'; import { LocalStrategy } from './local.strategy'; import { JwtModule } from '@nestjs/jwt'; import { jwtConstants } from './constants'; import { CryptoUtil } from 'src/common/utils/crypto.util'; import { JwtStrategy } from './jwt.strategy'; @Module({imports:[JwtModule.register({secret:jwtConstants.secret,signOptions:{expiresIn:"1h",}}),forwardRef(()=>UserModule),PassportModule,],providers: [AuthService,LocalStrategy,JwtStrategy,CryptoUtil],exports:[AuthService] }) export class AuthModule {}
实现受保护的路由和 JWT 策略守卫
-
更新user.controller.ts
import { Controller, Get, Post, Request, UseGuards } from '@nestjs/common'; import { ApiBearerAuth, ApiBody, ApiOperation, ApiTags } from '@nestjs/swagger'; import { LocalAuthGuard } from 'src/core/auth/local.auth.guard'; import { AuthGuard } from '@nestjs/passport'; import { AuthService } from 'src/core/auth/auth.service'; import { LoginUserDTO } from 'src/dto/user/login-user.dto'; @ApiTags('user') // 这个很重要,没有他,swagger请求头不会带token发送请求 @ApiBearerAuth() @Controller('user') export class UserController {constructor(private readonly authService: AuthService) {} @ApiOperation({summary:"用户登录"})@UseGuards(AuthGuard('local'))// @UseGuards(LocalAuthGuard) @Post("login")@ApiBody({type:LoginUserDTO,description:"请求体参数"})async login(@Request() req){console.log("gggggggggS",req.user); return this.authService.login(req.user);} @UseGuards(AuthGuard("jwt"))@Get("profile")getProfile(@Request()req){console.log("profile");return req.user} } -
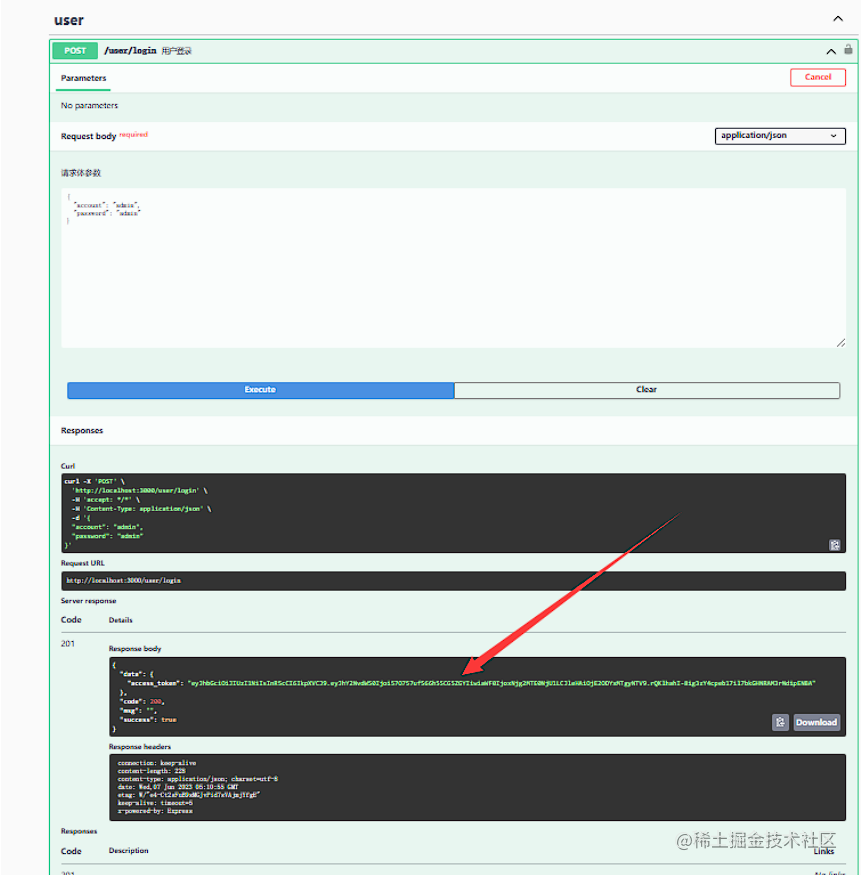
点击登录接口拿到token
- 点击这里设置token

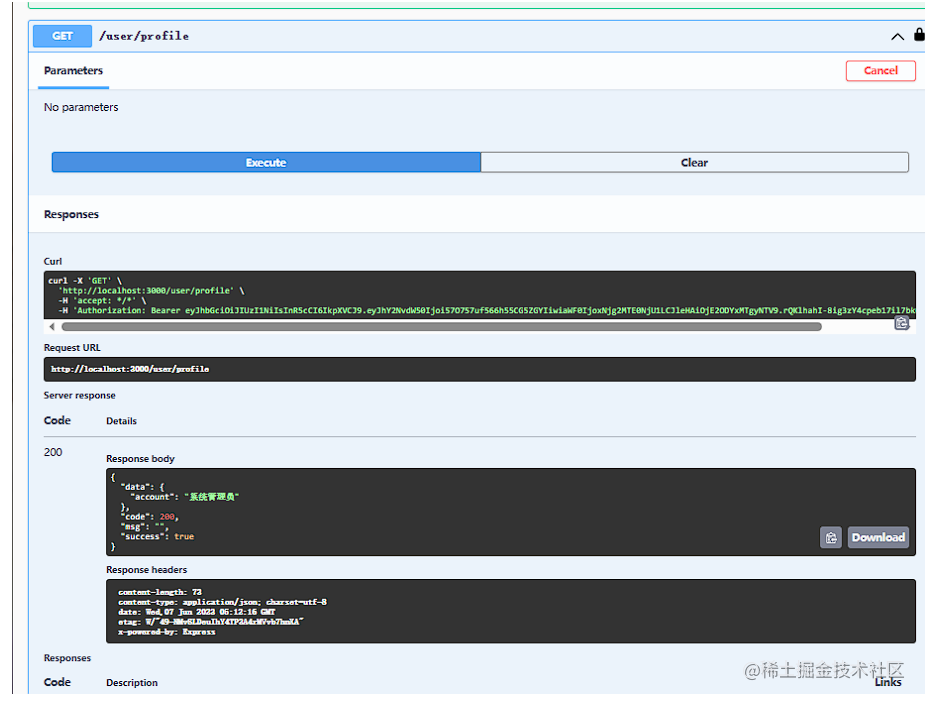
- 校验token成功拿到用户信息
启用全局身份验证
如果您的大多数端点都应该默认受到保护,您可以将身份验证守卫注册为全局守卫,而不是在每个控制器上使用 @UseGuards() 装饰器,您可以简单地标记哪些路由应该是公开的。
添加文件,自定义jwt拦截策略
import { ExecutionContext, Injectable, UnauthorizedException } from '@nestjs/common';
import { Reflector } from '@nestjs/core';
import { AuthGuard } from '@nestjs/passport';
import { IS_PUBLIC_KEY } from 'src/common/decorators/public.decorator';
@Injectable()
export class JwtAuthGuard extends AuthGuard('jwt') {constructor(private reflector:Reflector){super()}canActivate(context: ExecutionContext) {// 在这里添加自定义的认证逻辑const isPublic = this.reflector.getAllAndOverride<boolean>(IS_PUBLIC_KEY,[context.getHandler(),context.getClass()])// 一旦使用注解,就通过if(isPublic){return true}// 例如调用 super.logIn(request) 来建立一个sessionreturn super.canActivate(context);}
handleRequest(err, user, info) {// 可以抛出一个基于info或者err参数的异常if (err || !user) {throw err || new UnauthorizedException();}return user;}
}
首先,使用以下构造(在任何模块中)将 JwtAuthGuard 注册为全局守卫:
// app.module.ts
import { Module } from '@nestjs/common';
import { AppController } from './app.controller';
import { AppService } from './app.service';
import { TypeOrmModule } from '@nestjs/typeorm';
import { UserModule } from './feature/user/user.module';
import { PostModule } from './feature/post/post.module';
import { AuthModule } from './core/auth/auth.module';
import { APP_GUARD } from '@nestjs/core';
import { JwtAuthGuard } from './core/auth/jwt.auth.guard';
@Module({imports: [TypeOrmModule.forRoot({type:"mysql",host:'localhost',port:3306,username:"root",password:"123456",database:"nestjs",autoLoadEntities:true,synchronize:true}),UserModule,PostModule,AuthModule,],controllers: [AppController],providers: [AppService,// 启用全局身份校验,切记除了没有用@Public装饰器修饰的所有请求,都要携带token{provide:APP_GUARD,useClass:JwtAuthGuard}],
})
export class AppModule {}
有了这个,Nest 将自动将 JwtAuthGuard 绑定到所有端点。
现在我们必须提供一种机制来声明哪些路由是公开的。为此,我们可以使用 SetMetadata 装饰器工厂函数创建一个自定义装饰器。
// common/decorators/public.decorator.ts
import { SetMetadata } from '@nestjs/common';
export const IS_PUBLIC_KEY = 'isPublic';
export const Public = () => SetMetadata(IS_PUBLIC_KEY, true);
import { Controller, Get, Post, Request, UseGuards } from '@nestjs/common';
import { ApiBearerAuth, ApiBody, ApiOperation, ApiTags } from '@nestjs/swagger';
import { LocalAuthGuard } from 'src/core/auth/local.auth.guard';
import { AuthGuard } from '@nestjs/passport';
import { AuthService } from 'src/core/auth/auth.service';
import { LoginUserDTO } from 'src/dto/user/login-user.dto';
import { Public } from 'src/common/decorators/public.decorator';
@ApiTags('user')
// 这个很重要,没有他,swagger请求头不会带token发送请求
@ApiBearerAuth()
@Controller('user')
export class UserController {constructor(private readonly authService: AuthService) {}
@ApiOperation({summary:"用户登录"})@Public()// 使用了该注解就不用进行jwt校验的装饰器@UseGuards(AuthGuard('local'))// @UseGuards(LocalAuthGuard) @Post("login")@ApiBody({type:LoginUserDTO,description:"请求体参数"})async login(@Request() req){// console.log("gggggggggS",req.user);return this.authService.login(req.user);}
@Get("profile")getProfile(@Request()req){// console.log("profile");// 获取到用户的token中的内容return req.user}
}
jwt功能完结了哈哈哈
其实我认为,用户的信息校验应该封装到auth.controller.ts中,这样user.controller.ts中的业务耦合度会降低,有能力可以自己实现一下。
我已经改好了
User用户接口开发
user.service.ts
// user.service.ts
import { HttpException, Injectable } from '@nestjs/common';
import { InjectRepository } from '@nestjs/typeorm';
import { CryptoUtil } from 'src/common/utils/crypto.util';
import { UserRegisterDto } from 'src/dto/user/user-register.dto';
import { User } from 'src/entities/user.entity';
import { Repository } from 'typeorm';
@Injectable()
export class UserService {async onModuleInit() {if (await this.findOneByAccount('admin')) return;// 初始化系统管理员const admin = this.userRepository.create({account:'admin',password:this.cryptoUtil.encryptPassword("admin"),username:"系统管理员",role:"admin"});await this.userRepository.save(admin);}// 注入 一个操作数据表,一个加密密码constructor(@InjectRepository(User)private readonly userRepository:Repository<User>,private readonly cryptoUtil:CryptoUtil,){}
/*** 通过登录账号查询用户** @param account 登录账号*/async findOneByAccount(account: string): Promise<User> {const user = await this.userRepository.findOne({where:{account}});return user}async findOne(account:string):Promise<User|undefined>{// console.log("user service ts findone enter",account);const user = await this.userRepository.findOne({where:{account}});// console.log("user service ts findone leave",user);return user;}
/*** 创建用户* @param user */async register(user:UserRegisterDto):Promise<void>{const existing = await this.findOneByAccount(user.account);// 406 Not Acceptableif(existing)throw new HttpException("账户已经存在了",406);user.password = this.cryptoUtil.encryptPassword(user.password);await this.userRepository.save(this.userRepository.create(user));}
async remove(id:number):Promise<void>{const existing = await this.userRepository.findOne({where:{id}});if(!existing) throw new HttpException(`删除用户Id为${id}的用户不存在`,406)await this.userRepository.remove(existing);}
async update(id:number,updatInput:UserRegisterDto){const existing = await this.userRepository.findOne({where:{id}});if(!existing) throw new HttpException(`更新用户Id为${id}的用户不存在`,406)if(updatInput.account) existing.account = updatInput.account;if(updatInput.username) existing.username = updatInput.username;await this.userRepository.save(existing)}
async findOneWithPostsById(id:number):Promise<User>{return await this.userRepository.findOne({where:{id},relations:['posts']})}async findAll():Promise<User[]>{return await this.userRepository.find();}
}
user.controller.ts
// user.controller.ts
import { Body, Controller, Delete, Get, Param, Post, Put, Request, UseGuards } from '@nestjs/common';
import { ApiBearerAuth, ApiBody, ApiOperation, ApiTags } from '@nestjs/swagger';
import { Public } from 'src/common/decorators/public.decorator';
import { AuthService } from 'src/core/auth/auth.service';
import { UserService } from './user.service';
import { UserRegisterDto } from 'src/dto/user/user-register.dto';
@ApiTags('user')
// 这个很重要,没有他,swagger请求头不会带token发送请求
@ApiBearerAuth()
@Controller('user')
export class UserController {constructor(private readonly authService: AuthService,private readonly userService: UserService,) {}
@ApiOperation({summary:"测试token是否通过获取用户信息"})@Get("profile")getProfile(@Request()req){// console.log("profile");// 获取到用户的token中的内容return req.user}
@Public()@ApiOperation({summary:"注册用户(不用携带token)"})@Post("register")async register(@Body() user:UserRegisterDto):Promise<any>{await this.userService.register(user);return "注册成功"}
@ApiOperation({summary:"通过id删除用户"})@Delete(":id")async remove(@Param() id:number):Promise<any>{await this.userService.remove(id);return "删除成功"}
@ApiOperation({summary:"通过用户id跟新用户信息"})@Put(":id")async update(@Param()id:number,updateInput:UserRegisterDto):Promise<any>{const data = await this.userService.update(id,updateInput);return data;}
@ApiOperation({summary:"查询单个用户和用户关联的文章"})@Get(":id")async findOne(@Param() id:number):Promise<any>{const data = await this.userService.findOneWithPostsById(id);return data}
@ApiOperation({summary:"查询所有用户"})@Get()async findAll():Promise<any>{const data = await this.userService.findAll();return data}
}
Post用户接口开发
post.controller.ts
// post.controller.ts
import { Body, Controller, Delete, Get, Param, Post, Put, Req } from '@nestjs/common';
import { PostService } from './post.service';
import { Request } from 'express';
import { Post as PostEntity } from 'src/entities/post.entity';
import { User } from 'src/entities/user.entity';
import { ApiBearerAuth, ApiOperation, ApiTags } from '@nestjs/swagger';
@ApiTags("post")
@ApiBearerAuth()
@Controller('post')
export class PostController {constructor(private readonly postService: PostService) {}
@ApiOperation({summary:"创建文章"})@Post()async createPost(@Req() req:Request,@Body() createInput:PostEntity):Promise<any>{createInput.user = req.user as User;await this.postService.create(createInput);return "创建成功"}
@ApiOperation({summary:"删除文章"})@Delete(":id")async remove(@Param() id:number):Promise<any>{await this.postService.remove(id);return "删除文章成功"}
@ApiOperation({summary:"更新文章"})@Put(":id")async update(@Param() id:number,@Body() updateInpt:PostEntity):Promise<any>{await this.postService.update(id,updateInpt);return "更新成功";}
@ApiOperation({summary:"根据用户的信息查询所有文章"})@Get()async findAll(@Req() req:Request):Promise<any>{const data = await this.postService.findAll((req.user as User).id);return data;// 查询该用户的所有文章}
@ApiOperation({summary:"查询单个帖子"})@Get(":id")async findOne(@Param() id:number):Promise<any>{const data = await this.postService.findOneById(id);return data;// 查询单个文章}
}
post.service.ts
// post.service.ts
import { HttpException, Injectable } from '@nestjs/common';
import { InjectRepository } from '@nestjs/typeorm';
import { Post } from 'src/entities/post.entity';
import { Repository } from 'typeorm';
@Injectable()
export class PostService {constructor(@InjectRepository(Post)private readonly postRepository:Repository<Post>){}
async create(createInput:Post):Promise<void>{await this.postRepository.save(createInput);}
async remove(id:number):Promise<void>{const existing = await this.findOneById(id);// 服务器无法根据客户端请求的内容特性完成请求if(!existing) throw new HttpException(`删除失败,id为${id}的文章不存在`,406)await this.postRepository.remove(existing);}
async update(id:number,updateInput:Post):Promise<void>{const existing = await this.findOneById(id);if(!existing) throw new HttpException(`更新失败,id为${id}的文章不存在`,406)updateInput.title && (existing.title = updateInput.title);updateInput.content && (existing.content = updateInput.content);await this.postRepository.save(existing);}
/*** 根据用户id查询所有的文章* @param userId * @returns */async findAll(userId:number):Promise<Post[]>{return await this.postRepository.find({where:{user:{id:userId}}})}
async findOneById(id:number):Promise<Post>{return await this.postRepository.findOne({where:{id}})}
}
最终效果
![idea报错:Unable to connect to localhost_6379] with root cause](/images/no-images.jpg)
![[Yarn] info There appears to be trouble with your network connection. Retrying...](https://img-blog.csdnimg.cn/20210204164159346.png)