Spring Boot 整合MyBatis
(一)基础环境搭建
1、数据准备
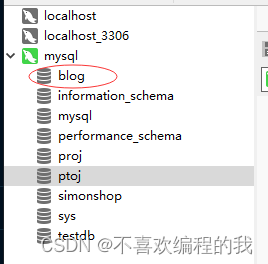
(1)创建博客数据库blog
CREATE DATABASE blog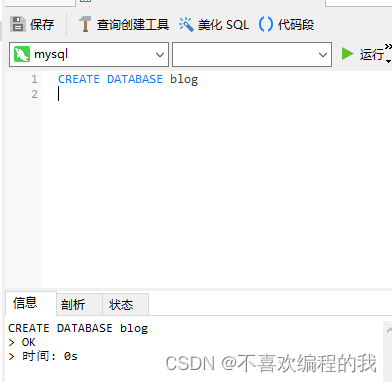
(2)在博客数据库里创建文章表t_article
CREATE TABLE `t_article` (`id` int(20) NOT NULL AUTO_INCREMENT COMMENT '文章编号',`title` varchar(200) DEFAULT NULL COMMENT '文章标题',`content` longtext COMMENT '文章内容',PRIMARY KEY (`id`)
) ENGINE=InnoDB AUTO_INCREMENT=3 DEFAULT CHARSET=utf8;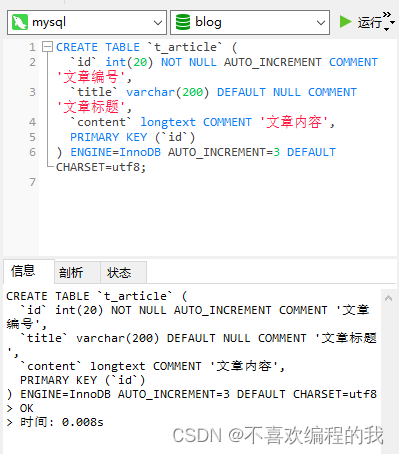
(3)在文章表t_article里插入数据记录
INSERT INTO `t_article` VALUES ('1', 'Spring Boot基础入门', '从入门到精通讲解...');
INSERT INTO `t_article` VALUES ('2', 'Spring Cloud基础入门', '从入门到精通讲解...');
INSERT INTO `t_article` VALUES ('3', '安卓开发权威指南', '从入门到精通讲解...');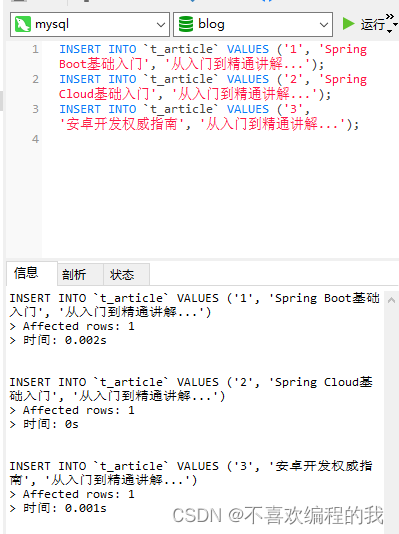
(4)在博客数据库里创建评论表t_comment
CREATE TABLE `t_comment` (`id` int(20) NOT NULL AUTO_INCREMENT COMMENT '评论编号',`content` longtext COMMENT '评论内容',`author` varchar(200) DEFAULT NULL COMMENT '评论作者',`a_id` int(20) DEFAULT NULL COMMENT '关联的文章编号',PRIMARY KEY (`id`)
) ENGINE=InnoDB AUTO_INCREMENT=7 DEFAULT CHARSET=utf8;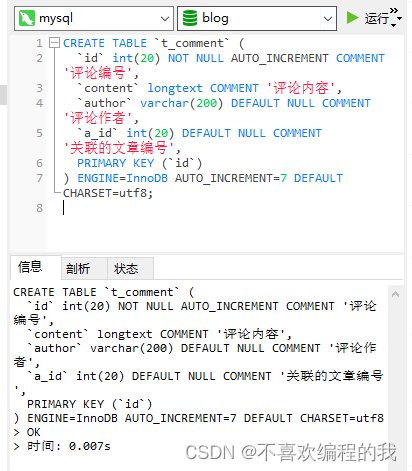
(5)在评论表t_comment里插入数据记录
INSERT INTO `t_comment` VALUES ('1', '很全、很详细', '小明', '1');
INSERT INTO `t_comment` VALUES ('2', '赞一个', '李文', '3');
INSERT INTO `t_comment` VALUES ('3', '很详细,喜欢', '童文宇', '1');
INSERT INTO `t_comment` VALUES ('4', '很好,非常详细', '钟小凯', '2');
INSERT INTO `t_comment` VALUES ('5', '很不错', '张三丰', '2');
INSERT INTO `t_comment` VALUES ('6', '操作性强,真棒', '唐雨涵', '3');
INSERT INTO `t_comment` VALUES ('7', '内容全面,讲解清晰', '张杨', '1');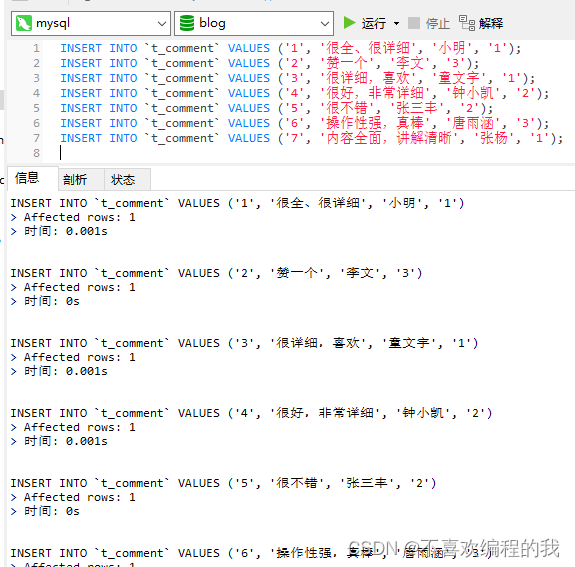
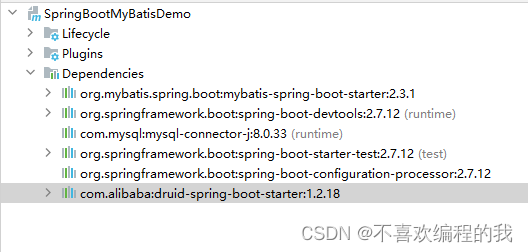
2、创建项目,引入相应启动器
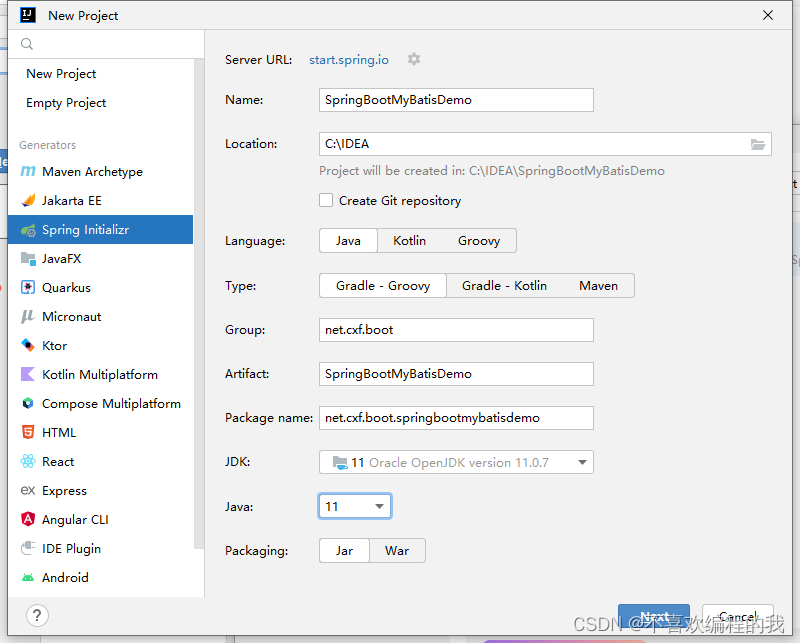
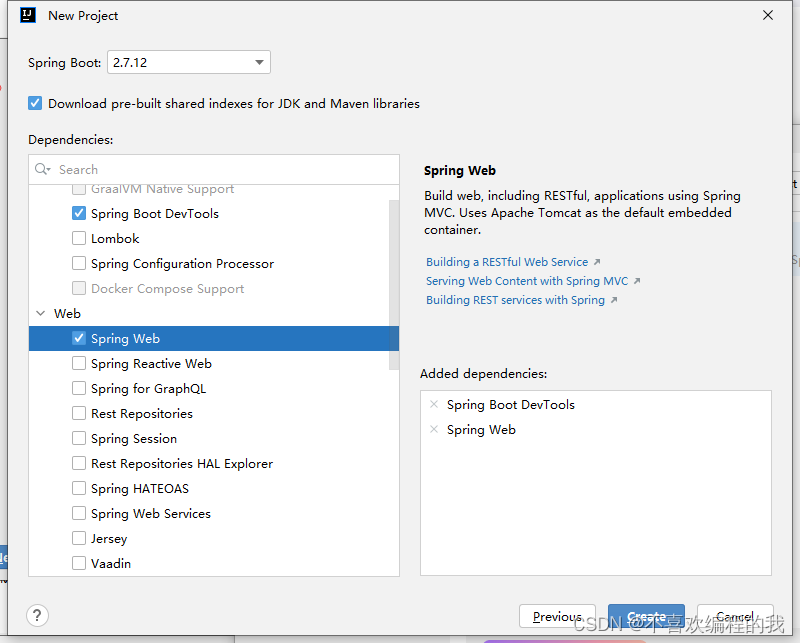
(1)创建Spring Boot项目MyBatisDemo

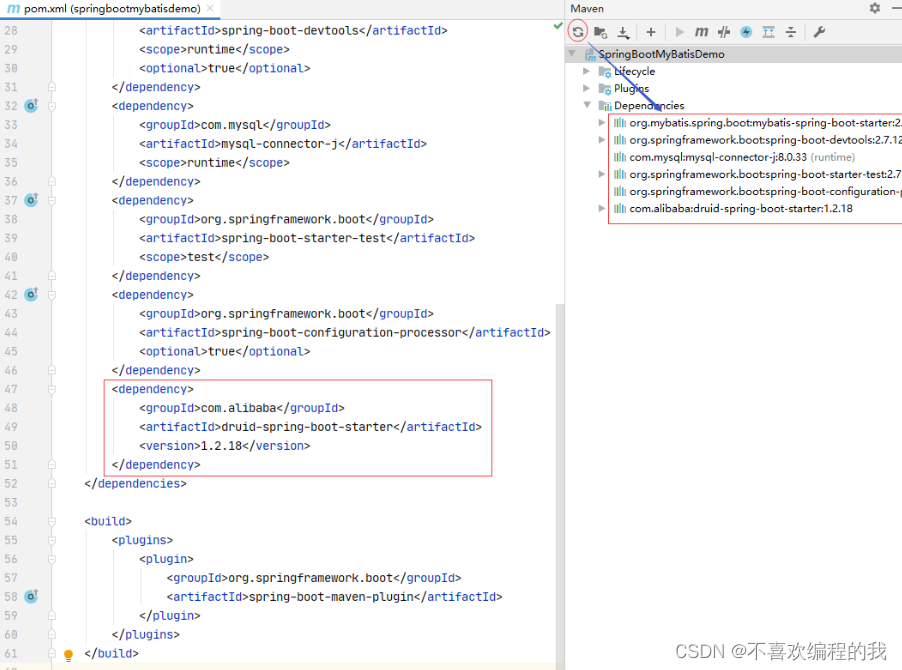
查看pom.xml文件,再添加一个配置处理器依赖
<?xml version="1.0" encoding="UTF-8"?>
<project xmlns="http://maven.apache.org/POM/4.0.0" xmlns:xsi="http://www.w3.org/2001/XMLSchema-instance"xsi:schemaLocation="http://maven.apache.org/POM/4.0.0 https://maven.apache.org/xsd/maven-4.0.0.xsd"><modelVersion>4.0.0</modelVersion><parent><groupId>org.springframework.boot</groupId><artifactId>spring-boot-starter-parent</artifactId><version>2.7.12</version><relativePath/> <!-- lookup parent from repository --></parent><groupId>net.huawei.boot</groupId><artifactId>springbootmybatisdemo</artifactId><version>0.0.1-SNAPSHOT</version><name>SpringBootMyBatisDemo</name><description>Demo project for Spring Boot</description><properties><java.version>11</java.version></properties><dependencies><dependency><groupId>org.mybatis.spring.boot</groupId><artifactId>mybatis-spring-boot-starter</artifactId><version>2.3.1</version></dependency><dependency><groupId>org.springframework.boot</groupId><artifactId>spring-boot-devtools</artifactId><scope>runtime</scope><optional>true</optional></dependency><dependency><groupId>com.mysql</groupId><artifactId>mysql-connector-j</artifactId><scope>runtime</scope></dependency><dependency><groupId>org.springframework.boot</groupId><artifactId>spring-boot-starter-test</artifactId><scope>test</scope></dependency><dependency><groupId>org.springframework.boot</groupId><artifactId>spring-boot-configuration-processor</artifactId><optional>true</optional></dependency></dependencies><build><plugins><plugin><groupId>org.springframework.boot</groupId><artifactId>spring-boot-maven-plugin</artifactId></plugin></plugins></build></project>
更新Maven项目依赖
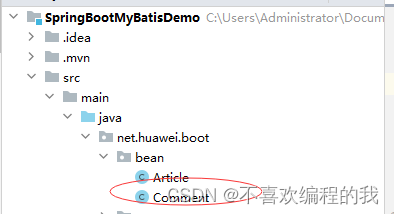
(2)创建评论实体类 - Comment
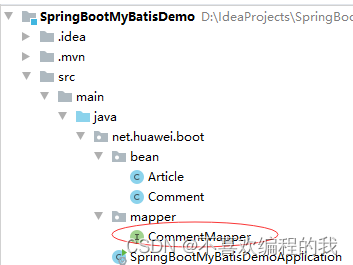
在net.huawei.boot根包里创建bean子包,在子包里创建Comment类
package net.huawei.boot.bean;/*** 功能:评论实体类* 作者:* 日期:2023年06月06日*/
public class Comment {private Integer id;private String content;private String author;private Integer aId;public Integer getId() {return id;}public void setId(Integer id) {this.id = id;}public String getContent() {return content;}public void setContent(String content) {this.content = content;}public String getAuthor() {return author;}public void setAuthor(String author) {this.author = author;}public Integer getaId() {return aId;}public void setaId(Integer aId) {this.aId = aId;}@Overridepublic String toString() {return "Comment{" +"id=" + id +", content='" + content + '\'' +", author='" + author + '\'' +", aId=" + aId +'}';}
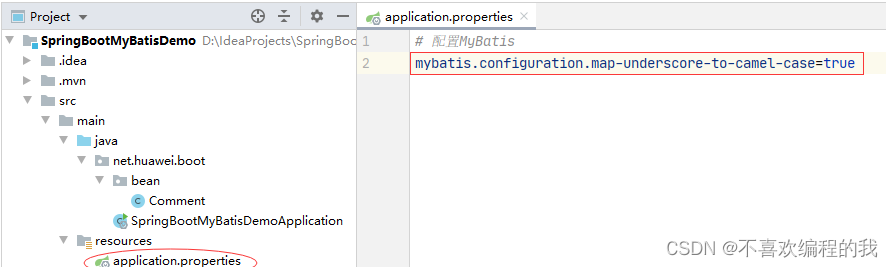
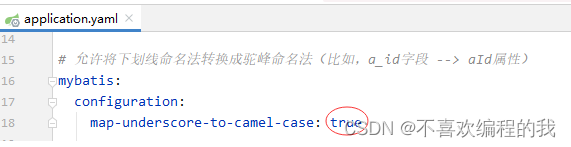
}全局配置文件中必须配置以下语句,否则查出数据为null
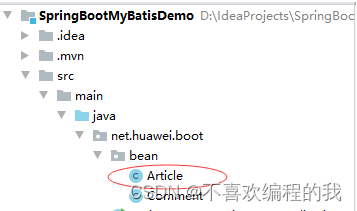
(3)创建文章实体类 - Article
在net.huawei.boot.bean包里创建Article类
package net.huawei.boot.bean;import java.util.List;/*** 功能:文章实体类* 作者:* 日期:2023年06月06日*/
public class Article {private Integer id;private String title;private String content;private List<Comment> comments;public Integer getId() {return id;}public void setId(Integer id) {this.id = id;}public String getTitle() {return title;}public void setTitle(String title) {this.title = title;}public String getContent() {return content;}public void setContent(String content) {this.content = content;}public List<Comment> getComments() {return comments;}public void setComments(List<Comment> comments) {this.comments = comments;}@Overridepublic String toString() {return "Article{" +"id=" + id +", title='" + title + '\'' +", content='" + content + '\'' +", comments=" + comments +'}';}
}
3、编写配置文件
将全局配置文件application.properties更名为application.yaml
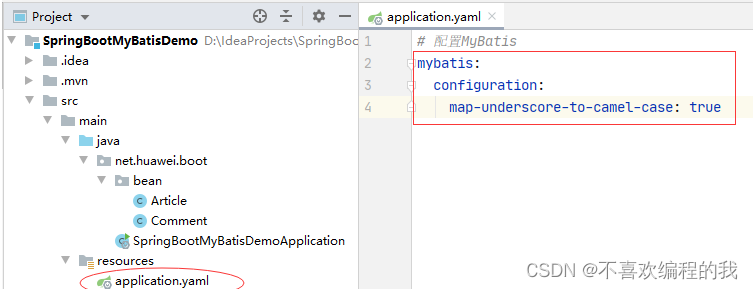
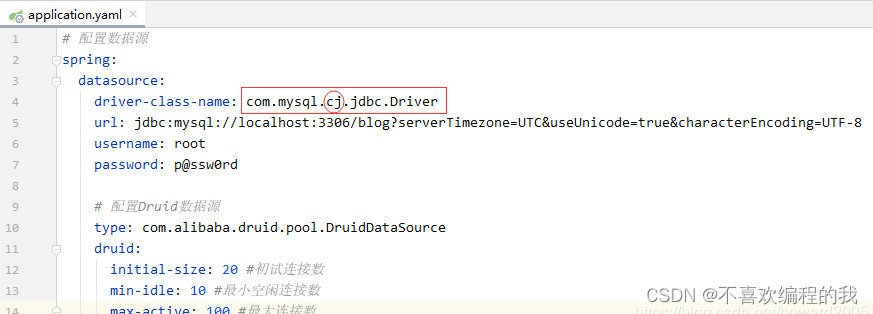
(1)在全局配置文件中进行数据库连接配置
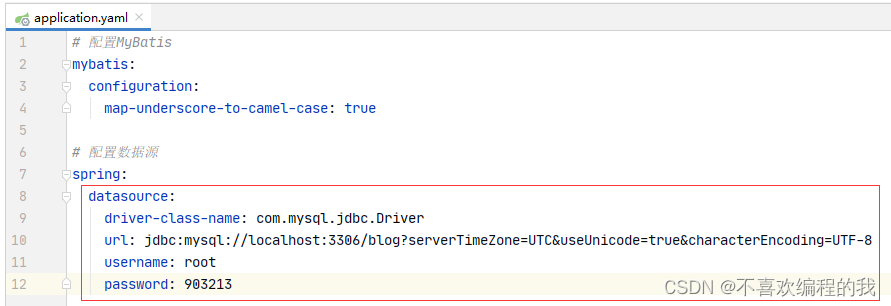
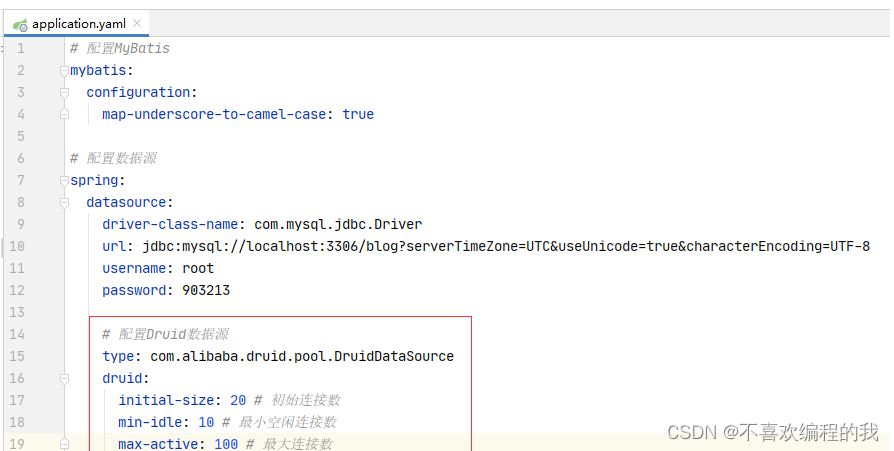
(2)数据源类型配置(以阿里巴巴的Druid数据源为例)
(3)在全局配置文件里覆盖默认参数
(二)使用注解方式整合MyBatis
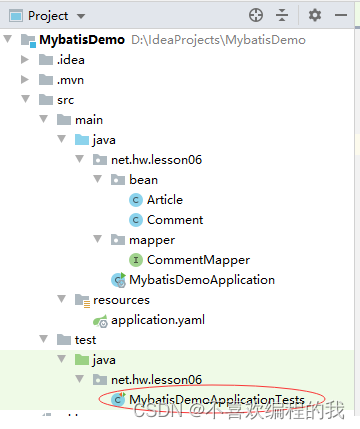
1、创建评论映射器接口 - CommentMapper
package net.huawei.boot.mapper;import net.huawei.boot.bean.Comment;
import org.apache.ibatis.annotations.*;import java.util.List;/*** 功能:评论映射器接口* 作者:* 日期:2023年06月06日*/
@Mapper // 交给Spring容器管理
public interface CommentMapper {@Insert("insert into t_comment values(#{id}, #{content}, #{author}, #{aId})")int insert(Comment comment); // 插入评论记录@Delete("delete from t_comment where id = #{id}")int deleteById(Integer id); // 按标识符删除评论@Update("update t_comment set content = #{content}, author = #{author} where id = #{id}")int update(Comment comment); // 更新评论@Select("select * from t_comment where id = #{id}")Comment findById(Integer id); // 按标识符查询评论@Select("select * from t_comment")List<Comment> findAll(); // 查询全部评论
}
2、在测试类编写测试方法,测试评论映射器接口
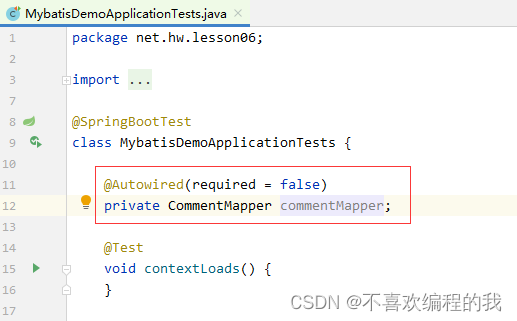
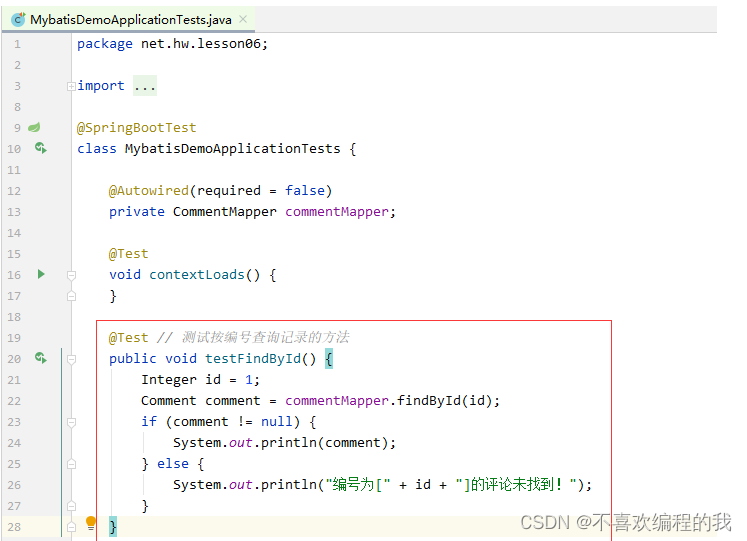
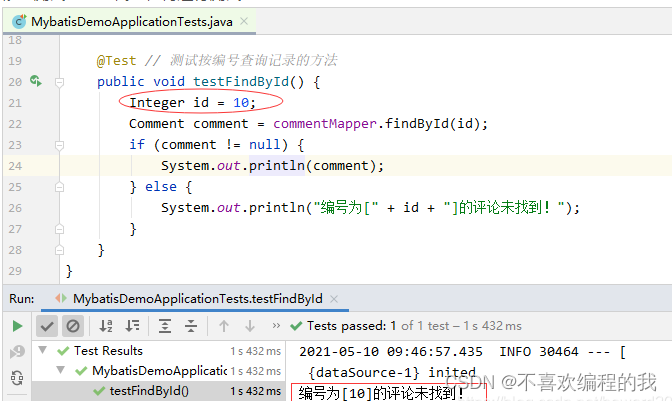
(1)创建测试方法testFindById()
运行测试方法,查看结果

要避免这个警告信息,修改一下全局属性配置文件
再运行测试方法,查看结果

再运行测试方法,查看结果

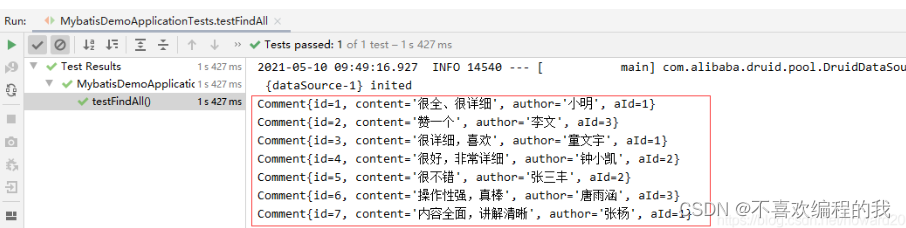
(2)创建测试方法testFindAll()

运行测试方法,查看结果
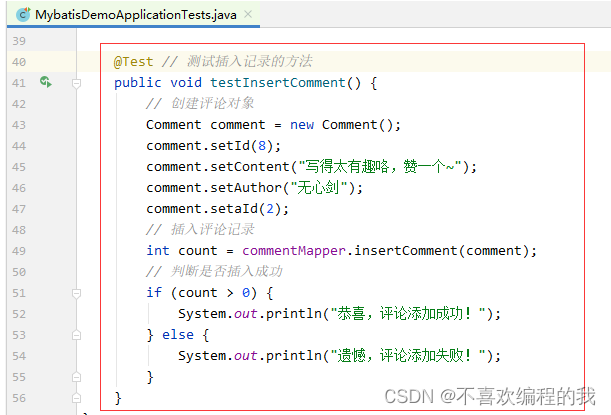
(3)创建测试方法testInsertComment()
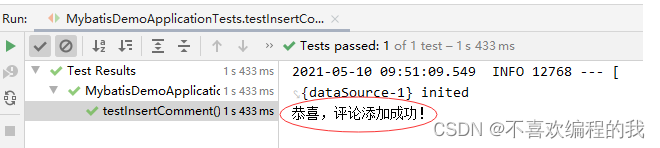
运行测试方法,查看结果
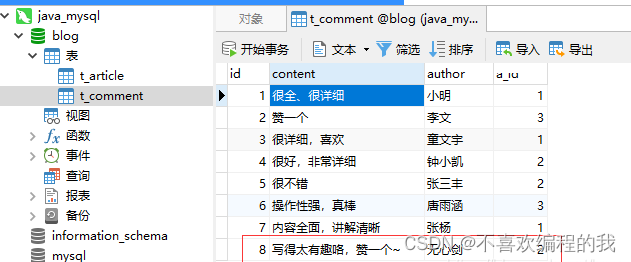
在Navicat里打开评论表,看是否成功地添加了一条新记录
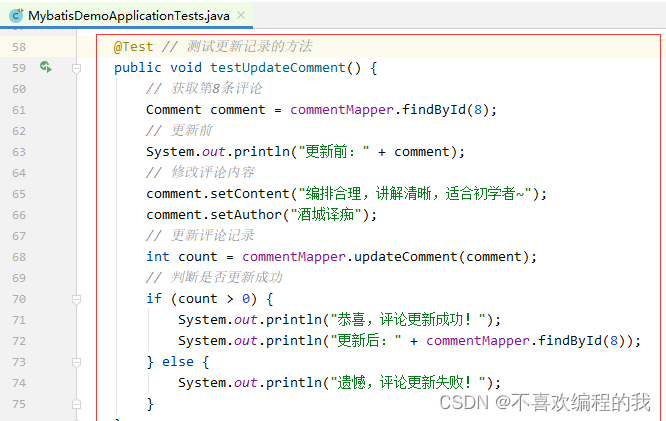
(4)创建测试方法testUpdateComment()
修改刚才插入的第8条记录
运行测试方法,查看结果

(5)创建测试方法testDeleteComment()
删除刚才插入的第8条记录
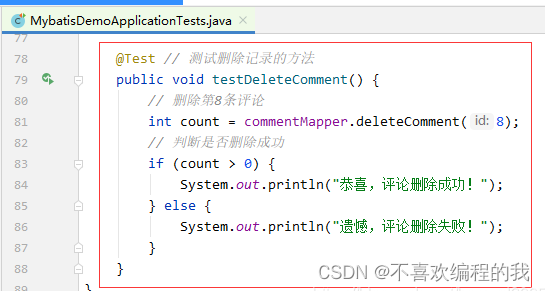
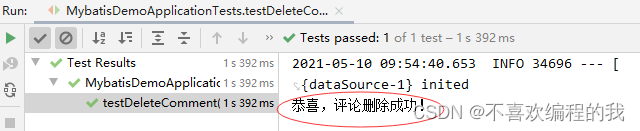
运行测试方法,查看结果
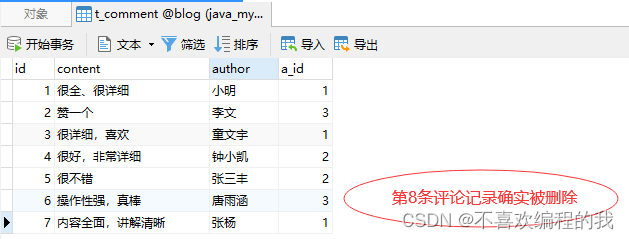
在Navicat里查看评论表t_comment
(三)使用配置文件方式整合MyBatis
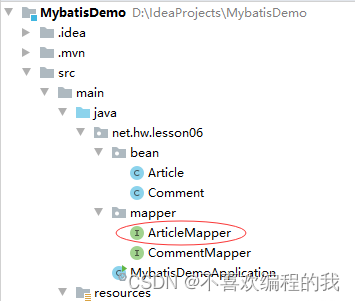
1、创建文章映射接口 - ArticleMapper
package net.hw.lesson06;import org.apache.ibatis.annotations.Mapper;/*** 功能:文章映射器接口* 作者:* 日期:*/
@Mapper
public interface ArticleMapper {Article findArticleById(Integer id);int updateArticle(Article article);
}
2、创建映射器配置文件 - ArticleMapper.xml
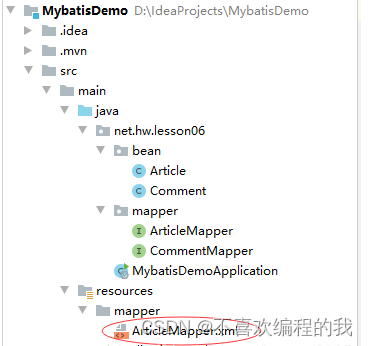
在resources目录里创建mapper目录,在mapper目录里创建ArticleMapper.xml
<?xml version="1.0" encoding="UTF-8" ?>
<!DOCTYPE mapperPUBLIC "-//mybatis.org//DTD Mapper 3.0//EN""http://mybatis.org/dtd/mybatis-3-mapper.dtd"><mapper namespace="net.hw.lesson06.mapper.ArticleMapper"><!--按id查询记录,文章表与评论表关联查询--><select id="findArticleById" resultMap="articleWithComment">SELECT a.*, c.id c_id, c.content c_content, c.author, c.a_idFROM t_article a, t_comment cWHERE a.id = c.a_id AND a.id = #{id}</select><!--结果集,一篇文章对应多个评论构成的集合--><resultMap id="articleWithComment" type="Article"><id property="id" column="id"/><result property="title" column="title"/><result property="content" column="content"/><collection property="commentList" ofType="Comment"><id property="id" column="c_id"/><result property="content" column="c_content"/><result property="author" column="author"/><result property="aId" column="a_id"/></collection></resultMap><!--更新记录--><update id="updateArticle" parameterType="Article">UPDATE t_article<set><if test="title != null and title != ''">title = #{title},</if><if test="content != null and content != ''">content = #{content}</if></set>WHERE id = #{id}</update>
</mapper>
3、在全局配置文件里配置映射器配置文件路径、

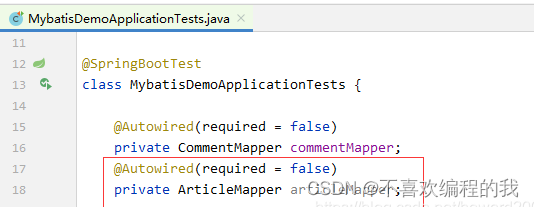
4、在测试类编写测试方法,测试文章映射器
注入文章映射器
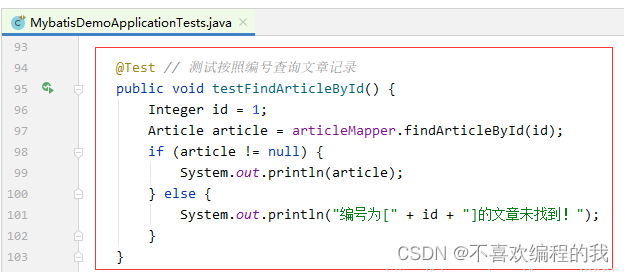
(1)创建测试方法testFindArticleById()
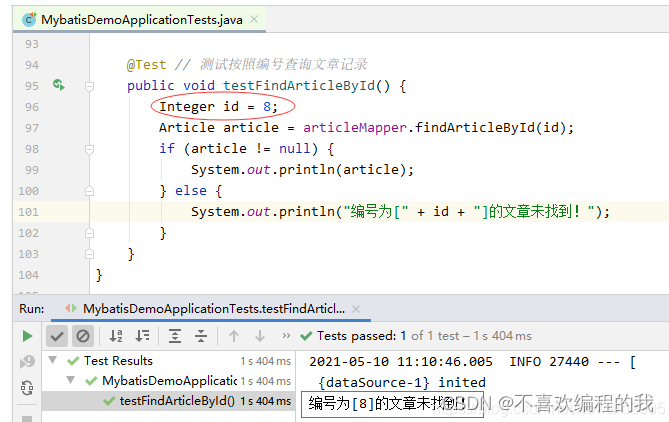
运行测试方法,查看结果

修改测试代码,再进行测试
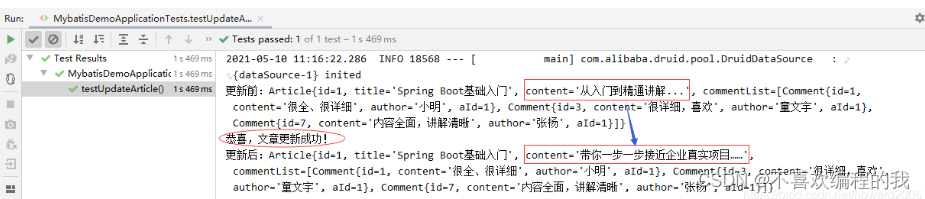
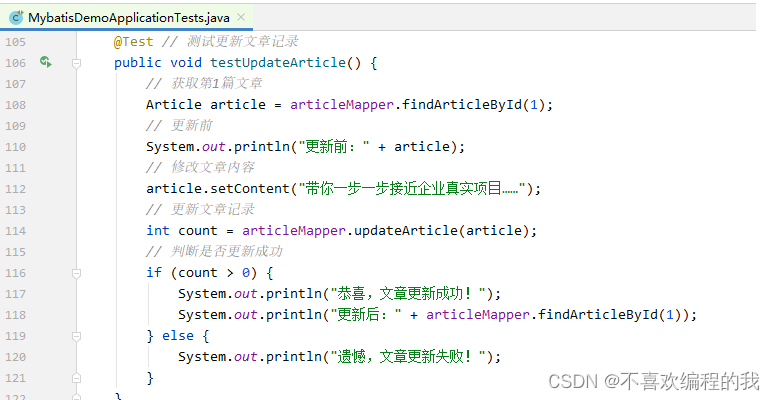
(2)创建测试方法testUpdateArticle()
运行测试方法,查看结果