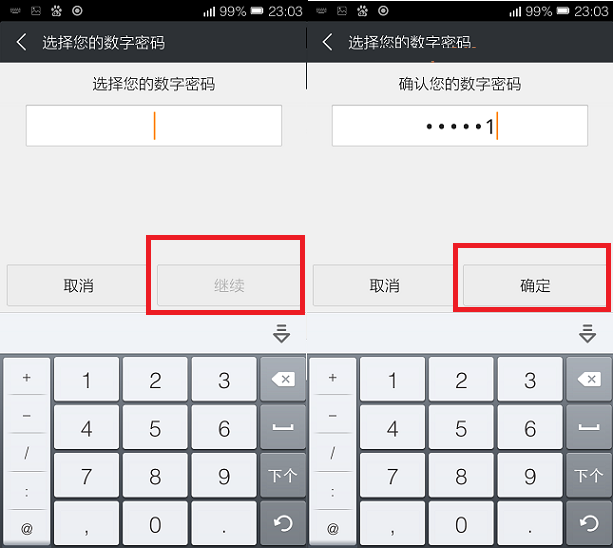
文章目录
- 准备
- 测试
- 示例一
- 示例二:
- 结论
- 源代码
原理篇: BLIP2-图像文本预训练论文解读
准备
如果无网络需提前下载相关模型
安装torch、transformers
pip install torch trtransformers
测试
测试blip基于图片生成文本描述能力(Caption);
caption分为两种:
有条件:在输入图片基础上,增加文本描述提示
无条件:仅输入图片。
以下是测试以blip-image-captioning-base模型进行
示例一
示例图如下:

运行结果如下:
有条件:a photography of a woman and her dog on the beach. 其中a photography of为输入文本提示
无条件:a woman sitting on the beach with her dog
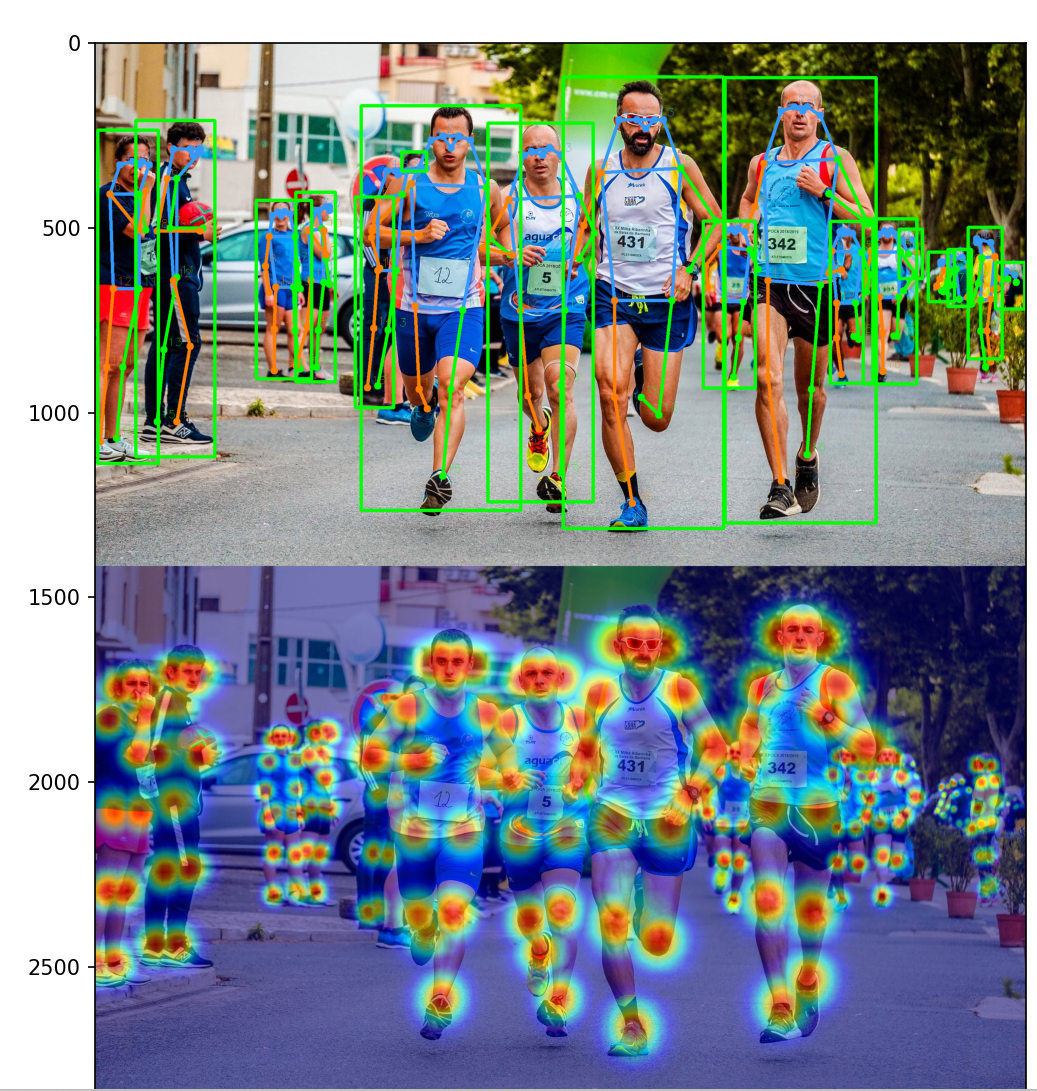
示例二:
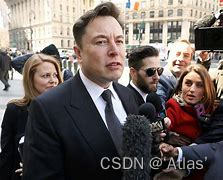
以网上下载musk图片示例,
运行结果如下:
有条件:a photography of a man in a suit and tie
无条件:a man in a suit and tie is surrounded by reporters
以several people作为文本提示,输出结果:
several people are standing in the street
以the man is interviewed作为文本提示,输出结果:
the man is interviewed by the media
结论
可对图片进行大致概括,但无法输出细节信息。比如:图中为马斯克、背景中人也没没有进行描述。
源代码
# coding=utf-8
import torch
from PIL import Image
from transformers import BlipProcessor, BlipForConditionalGenerationdef blip(img_path):# processor = BlipProcessor.from_pretrained("Salesforce/blip-image-captioning-base")# model = BlipForConditionalGeneration.from_pretrained("Salesforce/blip-image-captioning-base")processor = BlipProcessor.from_pretrained("./pretrained_models/blip-image-captioning-base")model = BlipForConditionalGeneration.from_pretrained("./pretrained_models/blip-image-captioning-base", torch_dtype=torch.float16).to("cuda")raw_image = Image.open(img_path).convert('RGB')# conditional image captioningtext = "several people"inputs = processor(raw_image, text, return_tensors="pt").to("cuda", torch.float16)out = model.generate(**inputs)print(processor.decode(out[0], skip_special_tokens=True))# >>> a photography of a woman and her dog# unconditional image captioninginputs = processor(raw_image, return_tensors="pt").to("cuda", torch.float16)out = model.generate(**inputs)print(processor.decode(out[0], skip_special_tokens=True))def main():img_path = "./example/blip/musk.jpg"blip(img_path)if __name__ == "__main__":main()