非常感谢匿名大哥一直对我的支持,本文内容由他赞助

#1. 视锥(Frustum)是什么
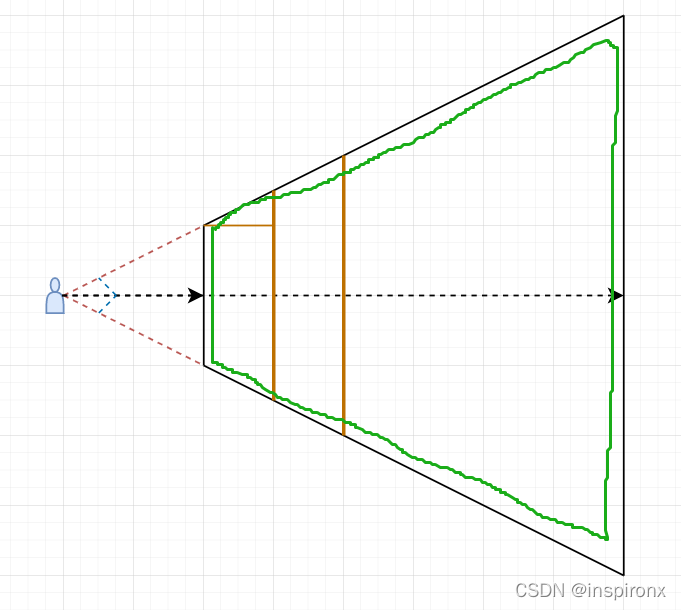
在相机的近裁剪面和远裁剪面之间的渲染范围内的空间叫做视锥空间(Frustum),通常情况下我们是不需要处理,但
当下比较流行动态遮挡剔除技术,只渲染视锥空间里面物体,再配合LOD等级来最大化效果,可以最小使用设备机能
Unity的FOV和Unreal的FOV有些区别
Unity的FOV是指视锥空间的张开角度,好比人眼睛的开闭角度
Unreal的FOV是指视锥空间的范围角度,基于水平面来伸开的
#2. 计算视锥需要的参数
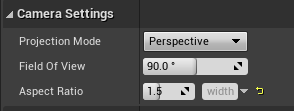
相机自身的2个参数:FieldOfView(FOV)和Aspect Ratio宽高比

一般情况下还需要配合摇臂一起使用,Target Arm Length
CameraSpringArm默认延展的长度是反向距离,所以需要减掉forward反向的摇臂长度
#3. 计算方法

使用0为原点,视角FOV为90度,摇臂300米来进行推导
第一个有效计算三角形,图中绿色部分
一个角是90度,另外一个角度是45度的等腰三角形
这是视锥空间中有效的计算三角形,总计2个可用,分别位于左右两边,我们已知了一个角度和一条边
因为视锥空间是真3维空间,完全是在空间中计算的,通常情况下3维度空间的计算我们可以转为
2维空间来处理,比如玩家移动,此时朝上的轴向是固定的
在完全3维空间中计算,我们需要找投影,只有投影的向量才是有效的(相机也是投影成像)
找投影需要找一个可靠的平面来进行投影,需要是相互垂直的平面,可以构成勾股定律
计算一个有效中心点
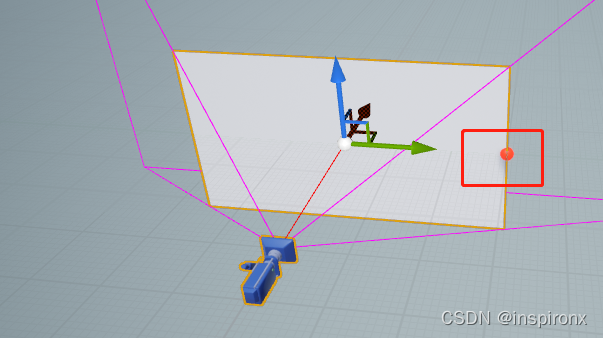
原点:(0,0,0)
理论点:(300,300,0) - 摇臂(300,0,0)
未知中心点:(0, 300, 0)

获取相机的宽高比aspect ratio:1.5 width/height
300/1.5 = 200
未知顶点1:(0,300,200)
未知顶点1:(0,300,-200)
#4. 显示相机的视锥空间
有两种方法可以显示相机的视锥空间,编辑器显示或者代码显示
> 编辑器显示

> 使用UDrawFrustumComponent来显示
DrawFrustum = CreateDefaultSubobject<UDrawFrustumComponent>(TEXT("DrawFrustum"));
DrawFrustum->SetupAttachment(CameraBoom, USpringArmComponent::SocketName);
DrawFrustum->FrustumAspectRatio = FollowCamera->AspectRatio;
DrawFrustum->FrustumAngle = FollowCamera->FieldOfView;
DrawFrustum->FrustumStartDist = 10.0f;
DrawFrustum->FrustumEndDist = 1010.0f;
代码显示的好处是可以在任意位置显示,编辑器默认跟随相机显示
#5. 代码绘制DebugLine
在绘制之前,我也不知道能不在空间中把相机的视锥边缘绘制出来,最关键的是如果我们不做,
那么功能一定是不能完成的,因此我们应该尝试迈出第一步,其中有3种常见情况,
分别是镜头默认在原点,镜头往上移动,镜头往下移动
> 镜头默认在原点
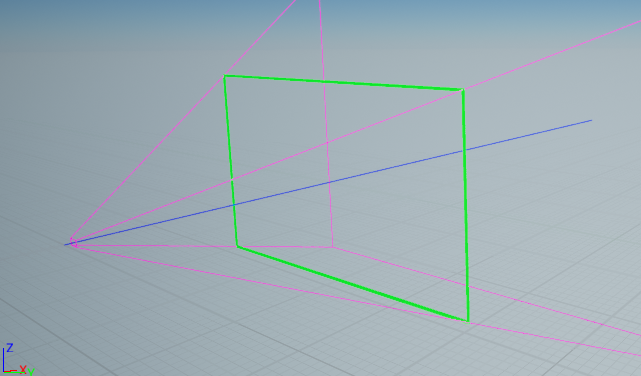
这种情况下,我们可以直接计算
//lv1.在原点,无旋转最简单的情况下
//1.通过角度计算对边(半边)
//2.通过比例计算上下顶点
//3.计算其余的两点
void AViewFrustumCharacter::DrawFrustumPlane(float Dist)
{float Angle = FollowCamera->FieldOfView / 2;float ToRadians = FMath::DegreesToRadians(Angle);float Tan = FMath::Tan(ToRadians);float HalfWidth = Tan * Dist;float AspectRatio = FollowCamera->AspectRatio;float HalfHeight = HalfWidth / AspectRatio;GLog->Logf(TEXT("Tan:%f Angle:%f HalfWidth:%f HalfHeight:%f"), Tan, Angle, HalfWidth, HalfHeight);FVector RightUpPoint = FVector(0, HalfWidth, HalfHeight);FVector RightBottomPoint = FVector(0, HalfWidth, -HalfHeight);FVector LeftUpPoint = FVector(0, -HalfWidth, HalfHeight);FVector LeftBottomPoint = FVector(0, -HalfWidth, -HalfHeight);DrawDebugLine(GetWorld(), RightUpPoint, RightBottomPoint, FColor::Green, true, -1, 0, 5);DrawDebugLine(GetWorld(), LeftUpPoint, LeftBottomPoint, FColor::Green, true, -1, 0, 5);DrawDebugLine(GetWorld(), LeftUpPoint, RightUpPoint, FColor::Green, true, -1, 0, 5);DrawDebugLine(GetWorld(), LeftBottomPoint, RightBottomPoint, FColor::Green, true, -1, 0, 5);
}
> 镜头左右有旋转
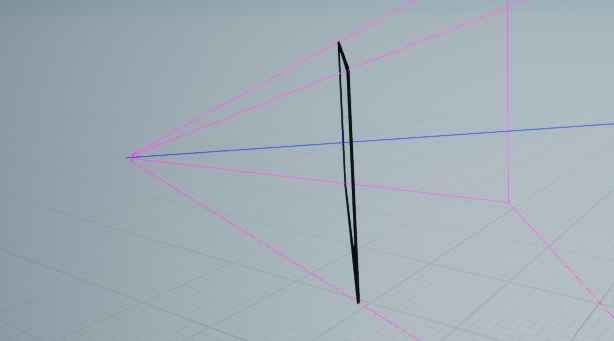
这种情况下,需要计算旋转之后的偏移,我们可以直接使用集成的API来计算
我直接在Google上找到了解决办法
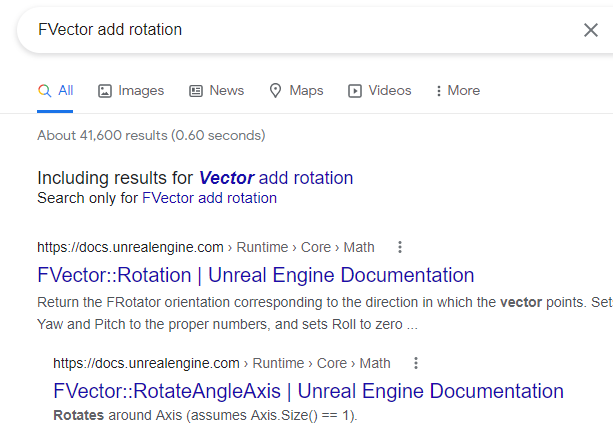
//lv2.相机有旋转,只有左右旋转的情况下
void AViewFrustumCharacter::DrawFrustumPlaneEx1(float Dist)
{float Angle = FollowCamera->FieldOfView / 2;float ToRadians = FMath::DegreesToRadians(Angle);float Tan = FMath::Tan(ToRadians);float HalfWidth = Tan * Dist;float AspectRatio = FollowCamera->AspectRatio;float HalfHeight = HalfWidth / AspectRatio;GLog->Logf(TEXT("Tan:%f Angle:%f HalfWidth:%f HalfHeight:%f"), Tan, Angle, HalfWidth, HalfHeight);FVector RightUpPoint = FVector(0, HalfWidth, HalfHeight);FVector RightBottomPoint = FVector(0, HalfWidth, -HalfHeight);FVector LeftUpPoint = FVector(0, -HalfWidth, HalfHeight);FVector LeftBottomPoint = FVector(0, -HalfWidth, -HalfHeight);FRotator Rotation = GetActorRotation();FVector EulerAngle = Rotation.Euler();FVector NewRightUpPoint = RightUpPoint.RotateAngleAxis(EulerAngle.Z, FVector::UpVector);FVector NewRightBottomPoint = RightBottomPoint.RotateAngleAxis(EulerAngle.Z, FVector::UpVector);FVector NewLeftUpPoint = LeftUpPoint.RotateAngleAxis(EulerAngle.Z, FVector::UpVector);FVector NewLeftBottomPoint = LeftBottomPoint.RotateAngleAxis(EulerAngle.Z, FVector::UpVector);DrawDebugLine(GetWorld(), NewRightUpPoint, NewRightBottomPoint, FColor::Black, true, -1, 0, 5);DrawDebugLine(GetWorld(), NewLeftUpPoint, NewLeftBottomPoint, FColor::Black, true, -1, 0, 5);DrawDebugLine(GetWorld(), NewLeftUpPoint, NewRightUpPoint, FColor::Black, true, -1, 0, 5);DrawDebugLine(GetWorld(), NewLeftBottomPoint, NewRightBottomPoint, FColor::Black, true, -1, 0, 5);
}
> 镜头上下有旋转
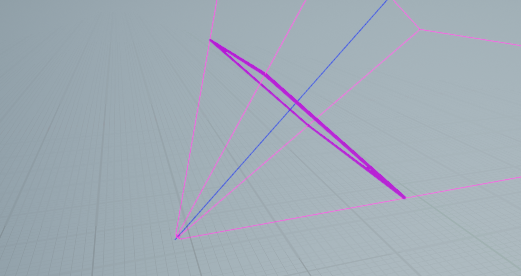
上下旋转的时候,是反方向进行的
void AViewFrustumCharacter::DrawFrustumPlaneEx2(float Dist)
{float Angle = FollowCamera->FieldOfView / 2;float ToRadians = FMath::DegreesToRadians(Angle);float Tan = FMath::Tan(ToRadians);float HalfWidth = Tan * Dist;float AspectRatio = FollowCamera->AspectRatio;float HalfHeight = HalfWidth / AspectRatio;GLog->Logf(TEXT("Tan:%f Angle:%f HalfWidth:%f HalfHeight:%f"), Tan, Angle, HalfWidth, HalfHeight);FVector RightUpPoint = FVector(0, HalfWidth, HalfHeight);FVector RightBottomPoint = FVector(0, HalfWidth, -HalfHeight);FVector LeftUpPoint = FVector(0, -HalfWidth, HalfHeight);FVector LeftBottomPoint = FVector(0, -HalfWidth, -HalfHeight);FRotator Rotation = GetActorRotation();FVector EulerAngle = Rotation.Euler();// 上下的旋转是默认取反,下显示往上,上显示往下FVector NewRightUpPoint = RightUpPoint.RotateAngleAxis(-EulerAngle.Y, FVector::RightVector);FVector NewRightBottomPoint = RightBottomPoint.RotateAngleAxis(-EulerAngle.Y, FVector::RightVector);FVector NewLeftUpPoint = LeftUpPoint.RotateAngleAxis(-EulerAngle.Y, FVector::RightVector);FVector NewLeftBottomPoint = LeftBottomPoint.RotateAngleAxis(-EulerAngle.Y, FVector::RightVector);DrawDebugLine(GetWorld(), NewRightUpPoint, NewRightBottomPoint, FColor::Purple, true, -1, 0, 5);DrawDebugLine(GetWorld(), NewLeftUpPoint, NewLeftBottomPoint, FColor::Purple, true, -1, 0, 5);DrawDebugLine(GetWorld(), NewLeftUpPoint, NewRightUpPoint, FColor::Purple, true, -1, 0, 5);DrawDebugLine(GetWorld(), NewLeftBottomPoint, NewRightBottomPoint, FColor::Purple, true, -1, 0, 5);
}


