《React后台管理系统实战:五》产品管理(三)商品列表页
一、静态产品列表页
第1步,product/home.jsx
import React,{Component} from 'react'
import {Card,Select,Input,Table,Icon,Button,message
} from 'antd'
import LinkButton from '../../../components/link-button'const Option=Select.Optionexport default class Home extends Component{state={//【1】商品列表products:[{"status": 1,"imgs": ["image-1559402396338.jpg"],"_id": "5ca9e05db49ef916541160cd","name": "联想ThinkPad 翼4809","desc": "年度重量级新品,X390、T490全新登场 更加轻薄机身设计9","price": 65999,"pCategoryId": "5ca9d6c0b49ef916541160bb","categoryId": "5ca9db9fb49ef916541160cc","detail": "<p><span style=\"color: rgb(228,57,60);background-color: rgb(255,255,255);font-size: 12px;\">想你所需,超你所想!精致外观,轻薄便携带光驱,内置正版office杜绝盗版死机,全国联保两年!</span> 222</p>\n<p><span style=\"color: rgb(102,102,102);background-color: rgb(255,255,255);font-size: 16px;\">联想(Lenovo)扬天V110 15.6英寸家用轻薄便携商务办公手提笔记本电脑 定制【E2-9010/4G/128G固态】 2G独显 内置</span></p>\n<p><span style=\"color: rgb(102,102,102);background-color: rgb(255,255,255);font-size: 16px;\">99999</span></p>\n","__v": 0},{"status": 1,"imgs": ["image-1559402448049.jpg","image-1559402450480.jpg"],"_id": "5ca9e414b49ef916541160ce","name": "华硕(ASUS) 飞行堡垒","desc": "15.6英寸窄边框游戏笔记本电脑(i7-8750H 8G 256GSSD+1T GTX1050Ti 4G IPS)","price": 6799,"pCategoryId": "5ca9d6c0b49ef916541160bb","categoryId": "5ca9db8ab49ef916541160cb","detail": "<p><span style=\"color: rgb(102,102,102);background-color: rgb(255,255,255);font-size: 16px;\">华硕(ASUS) 飞行堡垒6 15.6英寸窄边框游戏笔记本电脑(i7-8750H 8G 256GSSD+1T GTX1050Ti 4G IPS)火陨红黑</span> </p>\n<p><span style=\"color: rgb(228,57,60);background-color: rgb(255,255,255);font-size: 12px;\">【4.6-4.7号华硕集体放价,大牌够品质!】1T+256G高速存储组合!超窄边框视野无阻,强劲散热一键启动!</span> </p>\n","__v": 0}], loading:false,}//Table的列名及对应显示的内容渲染initColumns=()=>{this.columns=[{title:'商品名称',dataIndex:'name'},{title:'商品描述',dataIndex:'desc'},{title:'价格',dataIndex:'price',render:(price)=>'¥'+price //把price渲染进对应的行,并加上¥符号},{width:100,title:'商品状态',dataIndex:'status',render:(status)=>{return(<span><Button type='primary'>{status===1 ? '下架' : '上架'}</Button><span>{status===1 ? '在售':'已下架'}</span></span>)}},{width:100,title:'操作',render:(proObj)=>{return(<span><LinkButton>详情</LinkButton><LinkButton>修改</LinkButton></span>)}},]}componentWillMount(){//Table列名初始化函数调用,用于准备表格列名及显示内容this.initColumns()}render(){//state数据解构,简化使用const {products}=this.state//card左侧内容const title=(<span><Select value='1' style={{width:150,}}><Option value='1'>按名称搜索</Option><Option value='2'>按描述搜索</Option></Select><Input placeholder='关键字' style={{width:150,margin:'0 8px'}} /><Button type='primary'>搜索</Button></span>)//card右侧内容const extra=(<Button type='primary' onClick={() => this.props.history.push('/product/add-update')}><Icon type='plus'/>添加商品</Button>)return(<Card title={title} extra={extra}><Table bordered rowKey='_id'dataSource={products} columns={this.columns} /></Card>)}
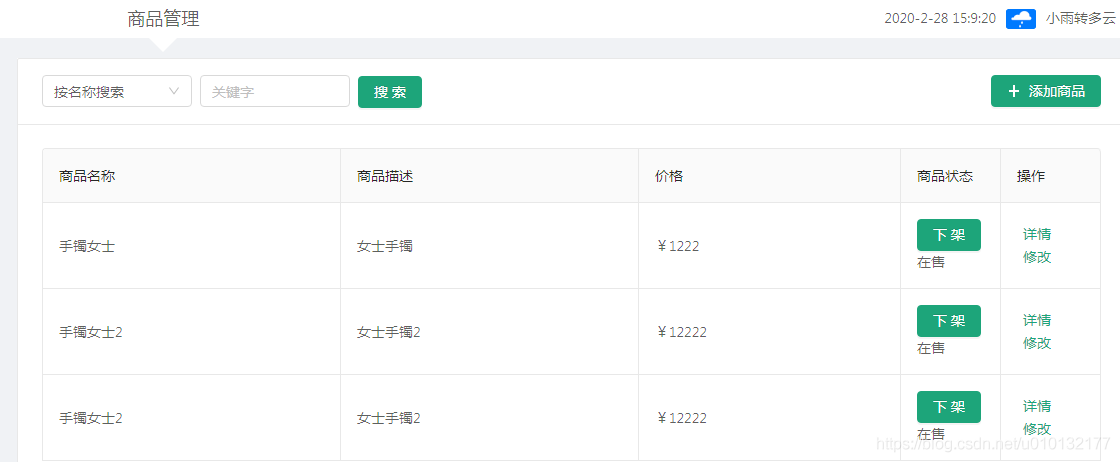
}效果:http://localhost:3000/product
二、api请求产品列表
第1步,编写产品请求接口src/api/index.js
//获取产品列表
export const reqProducts=(pageNum,pageSize)=>ajax(BASE+'/manage/product/list',{pageNum,pageSize})
第2步,设置一个常量src/utils/constans.js
//用于存放一些常量
export const PAGE_SIZE = 1 //第页显示条数
第3步,编写请求函数product/home.jsx
...
import {reqProducts} from '../../../api/' //【0】引入产品列表请求
import {PAGE_SIZE} from '../../../utils/constans' //【0-1】引入常量每页显示产品条数PAGE_SIZE=3state={//商品列表total:0,//商品总数products:[], //商品列表页loading:false, //是否显示加载动画}//state之后:
//【1】请求产品列表放入state,后台分页getProducts=async(pageNum)=>{//pageNum为请求页码this.setState({loading:true}) //设置加载动画开始显示this.pageNum=pageNum //接收参数   const result = await reqProducts(pageNum,PAGE_SIZE) //常量:每页显示产品条数,this.setState({loading:false}) //关闭加载动画if(result.status===0){console.log(result.data)const {total,list}=result.data  //解构需要 数据        this.setState({ //把数据设置到状态中total,products:list})}else{message.error('加载产品失败,请刷新页面重试')}}//【2】获取产品componentDidMount(){this.getProducts(1)       }   //render之后
//【3】state数据解构,简化使用const {products,loading}=this.state//【数据展示组件】return之后
<Card title={title} extra={extra}><Table bordered /*显示边框*/rowKey='_id'loading={loading} /*加载动画*/dataSource={products} /*展示数据*/columns={this.columns} />
</Card>
效果同上http://localhost:3000/product
第4步,分页设置home.jsx
https://ant.design/components/table-cn/
https://ant.design/components/pagination-cn/
//state数据解构,简化使用const {products,loading,total}=this.state
<Table bordered rowKey='_id'dataSource={products}loading={loading}columns={this.columns}pagination={{/*分页配置*/current: this.pageNum,total,defaultPageSize: PAGE_SIZE,showQuickJumper: true,onChange: this.getProducts /*onchange是一回调函数,把pageNum传给getproducts,等于:(pageNum)=>{this.getProducts(pageNum)}*/}} />
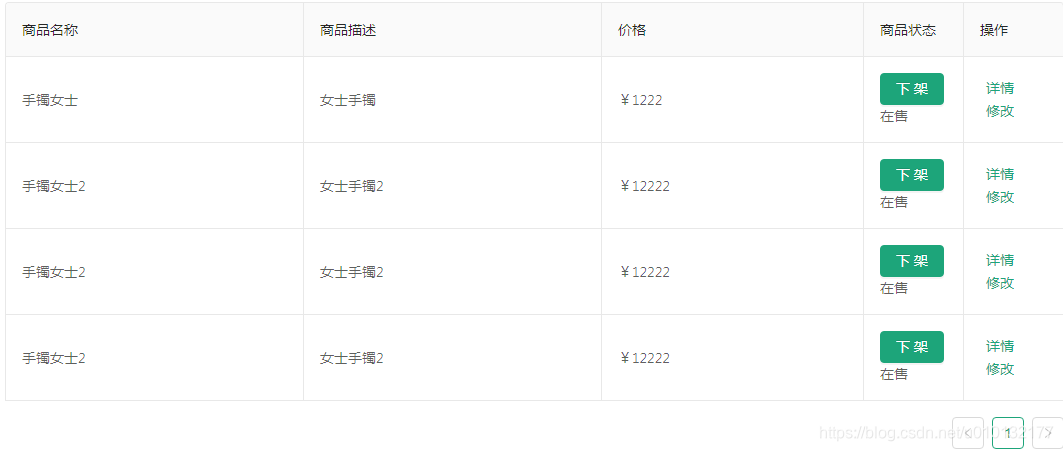
5. 效果:
三、搜索产品及分页
第1步,api请求函数reqSearchProducts
src/api/index.js
/*
搜索商品分页列表 (根据商品名称/商品描述)
searchType(搜索的类型): productName/productDesc*/
export const reqSearchProducts = ({pageNum, pageSize, searchName, searchType}) => ajax(BASE + '/manage/product/search', {pageNum,pageSize,[searchType]: searchName,})
第2步,设置状态home.jsx
select onChange的使用:https://ant.design/components/select-cn/#Select-props
input onChange的使用:https://ant.design/components/input-cn/#API
import {reqProducts,reqSearchProducts} from '../../../api/' //【0】引入产品搜索请求state={//商品列表total:0,//商品总数products:[], loading:false,searchName:'', //【1】搜索关键词searchType:'productName', //【2】按什么搜索:名称/描述 productName/productDesc}
第3步,和状态关联home.jsx
//render和return间
//【3】state数据解构,searchName,searchTypeconst {products,loading,total,searchName,searchType}=this.state//【4】card左侧内容const title=(<span><Select value={searchType} /*【5】*/style={{width:150,}} onChange={value=>this.setState({searchType:value})}/*【6】*/><Option value='productName'>按名称搜索</Option><Option value='productDesc'>按描述搜索</Option></Select><Input placeholder='关键字' style={{width:150,margin:'0 8px'}} value={searchName}/*【7】*/onChange={event=>this.setState({searchName:event.target.value})}/*【8】*//><Button type='primary'onClick={()=>this.getProducts(1)} //【9】点击搜索对应产品>搜索</Button></span>)
第4步,编写请求函数
//state下面
//请求产品列表放入state,后台分页getProducts=async(pageNum)=>{//pageNum为请求页码this.setState({loading:true}) //设置加载动画开始显示this.pageNum=pageNum //保存pageNum, 让其它方法可以看到const {searchName,searchType}=this.state  //【10】let result //【13】有两个result因此把result提出来定义if(searchName){//【11】如果有搜索关键词就是关键词搜索,易错pageSize:PAGE_SIZEresult=await reqSearchProducts({pageNum,pageSize:PAGE_SIZE,searchType,searchName})}else{//【12】否则就是一般搜索result = await reqProducts(pageNum,PAGE_SIZE) // 常量: 每页显示产品条数,}this.setState({loading:false}) //关闭加载动画if(result.status===0){console.log(result.data)const {total,list}=result.data          this.setState({total,products:list})}else{message.error('加载产品失败,请刷新页面重试')}}
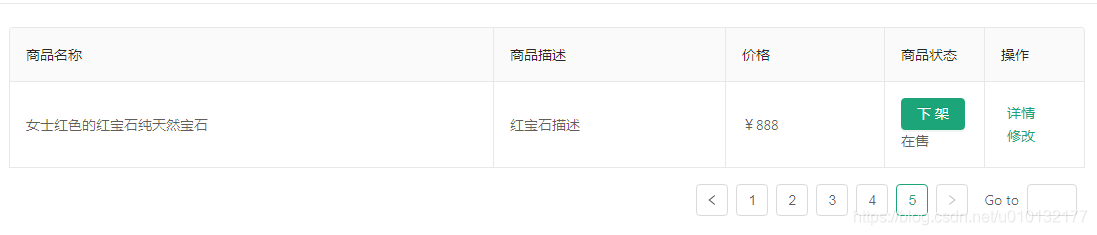
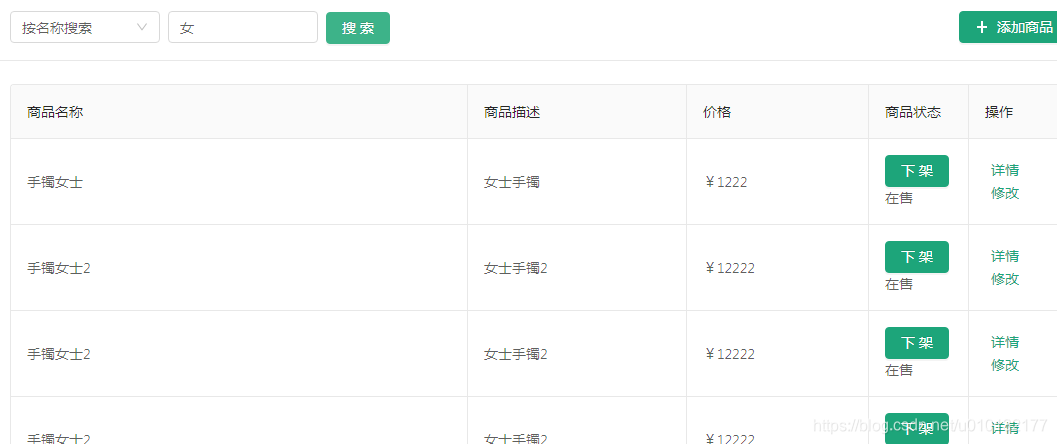
第5步,效果http://localhost:3000/product
选择搜索框,点搜索
四、商品详情页detail.jsx
1. 编写详情静态页detail.jsx
import React,{Component} from 'react'
import {Card,List,Icon
} from 'antd'
import LinkButton from '../../../components/link-button'
import './product.less'const Item=List.Itemexport default class Detail extends Component{render(){const title=(<span><LinkButton><Icon type='arrow-left' /></LinkButton><span>产品详情</span></span>)return(<Card title={title} className='product-detail'><List><Item><span className='left'>商品名称</span><span>笔记本电脑</span></Item><Item><span className='left'>商品描述</span><span>这是一台笔记本电脑的商品描述</span></Item><Item><span className='left'>商品价格</span><span>12888元</span></Item><Item><span className='left'>所属分类</span><span>电脑-->笔记本电脑</span></Item><Item><span className='left'>商品图片</span><span><img className='product-img' src='http://localhost:5000/upload/image-1582704160384.jpg' alt=''/><img className='product-img' src='http://localhost:5000/upload/image-1582704160384.jpg' alt=''/></span></Item><Item><span className='left'>商品详情</span><span dangerouslySetInnerHTML={{__html: 'detail'}}></span></Item></List></Card>)}
}
2. 对应样式 product.less
.product-detail {.left{margin-right: 15px;font-size: 20px;font-weight: bold;}.product-img{width: 150px;width: 150px;border: 1px solid #002140;margin-right: 10px;}
}
3. 效果http://localhost:3000/product/detail

4. home.jsx点详情跳转到商品详情并把此商品传过去
react路由history文档:https://react-router.docschina.org/web/api/history
【0】proObj当前商品对象onClick={()=>this.props.history.push('/product/detail',{proObj})}
【1】将product对象使用state传递给目标路由组件
//Table的列名及对应显示的内容渲染initColumns=()=>{this.columns=[{title:'商品名称',dataIndex:'name'},{title:'商品描述',dataIndex:'desc'},{title:'价格',dataIndex:'price',render:(price)=>'¥'+price //把price渲染进对应的行,并加上¥符号},{width:100,title:'商品状态',dataIndex:'status',render:(status)=>{return(<span><Button type='primary'>{status===1 ? '下架' : '上架'}</Button><span>{status===1 ? '在售':'已下架'}</span></span>)}},{width:100,title:'操作',render:(proObj)=>{//【0】proObj当前商品对象return(<span>{/*【1】将product对象使用state传递给目标路由组件*/}<LinkButton onClick={()=>this.props.history.push('/product/detail',{proObj})}>详情</LinkButton><LinkButton>修改</LinkButton></span>)}},]}
4效果:点商品列表里的详情后跳转到详情页并把对象商品信息传过去
5. 商品详情点返回箭头跳转回商品列表页detail.jsx
【1】跳转回商品列表页 onClick={()=>this.props.history.goBack()}
在render return之间修改如下的代码
const title=(<span>{/* 【1】跳转回商品列表页 */}<LinkButton onClick={()=>this.props.history.goBack()}><Icon type='arrow-left' /></LinkButton><span>产品详情</span></span>)
6.接收4步传过来的商品对象

//接收前一步传过来的商品对象数据(render之后)
const {proObj}=this.props.location.state
6.2 改进,解构方便调用
//接收前一步传过来的商品对象数据
const {name, desc, price, detail, imgs}=this.props.location.state.proObj
7. 显示对应商品详情数据1
显示除商品分类面包屑、图片外数据
render内return代码改为
return(<Card title={title} className='product-detail'><List><Item><span className='left'>商品名称</span><span>{name}</span></Item><Item><span className='left'>商品描述</span><span>{desc}</span></Item><Item><span className='left'>商品价格</span><span>{price}元</span></Item><Item><span className='left'>所属分类</span><span>电脑-->笔记本电脑</span></Item><Item><span className='left'>商品图片</span><span><img className='product-img' src='http://localhost:5000/upload/image-1582704160384.jpg' alt=''/><img className='product-img' src='http://localhost:5000/upload/image-1582704160384.jpg' alt=''/></span></Item><Item><span className='left'>商品详情</span><span dangerouslySetInnerHTML={{__html: detail}}></span></Item></List></Card>)
8. 显示图片
第1步,设置图片地址常量src/utils/constans.js
export const BASE_IMG_URL= 'http://localhost:5000/upload/' //图片基础地址
第2步,导入图片常量并使用map循环出来imgs列表
import {BASE_IMG_URL} from '../../../utils/constans'<Item><span className='left'>商品图片</span><span>{imgs.map(img=>(<img className='product-img' src={BASE_IMG_URL+img}alt={name}/>))}</span></Item>
效果:http://localhost:3000/product/随便点一商品

8. 面包屑detail.jsx
第1步,设置状态
state={cName1:'', //一级分类名称cName2:'' //二级分类名称}
第2步,根据分类id获取分类api编写(见api接口说明)src/api/index.js
//根据分类Id获取一个分类
export const reqCategory = (categoryId) => ajax(BASE + '/manage/category/info', {categoryId})
第3步,请求并显示面包屑 重点:用Promise.all(请求1,请求2,)发送多个请求
import {reqCategory} from '../../../api/index'async componentDidMount () {// 得到当前商品的分类IDconst {pCategoryId, categoryId} = this.props.location.state.proObjif(pCategoryId==='0') { // 一级分类下的商品const result = await reqCategory(categoryId)const cName1 = result.data.namethis.setState({cName1})} else { // 二级分类下的商品/*//通过多个await方式发多个请求: 后面一个请求是在前一个请求成功返回之后才发送const result1 = await reqCategory(pCategoryId) // 获取一级分类列表const result2 = await reqCategory(categoryId) // 获取二级分类const cName1 = result1.data.nameconst cName2 = result2.data.name*/// 一次性发送多个请求, 只有都成功了, 才正常处理const results = await Promise.all([reqCategory(pCategoryId), reqCategory(categoryId)])const cName1 = results[0].data.nameconst cName2 = results[1].data.namethis.setState({cName1,cName2})}}//显示面包屑render下
const {cName1,cName2}=this.state
//return下的:
<Item>
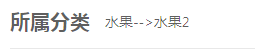
{/*判断是否存在二级分类有则显示无则显示空*/}<span className='left'>所属分类</span><span>{cName1}{cName2?'-->'+cName2:''}</span>
</Item>
效果:
4步完整代码:
detail.jsx
import React,{Component} from 'react'
import {Card,List,Icon
} from 'antd'
import LinkButton from '../../../components/link-button'
import './product.less'
import {BASE_IMG_URL} from '../../../utils/constans'
import {reqCategory} from '../../../api/index'const Item=List.Itemexport default class Detail extends Component{state={cName1:'', //一级分类名称cName2:'' //二级分类名称}async componentDidMount () {// 得到当前商品的分类IDconst {pCategoryId, categoryId} = this.props.location.state.proObjif(pCategoryId==='0') { // 一级分类下的商品const result = await reqCategory(categoryId)const cName1 = result.data.namethis.setState({cName1})} else { // 二级分类下的商品/*//通过多个await方式发多个请求: 后面一个请求是在前一个请求成功返回之后才发送const result1 = await reqCategory(pCategoryId) // 获取一级分类列表const result2 = await reqCategory(categoryId) // 获取二级分类const cName1 = result1.data.nameconst cName2 = result2.data.name*/// 一次性发送多个请求, 只有都成功了, 才正常处理const results = await Promise.all([reqCategory(pCategoryId), reqCategory(categoryId)])const cName1 = results[0].data.nameconst cName2 = results[1].data.namethis.setState({cName1,cName2})}}render(){//接收前一步传过来的商品对象数据const {name, desc, price, detail, imgs}=this.props.location.state.proObjconst {cName1,cName2}=this.stateconst title=(<span>{/* 跳转回商品列表页 */}<LinkButton onClick={()=>this.props.history.goBack()}><Icon type='arrow-left' /></LinkButton><span>产品详情</span></span>)return(<Card title={title} className='product-detail'><List><Item><span className='left'>商品名称</span><span>{name}</span></Item><Item><span className='left'>商品描述</span><span>{desc}</span></Item><Item><span className='left'>商品价格</span><span>{price}元</span></Item><Item><span className='left'>所属分类</span><span>{cName1}{cName2?'-->'+cName2:''}</span></Item><Item><span className='left'>商品图片</span><span>{imgs.map(img=>(<img className='product-img' src={BASE_IMG_URL+img}alt={name}/>))}</span></Item><Item><span className='left'>商品详情</span><span dangerouslySetInnerHTML={{__html: detail}}></span></Item></List></Card>)}
}
home.jsx
import React,{Component} from 'react'
import {Card,Select,Input,Table,Icon,Button,message
} from 'antd'
import LinkButton from '../../../components/link-button'
import {reqProducts,reqSearchProducts} from '../../../api/' //引入产品列表请求
import {PAGE_SIZE} from '../../../utils/constans' //引入常量每页显示产品条数PAGE_SIZE=3const Option=Select.Optionexport default class Home extends Component{state={//商品列表total:0,//商品总数products:[], loading:false,searchName:'', //搜索关键词searchType:'productName', //按什么搜索:名称/描述 productName/productDesc}//Table的列名及对应显示的内容渲染initColumns=()=>{this.columns=[{title:'商品名称',dataIndex:'name'},{title:'商品描述',dataIndex:'desc'},{title:'价格',dataIndex:'price',render:(price)=>'¥'+price //把price渲染进对应的行,并加上¥符号},{width:100,title:'商品状态',dataIndex:'status',render:(status)=>{return(<span><Button type='primary'>{status===1 ? '下架' : '上架'}</Button><span>{status===1 ? '在售':'已下架'}</span></span>)}},{width:100,title:'操作',render:(proObj)=>{//【0】proObj当前商品对象return(<span>{/*【1】将product对象使用state传递给目标路由组件*/}<LinkButton onClick={()=>this.props.history.push('/product/detail',{proObj})}>详情</LinkButton><LinkButton>修改</LinkButton></span>)}},]}//请求产品列表放入state,后台分页getProducts=async(pageNum)=>{//pageNum为请求页码this.setState({loading:true}) //设置加载动画开始显示this.pageNum=pageNum //保存pageNum, 让其它方法可以看到const {searchName,searchType}=this.state  //let result //有两个result因此把result提出来定义if(searchName){//如果有搜索关键词就是关键词搜索,易错pageSize:PAGE_SIZEresult=await reqSearchProducts({pageNum,pageSize:PAGE_SIZE,searchType,searchName})}else{//否则就是一般搜索result = await reqProducts(pageNum,PAGE_SIZE) // 常量:每页显示产品条数,}this.setState({loading:false}) //关闭加载动画if(result.status===0){console.log(result.data)const {total,list}=result.data          this.setState({total,products:list})}else{message.error('加载产品失败,请刷新页面重试')}}componentWillMount(){//Table列名初始化函数调用,用于准备表格列名及显示内容this.initColumns()}//获取产品componentDidMount(){this.getProducts(1)       }render(){//state数据解构,简化使用const {products,loading,total,searchName,searchType}=this.state//card左侧内容const title=(<span><Select value={searchType} /**/style={{width:150,}} onChange={value=>this.setState({searchType:value})}/**/><Option value='productName'>按名称搜索</Option><Option value='productDesc'>按描述搜索</Option></Select><Input placeholder='关键字' style={{width:150,margin:'0 8px'}} value={searchName}/**/onChange={event=>this.setState({searchName:event.target.value})}/**//><Button type='primary'onClick={()=>this.getProducts(1)} //点击搜索对应产品>搜索</Button></span>)//card右侧内容const extra=(<Button type='primary' onClick={() => this.props.history.push('/product/add-update')}><Icon type='plus'/>添加商品</Button>)return(<Card title={title} extra={extra}><Table bordered rowKey='_id'dataSource={products}loading={loading}columns={this.columns}pagination={{/*分页配置*/current: this.pageNum,total,defaultPageSize: PAGE_SIZE,showQuickJumper: true,onChange: this.getProducts /*onchange是一回调函数,把pageNum传给getproducts,等于:(pageNum)=>{this.getProducts(pageNum)}*/}} /></Card>)}
}
略过utils/constans.js、api/index、
五、商品上下架功能home.jsx
api
## 14. 对商品进行上架/下架处理
### 请求URL:http://localhost:5000/manage/product/updateStatus### 请求方式:POST### 参数类型:|参数		      |是否必选 |类型     |说明|productId    |Y       |string   |商品名称|status       |Y       |number   |商品状态值### 返回示例:{"status": 0}## product示例:
...
list{
status:1//在售2已下架
}
1.编写api接口api/index.js
//产品上下架
export const reqUpdateStatus=(productId,status)=>ajax(BASE+'/manage/product/updateStatus',{productId,status},'POST')
2.编写改状态函数,并根据status显示上下架状态
【0】引入入api请求函数
【1】根据状态显示上下架
import {reqProducts,reqSearchProducts,reqUpdateStatus} from '../../../api/' //【0】引入入api请求函数//Table的列名及对应显示的内容渲染(state之下)initColumns=()=>{this.columns=[{title:'商品名称',dataIndex:'name'},{title:'商品描述',dataIndex:'desc'},{title:'价格',dataIndex:'price',render:(price)=>'¥'+price //把price渲染进对应的行,并加上¥符号},{width:100,title:'商品状态',dataIndex:'status',render:(status)=>{return(<span>{/*【1】根据状态显示上下架*/}<Button type='primary'>{status===1 ? '下架' : '上架'}</Button><span>{status===1 ? '在售':'已下架'}</span></span>)}},{width:100,title:'操作',render:(proObj)=>{//proObj当前商品对象return(<span>{/*将product对象使用state传递给目标路由组件*/}<LinkButton onClick={()=>this.props.history.push('/product/detail',{proObj})}>详情</LinkButton><LinkButton>修改</LinkButton></span>)}},]}
3.调用更改状态函数
【1】注释掉
【2】传入当前的商品对象
【3】解构商品id和status
【4】把商品的状态2换1,1换2
【5】调用更新状态函数把当前商品id及要更新的状态传过去
//Table的列名及对应显示的内容渲染initColumns=()=>{this.columns=[{title:'商品名称',dataIndex:'name'},{title:'商品描述',dataIndex:'desc'},{title:'价格',dataIndex:'price',render:(price)=>'¥'+price //把price渲染进对应的行,并加上¥符号},{width:100,title:'商品状态',//dataIndex:'status',//【1】注释掉render:(proObj)=>{//【2】传入当前的商品对象const {_id,status}=proObj //【3】解构商品id和statusconst newStatus=status===1?2:1//【4】把商品的状态2换1,1换2return(<span><Button type='primary' /*【5】调用更新状态函数把当前商品id及要更新的状态传过去*/onClick={()=>this.updateStatus(_id,newStatus)}>{status===1 ? '下架' : '上架'}</Button><span>{status===1 ? '在售':'已下架'}</span></span>)}},{width:100,title:'操作',render:(proObj)=>{//proObj当前商品对象return(<span>{/*将product对象使用state传递给目标路由组件*/}<LinkButton onClick={()=>this.props.history.push('/product/detail',{proObj})}>详情</LinkButton><LinkButton>修改</LinkButton></span>)}},]}
4.更新状态函数
【6】更新商品上下架状态
【8】更新成功后重新获取正确的商品分页此时传入的页码来源于7步存入的页码
【7】保存pageNum, 让其它方法可以看到
//【6】更新商品上下架状态updateStatus = async (productId,status)=>{const result=await reqUpdateStatus(productId,status)if(result.status===0){message.success('商品上下架状态更新成功')//【8】更新成功后重新获取正确的商品分页此时传入的页码来源于7步存入的页码this.getProducts(this.pageNum)}}//请求产品列表放入state,后台分页getProducts=async(pageNum)=>{//pageNum为请求页码this.setState({loading:true}) //设置加载动画开始显示this.pageNum=pageNum //【7】保存pageNum, 让其它方法可以看到const {searchName,searchType}=this.state //let result //有两个result因此把result提出来定义if(searchName){//如果有搜索关键词就是关键词搜索,易错pageSize:PAGE_SIZEresult=await reqSearchProducts({pageNum,pageSize:PAGE_SIZE,searchType,searchName})}else{//否则就是一般搜索result = await reqProducts(pageNum,PAGE_SIZE) // 常量:每页显示产品条数,}this.setState({loading:false}) //关闭加载动画if(result.status===0){console.log(result.data)const {total,list}=result.data this.setState({total,products:list})}else{message.error('加载产品失败,请刷新页面重试')}}
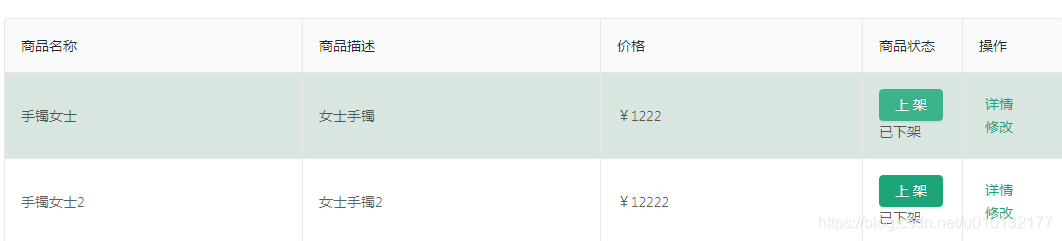
5.效果:点上下架按钮自动上下架,完成后跳转回对应页面,并显示新的上下架状态
五、完整代码
1.home.jsx
import React,{Component} from 'react'
import {Card,Select,Input,Table,Icon,Button,message
} from 'antd'
import LinkButton from '../../../components/link-button'
import {reqProducts,reqSearchProducts,reqUpdateStatus} from '../../../api/' //引入入api请求函数
import {PAGE_SIZE} from '../../../utils/constans' //引入常量每页显示产品条数PAGE_SIZE=3const Option=Select.Optionexport default class Home extends Component{state={//商品列表total:0,//商品总数products:[], loading:false,searchName:'', //搜索关键词searchType:'productName', //按什么搜索:名称/描述 productName/productDesc}//【6】更新商品上下架状态updateStatus = async (productId,status)=>{const result=await reqUpdateStatus(productId,status)if(result.status===0){message.success('商品上下架状态更新成功')//【8】更新成功后重新获取正确的商品分页此时传入的页码来源于7步存入的页码this.getProducts(this.pageNum)}}//Table的列名及对应显示的内容渲染initColumns=()=>{this.columns=[{title:'商品名称',dataIndex:'name'},{title:'商品描述',dataIndex:'desc'},{title:'价格',dataIndex:'price',render:(price)=>'¥'+price //把price渲染进对应的行,并加上¥符号},{width:100,title:'商品状态',//dataIndex:'status',//【1】注释掉render:(proObj)=>{//【2】传入当前的商品对象const {_id,status}=proObj //【3】解构商品id和statusconst newStatus=status===1?2:1//【4】把商品的状态2换1,1换2return(<span><Button type='primary' /*【5】调用更新状态函数把当前商品id及要更新的状态传过去*/onClick={()=>this.updateStatus(_id,newStatus)}>{status===1 ? '下架' : '上架'}</Button><span>{status===1 ? '在售':'已下架'}</span></span>)}},{width:100,title:'操作',render:(proObj)=>{//proObj当前商品对象return(<span>{/*将product对象使用state传递给目标路由组件*/}<LinkButton onClick={()=>this.props.history.push('/product/detail',{proObj})}>详情</LinkButton><LinkButton>修改</LinkButton></span>)}},]}//请求产品列表放入state,后台分页getProducts=async(pageNum)=>{//pageNum为请求页码this.setState({loading:true}) //设置加载动画开始显示this.pageNum=pageNum //【7】保存pageNum, 让其它方法可以看到const {searchName,searchType}=this.state  //let result //有两个result因此把result提出来定义if(searchName){//如果有搜索关键词就是关键词搜索,易错pageSize:PAGE_SIZEresult=await reqSearchProducts({pageNum,pageSize:PAGE_SIZE,searchType,searchName})}else{//否则就是一般搜索result = await reqProducts(pageNum,PAGE_SIZE) // 常量:每页显示产品条数,}this.setState({loading:false}) //关闭加载动画if(result.status===0){console.log(result.data)const {total,list}=result.data          this.setState({total,products:list})}else{message.error('加载产品失败,请刷新页面重试')}}componentWillMount(){//Table列名初始化函数调用,用于准备表格列名及显示内容this.initColumns()}//获取产品componentDidMount(){this.getProducts(1)       }render(){//state数据解构,简化使用const {products,loading,total,searchName,searchType}=this.state//card左侧内容const title=(<span><Select value={searchType} /**/style={{width:150,}} onChange={value=>this.setState({searchType:value})}/**/><Option value='productName'>按名称搜索</Option><Option value='productDesc'>按描述搜索</Option></Select><Input placeholder='关键字' style={{width:150,margin:'0 8px'}} value={searchName}/**/onChange={event=>this.setState({searchName:event.target.value})}/**//><Button type='primary'onClick={()=>this.getProducts(1)} //点击搜索对应产品>搜索</Button></span>)//card右侧内容const extra=(<Button type='primary' onClick={() => this.props.history.push('/product/add-update')}><Icon type='plus'/>添加商品</Button>)return(<Card title={title} extra={extra}><Table bordered rowKey='_id'dataSource={products}loading={loading}columns={this.columns}pagination={{/*分页配置*/current: this.pageNum,total,defaultPageSize: PAGE_SIZE,showQuickJumper: true,onChange: this.getProducts /*onchange是一回调函数,把pageNum传给getproducts,等于:(pageNum)=>{this.getProducts(pageNum)}*/}} /></Card>)}
}
api/index.js
import ajax from './ajax'
import jsonp from 'jsonp'
import {message} from 'antd' //借用antd返回信息组件
// const BASE = 'http://localhost:5000'
const BASE = ''//导出一个函数,第1种写法
//登录接口函数
// export function reqLogin(username,password){
//     return ajax('login',{username,password},'POST')
// }//导出一个函数,第2种写法
// 登录接口函数
export const reqLogin=(username,password)=>ajax(BASE+'login',{username,password},'POST')//获取产品一级/二级分类列表接口
export const reqCategorys=(parentId)=>ajax(BASE+'/manage/category/list',{parentId})
//添加产品分类接口
export const reqAddCategory=(parentId,categoryName)=>ajax(BASE+'/manage/category/add',{parentId,categoryName},'POST')
//修改产品分类接口
export const reqUpdateCategory=({categoryId,categoryName})=>ajax(BASE+'/manage/category/update',{categoryId,categoryName},'POST')
//根据分类Id获取一个分类
export const reqCategory = (categoryId) => ajax(BASE + '/manage/category/info', {categoryId})
//获取产品列表
export const reqProducts=(pageNum,pageSize)=>ajax(BASE+'/manage/product/list',{pageNum,pageSize})
//产品上下架
export const reqUpdateStatus=(productId,status)=>ajax(BASE+'/manage/product/updateStatus',{productId,status},'POST')/*搜索商品分页列表 (根据商品名称/商品描述)
searchType(搜索的类型): productName/productDesc*/
export const reqSearchProducts = ({pageNum, pageSize, searchName, searchType}) => ajax(BASE + '/manage/product/search', {pageNum,pageSize,[searchType]: searchName,})//添加商品/修改商品:二合一接口,如果参数存在._id则为修改商品,否则为添加商品
export const reqAddUpdatePro=(product)=>ajax(BASE+'/manage/product/'+(product._id?'update':'add'),product,'POST')// 删除服务器上指定名称图片
export const reqDeletPic=(name)=>ajax(BASE+'/manage/img/delete',{name},'POST')// 天气接口
export const reqWeather=(city) => {    const url = `http://api.map.baidu.com/telematics/v3/weather?location=${city}&output=json&ak=3p49MVra6urFRGOT9s8UBWr2`//返回一个promise函数return new Promise((resolve,reject) => {//发送一个jsonp请求jsonp(url,{},(err,data) => {//输出请求的数据到控制台console.log('jsonp()', err, data)//如果请求成功if(!err && data.status==='success'){//从数据中解构取出图片、天气const {dayPictureUrl,weather}=data.results[0].weather_data[0]//异步返回图片、天气给调用函数者resolve({dayPictureUrl,weather})}else{//如果请求失败message.error('天气信息获取失败')}})})
}
//reqWeather('上海')