文章目录
- 1 摘要
- 2 Apache POI
- 2.1 介绍
- 2.2 应用场景
- 2.3 入门案例
- 2.3.1 将数据写入Excel文件
- 2.3.1.1 导入POI maven坐标
- 2.3.1.2 代码开发
- 2.3.1.3 实现效果
- 2.3.2 读取Excel文件中的数据
- 2.3.3 实现效果
- 2.4 开发案例——导出运营数据Excel报表
- 2.4.1 产品原型
- 2.4.2 接口设计
- 2.4.3 代码实现
- 2.4.3.1 Controller层
- 2.4.3.2 Service层
- 2.4.3.3 Service层实现类
- 2.4.3.4 效果演示
1 摘要
文章主要自从POI的
介绍、应用场景、入门案例、开发案例入手POI入门学习。
2 Apache POI
2.1 介绍
Apache POI :处理Miscrosoft Office各种文件格式的开源项目,如:使用 POI 在 Java 程序中对Miscrosoft Office各种文件进行读写操作。
注:本文侧重于讲解POI 操作Excel文件
2.2 应用场景
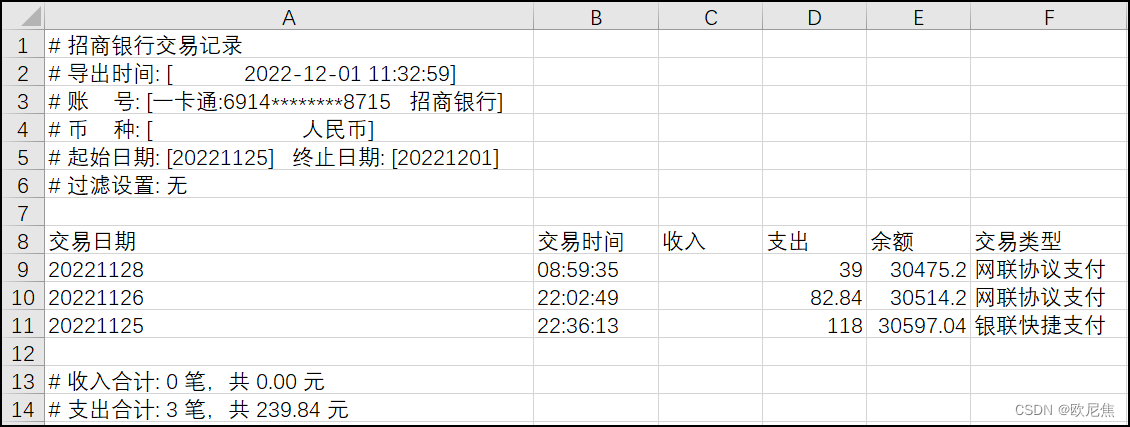
- 银行网银系统导出交易明细
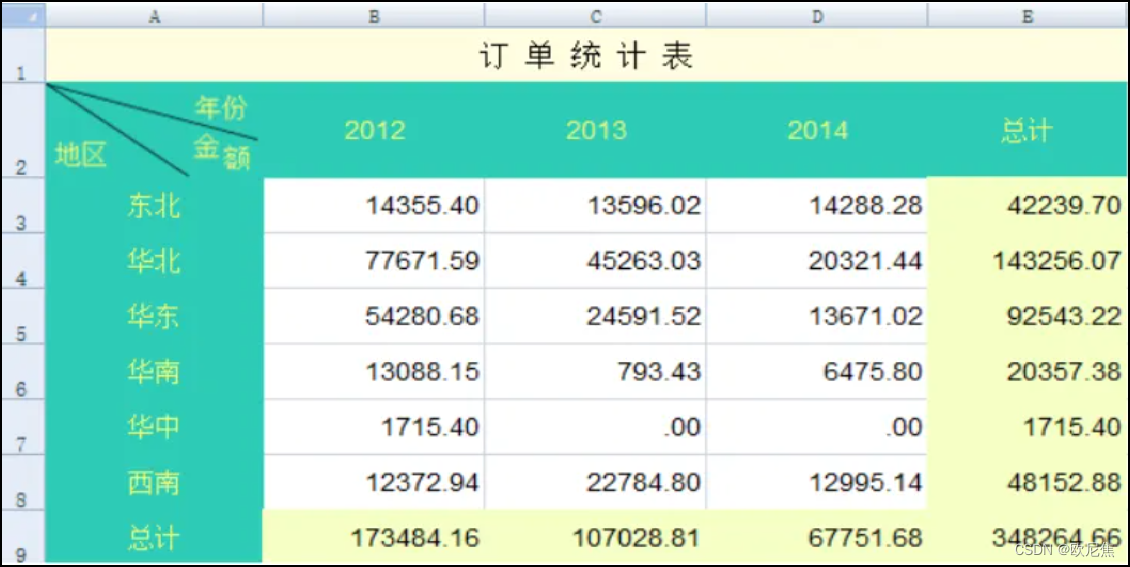
- 各种业务系统导出Excel报表
2.3 入门案例
2.3.1 将数据写入Excel文件
2.3.1.1 导入POI maven坐标
<dependency><groupId>org.apache.poi</groupId><artifactId>poi</artifactId><version>3.16</version>
</dependency>
<dependency><groupId>org.apache.poi</groupId><artifactId>poi-ooxml</artifactId><version>3.16</version>
</dependency>
2.3.1.2 代码开发
注意:Excel中每行下标均从下标0开始。
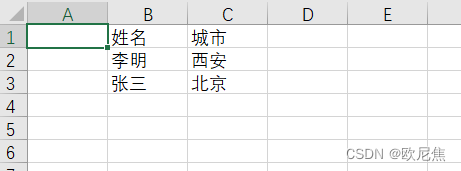
/*** 基于POI向Excel文件写入数据* @throws Exception*/public static void write() throws Exception{//在内存中创建一个Excel文件对象XSSFWorkbook excel = new XSSFWorkbook();//创建sheet页XSSFSheet sheet = excel.createSheet("exceltest");//在sheet页中创建行,下标0 开始 ,0表示第一行XSSFRow row1 = sheet.createRow(0);//创建单元格并在单元格中设置值,单元格编号也是从 下标0 开始row1.createCell(1).setCellValue("姓名");row1.createCell(2).setCellValue("城市");XSSFRow row2 = sheet.createRow(1);row2.createCell(1).setCellValue("李明");row2.createCell(2).setCellValue("西安");XSSFRow row3 = sheet.createRow(2);row3.createCell(1).setCellValue("张三");row3.createCell(2).setCellValue("北京");FileOutputStream out = new FileOutputStream(new File("D:\\workData\\POItest\\exceltest.xlsx"));//通过输入流将内存中的Excel文件写入到磁盘上excel.write(out);//关闭资源out.flush();out.close();excel.close();}public static void main(String[] args) throws Exception {write();System.out.println("==写入成功==");}
2.3.1.3 实现效果
2.3.2 读取Excel文件中的数据
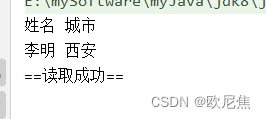
public static void read() throws Exception {FileInputStream in = new FileInputStream(new File("D:\\workData\\POItest\\exceltest.xlsx"));//通过输入流读取指定的Excel文件XSSFWorkbook excel = new XSSFWorkbook(in);//获取Excel文件中的第一个sheet页XSSFSheet sheet = excel.getSheetAt(0);//获取sheet页中的最后一行行号int lastRowNum = sheet.getLastRowNum();for (int i = 0; i < lastRowNum; i++) {//获取sheet页中的行XSSFRow titleRow = sheet.getRow(i);//获取行的第2个单元格XSSFCell cell1 = titleRow.getCell(1);//获取单元格中的文本内容String CellValue1 = cell1.getStringCellValue();//获取行的第三个单元格XSSFCell cell2 = titleRow.getCell(2);//获取单元格中文本内容String cellValue2 = cell2.getStringCellValue();System.out.println(CellValue1 + " " + cellValue2);in.close();excel.close();}}public static void main(String[] args) throws Exception {//write();//System.out.println("==写入成功==");read();System.out.println("==读取成功==");}
2.3.3 实现效果
2.4 开发案例——导出运营数据Excel报表
2.4.1 产品原型
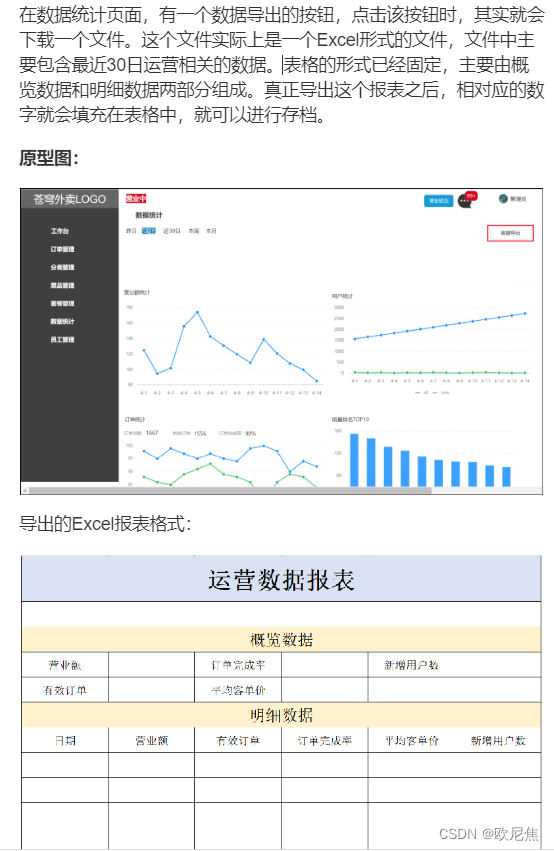
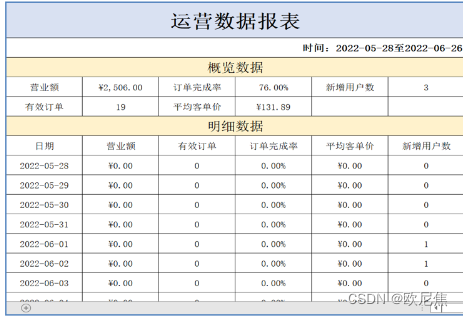
业务规则:
- 导出Excel形式的报表文件
- 导出最近30天的运营数据
2.4.2 接口设计
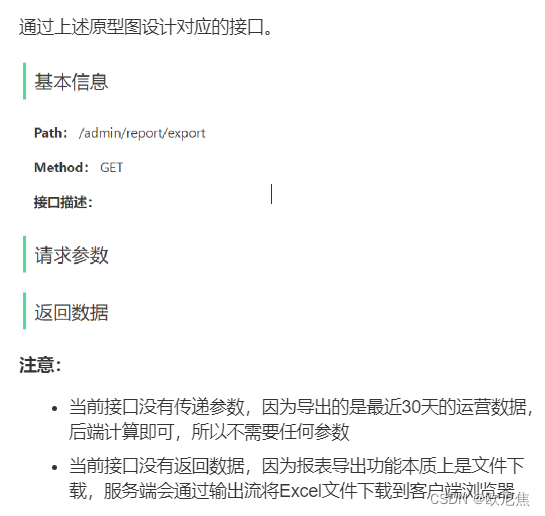
2.4.3 代码实现
- 设计Excel模板文件
- 查询近30天的运营数据
- 将查询到的运营数据写入模板文件
- 通过输出流将Excel文件下载到客户端浏览器
2.4.3.1 Controller层
/*** 导出Excel报表接口* @return*/@GetMapping("export")@ApiOperation("导出Excel报表接口")public void export(HttpServletResponse response){reportService.export(response);}
2.4.3.2 Service层
/*** 导出Excel报表接口*/void export(HttpServletResponse response);
2.4.3.3 Service层实现类
/*** 导出Excel报表接口*/@Overridepublic void export(HttpServletResponse response) {LocalDate begin = LocalDate.now().minusDays(30);LocalDate end = LocalDate.now().minusDays(1);//查询概览运营数据,提供给Excel模板文件BusinessDataVO businessData = workspaceService.getBusinessData(LocalDateTime.of(begin, LocalTime.MIN), LocalDateTime.of(end, LocalTime.MAX));InputStream inputStream = this.getClass().getClassLoader().getResourceAsStream("template\\运营数据报表模板.xlsx");try {//基于提供好的模板文件创建一个新的Excel表格对象XSSFWorkbook excel = new XSSFWorkbook(inputStream);//获得Excel文件中一个sheet页XSSFSheet sheet = excel.getSheet("Sheet1");sheet.getRow(1).getCell(1).setCellValue("时间:" + begin + "至" + end);//获得第4行XSSFRow row3 = sheet.getRow(3);row3.getCell(2).setCellValue(businessData.getTurnover());row3.getCell(4).setCellValue(businessData.getOrderCompletionRate());row3.getCell(6).setCellValue(businessData.getNewUsers());//获得第5行XSSFRow row5 = sheet.getRow(4);row5.getCell(2).setCellValue(businessData.getValidOrderCount());row5.getCell(4).setCellValue(businessData.getUnitPrice());for (int i = 0; i < 30; i++) {LocalDate date = begin.plusDays(i);//for循环遍历查询出来的 营业数据,如若不然只会有一样的重复数据//BusinessDataVO businessData2 = workspaceService.getBusinessData(LocalDateTime.of(begin,LocalTime.MIN),LocalDateTime.of(end,LocalTime.MAX));BusinessDataVO businessData2 = workspaceService.getBusinessData(LocalDateTime.of(date, LocalTime.MIN), LocalDateTime.of(date, LocalTime.MAX));//准备明细数据XSSFRow row = sheet.getRow(7 + i);row.getCell(1).setCellValue(date.toString());row.getCell(2).setCellValue(businessData2.getTurnover());row.getCell(3).setCellValue(businessData2.getValidOrderCount());row.getCell(4).setCellValue(businessData2.getOrderCompletionRate());row.getCell(5).setCellValue(businessData2.getUnitPrice());row.getCell(6).setCellValue(businessData2.getNewUsers());}//通过输出流将文件下载到客户端浏览器中ServletOutputStream out = response.getOutputStream();excel.write(out);//关闭资源out.flush();out.close();excel.close();} catch (Exception e) {e.printStackTrace();}}
2.4.3.4 效果演示
