VS2015+OpenCV3.0.0+CUDA10.0
- 环境:
- 第一步:安装显卡驱动:461.40-desktop-win10-64bit-international-nsd-dch-whql.exe
- 第二步:安装Visual Studio:2015
- 第三步:安装CUDA: cuda_10.0.130_411.31_win10
- 下载Cudnn: cudnn-10.0-windows10-x64-v7.6.1.34.zip
- 第四步:安装TBB:tbb2018_20171205oss
- 第五步:安装cmake: cmake-3.4.3-win32-x86.exe
- 第六步:下载OpenCV:opencv-3.0.0.exe
- OpenCV-contrib:opencv_contrib-3.0.0.tar.gz
- 第七步:cmake编译设置:
- 第八步: VS编译生成库文件(==进行编译前先阅读相关问题,少走弯路,减少编译时间==)
- 相关问题:
- 第九步:配置OpenCV环境
- 第十步:环境测试
环境:
操作系统:Windows 10
显卡:GeForce GTX1660 Ti
第一步:安装显卡驱动:461.40-desktop-win10-64bit-international-nsd-dch-whql.exe
下载地址: https://cn.download.nvidia.com/Windows/461.40/461.40-notebook-win10-64bit-international-nsd-dch-whql.exe
第二步:安装Visual Studio:2015
下载地址:https://jingyan.baidu.com/article/c45ad29c223421051753e23a.html
第三步:安装CUDA: cuda_10.0.130_411.31_win10
下载地址:https://developer.nvidia.com/cuda-10.0-download-archive
添加环境变量:
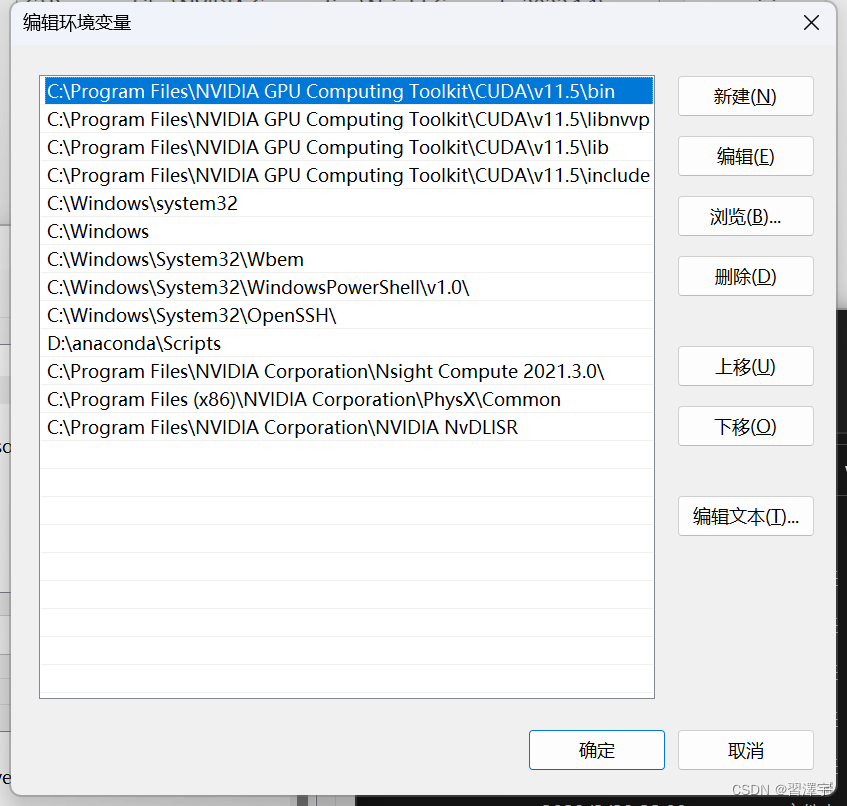
C:\Program Files\NVIDIA GPU Computing Toolkit\CUDA\v10.0\binC:\Program Files\NVIDIA GPU Computing Toolkit\CUDA\v10.0\libnvvpC:\Program Files\NVIDIA GPU Computing Toolkit\CUDA\v10.0\lib\x64C:\Program Files\NVIDIA GPU Computing Toolkit\CUDA\v10.0\extras\CUPTI\libx64
在cmd命令窗口中输入:nvcc -V,查看cuda是否安装成功:

下载Cudnn: cudnn-10.0-windows10-x64-v7.6.1.34.zip
下载地址:https://developer.nvidia.com/rdp/cudnn-download
解压cudnn压缩包,将Cudnn包中所带的文件放到Cuda目录(上面的CUDA_PATH的路径)下对应的文件夹即可
(cuda默认安装路径为C:\Program Files\NVIDIA GPU Computing Toolkit\CUDA\v10.0)
cuda测试:
cmd到C:\Program Files\NVIDIA GPU Computing Toolkit\CUDA\v10.0\extras\demo_suite目录下
执行bandwidthTest.exe

执行deviceQuery.exe

两次结果均为pass即为安装成功,记住显卡算力为7.5。
第四步:安装TBB:tbb2018_20171205oss
下载地址:https://github.com/oneapi-src/oneTBB/releases
解压好以后,添加环境变量:
D:\Program Files\tbb2018_20171205oss\bin\intel64\vc14
第五步:安装cmake: cmake-3.4.3-win32-x86.exe
下载地址:https://cmake.org/download/
添加环境变量:D:\Program Files (x86)\CMake\bin
改完之后重启一次
第六步:下载OpenCV:opencv-3.0.0.exe
下载地址:https://opencv.org/releases.html
下载后解压到D:\opencv300cuda
OpenCV-contrib:opencv_contrib-3.0.0.tar.gz
下载地址:https://github.com/opencv/opencv_contrib/releases
下载后解压到D:\opencv300cuda
第七步:cmake编译设置:
Configure后选择Visual Studio 14 2015 Win64


Cmake中红色的部分说明还没有更新,需要点击Configure更新,每次更改完一些配置或者参数之后都要点击Configure更新一下。最后Configure后没有输出红色信息后,确定配置无误再点Generate,生成项目文件。
第八步: VS编译生成库文件(进行编译前先阅读相关问题,少走弯路,减少编译时间)
打开D:\opencv300cuda\opencv\cudabuild100下的OpenCV.sln
编译,找到“ALL_BUILD”,右键->“生成”,然后开始漫长的等待……
编译输出没有错误,失败0个后,找到“CmakeTargets”下的“INSTALL”,右键->"仅用于项目“->“仅生成INSTALL”。
相关问题:
-
取消勾选BUILD_EXAMPLES、BUILD_PERF_TESTS、BUILD_TBB、WITH_MATLAB、BUILD_opencv_world、BUILD_opencv_face,减少编译时间
勾选WITH_CUDA、WITH_TBB -
特别注意,Cmake的版本一定要用3.4.3,不然会出现很多问题,比如报错:
无法打开输入文件“…\lib\Release\opencv_bioinspired300.lib”
-
“ALL_BUILD”前一定要先单独编译opencv_core、opencv_bioinspired、opencv_cudaarithm、opencv_cudabgsegm以及opencv_cudalegacy几个容易出错的项目试试,编译方法,在项目上 右键->生成。单独编译这几个项目没有报错后再进行“ALL_BUILD”。
-
编译过程中有个别几个项目生成失败,不必担心,可以到输出目录下的modules文件夹下找到生成失败的模块,打开对应的.sln解决方案,进行Build、Install。
-
用VS打开OpenCV.sln工程,编译生成Debug库时,VS报错:
无法打开文件\lib\Debug\opencv_bioinspired300d.lib
参考链接:https://blog.csdn.net/akadiao/article/details/78975786
解决方法:在VS中打开位于路径“……\ opencv_contrib-3.1.0\ modules\bioinspired\ src\ opencl ” 下的文件retina_kernel.cl:
把所有的注释的==//*****************************==删掉。然后重新使用cmake 配置生成。
- 编译opencv_cudalegacy项目时报错:
error C2061: 语法错误: 标识符“NppiGraphcutState”
参考链接:https://blog.csdn.net/hollisjoe/article/details/80063938
解决方案:找到…\sources\modules\cudalegacy\src目录下的graphcuts.cpp文件,将
#if !defined (HAVE_CUDA) || defined (CUDA_DISABLER)
改为
#if !defined (HAVE_CUDA) || defined (CUDA_DISABLER) || (CUDART_VERSION>= 8000)
- 编译VS项目时报错:
error C2382: “std::tuplecv::Size,perf:`anonymous-namespace’::MatDepth,perf::`anonymous-namespace’::MatCn::operator
=”: 重定义
解决办法:在cmake编译时取消勾选BUILD_PERF_TESTS。
- cmake编译时输出红色提示信息:
CMake Deprecation Warning at CMakeLists.txt:69 (cmake_policy): The
OLD behavior for policy CMP0022 will be removed from a future version
of CMake.The cmake-policies(7) manual explains that the OLD behaviors of all
policies are deprecated and that a policy should be set to OLD only
under specific short-term circumstances. Projects should be ported
to the NEW behavior and not rely on setting a policy to OLD.CMake Deprecation Warning at CMakeLists.txt:74 (cmake_policy): The
OLD behavior for policy CMP0026 will be removed from a future version
of CMake.The cmake-policies(7) manual explains that the OLD behaviors of all
policies are deprecated and that a policy should be set to OLD only
under specific short-term circumstances. Projects should be ported
to the NEW behavior and not rely on setting a policy to OLD.
cmake版本太高,将cmake版本换为3.4.3。
- cmake编译报错:
CMake Error: The following variables are used in this project, but
they are set to NOTFOUND. Please set them or make sure they are set
and tested correctly in the CMake files: CUDA_nppi_LIBRARY (ADVANCED)
参考链接:https://blog.csdn.net/u014613745/article/details/78310916#reply
解决方案如下:
1).找到FindCUDA.cmake文件,找到行
find_cuda_helper_libs(nppi)
改为
find_cuda_helper_libs(nppial)find_cuda_helper_libs(nppicc)find_cuda_helper_libs(nppicom)find_cuda_helper_libs(nppidei)find_cuda_helper_libs(nppif)find_cuda_helper_libs(nppig)find_cuda_helper_libs(nppim)find_cuda_helper_libs(nppist)find_cuda_helper_libs(nppisu)find_cuda_helper_libs(nppitc)
2).找到行
set(CUDA_npp_LIBRARY "${CUDA_nppc_LIBRARY};${CUDA_nppi_LIBRARY};${CUDA_npps_LIBRARY}")
改为
set(CUDA_npp_LIBRARY "${CUDA_nppc_LIBRARY};${CUDA_nppial_LIBRARY};${CUDA_nppicc_LIBRARY};${CUDA_nppicom_LIBRARY};${CUDA_nppidei_LIBRARY};${CUDA_nppif_LIBRARY};${CUDA_nppig_LIBRARY};${CUDA_nppim_LIBRARY};${CUDA_nppist_LIBRARY};${CUDA_nppisu_LIBRARY};${CUDA_nppitc_LIBRARY};${CUDA_npps_LIBRARY}")
3).找到行
unset(CUDA_nppi_LIBRARY CACHE)
改为
unset(CUDA_nppial_LIBRARY CACHE)
unset(CUDA_nppicc_LIBRARY CACHE)
unset(CUDA_nppicom_LIBRARY CACHE)
unset(CUDA_nppidei_LIBRARY CACHE)
unset(CUDA_nppif_LIBRARY CACHE)
unset(CUDA_nppig_LIBRARY CACHE)
unset(CUDA_nppim_LIBRARY CACHE)
unset(CUDA_nppist_LIBRARY CACHE)
unset(CUDA_nppisu_LIBRARY CACHE)
unset(CUDA_nppitc_LIBRARY CACHE)
4).找到文件 OpenCVDetectCUDA.cmake,修改以下几行
set(__cuda_arch_ptx "")if(CUDA_GENERATION STREQUAL "Fermi")set(__cuda_arch_bin "2.0")elseif(CUDA_GENERATION STREQUAL "Kepler")set(__cuda_arch_bin "3.0 3.5 3.7")
改为
set(__cuda_arch_ptx "")if(CUDA_GENERATION STREQUAL "Kepler")set(__cuda_arch_bin "3.0 3.5 3.7")elseif(CUDA_GENERATION STREQUAL "Maxwell")set(__cuda_arch_bin "5.0 5.2")
5).cuda9中有一个单独的halffloat(cuda_fp16.h)头文件,也应该被包括在opencv的目录里,将头文件cuda_fp16.h添加至 …\opencv\modules\cudev\include\opencv2\cudev\common.hpp
即在common.hpp中添加
#include <cuda_fp16.h>
重新生成即可
- cmake编译报错:
error MSB6006: “cmd.exe”已退出,代码为 1。
参考链接:https://blog.csdn.net/foso1994/article/details/96307491
解决办法:将cmake中CUDA_HOST_COMPILER设置为
D:\Program Files (x86)\Microsoft Visual Studio 14.0\VC\bin\cl.exe
- VS报错:
unsupported gpu architecture‘compute_20’
参考链接:https://blog.csdn.net/jialuo0238/article/details/88574113
解决办法:cmake中将CUDA_ARCH_BIN 和CUDA_ARCH_PTX对应的小于3的值全部删掉。
第九步:配置OpenCV环境
1.编译完成之后,在目标文件夹中多了一个install文件夹,里边就有配置OpenCV的Debug和Release版本需要的各种文件,可以将其拷贝至自定义目录下,我的拷贝路径为D:\opencv300cuda。
添加环境变量:D:\opencv300cuda\x64\vc14\bin,之后重启电脑。
2.VS新建项目,配置属性:
1)VC++目录->包含目录 添加:
D:\opencv300cuda\include
D:\opencv300cuda\include\opencv
D:\opencv300cuda\include\opencv2
2)VC++目录->库目录 添加:
D:\opencv300cuda\x64\vc14\lib
链接器->输入->附加依赖项 添加:
debug版本:
opencv_bgsegm300d.lib
opencv_bioinspired300d.lib
opencv_calib3d300d.lib
opencv_ccalib300d.lib
opencv_core300d.lib
opencv_cudaarithm300d.lib
opencv_cudabgsegm300d.lib
opencv_cudacodec300d.lib
opencv_cudafeatures2d300d.lib
opencv_cudafilters300d.lib
opencv_cudaimgproc300d.lib
opencv_cudalegacy300d.lib
opencv_cudaobjdetect300d.lib
opencv_cudaoptflow300d.lib
opencv_cudastereo300d.lib
opencv_cudawarping300d.lib
opencv_cudev300d.lib
opencv_features2d300d.lib
opencv_flann300d.lib
opencv_hal300d.lib
opencv_highgui300d.lib
opencv_imgcodecs300d.lib
opencv_imgproc300d.lib
opencv_latentsvm300d.lib
opencv_line_descriptor300d.lib
opencv_ml300d.lib
opencv_objdetect300d.lib
opencv_optflow300d.lib
opencv_photo300d.lib
opencv_reg300d.lib
opencv_rgbd300d.lib
opencv_saliency300d.lib
opencv_shape300d.lib
opencv_superres300d.lib
opencv_surface_matching300d.lib
opencv_text300d.lib
opencv_tracking300d.lib
opencv_ts300d.lib
opencv_video300d.lib
opencv_videoio300d.lib
opencv_videostab300d.lib
opencv_xfeatures2d300d.lib
opencv_ximgproc300d.lib
opencv_xobjdetect300d.lib
opencv_xphoto300d.lib
release版本:
opencv_bgsegm300.lib
opencv_bioinspired300.lib
opencv_calib3d300.lib
opencv_ccalib300.lib
opencv_core300.lib
opencv_cudaarithm300.lib
opencv_cudabgsegm300.lib
opencv_cudacodec300.lib
opencv_cudafeatures2d300.lib
opencv_cudafilters300.lib
opencv_cudaimgproc300.lib
opencv_cudalegacy300.lib
opencv_cudaobjdetect300.lib
opencv_cudaoptflow300.lib
opencv_cudastereo300.lib
opencv_cudawarping300.lib
opencv_cudev300.lib
opencv_features2d300.lib
opencv_flann300.lib
opencv_hal300.lib
opencv_highgui300.lib
opencv_imgcodecs300.lib
opencv_imgproc300.lib
opencv_latentsvm300.lib
opencv_line_descriptor300.lib
opencv_ml300.lib
opencv_objdetect300.lib
opencv_optflow300.lib
opencv_photo300.lib
opencv_reg300.lib
opencv_rgbd300.lib
opencv_saliency300.lib
opencv_shape300.lib
opencv_stitching300.lib
opencv_superres300.lib
opencv_surface_matching300.lib
opencv_text300.lib
opencv_tracking300.lib
opencv_ts300.lib
opencv_video300.lib
opencv_videoio300.lib
opencv_videostab300.lib
opencv_xfeatures2d300.lib
opencv_ximgproc300.lib
opencv_xobjdetect300.lib
opencv_xphoto300.lib
3.将D:\opencv300cuda\x64\vc14\bin下所有的.dll文件复制到C:\Windows\System32和C:\Windows\SysWOW64下。
第十步:环境测试
程序1(m1.cpp):
#include "opencv2/opencv.hpp"
//#include "opencv2/core.hpp"
//#include "opencv2/highgui.hpp"
//#include "opencv2/videoio.hpp"
//#include "opencv2/core/cuda.hpp"#include<opencv2/cudaarithm.hpp>
#include<opencv2/cudaoptflow.hpp>
#include<opencv2/cudaobjdetect.hpp>
#include<opencv2/cudawarping.hpp>
#include<opencv2/cudafilters.hpp>#include<opencv2/cudaimgproc.hpp>
#include "opencv2/cudabgsegm.hpp"#include<iostream>using namespace std;
using namespace cv;
using namespace cv::cuda;int main()
{/*int num_devices = cv::cuda::getCudaEnabledDeviceCount();if (num_devices <= 0) {cerr << "There is no device." << endl;return -1;}int enable_device_id = -1;for (int i = 0; i < num_devices; i++) {cv::cuda::DeviceInfo dev_info(i);if (dev_info.isCompatible()) {enable_device_id = i;}}if (enable_device_id < 0) {cerr << "GPU module isn't built for GPU" << endl;}cv::cuda::setDevice(enable_device_id);*/cuda::printCudaDeviceInfo(cuda::getDevice());int count = cuda::getCudaEnabledDeviceCount();printf("GPU Device Number:%d\n", count);printf("**************************************************\n");/*-------------------------以下四种验证方式任意选取一种即可-------------------------*///获取显卡简单信息cuda::printShortCudaDeviceInfo(cuda::getDevice());  //有显卡信息表示GPU模块配置成功cuda::printCudaDeviceInfo(cuda::getDevice());  //有显卡信息表示GPU模块配置成功int Device_Num = cuda::getCudaEnabledDeviceCount();//获取显卡设备数量cout << Device_Num << endl;  //返回值大于0表示GPU模块配置成功cuda::DeviceInfo Device_State;//获取显卡设备状态bool Device_OK = Device_State.isCompatible();cout << "Device_State: " << Device_OK << endl;  //返回值大于0表示GPU模块配置成功waitKey();return 0;
}
***** VIDEOINPUT LIBRARY - 0.1995 - TFW07 ******** CUDA Device Query (Runtime API) version (CUDART static linking) ***Device count: 1Device 0: "GeForce GTX 1660 Ti"CUDA Driver Version / Runtime Version          11.20 / 10.0CUDA Capability Major/Minor version number:    7.5Total amount of global memory:                 6144 MBytes (6442450944 bytes)GPU Clock Speed:                               1.59 GHzMax Texture Dimension Size (x,y,z)             1D=(131072), 2D=(131072,65536), 3D=(16384,16384,16384)Max Layered Texture Size (dim) x layers        1D=(32768) x 2048, 2D=(32768,32768) x 2048Total amount of constant memory:               65536 bytesTotal amount of shared memory per block:       49152 bytesTotal number of registers available per block: 65536Warp size:                                     32Maximum number of threads per block:           1024Maximum sizes of each dimension of a block:    1024 x 1024 x 64Maximum sizes of each dimension of a grid:     2147483647 x 65535 x 65535Maximum memory pitch:                          2147483647 bytesTexture alignment:                             512 bytesConcurrent copy and execution:                 Yes with 6 copy engine(s)Run time limit on kernels:                     YesIntegrated GPU sharing Host Memory:            NoSupport host page-locked memory mapping:       YesConcurrent kernel execution:                   YesAlignment requirement for Surfaces:            YesDevice has ECC support enabled:                NoDevice is using TCC driver mode:               NoDevice supports Unified Addressing (UVA):      YesDevice PCI Bus ID / PCI location ID:           1 / 0Compute Mode:Default (multiple host threads can use ::cudaSetDevice() with device simultaneously)deviceQuery, CUDA Driver = CUDART, CUDA Driver Version  = 11.20, CUDA Runtime Version = 10.0, NumDevs = 1GPU Device Number:1
**************************************************
Device 0:  "GeForce GTX 1660 Ti"  6144Mb, sm_75, Driver/Runtime ver.11.20/10.0
*** CUDA Device Query (Runtime API) version (CUDART static linking) ***Device count: 1Device 0: "GeForce GTX 1660 Ti"CUDA Driver Version / Runtime Version          11.20 / 10.0CUDA Capability Major/Minor version number:    7.5Total amount of global memory:                 6144 MBytes (6442450944 bytes)GPU Clock Speed:                               1.59 GHzMax Texture Dimension Size (x,y,z)             1D=(131072), 2D=(131072,65536), 3D=(16384,16384,16384)Max Layered Texture Size (dim) x layers        1D=(32768) x 2048, 2D=(32768,32768) x 2048Total amount of constant memory:               65536 bytesTotal amount of shared memory per block:       49152 bytesTotal number of registers available per block: 65536Warp size:                                     32Maximum number of threads per block:           1024Maximum sizes of each dimension of a block:    1024 x 1024 x 64Maximum sizes of each dimension of a grid:     2147483647 x 65535 x 65535Maximum memory pitch:                          2147483647 bytesTexture alignment:                             512 bytesConcurrent copy and execution:                 Yes with 6 copy engine(s)Run time limit on kernels:                     YesIntegrated GPU sharing Host Memory:            NoSupport host page-locked memory mapping:       YesConcurrent kernel execution:                   YesAlignment requirement for Surfaces:            YesDevice has ECC support enabled:                NoDevice is using TCC driver mode:               NoDevice supports Unified Addressing (UVA):      YesDevice PCI Bus ID / PCI location ID:           1 / 0Compute Mode:Default (multiple host threads can use ::cudaSetDevice() with device simultaneously)deviceQuery, CUDA Driver = CUDART, CUDA Driver Version  = 11.20, CUDA Runtime Version = 10.0, NumDevs = 11
Device_State: 1
程序2(m2.cpp):
#include "opencv2/opencv.hpp"
//#include "opencv2/core.hpp"
//#include "opencv2/highgui.hpp"
//#include "opencv2/videoio.hpp"
//#include "opencv2/core/cuda.hpp"#include<opencv2/cudaarithm.hpp>
#include<opencv2/cudaoptflow.hpp>
#include<opencv2/cudaobjdetect.hpp>
#include<opencv2/cudawarping.hpp>
#include<opencv2/cudafilters.hpp>#include<opencv2/cudaimgproc.hpp>
#include "opencv2/cudabgsegm.hpp"#include<iostream>using namespace std;
using namespace cv;
using namespace cv::cuda;int main()
{Mat src_image = imread("E:/finished202102/picture/test.png");imshow("image", src_image);Mat dst_image, dst_imge1;vector<Mat> channels;//定义存储的容器split(src_image, channels);Mat src_image0 = channels[0];//b通道的图像cuda::GpuMat d_src_img(src_image);//upload src image to gpucuda::GpuMat d_dst_img, d_src_img00;cuda::cvtColor(d_src_img, d_dst_img, CV_BGR2GRAY);d_dst_img.download(dst_image);cuda::GpuMat d_src_img0(src_image0);cuda::equalizeHist(d_src_img0, d_src_img00);Mat hist_image;d_src_img00.download(hist_image);imshow("gray", dst_image);imshow("hist", hist_image);waitKey();return 0;
}

程序3(m3.cpp):
#include <iostream>#include "opencv2/opencv_modules.hpp"
#include "opencv2/core.hpp"
#include "opencv2/features2d.hpp"
#include "opencv2/highgui.hpp"
#include "opencv2/cudafeatures2d.hpp"
#include "opencv2/xfeatures2d/cuda.hpp"#include "opencv2/opencv.hpp"
#include "opencv2/core.hpp"
#include "opencv2/highgui.hpp"
#include "opencv2/videoio.hpp"
#include "opencv2/core/cuda.hpp"
#include<opencv2/cudaarithm.hpp>
#include<opencv2/cudaoptflow.hpp>
#include<cudaobjdetect.hpp>
#include<opencv2/cudawarping.hpp>
#include<opencv2/cudafilters.hpp>#include<opencv2/cudaimgproc.hpp>
#include "opencv2/cudabgsegm.hpp"using namespace std;
using namespace cv;
using namespace cv::cuda;int main()
{cuda::printShortCudaDeviceInfo(cuda::getDevice());GpuMat img1, img2;img1.upload(imread("1.jpg", IMREAD_GRAYSCALE));img2.upload(imread("2.jpg", IMREAD_GRAYSCALE));SURF_CUDA surf;// detecting keypoints & computing descriptorsGpuMat keypoints1GPU, keypoints2GPU;GpuMat descriptors1GPU, descriptors2GPU;surf(img1, GpuMat(), keypoints1GPU, descriptors1GPU);surf(img2, GpuMat(), keypoints2GPU, descriptors2GPU);cout << "FOUND " << keypoints1GPU.cols << " keypoints on first image" << endl;cout << "FOUND " << keypoints2GPU.cols << " keypoints on second image" << endl;// matching descriptorsPtr<cuda::DescriptorMatcher> matcher = cuda::DescriptorMatcher::createBFMatcher(surf.defaultNorm());vector<DMatch> matches;matcher->match(descriptors1GPU, descriptors2GPU, matches);// downloading resultsvector<KeyPoint> keypoints1, keypoints2;vector<float> descriptors1, descriptors2;surf.downloadKeypoints(keypoints1GPU, keypoints1);surf.downloadKeypoints(keypoints2GPU, keypoints2);surf.downloadDescriptors(descriptors1GPU, descriptors1);surf.downloadDescriptors(descriptors2GPU, descriptors2);// drawing the resultsMat img_matches;drawMatches(Mat(img1), keypoints1, Mat(img2), keypoints2, matches, img_matches);namedWindow("matches", 0);imshow("matches", img_matches);waitKey(0);return 0;
}

***** VIDEOINPUT LIBRARY - 0.1995 - TFW07 *****Device 0:  "GeForce GTX 1660 Ti"  6144Mb, sm_75, Driver/Runtime ver.11.20/10.0
FOUND 643 keypoints on first image
FOUND 1161 keypoints on second image
参考链接:
WIN10 + OpenCV3.4 + CUDA8.0 + Cmake3.9.0 + TBB + VS2015配置/重编译:
https://blog.csdn.net/gggttt222/article/details/79482033
Win10 下Cmake编译配置 Opencv3.1 + Cuda7.5 + VS2013:
https://www.cnblogs.com/asmer-stone/p/5530868.html


