文章目录
- 一、harbor简介
- 二、harbor的功能
- 三、Docker compose
- 四、harbor部署
- 4.1 关闭防火墙和 selinux
- 4.2 下载 harbor包
- 4.3 配置加速器
- 4.4 安装 harbor
- 4.5 harbor网页操作
- 五、harbor开机自启
一、harbor简介
云原生技术的兴起为企业数字化转型带来新的可能。作为云原生的要素之一,带来更为轻量级虚拟化的容器技术具有举足轻重的推动作用。其实很早之前,容器技术已经有所应用,而 Docker 的出现和兴起彻底带火了容器。其关键因素是 Docker 提供了使用容器的完整工具链,使得容器的上手和使用变得非常简单。工具链中的一个关键,就是定义了新的软件打包格式-容器镜像。镜像包含了软件运行所需要的包含基础 OS 在内的所有依赖,推送至运行时可直接启动。从镜像构建环境到运行环境,镜像的快速分发成为硬需求。同时,大量构建以及依赖的镜像的出现,也给镜像的维护管理带来挑战。镜像仓库的出现成为必然。
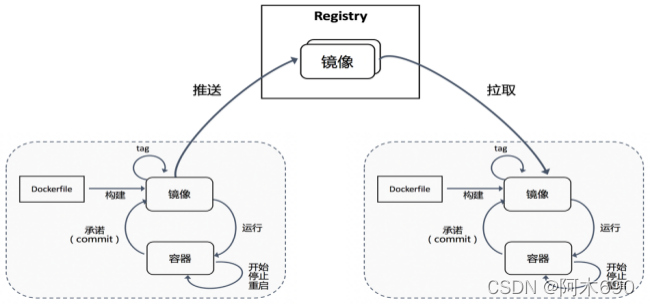
镜像构建之后可以推送至仓库储存和管理,运行时环境在有应用运行需求时,从仓库拉取特定的应用镜像来运行。镜像仓库作为镜像的分发媒介,可以实现特定的管理和访问控制机制。仓库作为镜像传输流动的主要媒介,成为云原生应用平台运转的核心要件。Docker 开源了其 registry 实现, 目前已经成为 CNCF 的沙箱项目Distribution。不过,Distribution 项目仅仅实现了对镜像存储的支持,对企业级的一些管理诉求并无法提供支持。
为了实现企业级镜像仓库的支持,Harbor 项目应运而生
Harbor Registry(又称 Harbor 云原生制品仓库或 Harbor 镜像仓库)由 VMware 公司中国研发中心云原生实验室原创,并于 2016 年 3 月开源。Harbor 在 Docker Distribution的基础上增加了企业用户必需的权限控制、镜像签名、安全漏洞扫描和远程复制等重要功能,还提供了图形管理界面及面向国内用户的中文支持,开源后迅速在中国开发者和用户社区流行,成为中国云原生用户的主流容器镜像仓库。

Harbor是由VMWare在Docker Registry的基础之上进行了二次封装,加进去了很多额外程序,而且提供了一个非常漂亮的web界面。
- Project Harbor 是一个开源的受信任的云原生注册表项目,用于存储、签名和扫描上下文。
- Harbor 通过添加用户通常需要的功能(如安全性、身份和管理)来扩展开源 Docker 发行版。
- Harbor 支持用户管理、访问控制、活动监控、实例间复制等高级功能。
二、harbor的功能
Feathers
- 多租户内容签名和验证
- 安全性和漏洞分析
- 审核日志记录
- 身份集成和基于角色的访问控制
- 实例之间的映像复制
- 可扩展的 API 和图形用户界面
- 国际化(目前为中英文)
三、Docker compose
Harbor在物理机上部署是非常难的,而为了简化Harbor的应用,Harbor官方直接把Harbor做成了在容器中运行的应用,而且这个容器在Harbor中依赖类似redis、mysql、pgsql等很多存储系统,所以它需要编排很多容器协同起来工作,因此VMWare Harbor在部署和使用时,需要借助于Docker的单机编排工具( Docker compose)来实现。
Compose 是一个用于定义和运行多容器 Docker 应用程序的工具。使用 Compose,您可以使用 YAML 文件来配置应用程序的服务。然后,使用单个命令,从配置创建并启动所有服务。
Docker Compose官方文档
Docker-Compose下载地址
// 配置网络源
[root@localhost ~]# curl -o /etc/yum.repos.d/CentOS-Base.repo https://mirrors.aliyun.com/repo/Centos-8.repo// 安装docker-compose需要先安装docker-ce
[root@localhost ~]# cd /etc/yum.repos.d/// docker-ce源
[root@localhost yum.repos.d]# curl -o docker-ce.repo https://mirrors.tuna.tsinghua.edu.cn/docker-ce/linux/centos/docker-ce.repo[root@localhost yum.repos.d]# sed -i 's@https://download.docker.com@https://mirrors.tuna.tsinghua.edu.cn/docker-ce@g' docker-ce.repo[root@localhost yum.repos.d]# yum -y install docker-ce// 启动docker[root@localhost yum.repos.d]# yum clean all
Failed to set locale, defaulting to C.UTF-8
28 files removed// 启动服务
[root@localhost ~]# systemctl enable --now docker
Created symlink /etc/systemd/system/multi-user.target.wants/docker.service → /usr/lib/systemd/system/docker.service.
[root@localhost ~]# ls /etc/docker/
key.json// centos8 是没有docker-compose这个包的
[root@localhost ~]# yum list all | grep docker
Failed to set locale, defaulting to C.UTF-8
podman-docker.noarch                                   1:3.4.1-3.module_el8.6.0+954+963caf36                     @appstream
containerd.io.x86_64                                   1.4.12-3.1.el8                                            docker-ce-stable
docker-ce.x86_64                                       3:20.10.12-3.el8                                          docker-ce-stable
docker-ce-cli.x86_64                                   1:20.10.12-3.el8                                          docker-ce-stable
docker-ce-rootless-extras.x86_64                       20.10.12-3.el8                                            docker-ce-stable
docker-scan-plugin.x86_64                              0.12.0-3.el8                                              docker-ce-stable
pcp-pmda-docker.x86_64                                 5.3.5-2.el8                                               appstream       // 下载docker-compose包
[root@localhost ~]# curl -L "https://github.com/docker/compose/releases/download/1.29.2/docker-compose-$(uname -s)-$(uname -m)" -o /usr/local/bin/docker-compose[root@localhost bin]# cd /usr/local/bin/
[root@localhost bin]# ls
docker-compose// 给权限,查看版本
[root@localhost bin]# chmod +x docker-compose
[root@localhost bin]# docker-compose --version
docker-compose version 1.29.2, build 5becea4c// 做软链接
[root@localhost ~]# ln -s /usr/local/bin/docker-compose /usr/bin/docker-compose
四、harbor部署
Harbor官方文档
Harbor下载地址
4.1 关闭防火墙和 selinux
[root@localhost harbor]# systemctl disable --now firewalld
Removed /etc/systemd/system/multi-user.target.wants/firewalld.service.
Removed /etc/systemd/system/dbus-org.fedoraproject.FirewallD1.service.
[root@localhost harbor]# systemctl stop --now firewalld[root@localhost harbor]# cat /etc/selinux/config
SELINUX=disabled	// 修改这一行// 修改完之后重启
[root@localhost harbor]# reboot
[root@localhost harbor]# setenforce 0
setenforce: SELinux is disabled
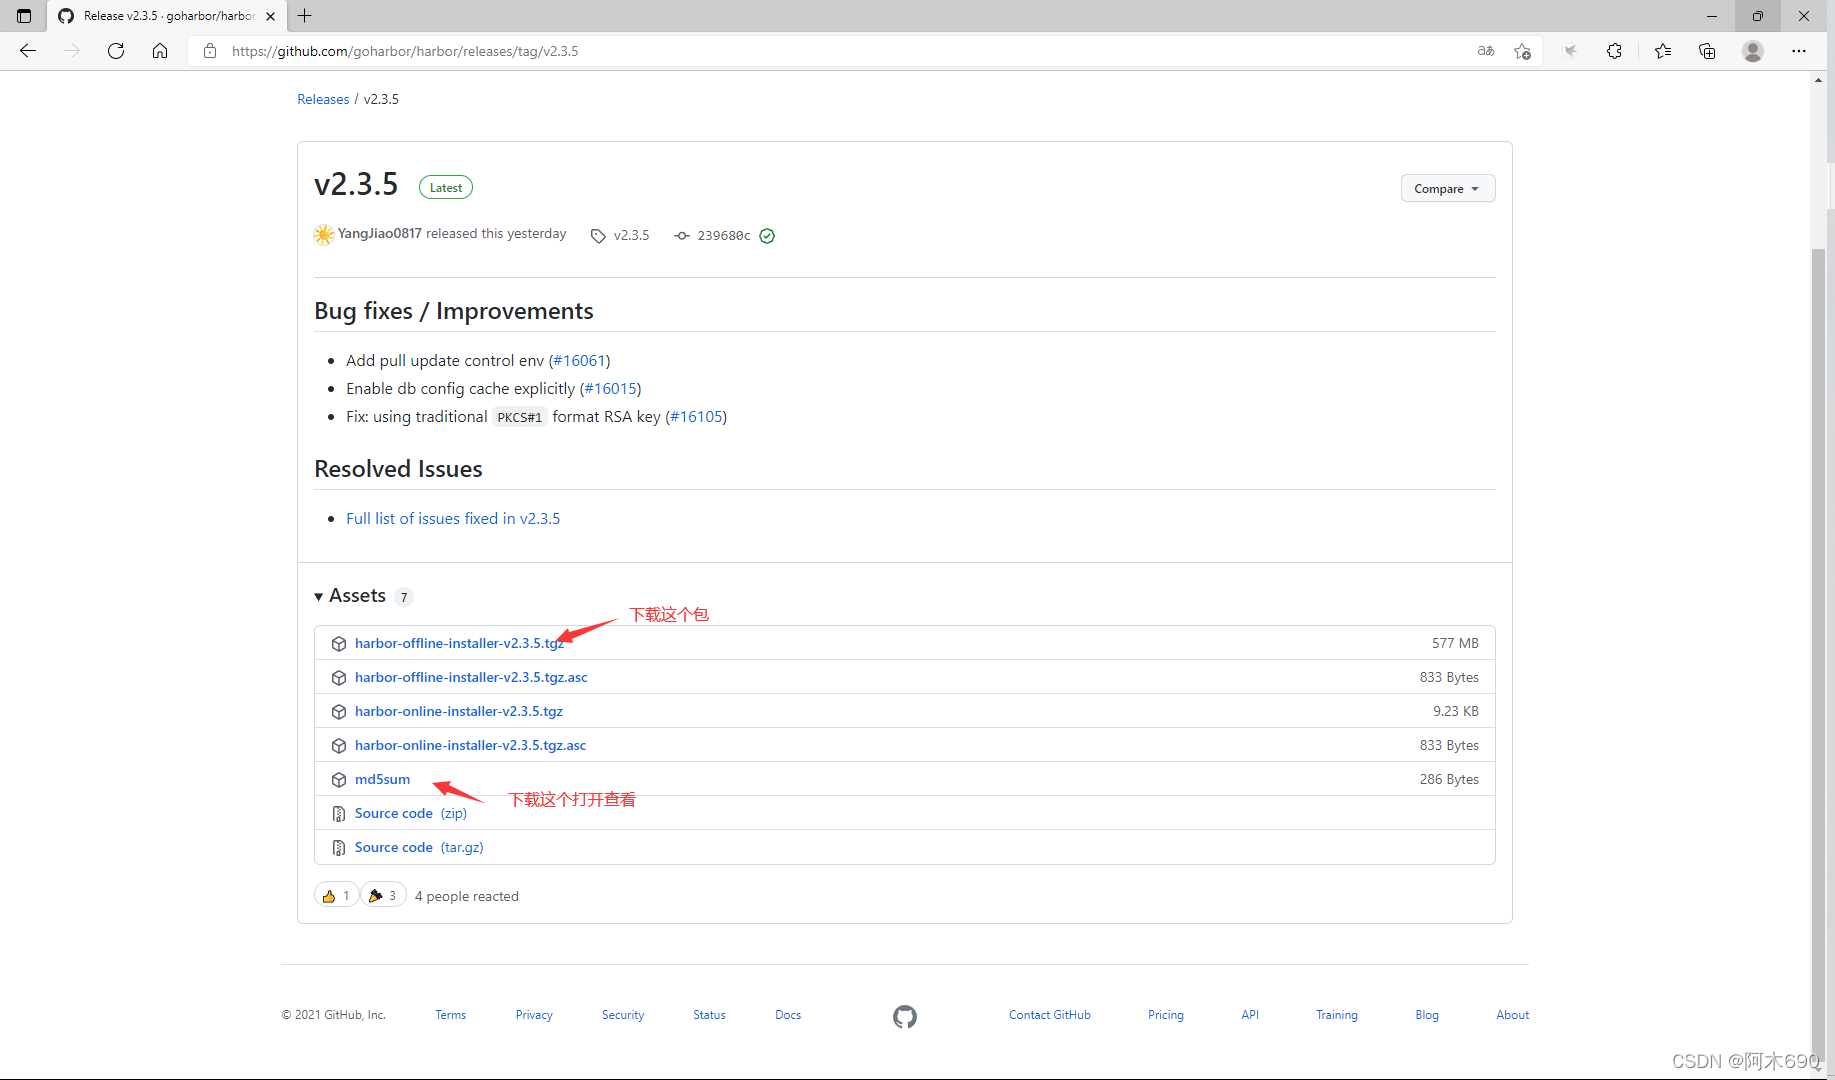
4.2 下载 harbor包
// 上传下载好的harbor包.
[root@localhost ~]# ls
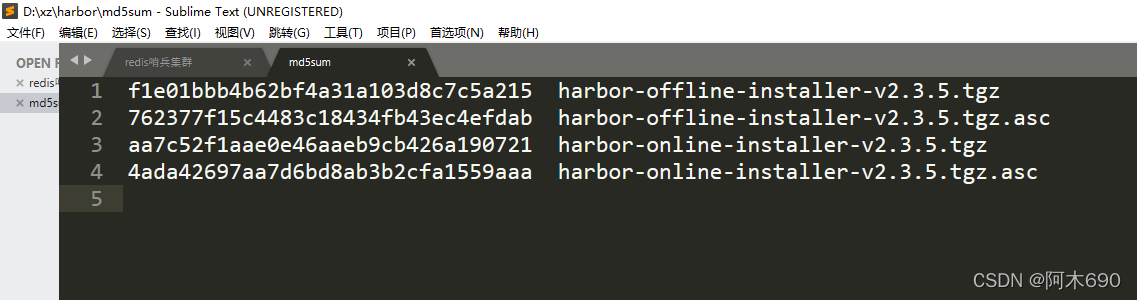
amu anaconda-ks.cfg harbor-offline-installer-v2.3.5.tgz// 查看 md5sum值是否和官网的 md5sum文件里面的值一样
[root@localhost ~]# md5sum harbor-offline-installer-v2.3.5.tgz
f1e01bbb4b62bf4a31a103d8c7c5a215 harbor-offline-installer-v2.3.5.tgz
4.3 配置加速器
加速器获取
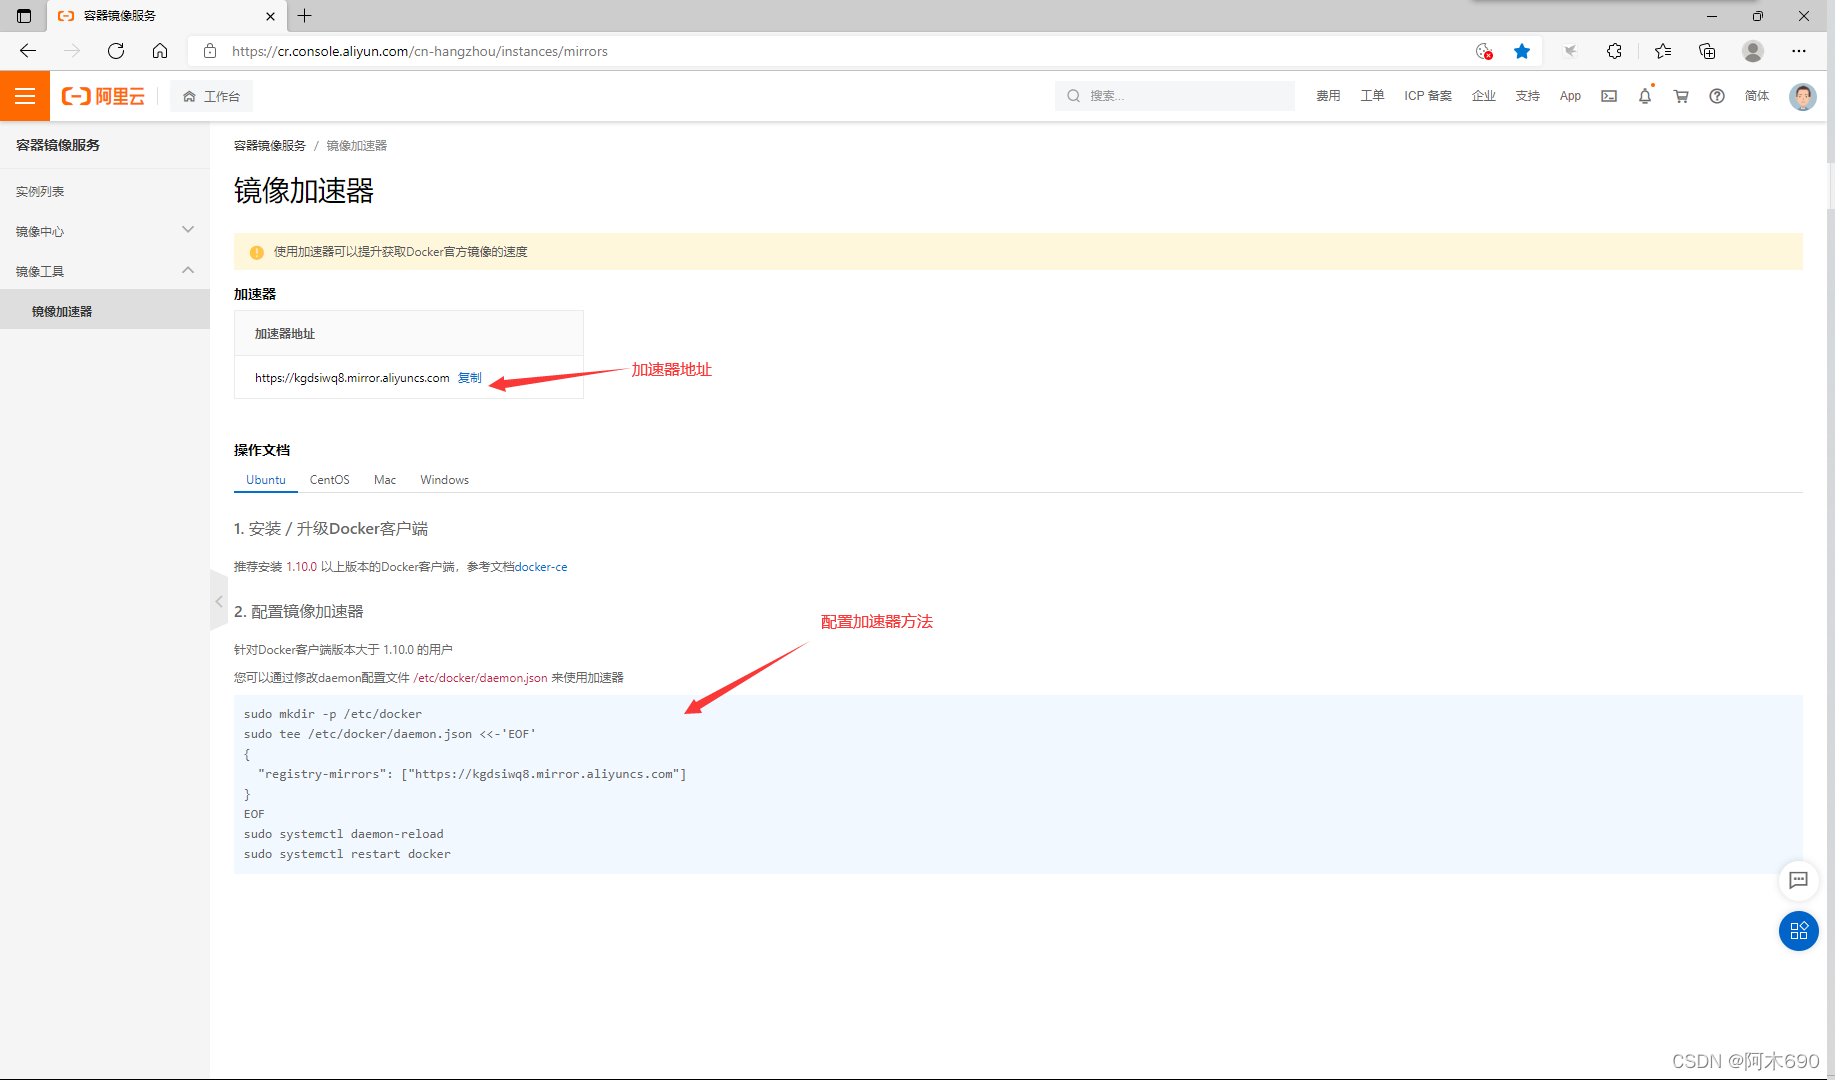
[root@localhost ~]# vim /etc/docker/daemon.json
{"registry-mirrors": ["https://kgdsiwq8.mirror.aliyuncs.com"]
}// 重新加载docker服务
[root@localhost ~]# systemctl daemon-reload
[root@localhost ~]# systemctl restart docker// 查看加速器配置情况
[root@localhost ~]# docker info
......以上省略Experimental: falseInsecure Registries:127.0.0.0/8Registry Mirrors:https://kgdsiwq8.mirror.aliyuncs.com/		// 加速器配置成功Live Restore Enabled: false
4.4 安装 harbor
// 解压 harbor包到 /usr/local/ 目录下
[root@localhost ~]# tar xf harbor-offline-installer-v2.3.5.tgz -C /usr/local/[root@localhost ~]# cd /usr/local/
[root@localhost local]# ls
bin  games   include  lib64    sbin   src
etc  harbor  lib      libexec  share[root@localhost local]# cd harbor/
[root@localhost harbor]# ls
LICENSE    harbor.v2.3.5.tar.gz  install.sh
common.sh  harbor.yml.tmpl       prepare// 设置主机名
[root@localhost harbor]# hostnamectl set-hostname node1.example.com
[root@localhost harbor]# bash
[root@node1 harbor]# hostname
node1.example.com[root@node1 harbor]# cp harbor.yml.tmpl harbor.yml
[root@node1 harbor]# vim harbor.yml
# DO NOT use localhost or 127.0.0.1, because Harbor needs to be accessed by external clients.
hostname: node1.example.com	// 添加主机名# https related config
#https:						// 注释掉证书,不使用证书就需要注释# https port for harbor, default is 443# port: 443				// 注释# The path of cert and key files for nginx# certificate: /your/certificate/path		// 注释# private_key: /your/private/key/path		// 注释harbor_admin_password: Harbor12345			// 默认的登录密码// 以上这些需要修改,其余保持默认// 添加主机映射
[root@localhost harbor]# vim /etc/hosts
127.0.0.1   localhost localhost.localdomain localhost4 localhost4.localdomain4
::1         localhost localhost.localdomain localhost6 localhost6.localdomain6
192.168.91.137 node1.example.com// 测试能否ping通 node1.example.com 主机
[root@localhost harbor]# ping node1.example.com
PING node1.example.com (192.168.91.137) 56(84) bytes of data.
64 bytes from node1.example.com (192.168.91.137): icmp_seq=1 ttl=64 time=0.044 ms
64 bytes from node1.example.com (192.168.91.137): icmp_seq=2 ttl=64 time=0.033 ms// 启动脚本进行安装
[root@localhost harbor]# ./install.sh[Step 0]: checking if docker is installed ...Note: docker version: 20.10.12[Step 1]: checking docker-compose is installed ...Note: docker-compose version: 1.29.2[Step 2]: loading Harbor images ...
......安装过程省略
✔ ----Harbor has been installed and started successfully.----// 安装完成会自动启动很多容器
[root@node1 harbor]# docker ps
CONTAINER ID   IMAGE                                COMMAND                  CREATED         STATUS                            PORTS                                   NAMES
3daa18aedde3   goharbor/harbor-jobservice:v2.3.5    "/harbor/entrypoint.…"   5 seconds ago   Up 4 seconds (health: starting)                                           harbor-jobservice
67cda2a01e08   goharbor/nginx-photon:v2.3.5         "nginx -g 'daemon of…"   5 seconds ago   Up 4 seconds (health: starting)   0.0.0.0:80->8080/tcp, :::80->8080/tcp   nginx
388f512bcfe1   goharbor/harbor-core:v2.3.5          "/harbor/entrypoint.…"   6 seconds ago   Up 4 seconds (health: starting)                                           harbor-core
b4e7fefa599e   goharbor/harbor-db:v2.3.5            "/docker-entrypoint.…"   7 seconds ago   Up 5 seconds (health: starting)                                           harbor-db
9201662bba92   goharbor/redis-photon:v2.3.5         "redis-server /etc/r…"   7 seconds ago   Up 5 seconds (health: starting)                                           redis
42368cf0e78b   goharbor/registry-photon:v2.3.5      "/home/harbor/entryp…"   7 seconds ago   Up 5 seconds (health: starting)                                           registry
ed564a1e593b   goharbor/harbor-registryctl:v2.3.5   "/home/harbor/start.…"   7 seconds ago   Up 5 seconds (health: starting)                                           registryctl
daa189f31bc3   goharbor/harbor-portal:v2.3.5        "nginx -g 'daemon of…"   7 seconds ago   Up 5 seconds (health: starting)                                           harbor-portal
8ac96968e301   goharbor/harbor-log:v2.3.5           "/bin/sh -c /usr/loc…"   7 seconds ago   Up 6 seconds (health: starting)   127.0.0.1:1514->10514/tcp               harbor-log// 安装完成之后会多两个文件,一个common,一个docker-compose.yml
[root@localhost harbor]# ls /usr/local/harbor/
LICENSE    docker-compose.yml    harbor.yml.tmpl
common     harbor.v2.3.5.tar.gz  install.sh
common.sh  harbor.yml            prepare[root@node1 harbor]# ss -antl
State  Recv-Q Send-Q Local Address:Port   Peer Address:Port Process
LISTEN 0      128          0.0.0.0:22          0.0.0.0:*
LISTEN 0      128        127.0.0.1:1514        0.0.0.0:*
LISTEN 0      128          0.0.0.0:80          0.0.0.0:*
LISTEN 0      128             [::]:22             [::]:*
LISTEN 0      128             [::]:80             [::]:*
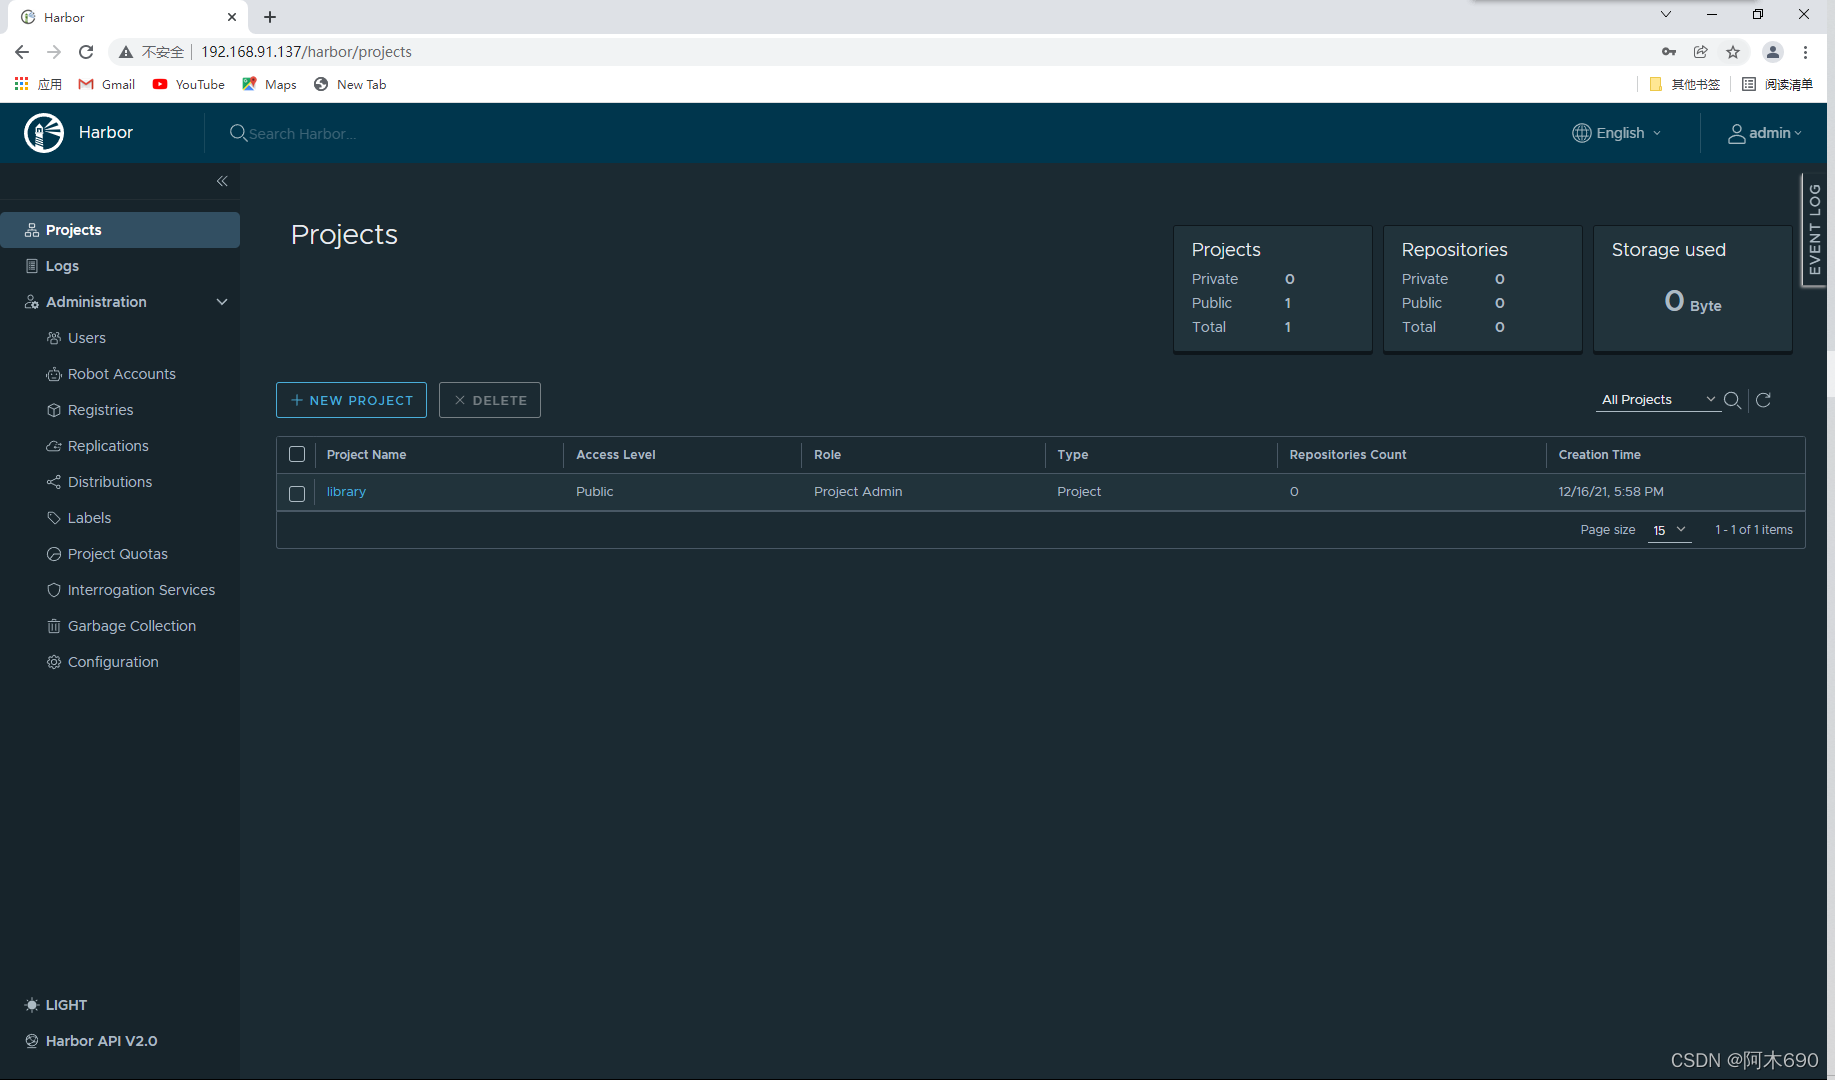
4.5 harbor网页操作
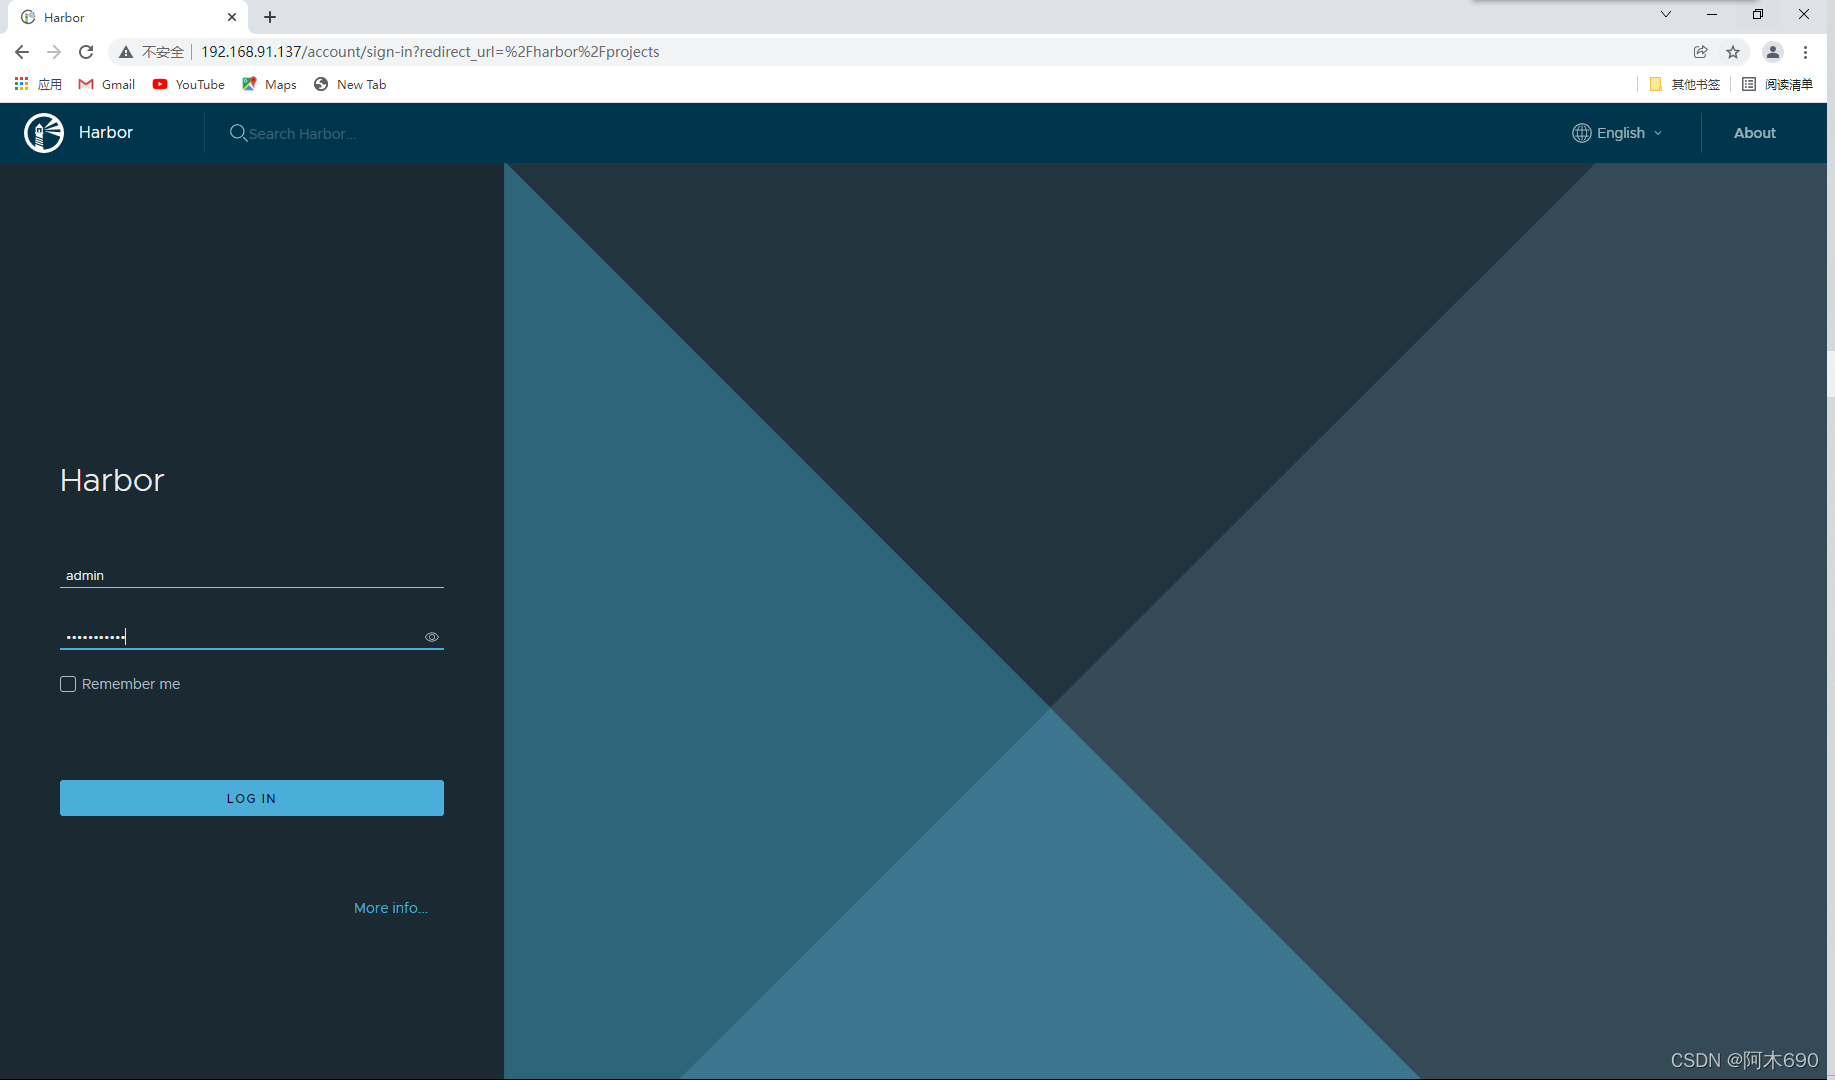
使用系统账号登录
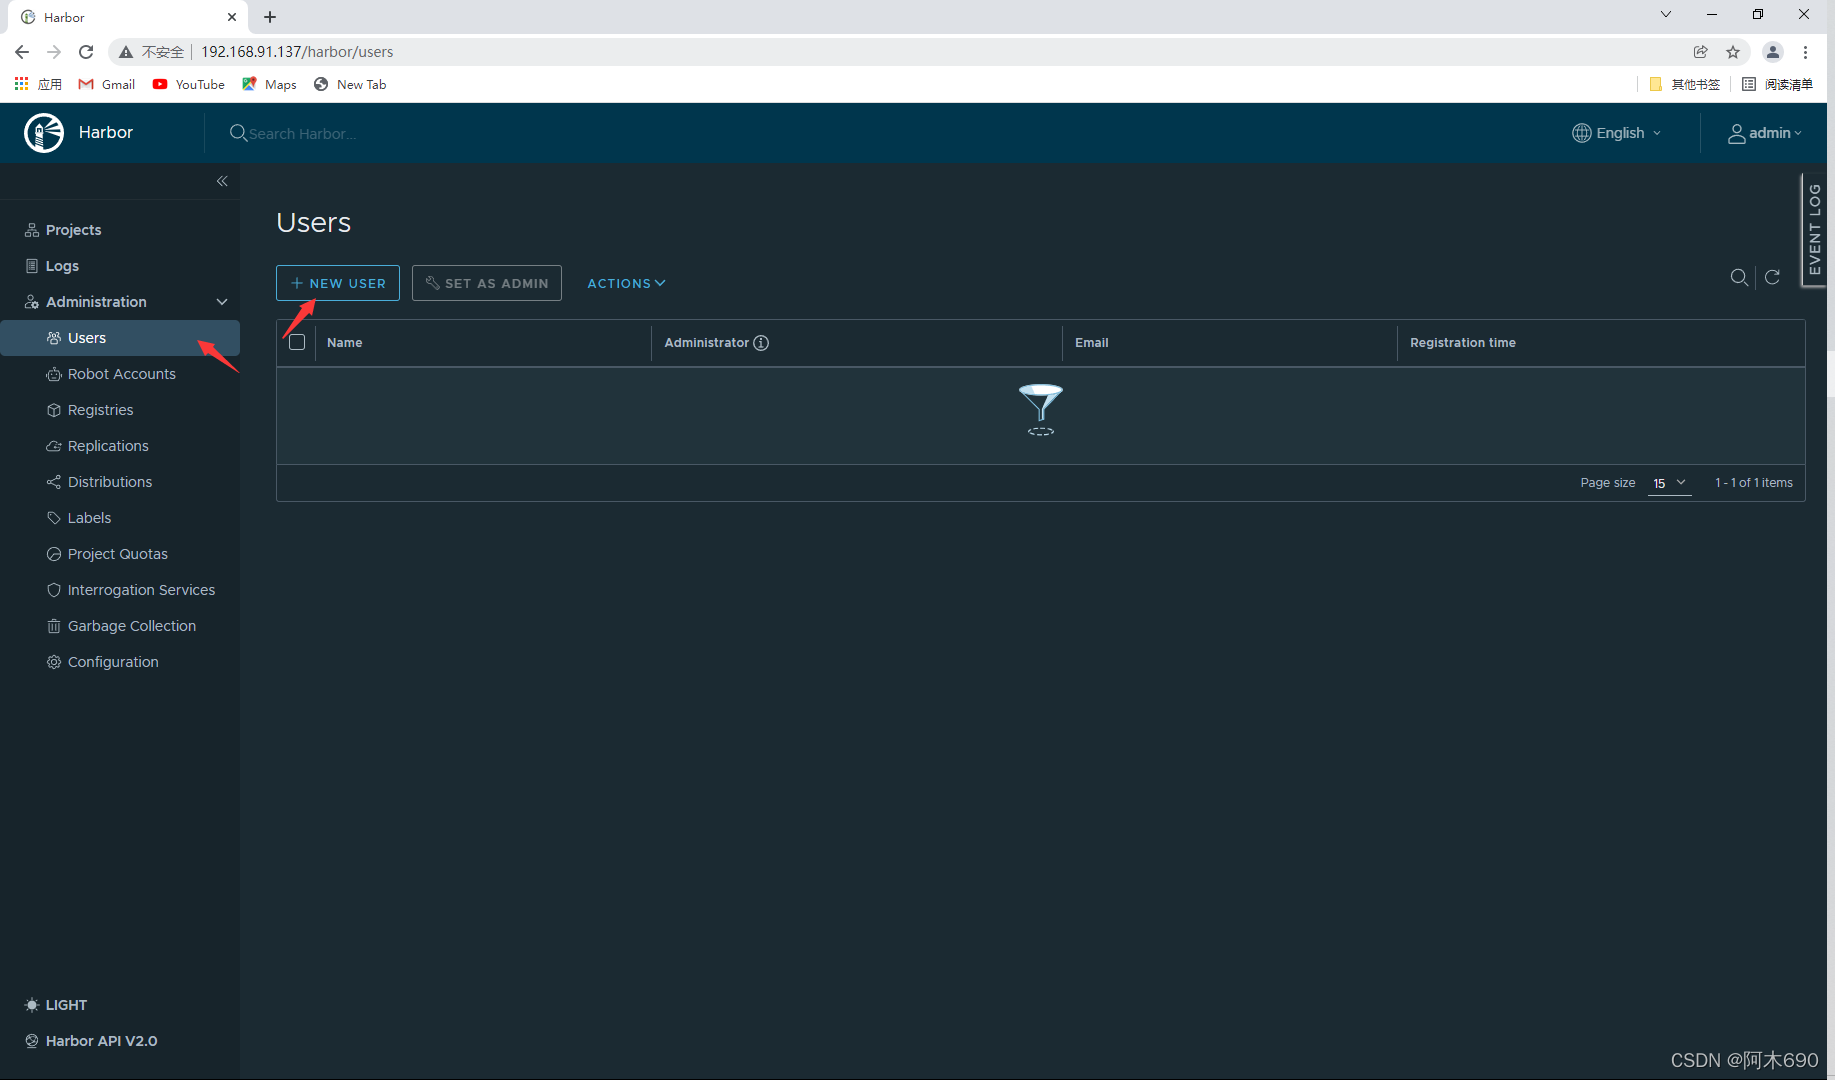
用户管理
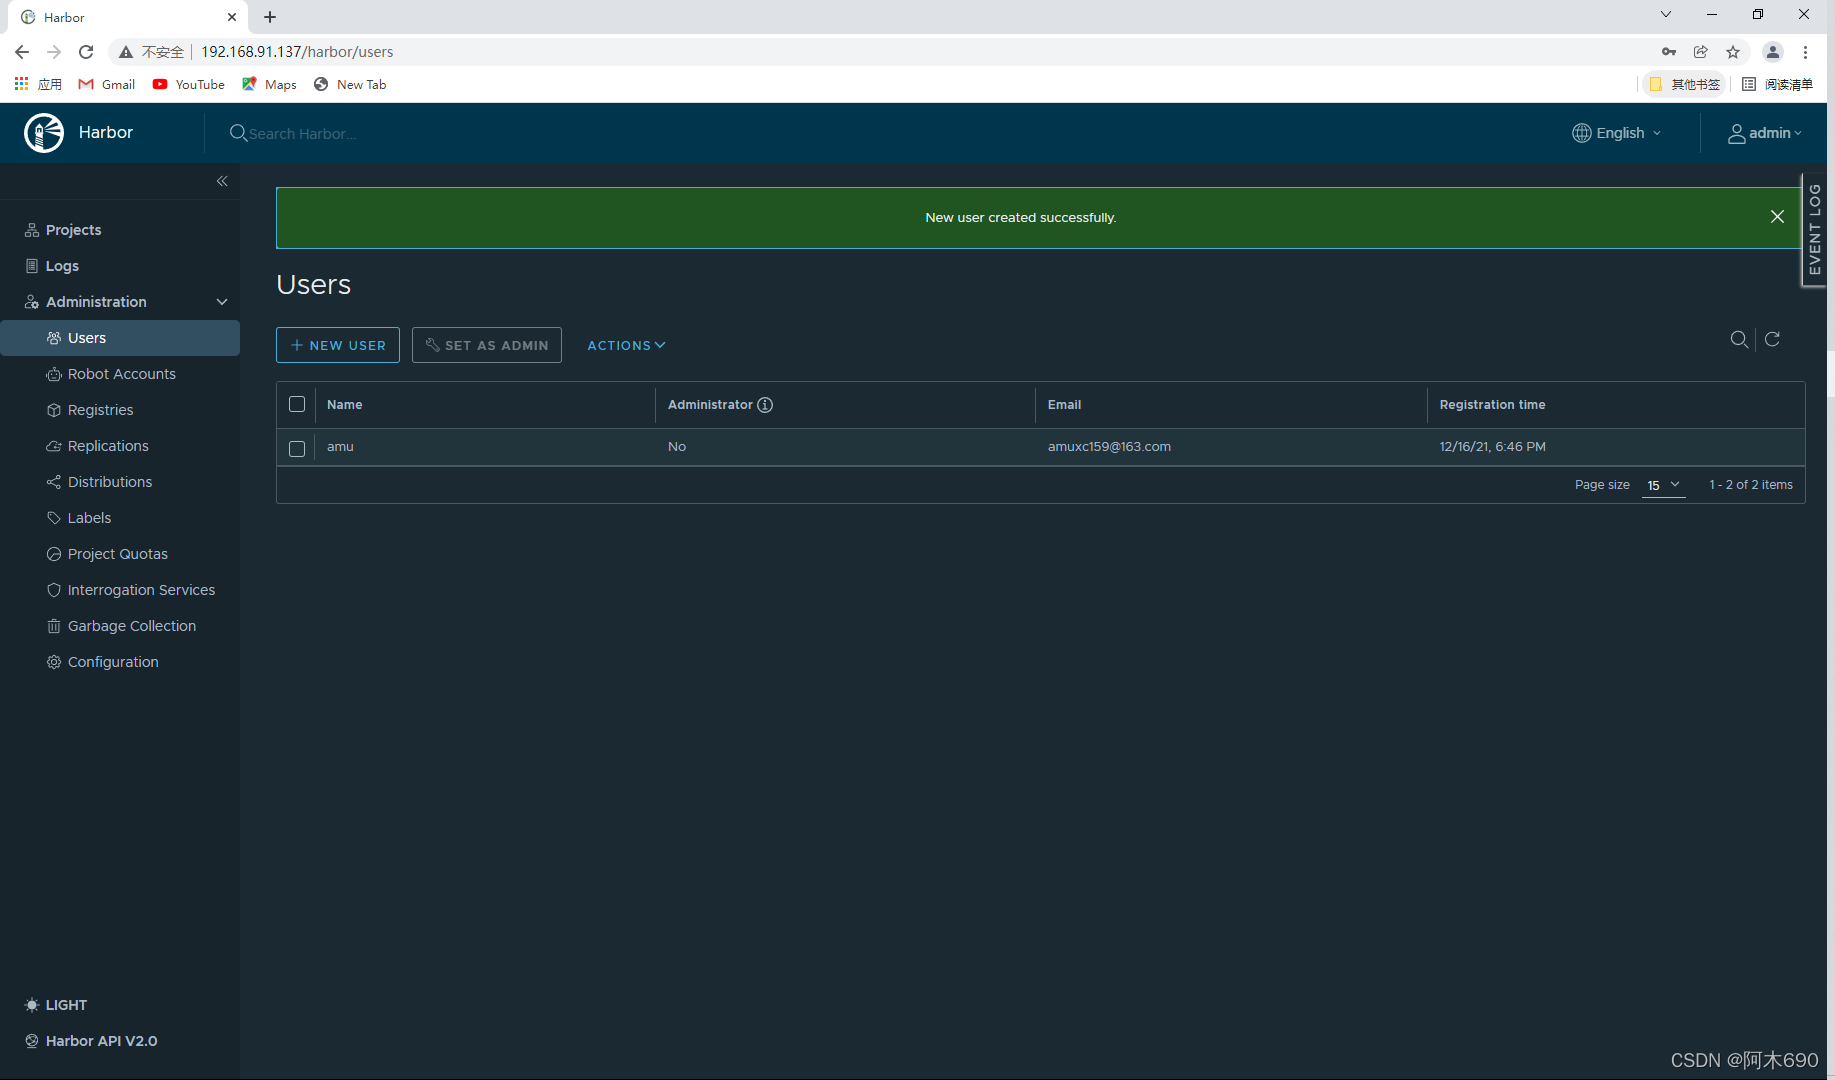
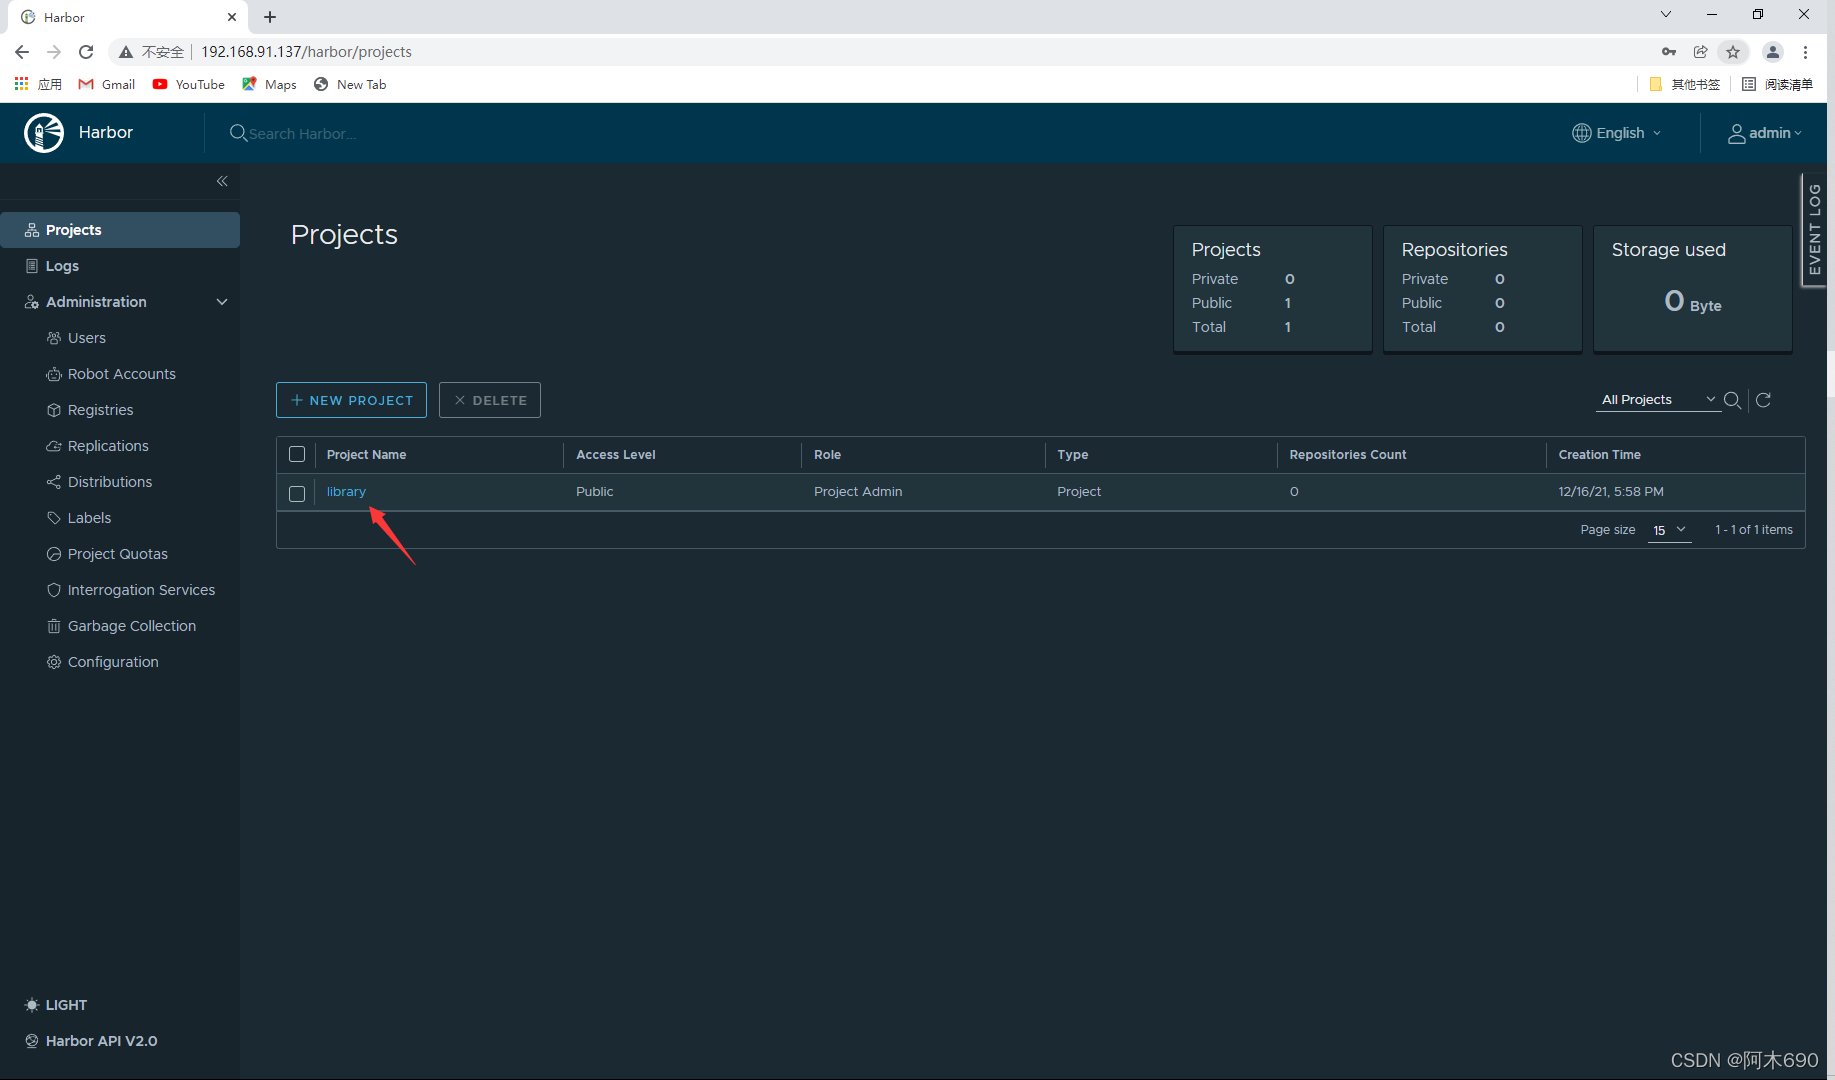
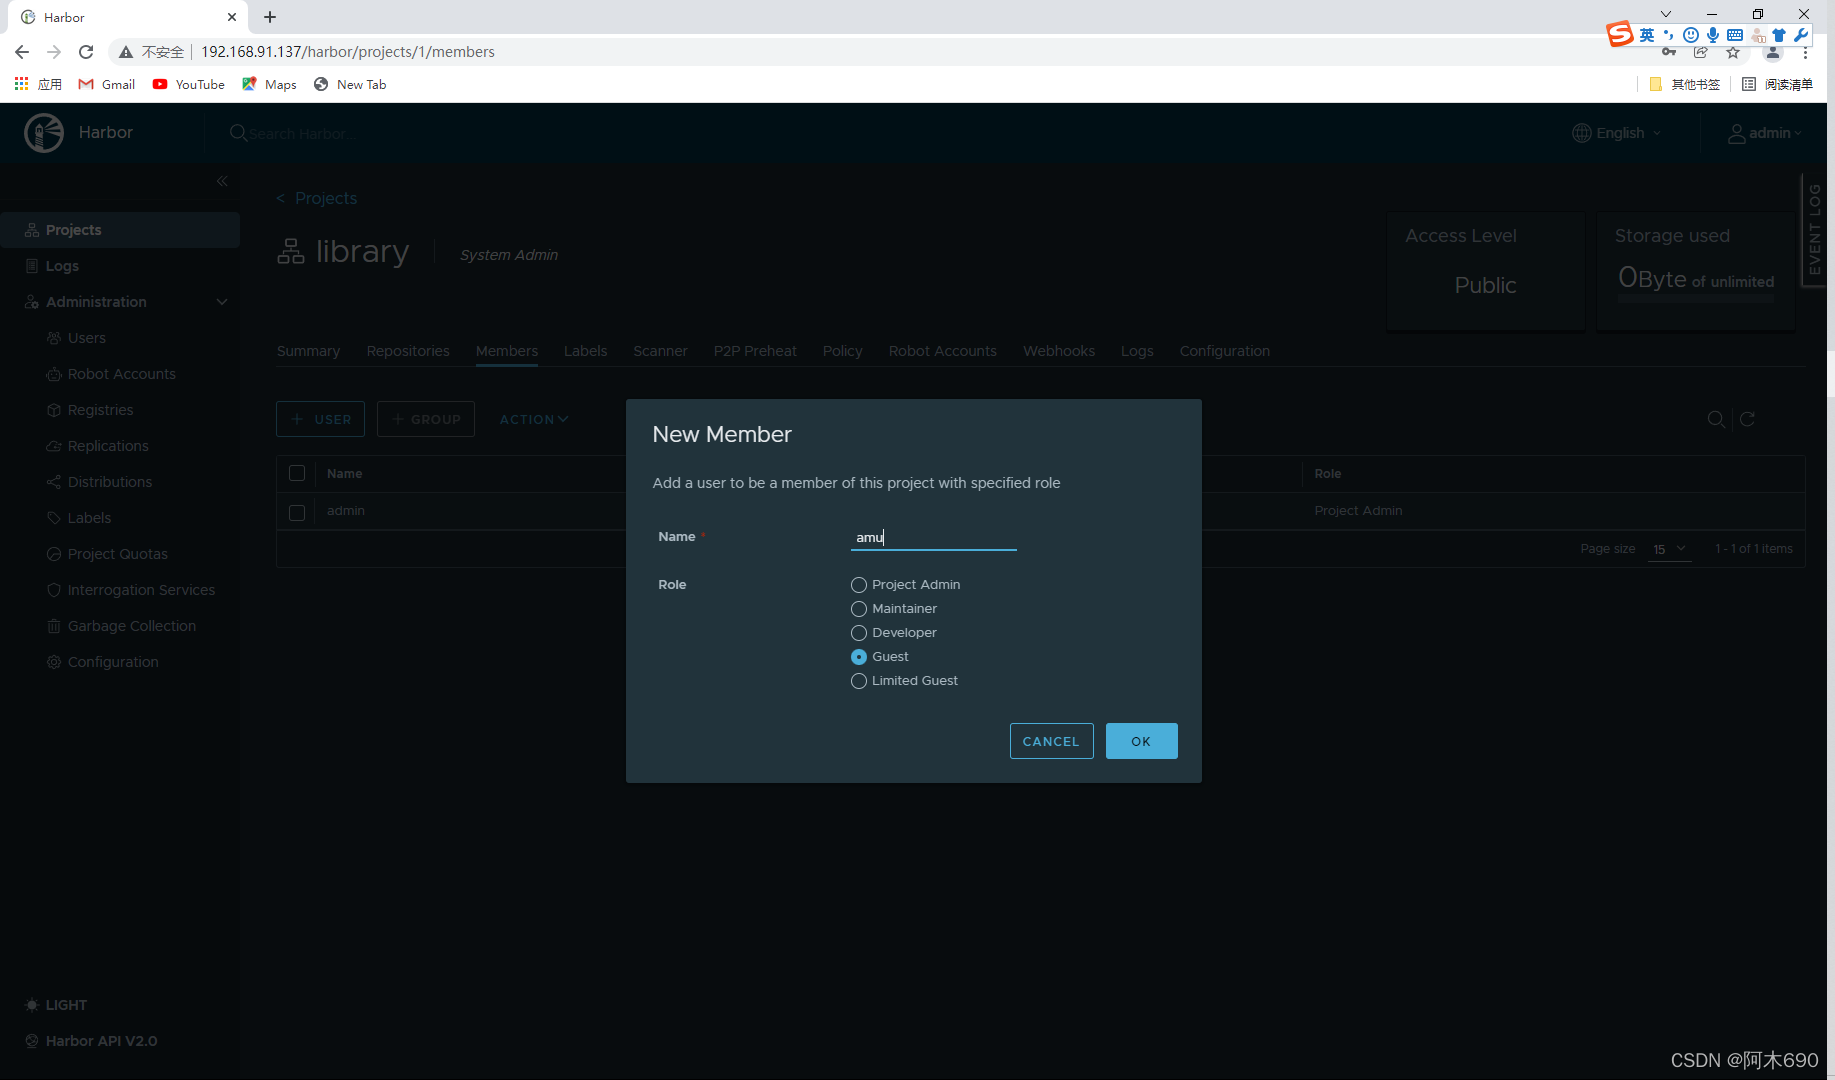
创建用户

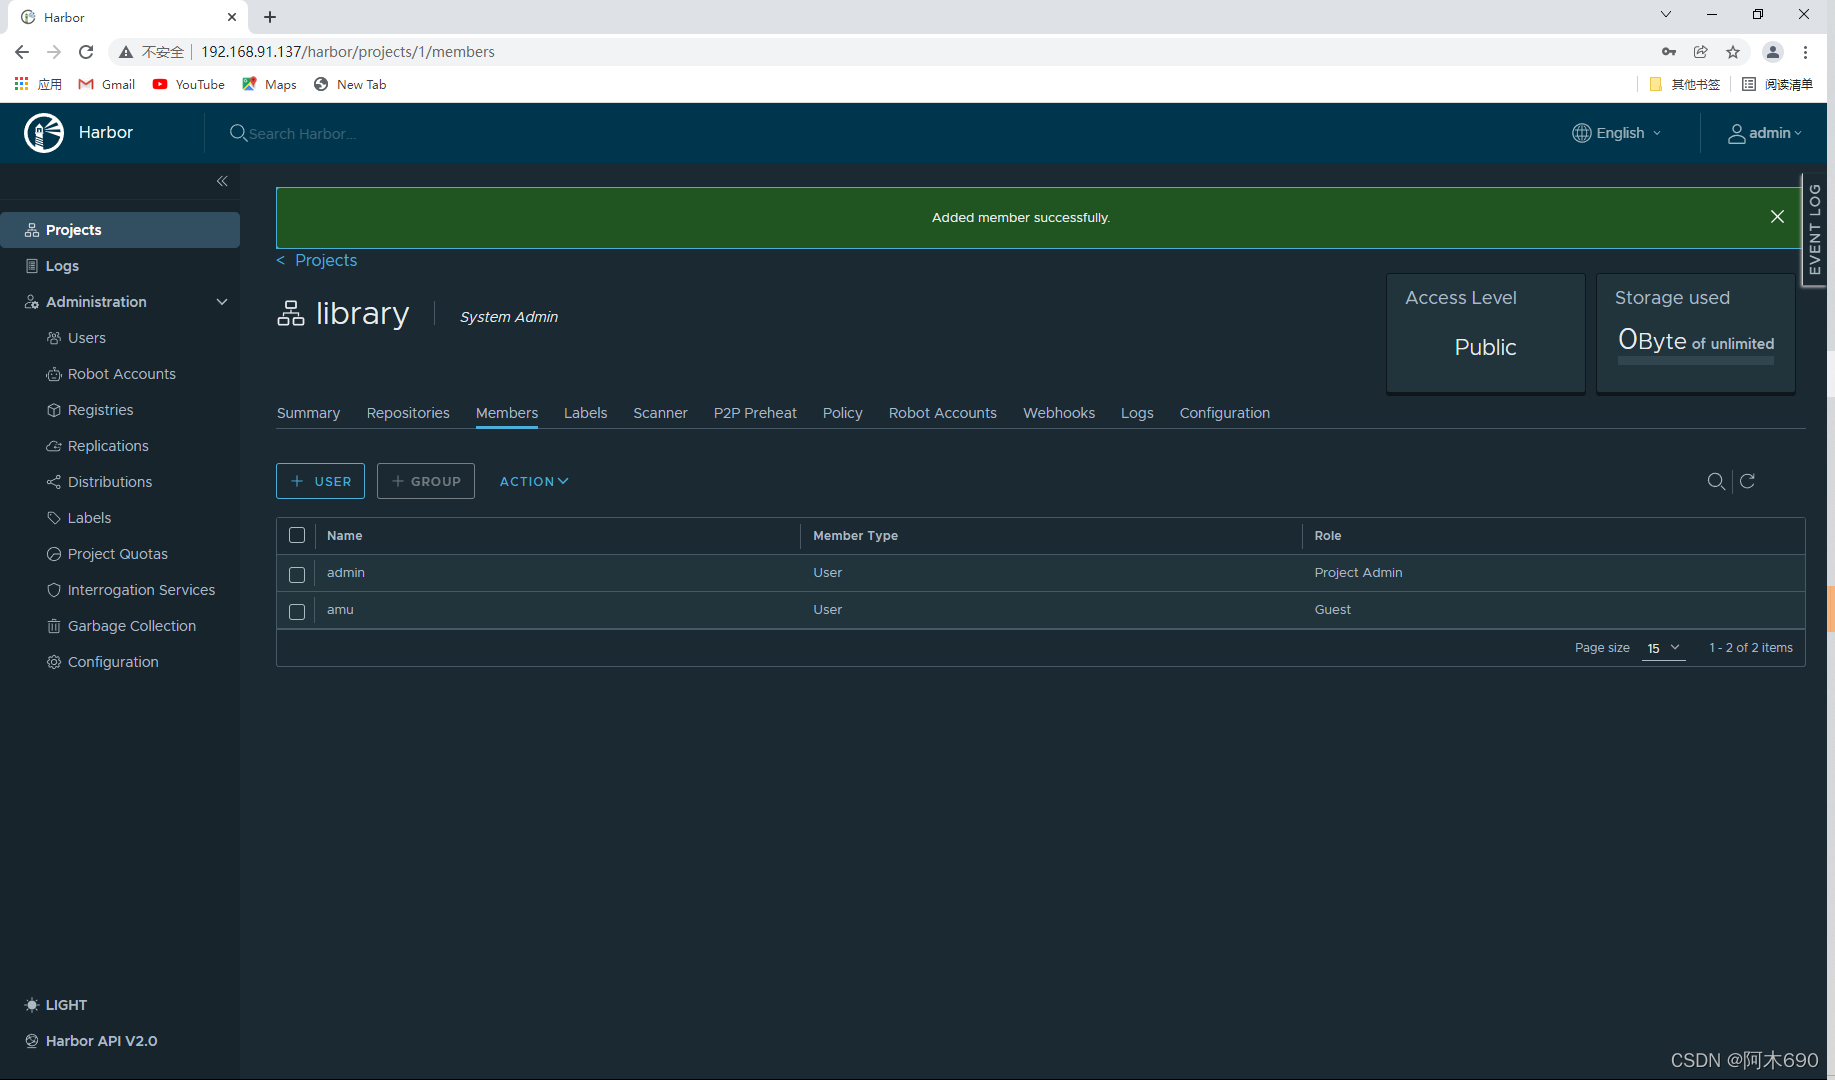
加入项目
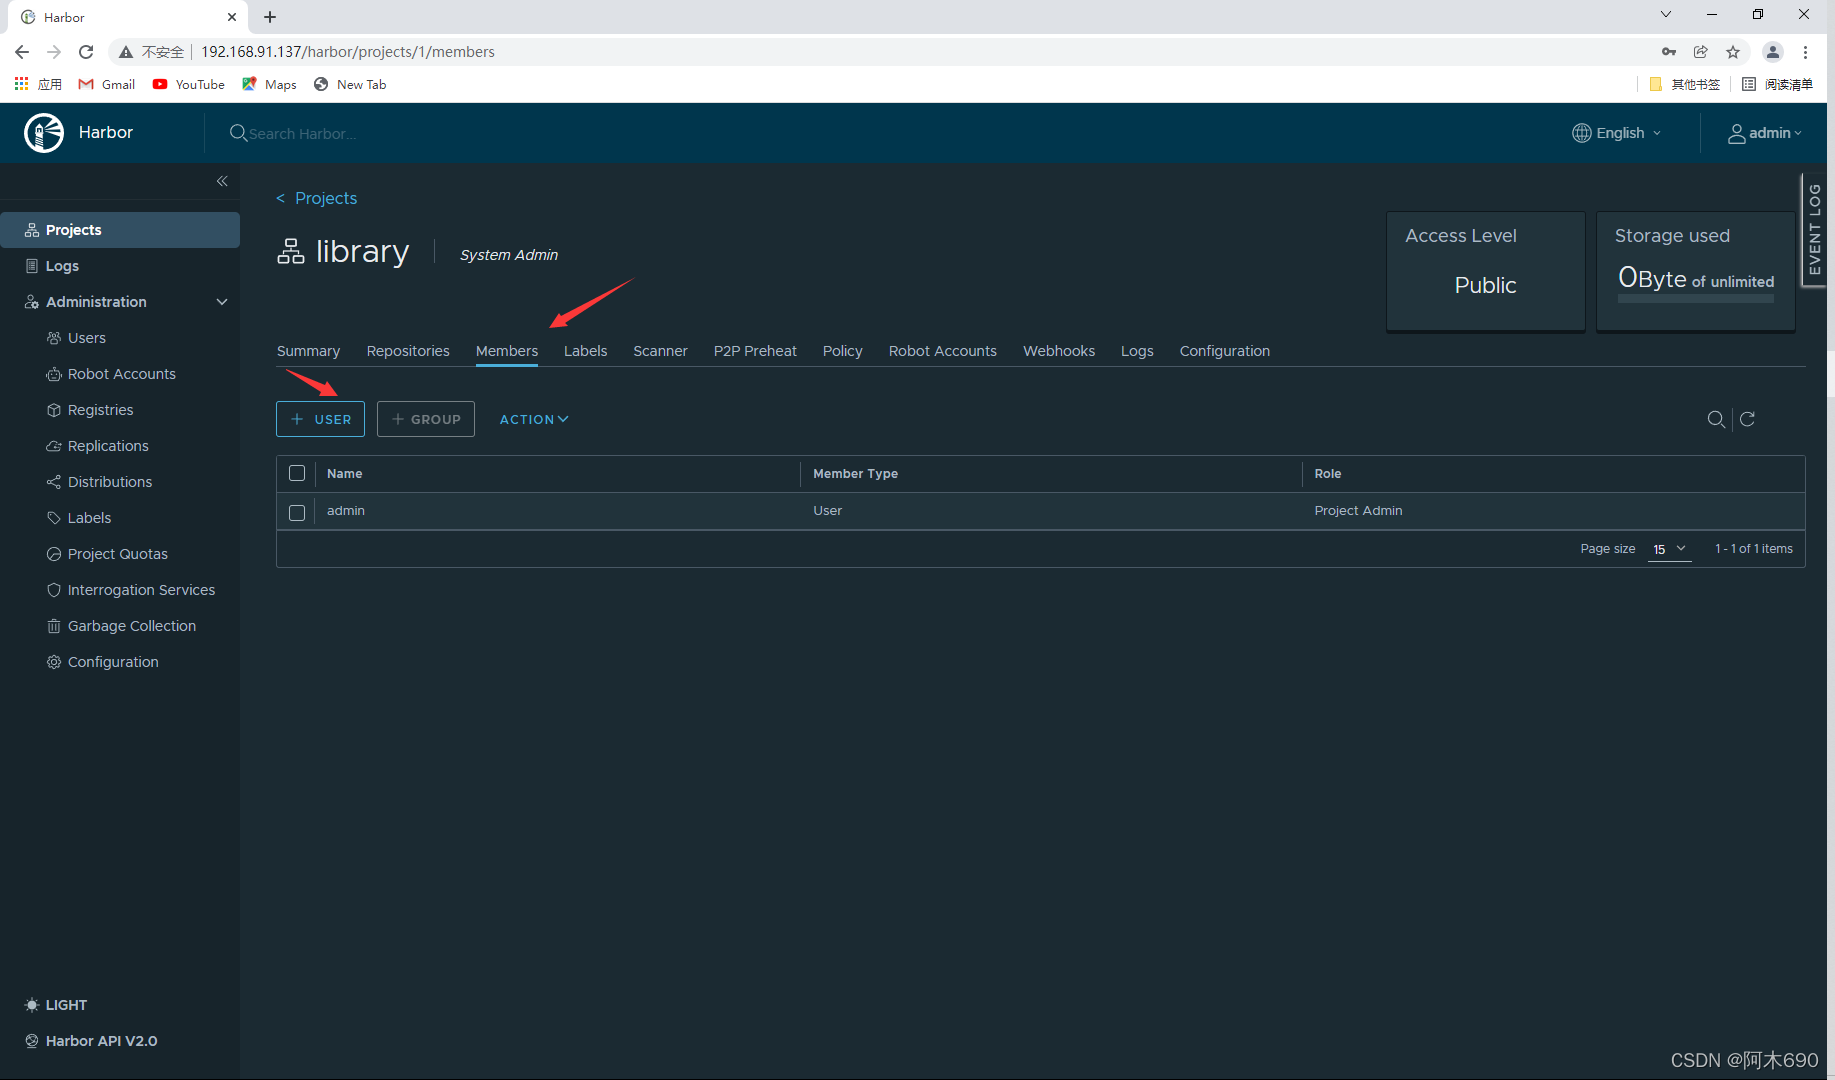
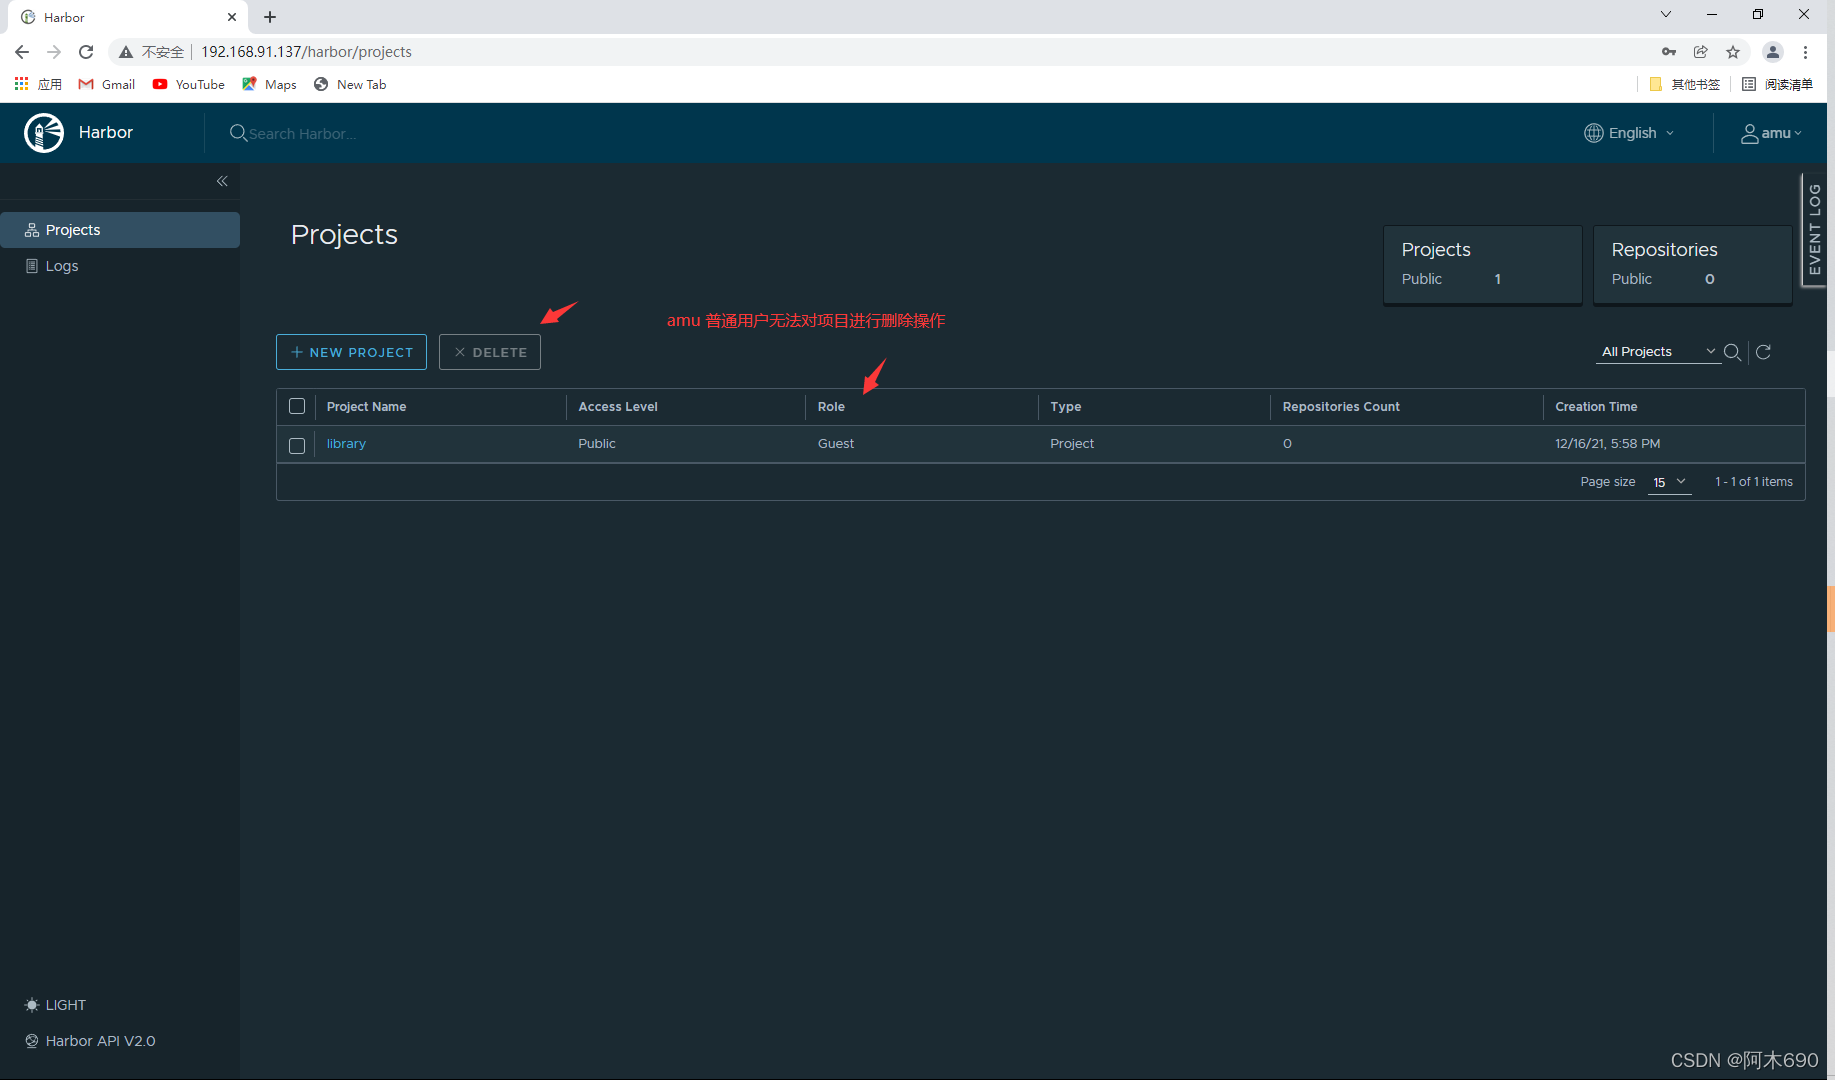
将该用户设置为访客权限
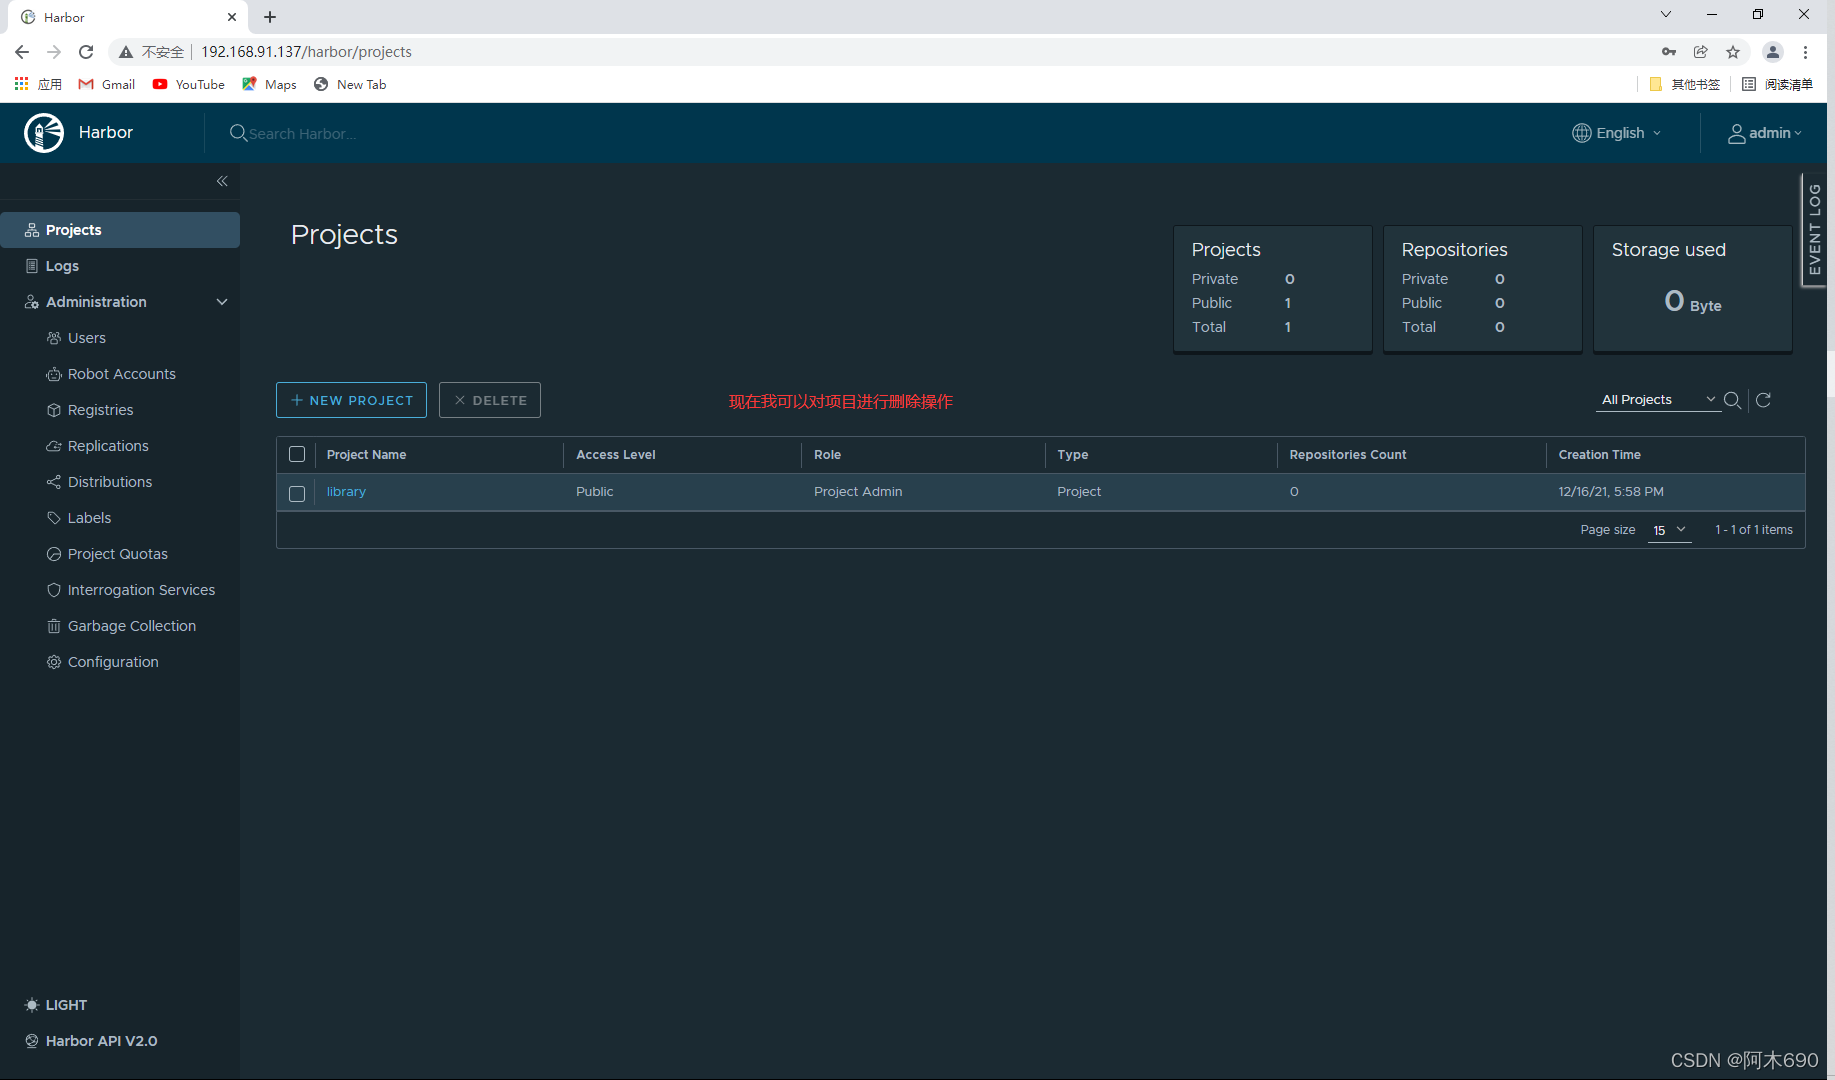
开始权限对比
系统用户可以删除项目
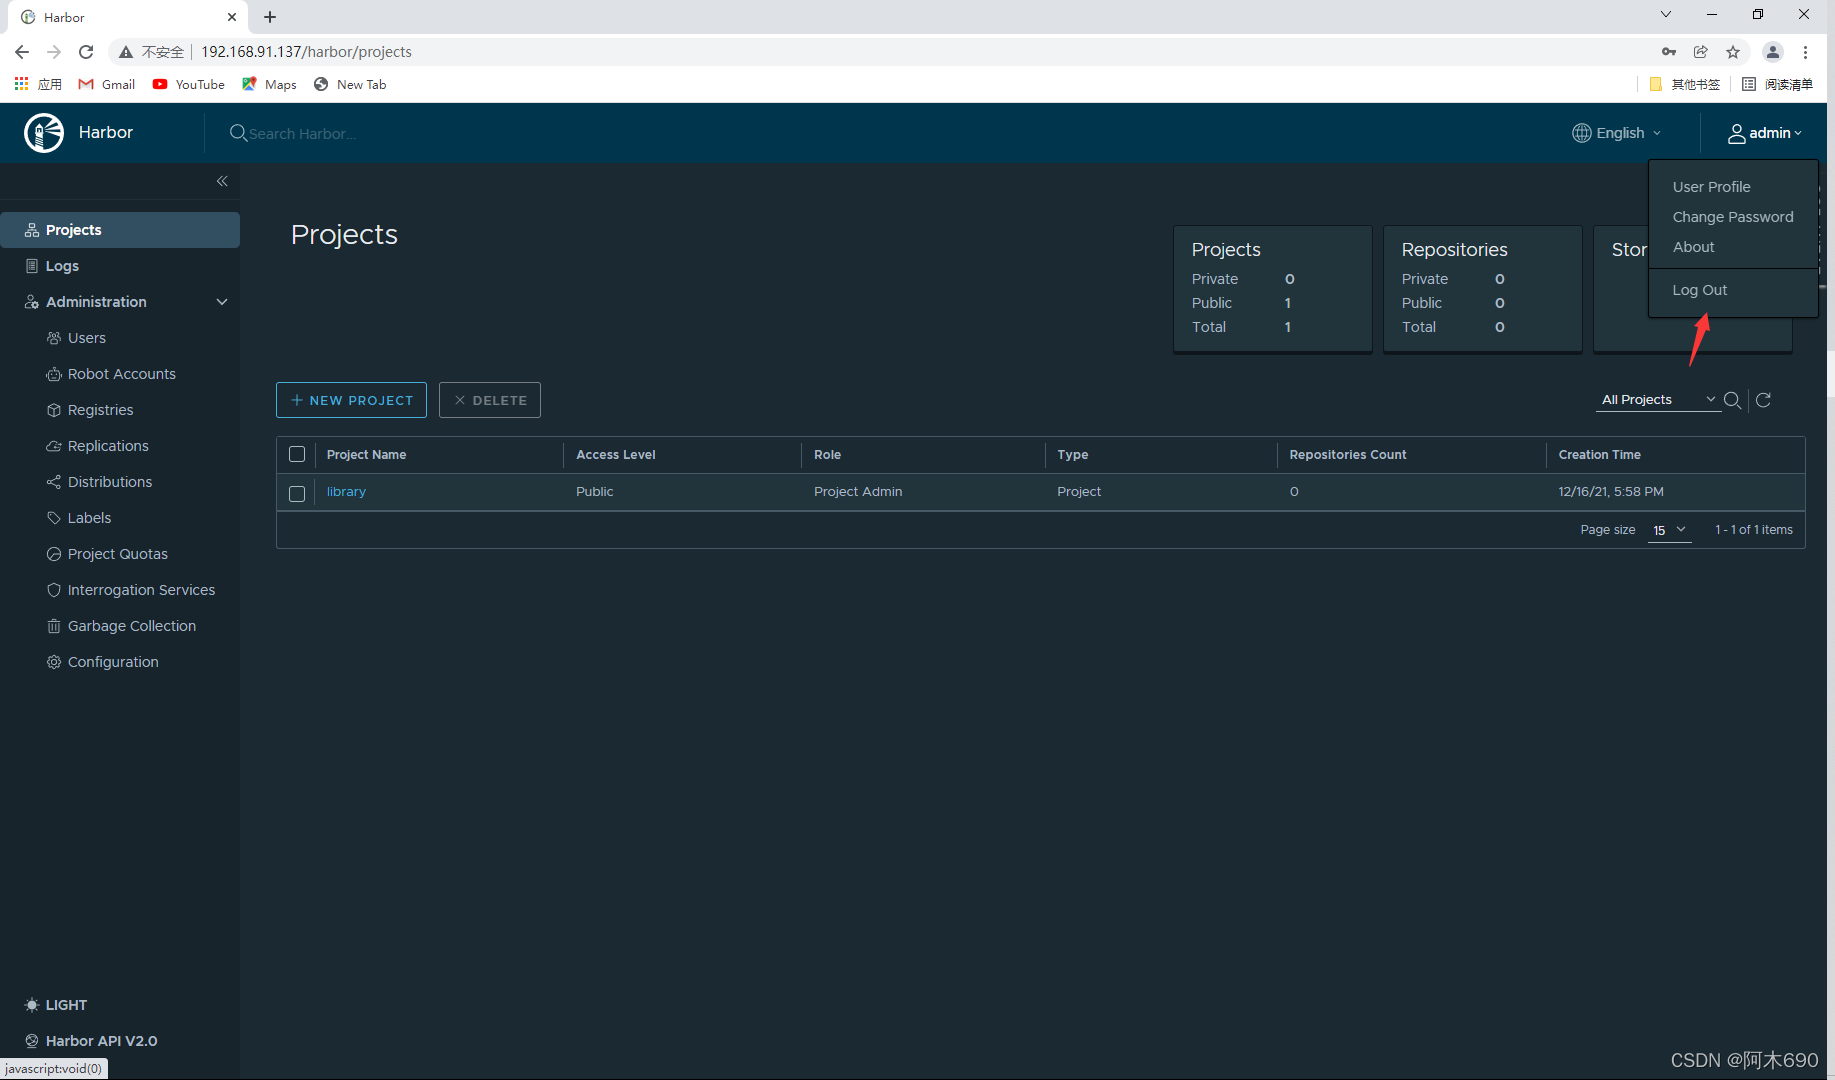
退出切换为 amu 用户
普通用户无法删除项目
五、harbor开机自启
因为harbor的服务是由 /usr/local/harbor/中的 docker-compose.yml 配置文件和docker中的 容器 提供的所以,我们在设置开机自启时就需要在此目录中启动容器。
容器启动、停止、重启命令
[root@node1 harbor]# pwd
/usr/local/harbor
[root@node1 harbor]# docker-compose stop
Stopping harbor-jobservice ... done
Stopping nginx             ... done
Stopping harbor-core       ... done
Stopping harbor-db         ... done
Stopping redis             ... done
Stopping registry          ... done
Stopping registryctl       ... done
Stopping harbor-portal     ... done
Stopping harbor-log        ... done[root@node1 harbor]# docker-compose start
Starting log         ... done
Starting registry    ... done
Starting registryctl ... done
Starting postgresql  ... done
Starting portal      ... done
Starting redis       ... done
Starting core        ... done
Starting jobservice  ... done
Starting proxy       ... done
写一个 harbor_start.sh 脚本
[root@node1 harbor]# vim harbor_enable.sh
#!/bin/bashcd /usr/local/harbor
docker-compose start// 给权限
[root@node1 harbor]# chmod +x harbor_enable.sh
[root@node1 harbor]# ll harbor_enable.sh
-rwxr-xr-x. 1 root root 55 Dec 16 18:59 harbor_enable.sh// 把脚本写入到 /etc/rc.local 文件中
[root@node1 harbor]# vim /etc/rc.local
#!/bin/bash
/bin/bash /usr/local/harbor/harbor_enable.sh	// 添加这行
# THIS FILE IS ADDED FOR COMPATIBILITY PURPOSES
#
# It is highly advisable to create own systemd services or udev rules
# to run scripts during boot instead of using this file.
#
# In contrast to previous versions due to parallel execution during boot
# this script will NOT be run after all other services.
#
# Please note that you must run 'chmod +x /etc/rc.d/rc.local' to ensure
# that this script will be executed during boot.touch /var/lock/subsys/local// 给权限
[root@node1 harbor]# chmod +x /etc/rc.local
[root@node1 harbor]# ll /etc/rc.local
lrwxrwxrwx. 1 root root 13 Dec  2  2020 /etc/rc.local -> rc.d/rc.local
重启验证
[root@node1 harbor]# reboot// 脚本自启动设置成功
[root@node1 ~]# docker ps
CONTAINER ID   IMAGE                                COMMAND                  CREATED          STATUS                    PORTS                                   NAMES
3daa18aedde3   goharbor/harbor-jobservice:v2.3.5    "/harbor/entrypoint.…"   57 minutes ago   Up 39 seconds (healthy)                                           harbor-jobservice
67cda2a01e08   goharbor/nginx-photon:v2.3.5         "nginx -g 'daemon of…"   57 minutes ago   Up 39 seconds (healthy)   0.0.0.0:80->8080/tcp, :::80->8080/tcp   nginx
388f512bcfe1   goharbor/harbor-core:v2.3.5          "/harbor/entrypoint.…"   57 minutes ago   Up 40 seconds (healthy)                                           harbor-core
b4e7fefa599e   goharbor/harbor-db:v2.3.5            "/docker-entrypoint.…"   57 minutes ago   Up 41 seconds (healthy)                                           harbor-db
9201662bba92   goharbor/redis-photon:v2.3.5         "redis-server /etc/r…"   57 minutes ago   Up 40 seconds (healthy)                                           redis
42368cf0e78b   goharbor/registry-photon:v2.3.5      "/home/harbor/entryp…"   57 minutes ago   Up 41 seconds (healthy)                                           registry
ed564a1e593b   goharbor/harbor-registryctl:v2.3.5   "/home/harbor/start.…"   57 minutes ago   Up 40 seconds (healthy)                                           registryctl
daa189f31bc3   goharbor/harbor-portal:v2.3.5        "nginx -g 'daemon of…"   57 minutes ago   Up 40 seconds (healthy)                                           harbor-portal
8ac96968e301   goharbor/harbor-log:v2.3.5           "/bin/sh -c /usr/loc…"   57 minutes ago   Up 42 seconds (healthy)   127.0.0.1:1514->10514/tcp               harbor-log[root@node1 ~]# ss -antl
State  Recv-Q Send-Q Local Address:Port   Peer Address:Port Process
LISTEN 0      128        127.0.0.1:1514        0.0.0.0:*
LISTEN 0      128          0.0.0.0:80          0.0.0.0:*
LISTEN 0      128          0.0.0.0:22          0.0.0.0:*
LISTEN 0      128             [::]:80             [::]:*
LISTEN 0      128             [::]:22             [::]:*

