目录
一、常见的问题的解决方案
1.1 system-config-kickstart需要图形化界面包X server支持,可通过如下安装:
1.2 一定注意关闭防火墙以及selinux;
1.3验证pxe安装,虚拟机内存至少需要2G 不然在启动安装时可能会报错;
1.4PXE装机设置基础软件仓库问题:最重要的是将inst.stage2换成inst.repo
二、PXE定义及条件
三、搭建基本服务
3.1 搭建DHCP服务
3.2 搭建TFTP服务
3.2.1 获取pxelinux.0系统
最重要的是将inst.stage2换成inst.repo
3.2.2 搭建FTP服务
四、关闭禁用防火墙并禁用SElinux
五、Kickstart文件的生成
六、 创建虚拟机进行测试
一、常见的问题的解决方案
1.1 system-config-kickstart需要图形化界面包X server支持,可通过如下安装:
yum -y install xorg-x11-xauth
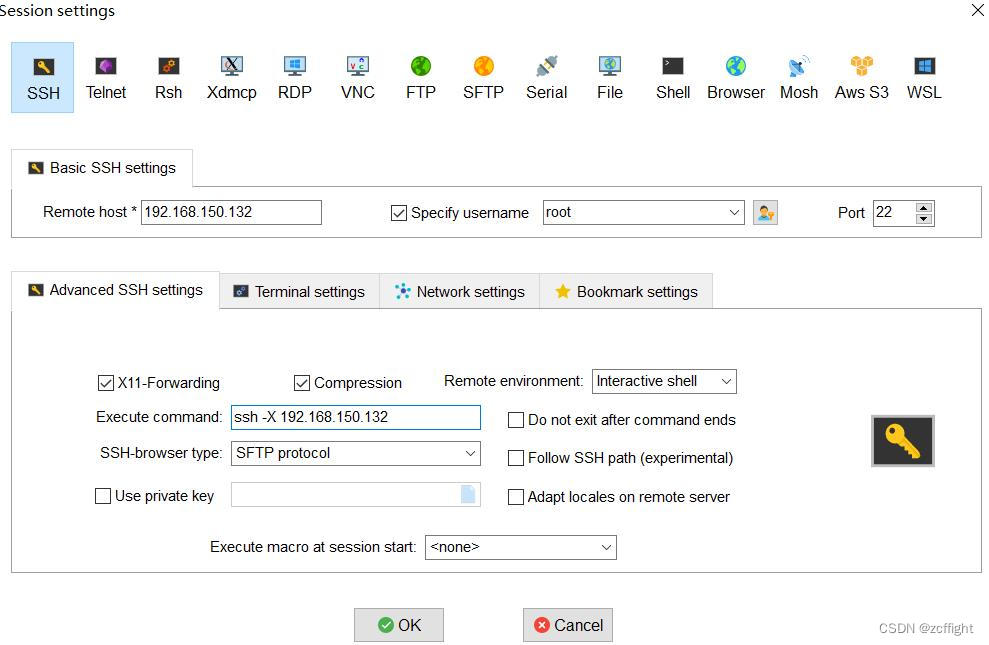
1.2 一定注意关闭防火墙以及selinux;
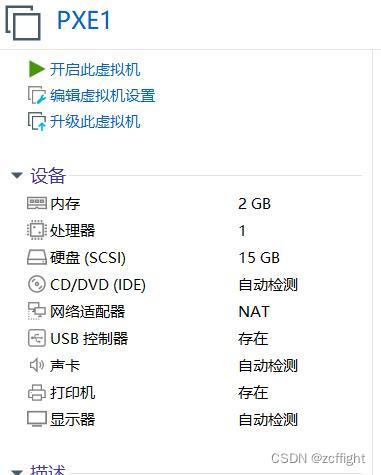
1.3验证pxe安装,虚拟机内存至少需要2G 不然在启动安装时可能会报错;
1.4PXE装机设置基础软件仓库问题:最重要的是将inst.stage2换成inst.repo
二、PXE定义及条件
定义:PXE 的全称是 preboot execute environment它其实是Intel在很久以前提出来的一项用于通过网络来引导系统的标准。允许客户机通过网络从远程服务器上下载引导镜像,并加载安装文件或者整个操作系统。
pxe是通过网卡引导启动
三、搭建基本服务
3.1 搭建DHCP服务
yum -y install dhcp
[root@zcfwork ~]# cd /usr/share/doc/dhcp-4.2.5/
[root@zcfwork dhcp-4.2.5]# ll
total 8
-rw-r--r--. 1 root root 3306 Jun  9  2021 dhcpd6.conf.example
-rw-r--r--. 1 root root 3262 Nov 19  2012 dhcpd.conf.example
drwxr-xr-x. 2 root root   70 Sep  7 20:38 ldap
[root@zcfwork dhcp-4.2.5]# cp dhcpd.conf.example /etc/dhcp/dhcpd.conf
ddns-update-style interim;      #设置DHCP服务器模式
ignore client-updates;          #禁止客户端更新
log-facility local7;            #使用rsyslog记录日志
subnet 192.168.150.0 netmask 255.255.255.0 {range 192.168.150.3 192.168.150.120;             #地址池option subnet-mask 255.255.255.0;                 #子网掩码option domain-name-servers 192.168.150.2;        #设置DNSoption domain-name "contoso.com";                   #域名搜索列表option routers 192.168.150.2;   #网关地址     default-lease-time 600;    #默认租约期限(单位秒)max-lease-time 7200;    #最大租约期限(单位秒)next-server 192.168.150.132;    #设置DNSfilename "pxelinux.0";    #在next-server上需要下载的文件
}systemctl restart dhcpd
[root@zcfwork ~]# netstat -lntup | grep dhcpd
udp        0      0 0.0.0.0:67              0.0.0.0:*                           4398/dhcpd
3.2 搭建TFTP服务
yum install xinetd tftp tftp-server
# default: off
# description: The tftp server serves files using the trivial file transfer \
#       protocol.  The tftp protocol is often used to boot diskless \
#       workstations, download configuration files to network-aware printers, \
#       and to start the installation process for some operating systems.
service tftp
{socket_type             = dgramprotocol                = udpwait                    = yesuser                    = rootserver                  = /usr/sbin/in.tftpdserver_args             = -s /var/lib/tftpbootdisable                 = noper_source              = 11cps                     = 100 2flags                   = IPv4
}
disable = no #把原来的yes改成no
systemctl restart xinetd
[root@zcfwork ~]# netstat -a |grep tftp
udp        0      0 0.0.0.0:tftp            0.0.0.0:*
[root@zcfwork ~]# netstat -atunp |grep :69
udp        0      0 0.0.0.0:69              0.0.0.0:*                           4409/xinetd
3.2.1 获取pxelinux.0系统
yum install syslinux -y #通过安装syslinux获取引导文件
cp /usr/share/syslinux/pxelinux.0 /var/lib/tftpboot/
mount -o loop -t iso9660 /dev/sr0 /media
cp -a /media/isolinux/* /var/lib/tftpboot/
cd /var/lib/tftpboot/mkdir pxelinux.cfgcd pxelinux.cfg
[root@zcfwork pxelinux.cfg]# vim default
default vesamenu.c32
timeout 60
display boot.msg menu backgroud splash2.png menu title beautiful girl
label centos7 64 <Auto Installation>menu label Install CentOS Linux ^7 x86_64 <Auto>kernel vmlinuzappend initrd=initrd.img inst.stage2=ftp://192.168.150.132/pubinst.repo=ftp://192.168.150.132/pubinst.ks=ftp://192.168.150.132/ks.cfg
label centos7 64 <Manual Installation>menu label Install CentOS Linux ^7 x86_64 <Manual>kernel vmlinuzappend initrd=initrd.img inst.stage2=ftp://192.168.150.132/pub
label localmenu defaultmenu label Boot from ^local drivelocalboot 0xffff
menu end
最重要的是将inst.stage2换成inst.repo
3.2.2 搭建FTP服务
yum install vsftpd -y
重启服务
systemctl restart vsftpd
将镜像挂载到ftp的发布目录,便于使用ftp访问
umount /media
mount /dev/sr0 /var/ftp/pub
[root@zcfwork pxelinux.cfg]# cd /var/ftp/pub/
[root@zcfwork pub]# ll
total 696
-rw-r--r--.  3 root root     14 Oct 29  2020 CentOS_BuildTag
drwxr-xr-x.  3 root root   2048 Oct 26  2020 EFI
-rw-rw-r--. 21 root root    227 Aug 30  2017 EULA
-rw-rw-r--. 21 root root  18009 Dec  9  2015 GPL
drwxr-xr-x.  3 root root   2048 Oct 26  2020 images
drwxr-xr-x.  2 root root   2048 Nov  2  2020 isolinux
drwxr-xr-x.  2 root root   2048 Oct 26  2020 LiveOS
drwxr-xr-x.  2 root root 673792 Nov  4  2020 Packages
drwxr-xr-x.  2 root root   4096 Nov  4  2020 repodata
-rw-rw-r--. 21 root root   1690 Dec  9  2015 RPM-GPG-KEY-CentOS-7
-rw-rw-r--. 21 root root   1690 Dec  9  2015 RPM-GPG-KEY-CentOS-Testing-7
-r--r--r--.  1 root root   2883 Nov  4  2020 TRANS.TBL
四、关闭禁用防火墙并禁用SElinux
systemctl stop firewalld.service
systemctl disable firewalld.service
[root@zcfwork pub]# getenforce
Permissive
[root@zcfwork pub]# setenforce 0
禁用SElinux
[root@zcfwork pub]# vim /etc/sysconfig/selinux# This file controls the state of SELinux on the system.
# SELINUX= can take one of these three values:
#     enforcing - SELinux security policy is enforced.
#     permissive - SELinux prints warnings instead of enforcing.
#     disabled - No SELinux policy is loaded.
SELINUX=disabled
# SELINUXTYPE= can take one of three values:
#     targeted - Targeted processes are protected,
#     minimum - Modification of targeted policy. Only selected processes are protected.
#     mls - Multi Level Security protection.
SELINUXTYPE=targeted
修改为 :SELINUX=disabled
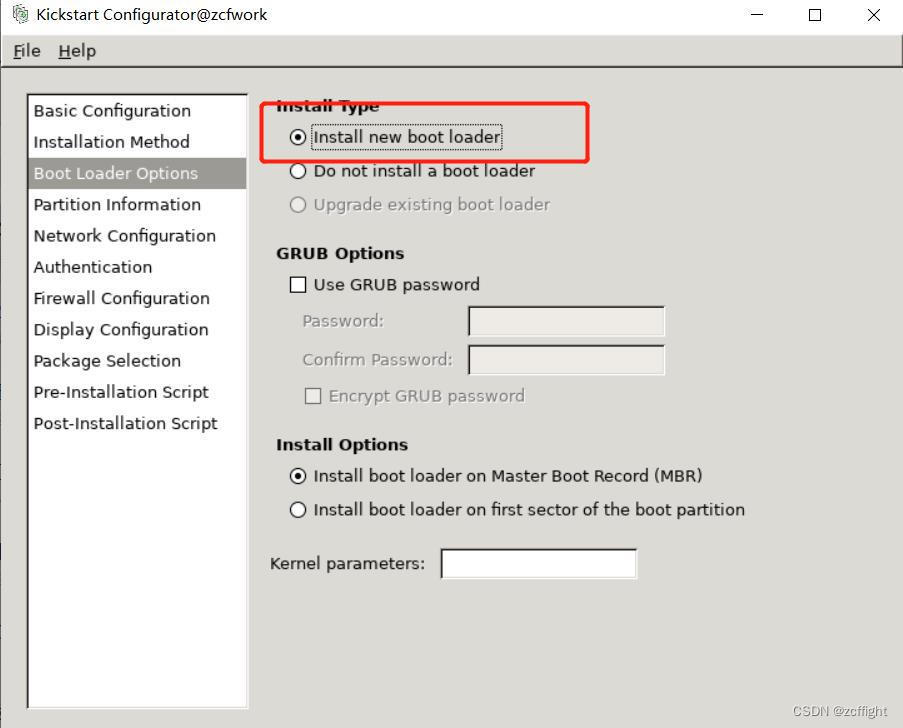
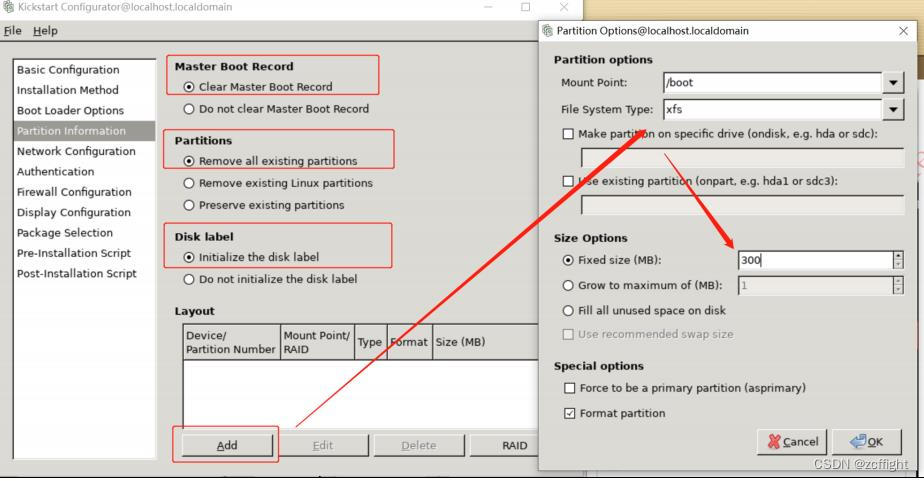
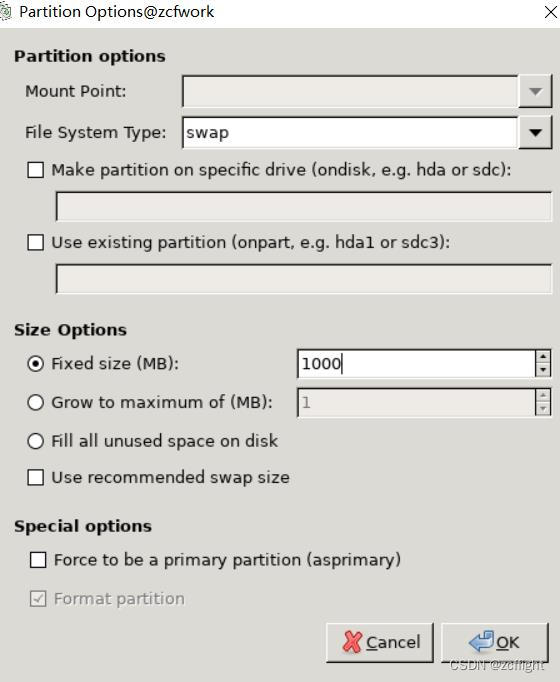
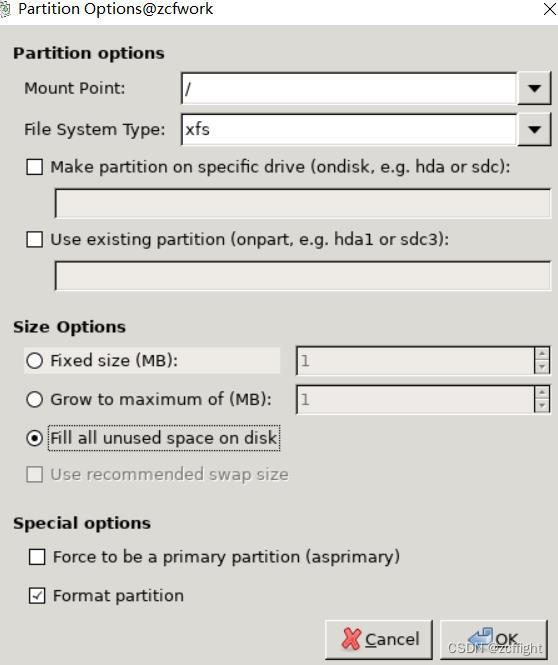
五、Kickstart文件的生成
使用yum安装system-config-kickstart
yum install system-config-kickstart
[root@zcfwork pub]# system-config-kickstart
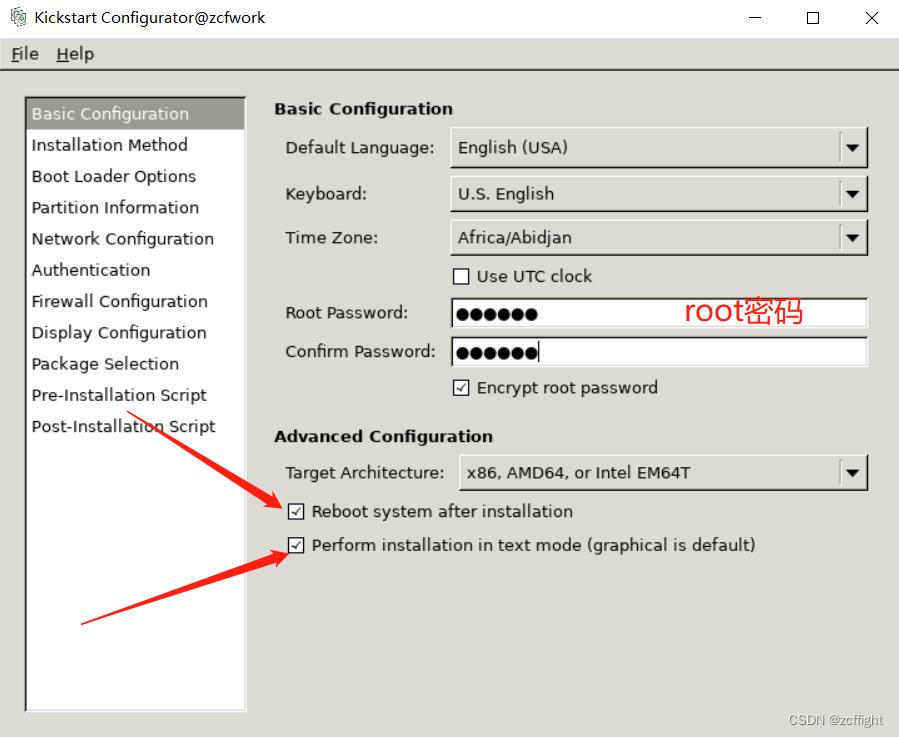

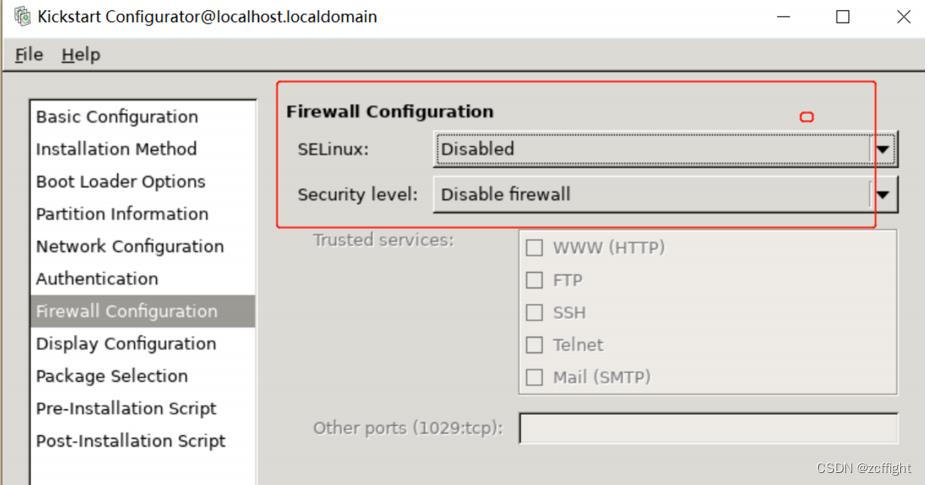
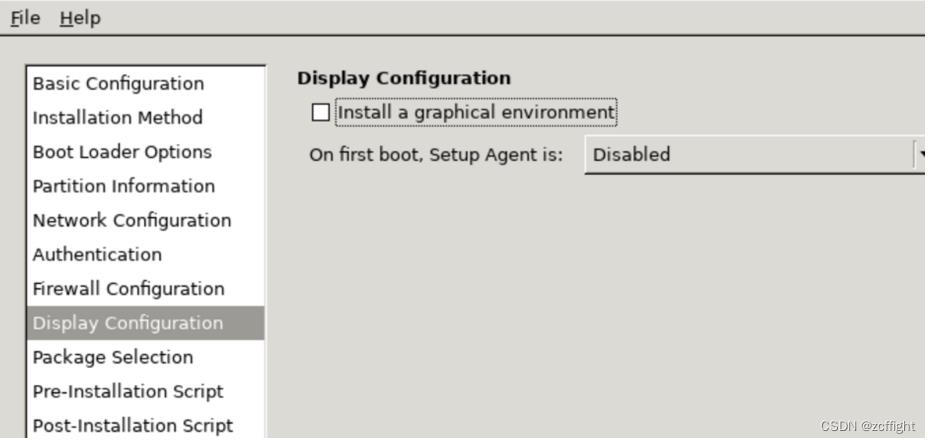
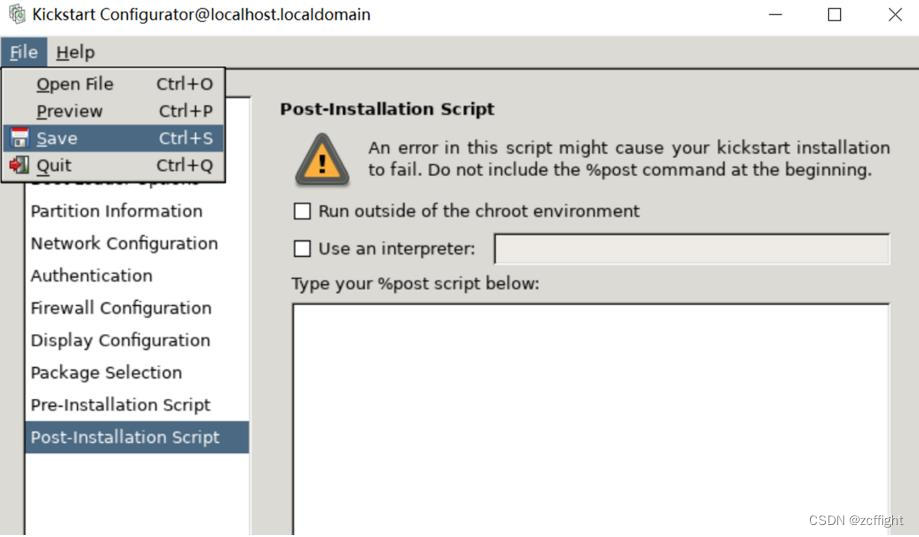
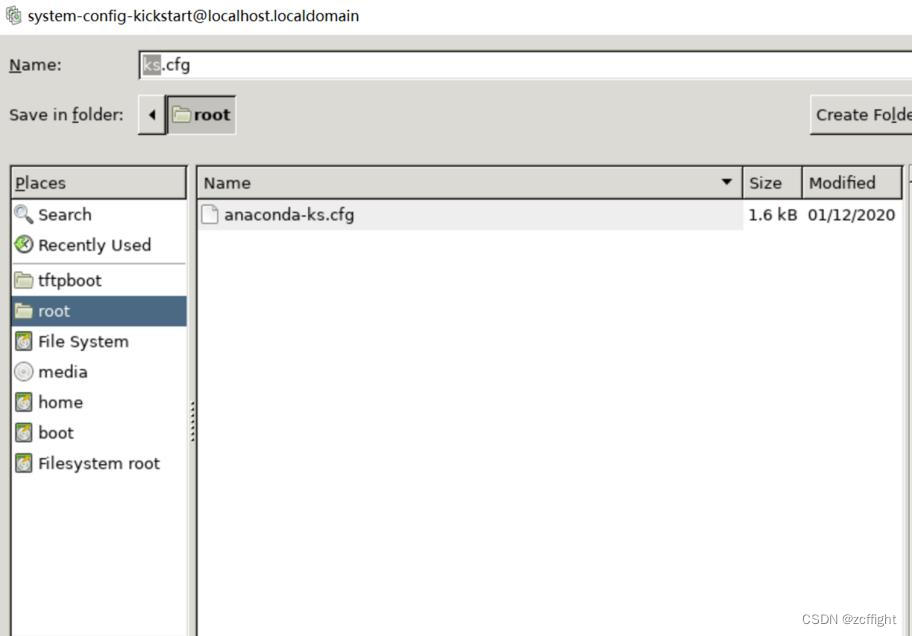
也可以在/root目录下看到应答文件
[root@zcfwork ~]# ll
total 8
-rw-------. 1 root root 1587 Jul 19 22:48 anaconda-ks.cfg
-rw-r--r--. 1 root root  919 Sep  8 09:39 ks.cfg
在末尾添加这几行:
[root@zcfwork ~]# tail ks.cfg
clearpart --all --initlabel
# Disk partitioning information
part /boot --fstype="xfs" --size=300
part swap --fstype="swap" --size=1000
part / --fstype="xfs" --grow --size=1
%packages
@base
net-tools
@core
%end
ksvalidator ks.cfg
mv ks.cfg /var/ftp
systemctl restart vsftpd
六、 创建虚拟机进行测试

光标移动到最后,然后回车,按住shift和+号移动到第一个位置,如下:

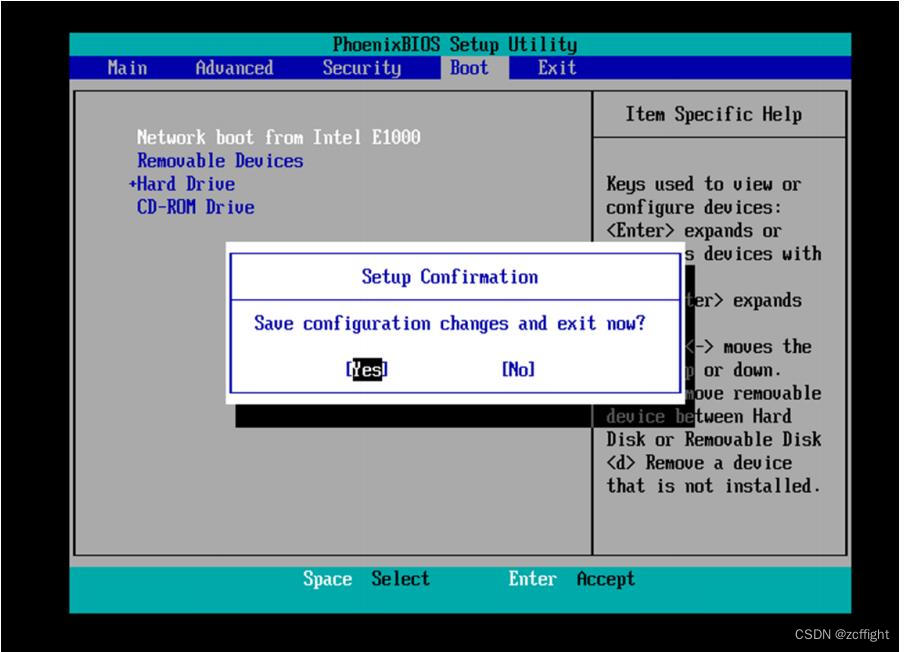 F10 保存退出


