目录
1.ListView控件
android%3Adivider-toc" style="margin-left:40px;">1)android:divider
android%3AdividerHeight-toc" style="margin-left:40px;">2)android:dividerHeight
android%3Aentries-toc" style="margin-left:40px;">3)android:entries
android%3AfooterDividersEnabled-toc" style="margin-left:40px;">4)android:footerDividersEnabled
android%3AheaderDividersEnabled-toc" style="margin-left:40px;">5)android:headerDividersEnabled
android%3AlistSelector-toc" style="margin-left:40px;">6)android:listSelector
android%3Ascrollbars-toc" style="margin-left:40px;">7)android:scrollbars
android%3AsmoothScrollbar-toc" style="margin-left:40px;">8)android:smoothScrollbar
android%3AstackFromBottom-toc" style="margin-left:40px;">9)android:stackFromBottom
android%3AtranscriptMode-toc" style="margin-left:40px;">10)android:transcriptMode
android%3AcacheColorHint-toc" style="margin-left:40px;">11)android:cacheColorHint
android%3AchoiceMode-toc" style="margin-left:40px;">12)android:choiceMode
android%3AdrawSelectorOnTop-toc" style="margin-left:40px;">13)android:drawSelectorOnTop
android%3AfadingEdge-toc" style="margin-left:40px;">14)android:fadingEdge
android%3AfadingEdgeLength-toc" style="margin-left:40px;">15)android:fadingEdgeLength
android%3AfastScrollEnabled-toc" style="margin-left:40px;">16)android:fastScrollEnabled
android%3AfastScrollAlwaysVisible-toc" style="margin-left:40px;">17)android:fastScrollAlwaysVisible
android%3AscrollingCache-toc" style="margin-left:40px;">18)android:scrollingCache
java%E4%B8%AD%E6%93%8D%E4%BD%9C-toc" style="margin-left:40px;"> 19 java中操作
20.ListView的简单使用
1.代码
xml%E5%B8%83%E5%B1%80%E4%BB%A3%E7%A0%81-toc" style="margin-left:160px;">1-xml布局代码
java%E4%BB%A3%E7%A0%81-toc" style="margin-left:160px;">2-java代码
3-适配器代码
2.效果
2.RecyclerView控件
1..属性
android%3Alayout_width%20%E5%92%8C%20android%3Alayout_height-toc" style="margin-left:80px;">1)android:layout_width 和 android:layout_height
android%3Ascrollbars-toc" style="margin-left:80px;">2)android:scrollbars
android%3AoverScrollMode-toc" style="margin-left:80px;">3)android:overScrollMode
android%3AnestedScrollingEnabled-toc" style="margin-left:80px;">4)android:nestedScrollingEnabled
android%3AclipToPadding-toc" style="margin-left:80px;">5)android:clipToPadding
android%3Apadding-toc" style="margin-left:80px;">6)android:padding
7)app:layoutManager
8)app:spanCount
9)app:reverseLayout
10)app:stackFromEnd
2..Java/Kotlin 代码中的属性设置
1)设置 LayoutManager
2)设置 ItemAnimator
3)设置适配器
4)设置项目装饰
5)设置 HasFixedSize
6)设置 NestedScrollingEnabled
7)设置 OnScrollListener
8)设置 ItemTouchHelper
9)设置 OverScrollMode
10)设置 ItemViewCacheSize
11)设置 RecycledViewPool
12)设置 AccessibilityDelegateCompat
13)设置 EdgeEffectFactory
14)设置 Focusable 和 FocusableInTouchMode
15)设置 DescendantFocusability
16.案例:Recyclerview 的简单使用
1.代码
xml%E5%B8%83%E5%B1%80%E4%BB%A3%E7%A0%81-toc" style="margin-left:160px;">1-xml布局代码
java%E4%BB%A3%E7%A0%81-toc" style="margin-left:160px;">2-java代码
3-适配器代码
2.效果
1.ListView控件
android%3Adivider">1)android:divider
设置列表项之间的分隔线的颜色。
android:divider="@color/your_color"
android%3AdividerHeight">2)android:dividerHeight
设置分隔线的高度。
android:dividerHeight="2dp"
android%3Aentries">3)android:entries
直接在 XML 文件中指定列表项的内容(通常用于简单的情况)。
android:entries="@array/your_array_resource"
android%3AfooterDividersEnabled">4)android:footerDividersEnabled
是否在底部视图之前显示分隔线。
android:footerDividersEnabled="true"
android%3AheaderDividersEnabled">5)android:headerDividersEnabled
是否在顶部视图之后显示分隔线。
android:headerDividersEnabled="false"
android%3AlistSelector">6)android:listSelector
设置当用户点击或触摸某个列表项时显示的选择器背景。
android:listSelector="@drawable/your_selector_drawable"
android%3Ascrollbars">7)android:scrollbars
指定哪些方向上应显示滚动条。
android:scrollbars="vertical"
android%3AsmoothScrollbar">8)android:smoothScrollbar
启用平滑滚动条。
android:smoothScrollbar="true"
android%3AstackFromBottom">9)android:stackFromBottom
如果为 true,则从底部开始堆叠列表项;默认为 false。
android:stackFromBottom="true"
android%3AtranscriptMode">10)android:transcriptMode
设置转录模式,这对于聊天应用等场景很有用。
android:transcriptMode="alwaysScroll"
android%3AcacheColorHint">11)android:cacheColorHint
设置缓存颜色提示,影响滚动性能。
android:cacheColorHint="@null" <!-- 或者指定其他颜色 -->
android%3AchoiceMode">12)android:choiceMode
定义选择模式,如单选或多选。
android:choiceMode="singleChoice" <!-- 可以是 "none", "singleChoice", "multipleChoice" -->
android%3AdrawSelectorOnTop">13)android:drawSelectorOnTop
选择器是否绘制在内容之上,默认为 false。
android:drawSelectorOnTop="true"
android%3AfadingEdge">14)android:fadingEdge
设置渐变边缘效果的方向。
android:fadingEdge="vertical"
android%3AfadingEdgeLength">15)android:fadingEdgeLength
设置渐变边缘长度。
android:fadingEdgeLength="30dp"
android%3AfastScrollEnabled">16)android:fastScrollEnabled
启用快速滚动条。
android:fastScrollEnabled="true"
android%3AfastScrollAlwaysVisible">17)android:fastScrollAlwaysVisible
即使没有足够的项目也总是显示快速滚动条。
android:fastScrollAlwaysVisible="true"
android%3AscrollingCache">18)android:scrollingCache
控制是否使用滚动缓存。
android:scrollingCache="false"
java%E4%B8%AD%E6%93%8D%E4%BD%9C" style="background-color:transparent;"> 19 java中操作
java">// 设置适配器
listView.setAdapter(adapter);// 设置选择模式
listView.setChoiceMode(ListView.CHOICE_MODE_SINGLE);// 设置点击监听器
listView.setOnItemClickListener(new AdapterView.OnItemClickListener() {@Overridepublic void onItemClick(AdapterView<?> parent, View view, int position, long id) {// 处理点击事件}
});// 添加头部视图
listView.addHeaderView(headerView);// 添加尾部视图
listView.addFooterView(footerView);
20.ListView的简单使用
1.代码
xml%E5%B8%83%E5%B1%80%E4%BB%A3%E7%A0%81">1-xml布局代码
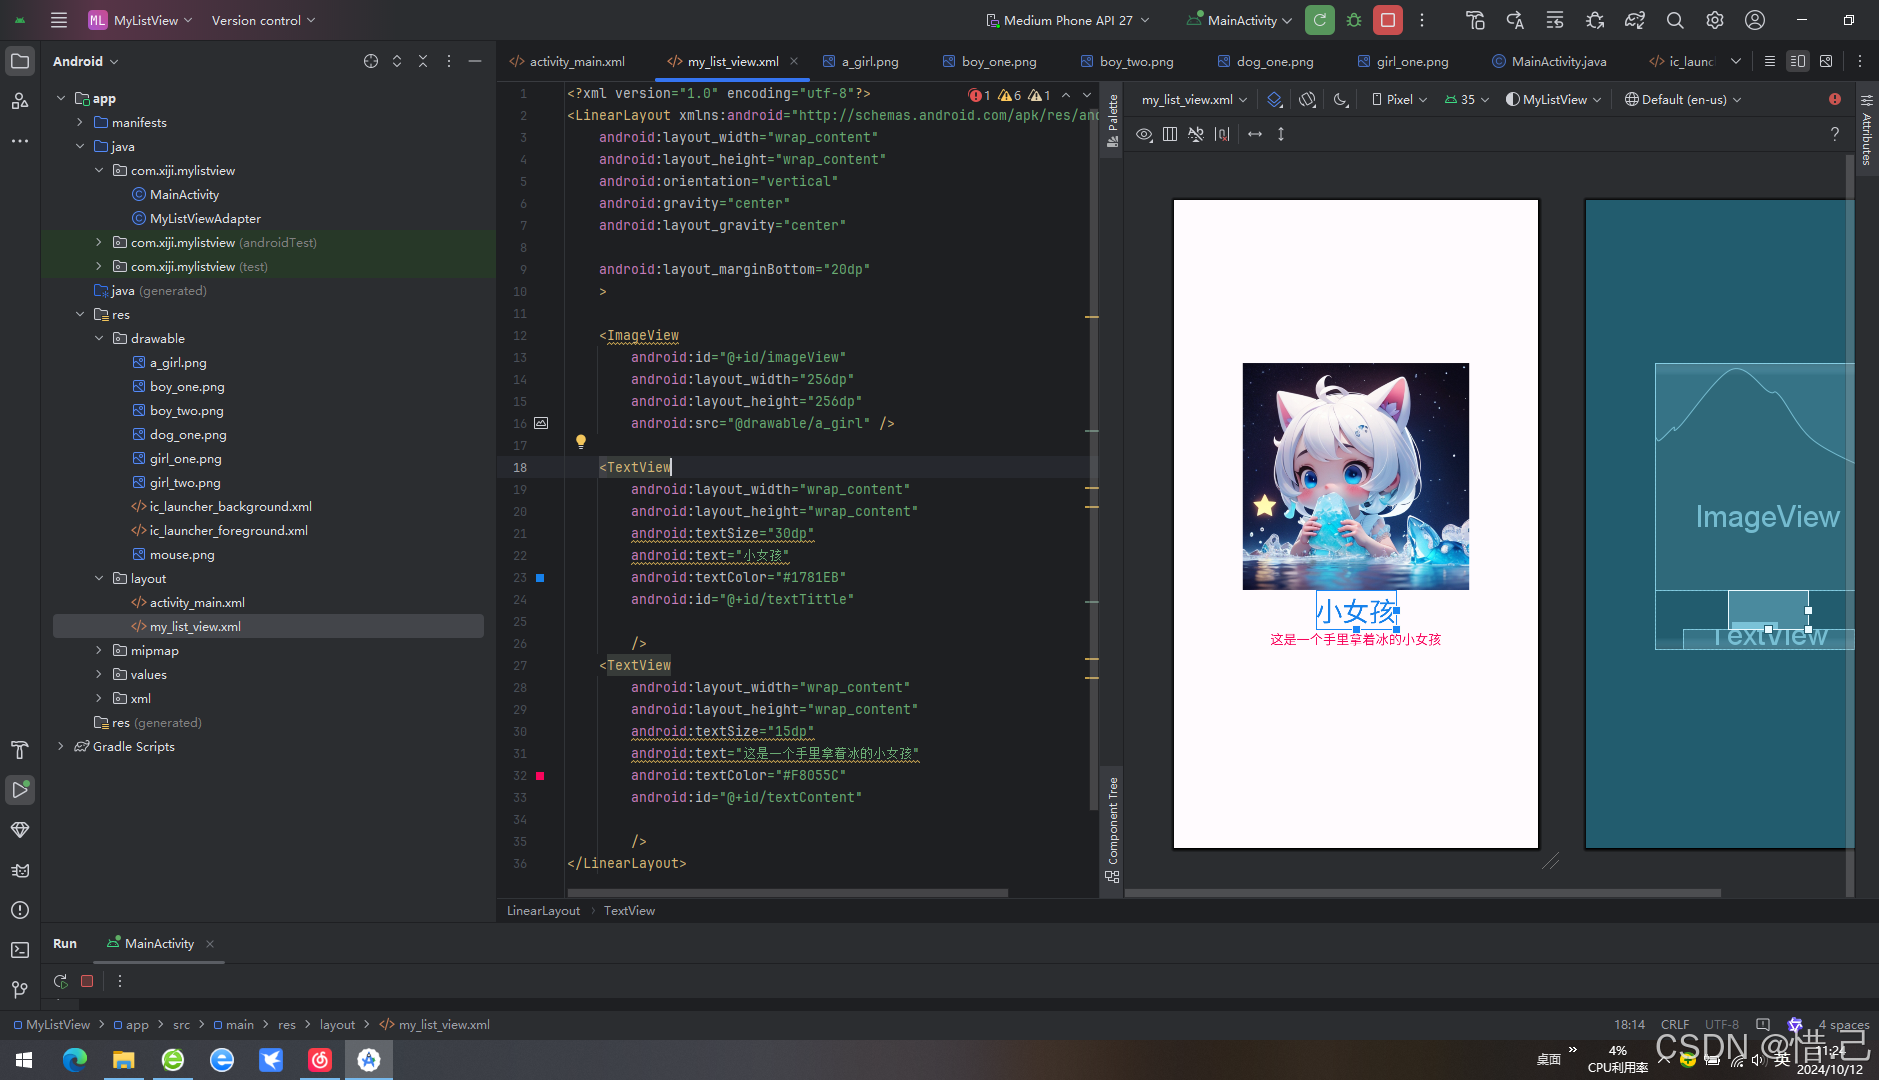
my_list_view.xml文件内容
<?xml version="1.0" encoding="utf-8"?>
<LinearLayout xmlns:android="http://schemas.android.com/apk/res/android"android:layout_width="wrap_content"android:layout_height="wrap_content"android:orientation="vertical"android:gravity="center"android:layout_gravity="center"android:layout_marginBottom="20dp"><ImageViewandroid:id="@+id/imageView"android:layout_width="256dp"android:layout_height="256dp"android:src="@drawable/a_girl" /><TextViewandroid:layout_width="wrap_content"android:layout_height="wrap_content"android:textSize="30dp"android:text="小女孩"android:textColor="#1781EB"android:id="@+id/textTittle"/><TextViewandroid:layout_width="wrap_content"android:layout_height="wrap_content"android:textSize="15dp"android:text="这是一个手里拿着冰的小女孩"android:textColor="#F8055C"android:id="@+id/textContent"/>
</LinearLayout>
activity_main.xml内容
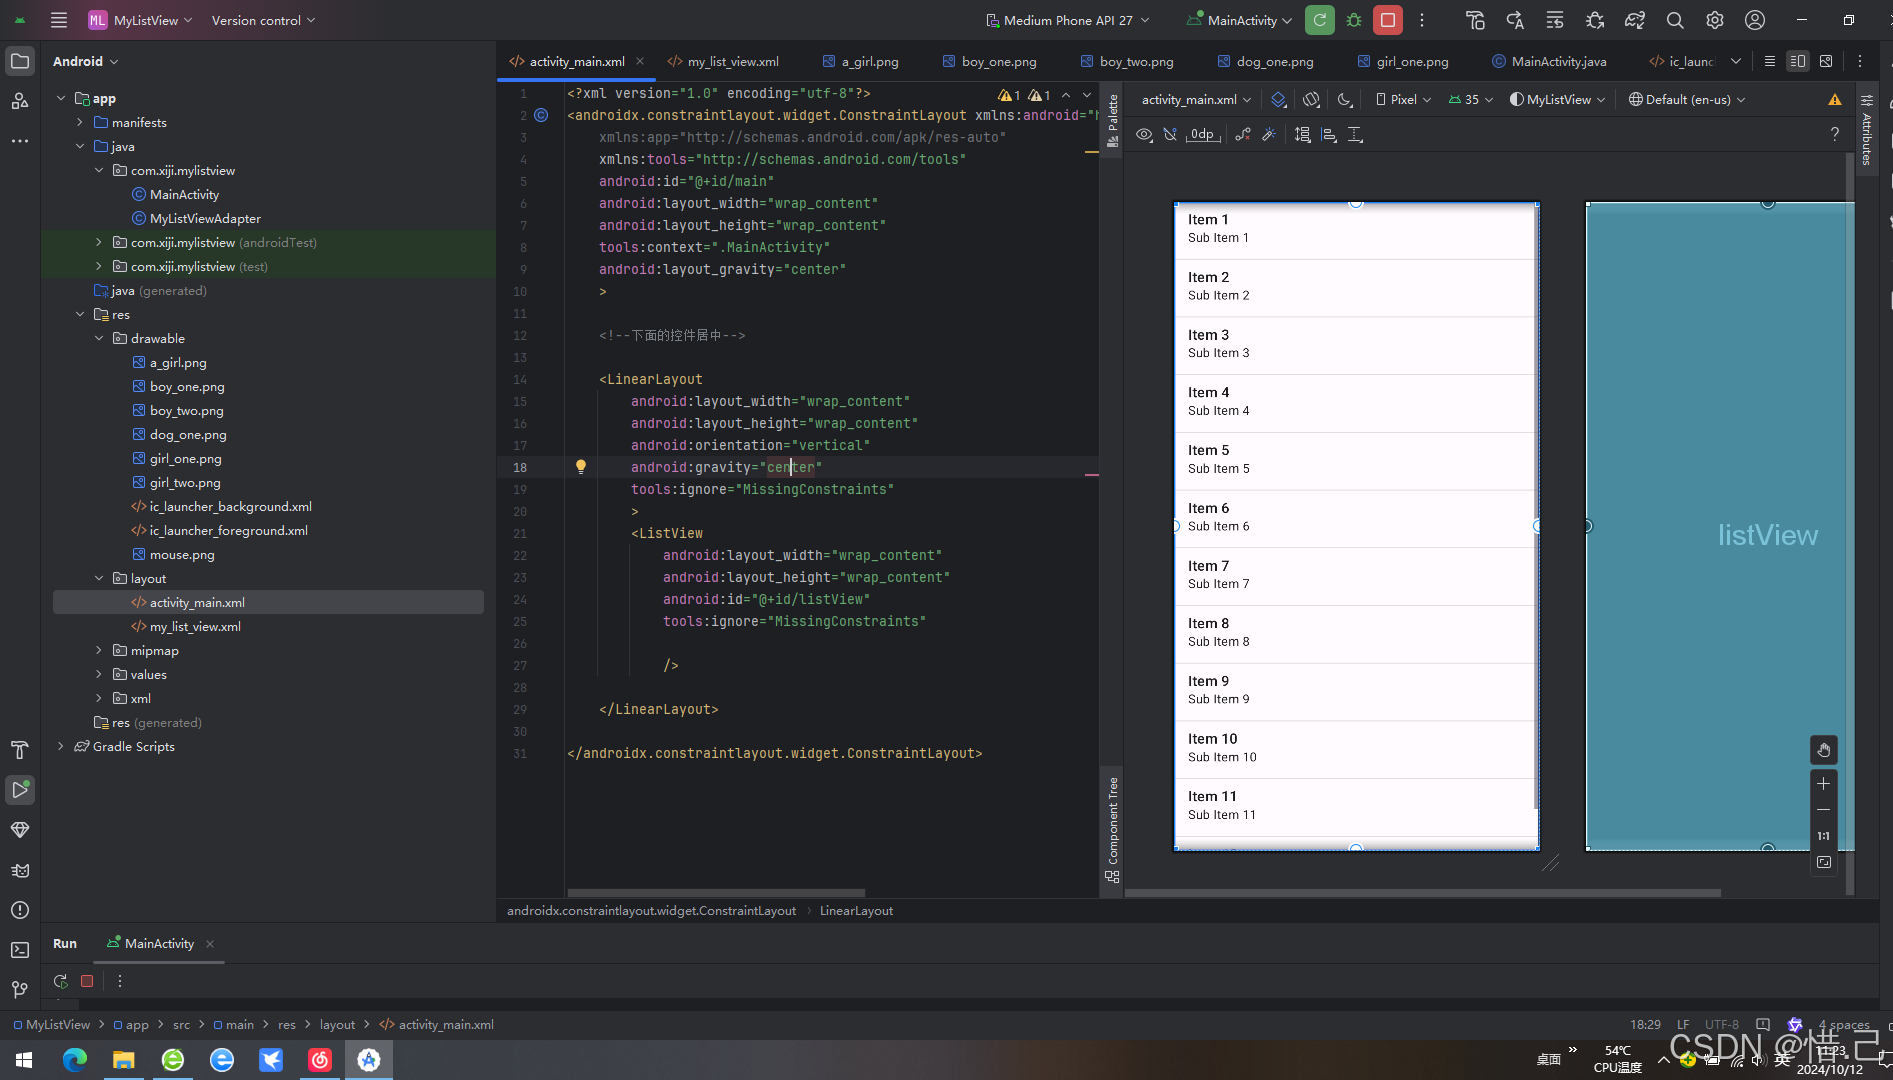
<?xml version="1.0" encoding="utf-8"?>
<androidx.constraintlayout.widget.ConstraintLayout xmlns:android="http://schemas.android.com/apk/res/android"xmlns:app="http://schemas.android.com/apk/res-auto"xmlns:tools="http://schemas.android.com/tools"android:id="@+id/main"android:layout_width="wrap_content"android:layout_height="wrap_content"tools:context=".MainActivity"android:layout_gravity="center"><!--下面的控件居中--><LinearLayoutandroid:layout_width="wrap_content"android:layout_height="wrap_content"android:orientation="vertical"android:gravity="center"tools:ignore="MissingConstraints"><ListViewandroid:layout_width="wrap_content"android:layout_height="wrap_content"android:id="@+id/listView"tools:ignore="MissingConstraints"/></LinearLayout></androidx.constraintlayout.widget.ConstraintLayout>
java%E4%BB%A3%E7%A0%81">2-java代码
java">package com.xiji.mylistview;import android.os.Bundle;
import android.widget.ListView;import androidx.activity.EdgeToEdge;
import androidx.appcompat.app.AppCompatActivity;
import androidx.core.graphics.Insets;
import androidx.core.view.ViewCompat;
import androidx.core.view.WindowInsetsCompat;public class MainActivity extends AppCompatActivity {private MyListViewAdapter  myListViewAdapter;private ListView listView;@Overrideprotected void onCreate(Bundle savedInstanceState) {super.onCreate(savedInstanceState);EdgeToEdge.enable(this);setContentView(R.layout.activity_main);ViewCompat.setOnApplyWindowInsetsListener(findViewById(R.id.main), (v, insets) -> {Insets systemBars = insets.getInsets(WindowInsetsCompat.Type.systemBars());v.setPadding(systemBars.left, systemBars.top, systemBars.right, systemBars.bottom);return insets;});//创建适配器initView();}//初始化public void initView() {listView = findViewById(R.id.listView);myListViewAdapter = new MyListViewAdapter();listView.setAdapter(myListViewAdapter);}
}
3-适配器代码
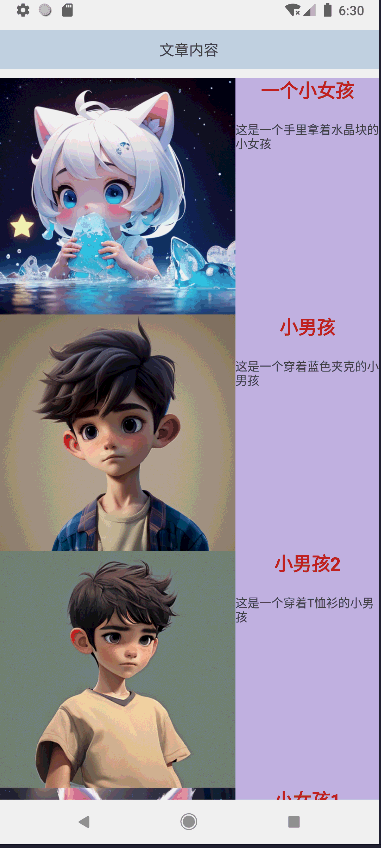
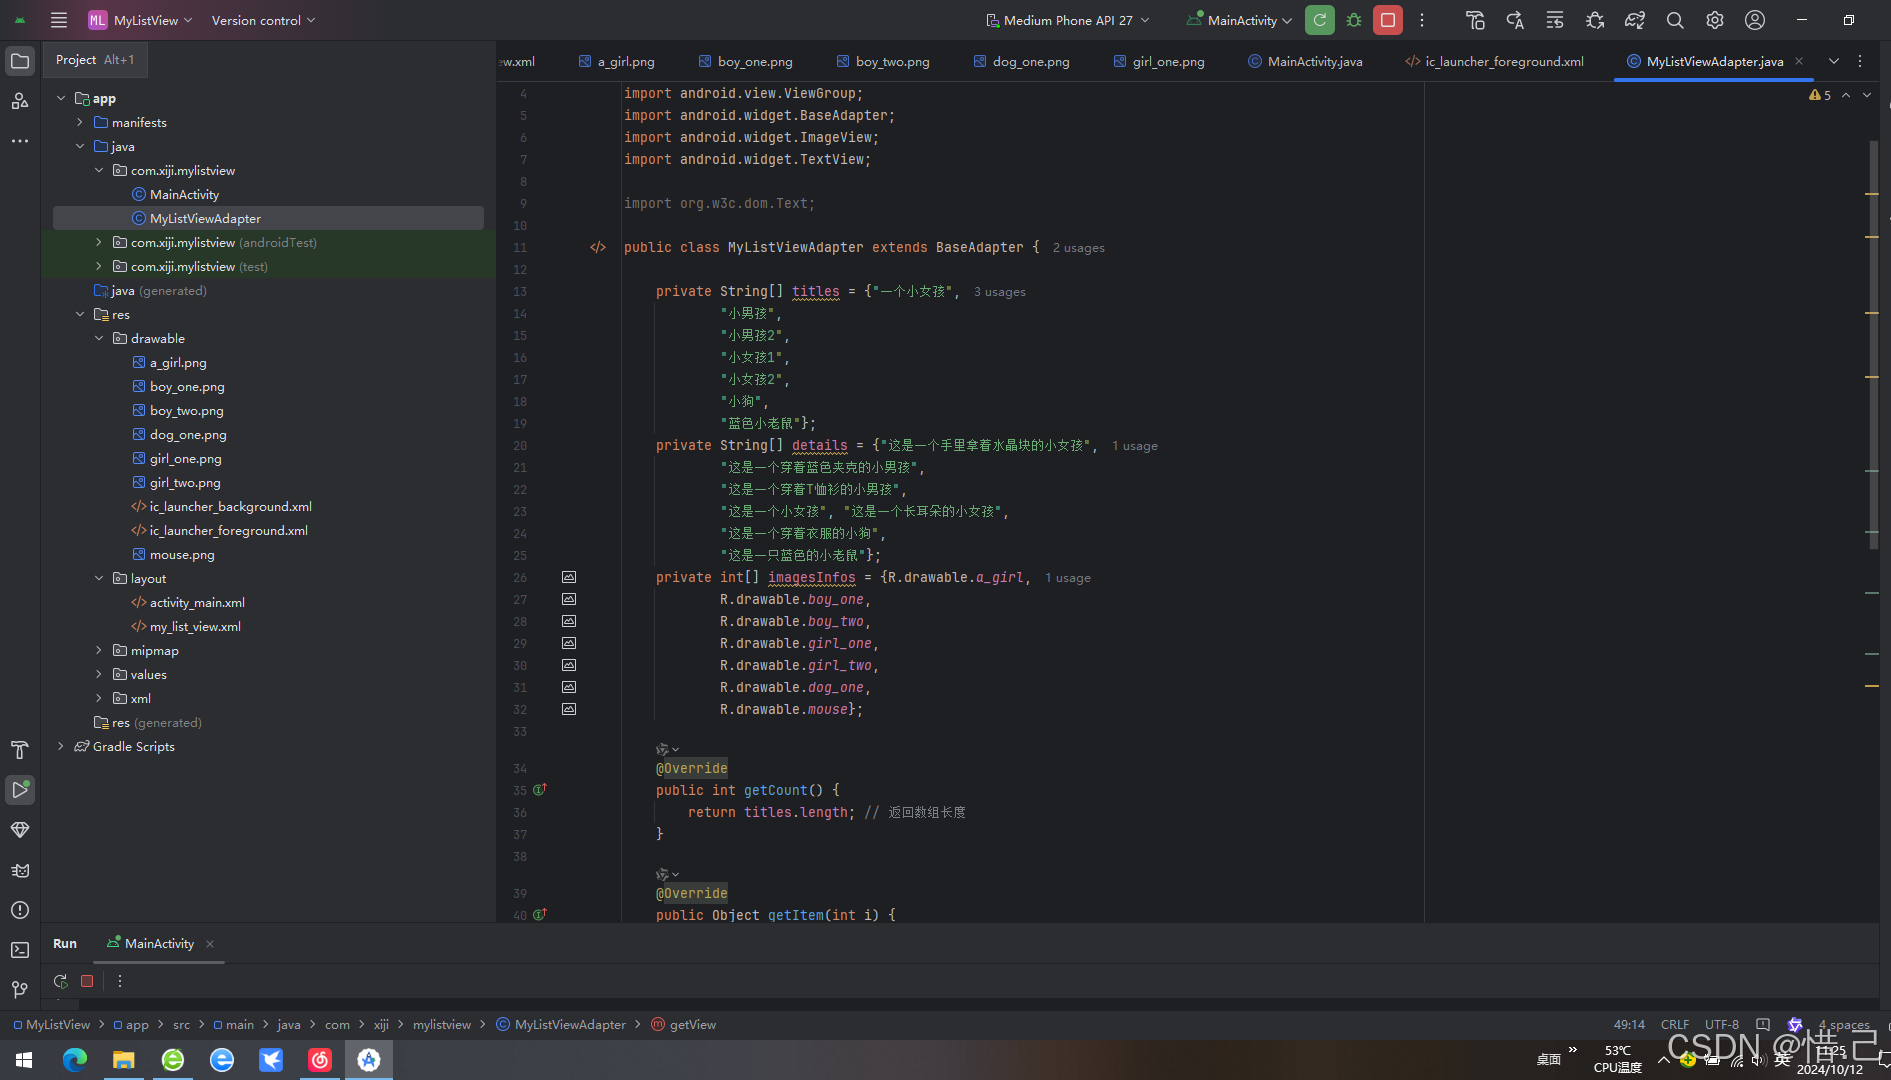
java">package com.xiji.mylistview;import android.view.View;
import android.view.ViewGroup;
import android.widget.BaseAdapter;
import android.widget.ImageView;
import android.widget.TextView;import org.w3c.dom.Text;public class MyListViewAdapter extends BaseAdapter {private String[] titles = {"一个小女孩","小男孩", "小男孩2", "小女孩1", "小女孩2", "小狗", "蓝色小老鼠"};private String[] details = {"这是一个手里拿着水晶块的小女孩", "这是一个穿着蓝色夹克的小男孩", "这是一个穿着T恤衫的小男孩","这是一个小女孩", "这是一个长耳朵的小女孩", "这是一个穿着衣服的小狗", "这是一只蓝色的小老鼠"};private int[] imagesInfos = {R.drawable.a_girl, R.drawable.boy_one, R.drawable.boy_two, R.drawable.girl_one, R.drawable.girl_two, R.drawable.dog_one, R.drawable.mouse};@Overridepublic int getCount() {return titles.length; // 返回数组长度}@Overridepublic Object getItem(int i) {return titles[i]; // 返回对应位置的标题}@Overridepublic long getItemId(int i) {return i; // 返回索引作为 ID}@Overridepublic View getView(int position, View convertView, ViewGroup parent) {// 这里可以添加自定义视图逻辑View inflate = View.inflate(parent.getContext(), R.layout.my_list_view, null);TextView textInfo = inflate.findViewById(R.id.textTittle);textInfo.setText(titles[position]);TextView textDetail = inflate.findViewById(R.id.textContent);textDetail.setText(details[position]);//图片ImageView imageView = inflate.findViewById(R.id.imageView);imageView.setImageResource(imagesInfos[position]);return inflate;}
}
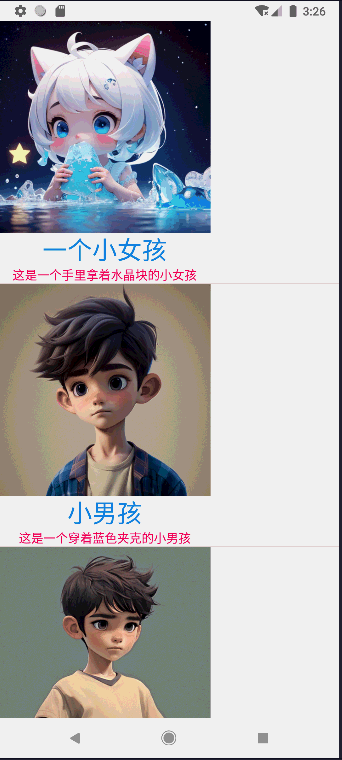
2.效果
2.RecyclerView控件
1..属性
android%3Alayout_width%20%E5%92%8C%20android%3Alayout_height" style="background-color:transparent;">1)android:layout_width 和 android:layout_height
定义 RecyclerView 的宽度和高度。
android:layout_width="match_parent"
android:layout_height="match_parent"
android%3Ascrollbars">2)android:scrollbars
指定滚动条的方向。
android:scrollbars="vertical"
android%3AoverScrollMode">3)android:overScrollMode
控制过度滚动的效果。
android:overScrollMode="always" <!-- 可以是 "always", "ifContentScrolls", "never" -->
android%3AnestedScrollingEnabled">4)android:nestedScrollingEnabled
启用嵌套滚动,默认为 true。
android:nestedScrollingEnabled="true"
android%3AclipToPadding">5)android:clipToPadding
是否将内容裁剪到内边距区域,默认为 true。
android:clipToPadding="false"
android%3Apadding">6)android:padding
设置 RecyclerView 的内边距。
android:padding="10dp"
7)app:layoutManager
通过 XML 设置 LayoutManager(需要使用 app 命名空间)。
app:layoutManager="androidx.recyclerview.widget.LinearLayoutManager"
8)app:spanCount
当使用 GridLayoutManager 时,设置每行/列的项数。
app:spanCount="2"
9)app:reverseLayout
反转布局方向。
app:reverseLayout="true"
10)app:stackFromEnd
从底部开始堆叠列表项。
app:stackFromEnd="true"
2..Java/Kotlin 代码中的属性设置
除了 XML 属性外,还可以通过 Java 或 Kotlin 代码动态地修改 RecyclerView 的属性:
1)设置 LayoutManager
java">recyclerView.setLayoutManager(new LinearLayoutManager(context));
// 或者 GridLayoutManager, StaggeredGridLayoutManager 等
2)设置 ItemAnimator
java">recyclerView.setItemAnimator(new DefaultItemAnimator());
3)设置适配器
java">recyclerView.setAdapter(adapter);
4)设置项目装饰
java">recyclerView.addItemDecoration(new DividerItemDecoration(context, DividerItemDecoration.VERTICAL));
5)设置 HasFixedSize
java">recyclerView.setHasFixedSize(true); // 如果所有项大小相同,可以提高性能
6)设置 NestedScrollingEnabled
java">recyclerView.setNestedScrollingEnabled(false); // 默认为 true
7)设置 OnScrollListener
java">recyclerView.addOnScrollListener(new RecyclerView.OnScrollListener() {@Overridepublic void onScrolled(@NonNull RecyclerView recyclerView, int dx, int dy) {super.onScrolled(recyclerView, dx, dy);// 处理滚动事件}
});
8)设置 ItemTouchHelper
java">ItemTouchHelper itemTouchHelper = new ItemTouchHelper(simpleCallback);
itemTouchHelper.attachToRecyclerView(recyclerView);
9)设置 OverScrollMode
java">recyclerView.setOverScrollMode(View.OVER_SCROLL_ALWAYS); // 可以是 OVER_SCROLL_ALWAYS, OVER_SCROLL_IF_CONTENT_SCROLLS, OVER_SCROLL_NEVER
10)设置 ItemViewCacheSize
recyclerView.setItemViewCacheSize(20); // 设置缓存的视图数量
11)设置 RecycledViewPool
java">RecyclerView.RecycledViewPool pool = new RecyclerView.RecycledViewPool();
recyclerView.setRecycledViewPool(pool);
12)设置 AccessibilityDelegateCompat
java">recyclerView.setAccessibilityDelegateCompat(new RecyclerViewAccessibilityDelegate(recyclerView));
13)设置 EdgeEffectFactory
java">recyclerView.setEdgeEffectFactory(new CustomEdgeEffectFactory());
14)设置 Focusable 和 FocusableInTouchMode
java">recyclerView.setFocusable(true);
recyclerView.setFocusableInTouchMode(true);
15)设置 DescendantFocusability
java">recyclerView.setDescendantFocusability(ViewGroup.FOCUS_BLOCK_DESCENDANTS);
16.案例:Recyclerview 的简单使用
1.代码
1-xml布局代码
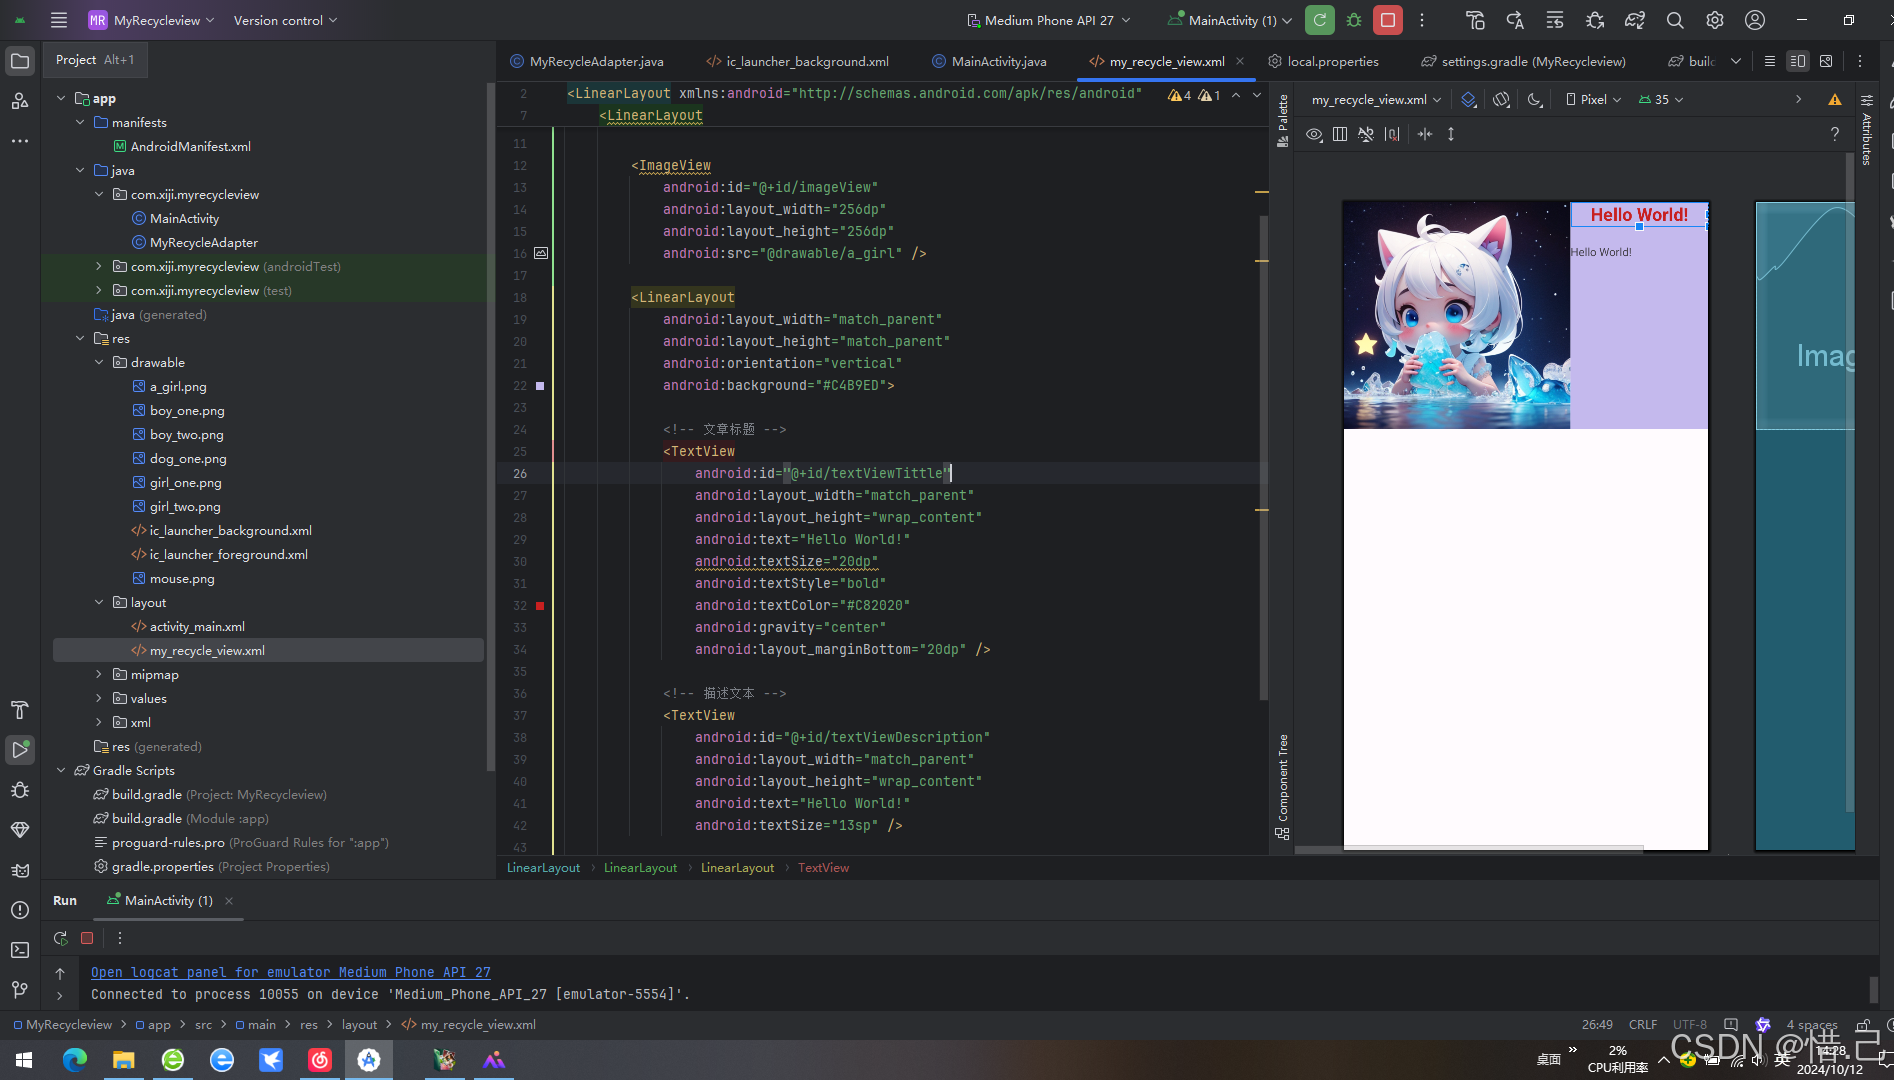
<?xml version="1.0" encoding="utf-8"?>
<LinearLayout xmlns:android="http://schemas.android.com/apk/res/android"android:layout_width="match_parent"android:layout_height="wrap_content"android:orientation="vertical"><LinearLayoutandroid:layout_width="match_parent"android:layout_height="wrap_content"android:orientation="horizontal"><ImageViewandroid:id="@+id/imageView"android:layout_width="256dp"android:layout_height="256dp"android:src="@drawable/a_girl" /><LinearLayoutandroid:layout_width="match_parent"android:layout_height="match_parent"android:orientation="vertical"android:background="#C4B9ED"><!-- 文章标题 --><TextViewandroid:id="@+id/textViewTittle"android:layout_width="match_parent"android:layout_height="wrap_content"android:text="Hello World!"android:textSize="20dp"android:textStyle="bold"android:textColor="#C82020"android:gravity="center"android:layout_marginBottom="20dp" /><!-- 描述文本 --><TextViewandroid:id="@+id/textViewDescription"android:layout_width="match_parent"android:layout_height="wrap_content"android:text="Hello World!"android:textSize="13sp" /></LinearLayout></LinearLayout></LinearLayout>
activity_main.xml文件
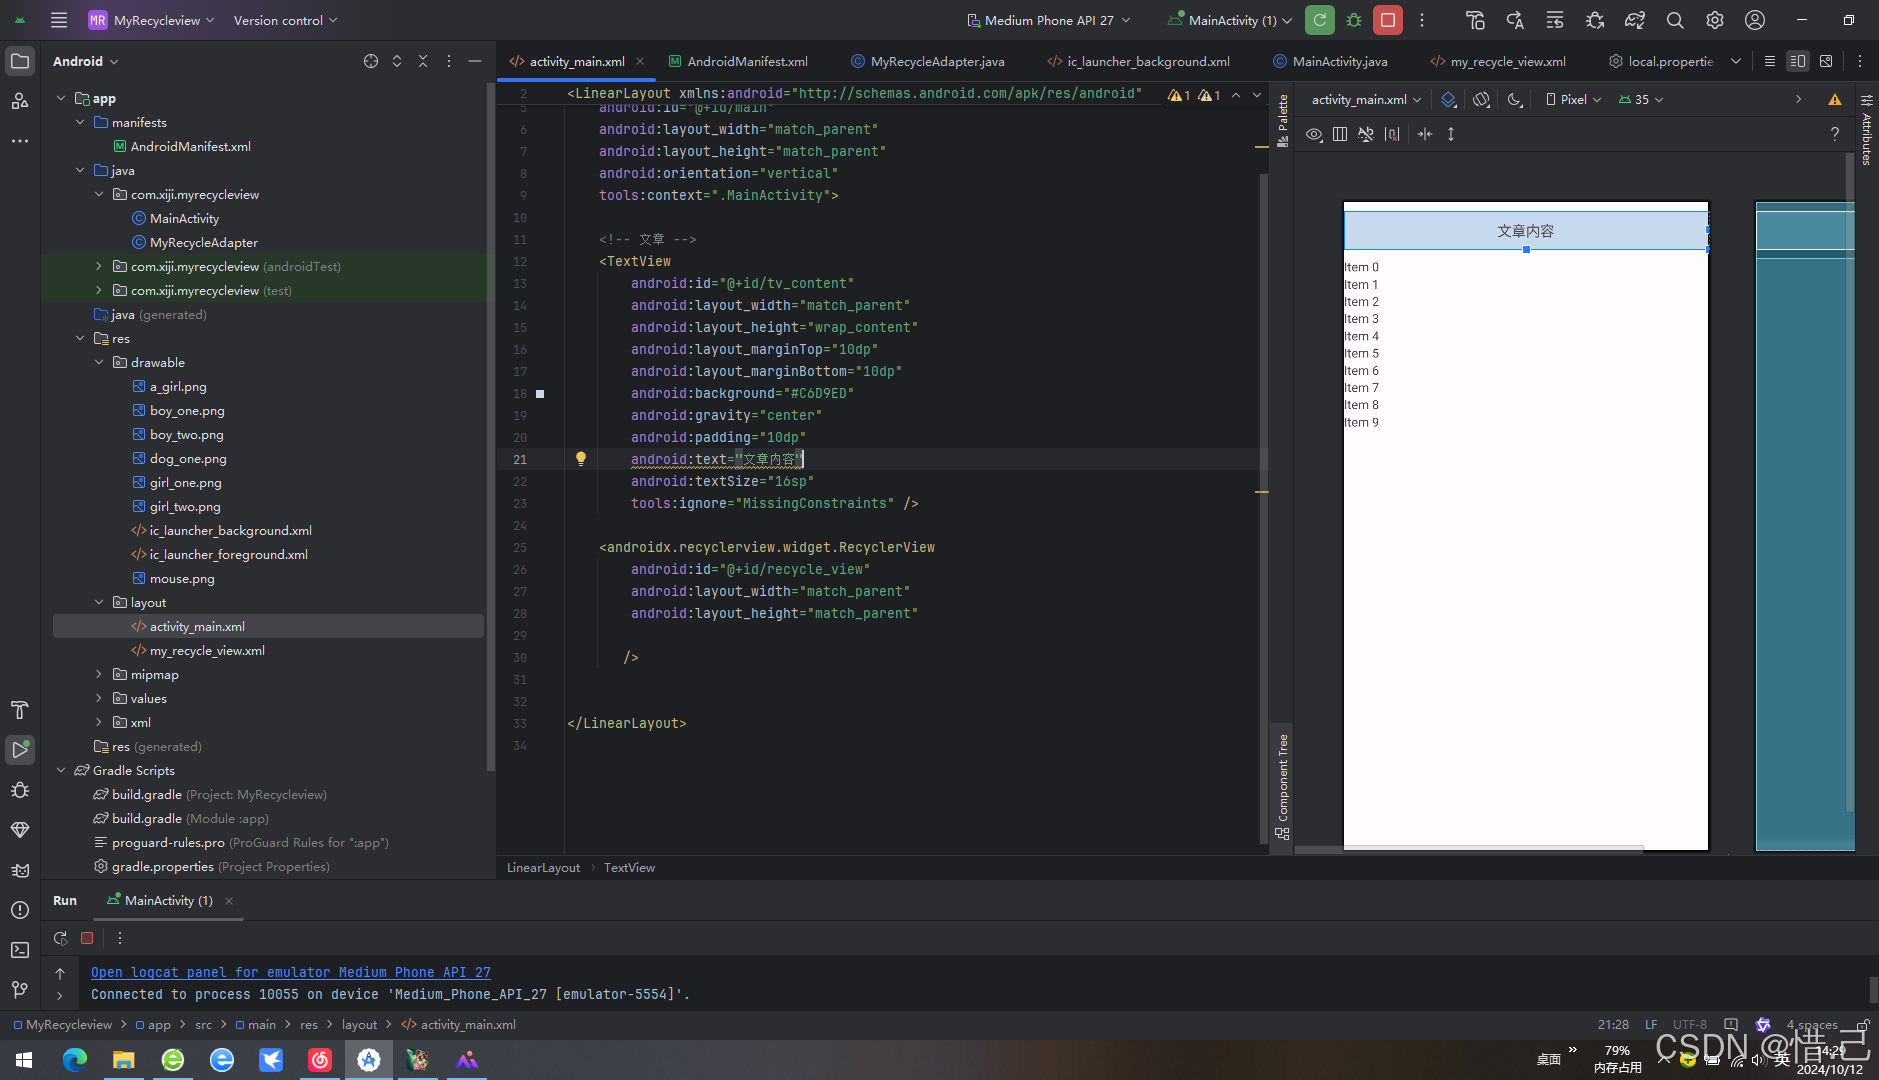
<?xml version="1.0" encoding="utf-8"?>
<LinearLayout xmlns:android="http://schemas.android.com/apk/res/android"xmlns:app="http://schemas.android.com/apk/res-auto"xmlns:tools="http://schemas.android.com/tools"android:id="@+id/main"android:layout_width="match_parent"android:layout_height="match_parent"android:orientation="vertical"tools:context=".MainActivity"><!-- 文章 --><TextViewandroid:id="@+id/tv_content"android:layout_width="match_parent"android:layout_height="wrap_content"android:layout_marginTop="10dp"android:layout_marginBottom="10dp"android:background="#C6D9ED"android:gravity="center"android:padding="10dp"android:text="文章内容"android:textSize="16sp"tools:ignore="MissingConstraints" /><androidx.recyclerview.widget.RecyclerViewandroid:id="@+id/recycle_view"android:layout_width="match_parent"android:layout_height="match_parent"/></LinearLayout>
2-java代码
java">package com.xiji.myrecycleview;import android.os.Bundle;import androidx.activity.EdgeToEdge;
import androidx.appcompat.app.AppCompatActivity;
import androidx.core.graphics.Insets;
import androidx.core.view.ViewCompat;
import androidx.core.view.WindowInsetsCompat;
import androidx.recyclerview.widget.LinearLayoutManager;
import androidx.recyclerview.widget.RecyclerView;public class MainActivity extends AppCompatActivity {// 适配器MyRecycleAdapter adapter;// 视图RecyclerView recyclerView;@Overrideprotected void onCreate(Bundle savedInstanceState) {super.onCreate(savedInstanceState);EdgeToEdge.enable(this);setContentView(R.layout.activity_main);ViewCompat.setOnApplyWindowInsetsListener(findViewById(R.id.main), (v, insets) -> {Insets systemBars = insets.getInsets(WindowInsetsCompat.Type.systemBars());v.setPadding(systemBars.left, systemBars.top, systemBars.right, systemBars.bottom);return insets;});initView();}private void initView() {recyclerView = findViewById(R.id.recycle_view);//设置布局管理器recyclerView.setLayoutManager(new LinearLayoutManager(this));adapter = new MyRecycleAdapter();//设置数据适配器recyclerView.setAdapter(adapter);}
}
3-适配器代码
java">package com.xiji.myrecycleview;import android.view.LayoutInflater;
import android.view.View;
import android.view.ViewGroup;
import android.widget.ImageView;
import android.widget.TextView;import androidx.recyclerview.widget.RecyclerView;public class MyRecycleAdapter extends RecyclerView.Adapter<MyRecycleAdapter.MyView> {private String[] titles = {"一个小女孩","小男孩","小男孩2","小女孩1","小女孩2","小狗","蓝色小老鼠"};private String[] details = {"这是一个手里拿着水晶块的小女孩","这是一个穿着蓝色夹克的小男孩","这是一个穿着T恤衫的小男孩","这是一个小女孩", "这是一个长耳朵的小女孩","这是一个穿着衣服的小狗","这是一只蓝色的小老鼠"};private int[] imagesInfos = {R.drawable.a_girl,R.drawable.boy_one,R.drawable.boy_two,R.drawable.girl_one,R.drawable.girl_two,R.drawable.dog_one,R.drawable.mouse};@Overridepublic MyView onCreateViewHolder( ViewGroup parent, int viewType) {View view = LayoutInflater.from(parent.getContext()).inflate(R.layout.my_recycle_view, parent, false);return new MyView(view);}@Overridepublic void onBindViewHolder( MyView holder, int position) {holder.title.setText(titles[position]);holder.detail.setText(details[position]);holder.image.setImageResource(imagesInfos[position]);}@Overridepublic int getItemCount() {return titles.length;}class MyView extends RecyclerView.ViewHolder {TextView title;TextView detail;ImageView image;public MyView(View itemView) {super(itemView);title = itemView.findViewById(R.id.textViewTittle);detail = itemView.findViewById(R.id.textViewDescription);image = itemView.findViewById(R.id.imageView);}}
}
2.效果