Ubuntu 22.04 Ubuntu 22.04 是一个基于 Debian 的 Linux 操作系统,它是一个长期支持版本 (LTS),提供五年官方支持和安全更新。
它使用现代的 GNOME 桌面环境,优化了性能和稳定性,并包含最新的软件包和工具来支持新硬件。此外,Ubuntu 22.04 增强了安全性,并提供了更严格的默认安全设置和隐私保护。
Ubuntu 22.04 仍然受支持吗?
是的!
Ubuntu 22.04 的代号是 Jammy Jellyfish。它于 2022 年 4 月 21 日发布,是一个长期支持版本,支持五年,直到 2027 年 4 月。
什么是 Browserless?
Browserless 是一款强大的浏览器解决方案。基于云集群,Browserless 旨在以可扩展且高效的方式促进复杂的浏览器自动化任务、网络爬取和测试。它基于 Nstbrowser 的全面指纹库,并提供随机指纹切换,以满足用户对数据收集和自动化任务的需求。
您对网络爬取和 Browserless 有什么奇妙的想法和疑问吗?
让我们看看其他开发人员在 Discord 和 Telegram 上分享了什么!
如何在 Ubuntu 22.04 上使用 Browserless?
先决条件
在使用 Browserless 之前,您需要提前配置 NodeJS。
Ubuntu 22.04 自带 Node.js 软件包。虽然默认版本可能不是最新的,但足以满足基本开发需求。我们使用 apt 来安装它,这是一种简单的方法。
步骤 1. 更新本地软件包索引。
在安装 Node.js 之前,更新本地软件包索引:
sudo apt update步骤 2. 安装 Node.js。
使用 apt 包管理器安装 Node.js:
sudo apt install nodejs -y步骤 3. 安装节点包管理器。npm 用于管理 Node.js 模块和包
sudo apt install npm -y步骤 4. 验证 Node.js 和 npm 是否已成功安装。
安装完成后,可以使用以下命令检查已安装的 Node.js 版本:
node -v
npm -v
如果输出 显示版本信息,则表示安装成功。
使用 Browserless
步骤 1. 项目构建
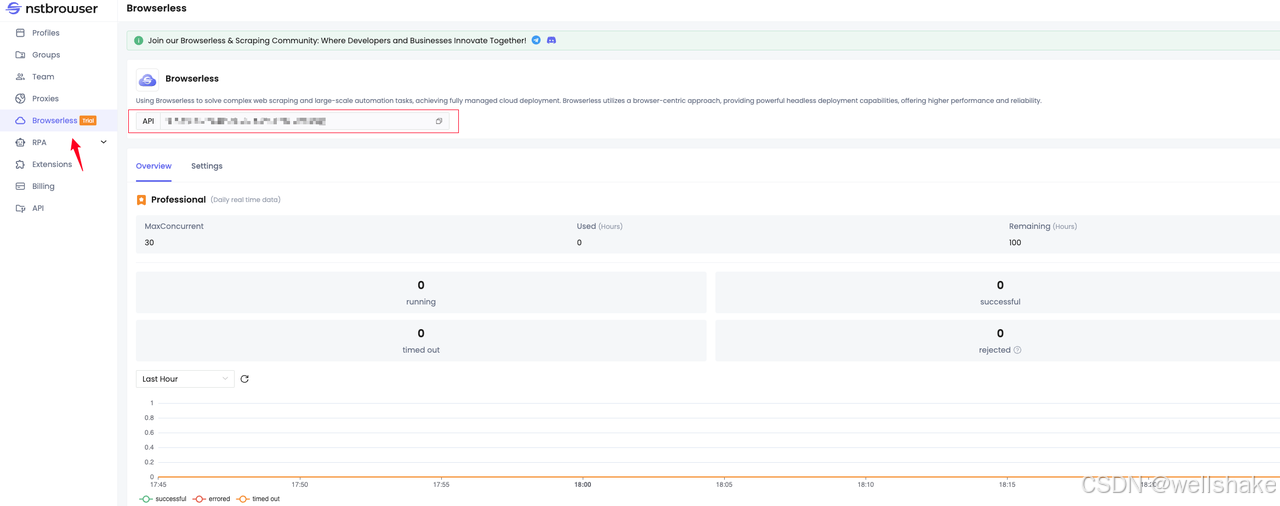
- 按照 Nstbrowser browserless API 文档 的说明,首先,我们需要获取 API Key:
- 接下来,请创建一个节点项目
mkdir nst-browserless && cd nst-browserless
npm init -y- 然后,只需选择您喜欢的 IDE 即可。我们在这里使用 VisualStudio:
code .目前,Browserless 仅支持 Puppeteer 和 PlaywrightPlaywright。在本教程中,我们选择使用 puppeteer。接下来,是时候安装依赖项了:
npm i --save puppeteer-core到目前为止,我们已经完成了项目构建。
步骤 2. 编码
访问 Browserless
首先,编写一个简单的流程来验证 Browserless 是否可以正常访问
import puppeteer from "puppeteer-core";const token = "your token"; // required
const config = {proxy: 'your proxy', // required
};
const query = new URLSearchParams({token: token, // requiredconfig: JSON.stringify(config),
});
const browserWSEndpoint = `https://less.nstbrowser.io/connect?${query.toString()}`;const getBrowser = async () => puppeteer.connect({browserWSEndpoint,defaultViewport: null,
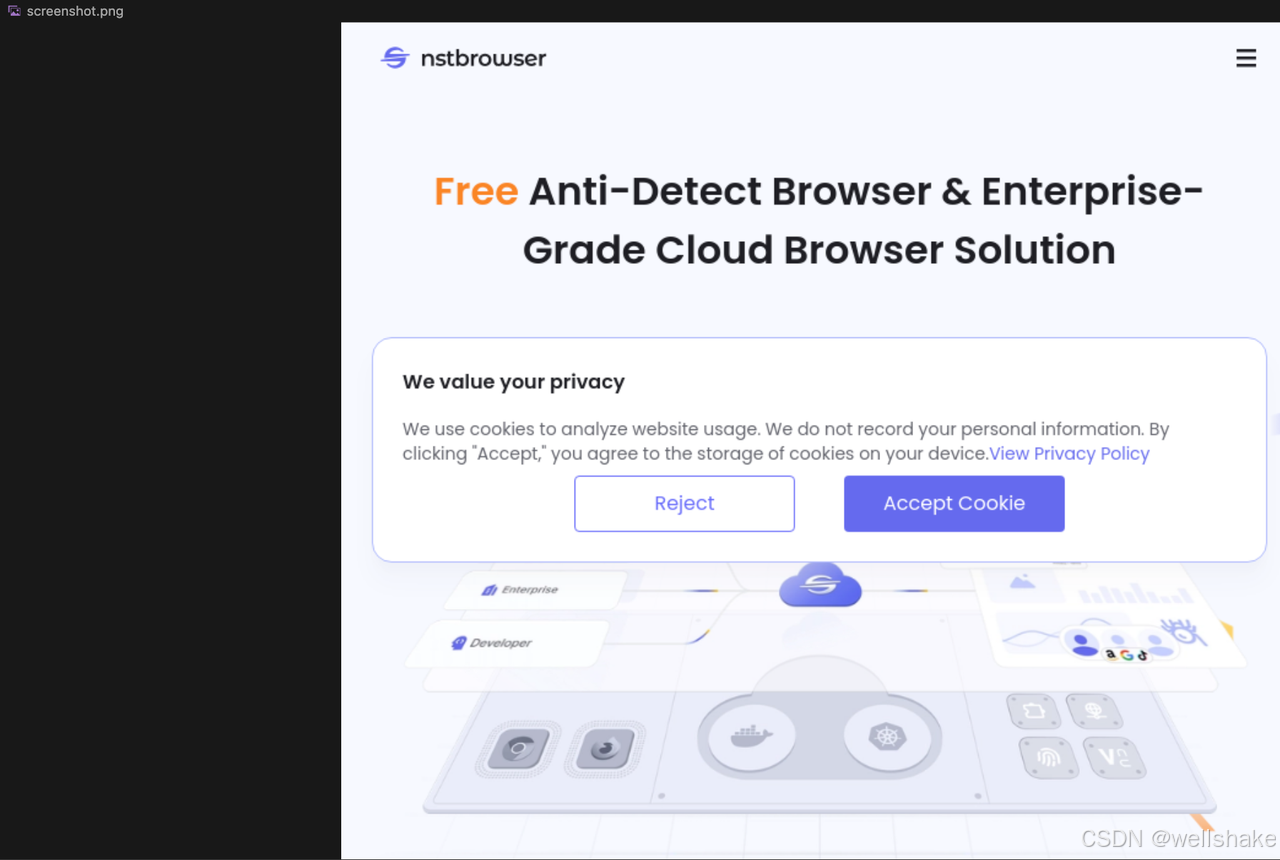
});(async () => {let browser = null;await getBrowser().then(async (browser) => {const page = await browser.newPage();await page.goto("https://nstbrowser.io");await page.screenshot({ path: "screenshot.png", fullPage: true });await page.close();await browser.close();}).catch((error) => {console.log(error);}).finally(() => browser?.close());
})()能够生成屏幕截图表明我们可以正常使用 Browserless:
抓取图片
接下来,我们去Pixels网站抓取一些图片:
- 从主页顶部的 Wall Art 类别导航中进入子页面
- 获取前六个图片地址并打印结果。
- 网站分析
找到导航菜单链接:
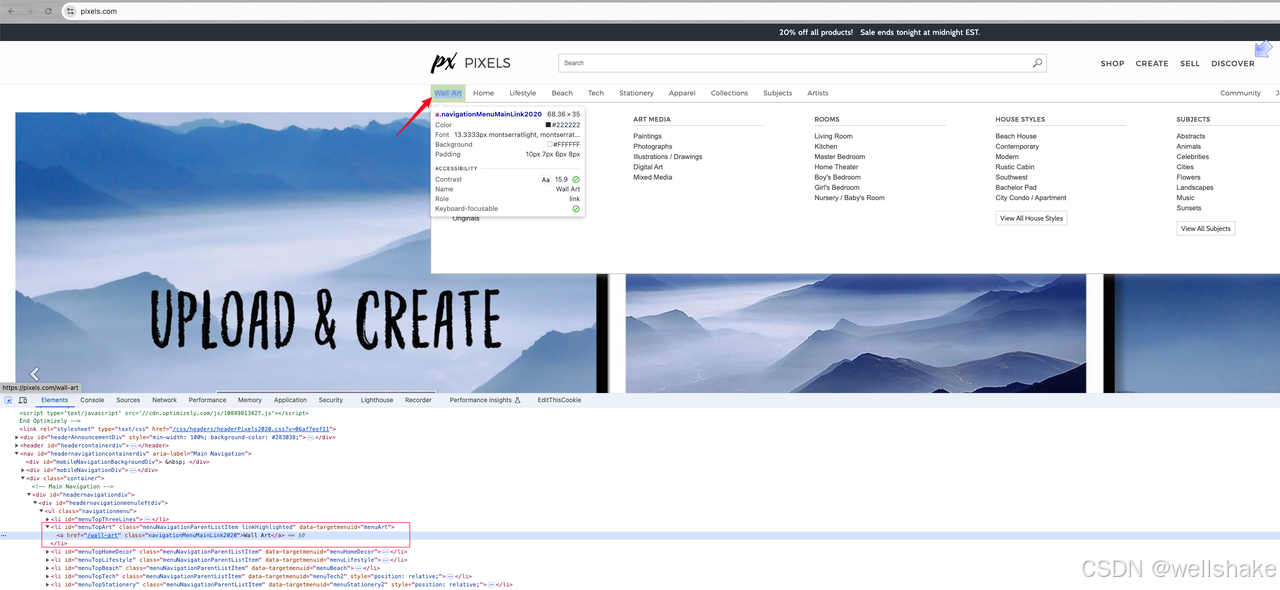
经过分析,我们可以看到我们需要点击的链接是 menuTopArt id 下的 li 元素下的一个 a 标签。接下来,让我们进一步分析要爬取的元素:
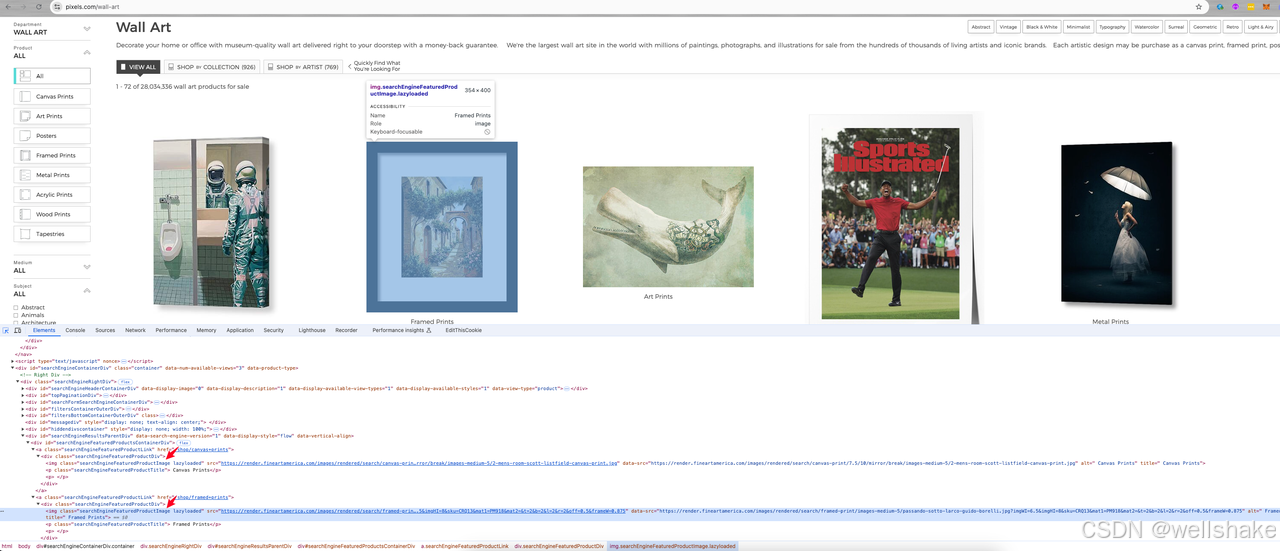
它显示我们想要的图片所在的元素位于类名为 searchEngineFeaturedProductImage 的 img 元素的 src 值中,并进行懒加载。
- 抓取图片
修改我们之前编写的代码以完成抓取工作:
import puppeteer from "puppeteer-core";const token = "your api token";
const config = {proxy: 'your proxy', // required
};
const query = new URLSearchParams({token: token, // requiredconfig: JSON.stringify(config),
});
const browserWSEndpoint = `https://less.nstbrowser.io/connect?${query.toString()}`;const getBrowser = async () => puppeteer.connect({browserWSEndpoint,defaultViewport: null,
});(async () => {let browser = null;const pixelsWebsite = "https://pixels.com";await getBrowser().then(async (browser) => {const page = await browser.newPage();await page.goto(pixelsWebsite);await page.waitForSelector("#menuTopArt", { timeout: 30000 });await page.click("#menuTopArt a"); // click 'Wall Art' menuawait page.waitForSelector(".searchEngineFeaturedProductImage", { timeout: 30000 });const imageElements = await page.$$('.searchEngineFeaturedProductImage');for (const imageElement of imageElements) {const src = await page.evaluate(el => el.src, imageElement);if (src.includes("Blank.jpg")) { // break if Blank.jgp comesbreak}console.log(src);// TODO: Add further processing for the image if needed}await page.close();await browser.close();}).catch((error) => {console.log(error);}).finally(() => browser?.close());
})()
太棒了!在这里您可以找到抓取结果:

总结
Ubuntu 太棒了!在本博客中,我们了解到:
- 在 Ubuntu 22.04 上安装 NodeJS 的步骤
- 通过 Puppeteer 使用 Browserless 在 Pixels 网站上抓取图片地址链接数据
您可以看到整个过程非常轻便快捷,而且过程也非常简单。


