动画系统
为了实现演示中复杂的动画效果,使用 Animation 类统一管理;切换动画通过 css animation 实现,并且是应用在 konvajs-content 上,动画则通过 gsap 实现,应用在 Konva.Node 上,实现思路如下:
/*** 动画相关实现* 1. 切换动画通过 css animation 实现* 1.1 应用在 konvajs-content 上* 1.2 对于 animation 来说,动画就是个类名,通过 style 来设置动画* 1.3 动画结束后,需要移除动画类名,通过 style.animation = '' 实现* 1.4 动画应用是通过 Layer.setAttrs 记录状态,在预览时,动态添加即可** 2. 元素动画则通过 gsap 库实现,应用在 Konva.Node 上* 2.1 这里的动画其实是一个时间线,从某个节点状态运行到另一个节点状态* 2.2 官网: https://gsap.com/docs/v3/* 2.3 官网上提供了很多动画,这里只使用 gsap 的 timeline 来实现动画* 2.4 同样需要记录 动画状态,在预览时,通过动画状态来应用动画;** 3. 切换应用动画的流程:* 3.1 调用 setAnimation 给当前layer标记动画属性;* 3.2 在预览时 调用 applyAnimation 应用动画;* 3.3 动画结束后,调用clearTimeOut清除动画* 3.4 如果是应用全部动画的话,通过 global 标识,每次新增幻灯片,都判断有没有全局动画,如果有,则应用全局动画*/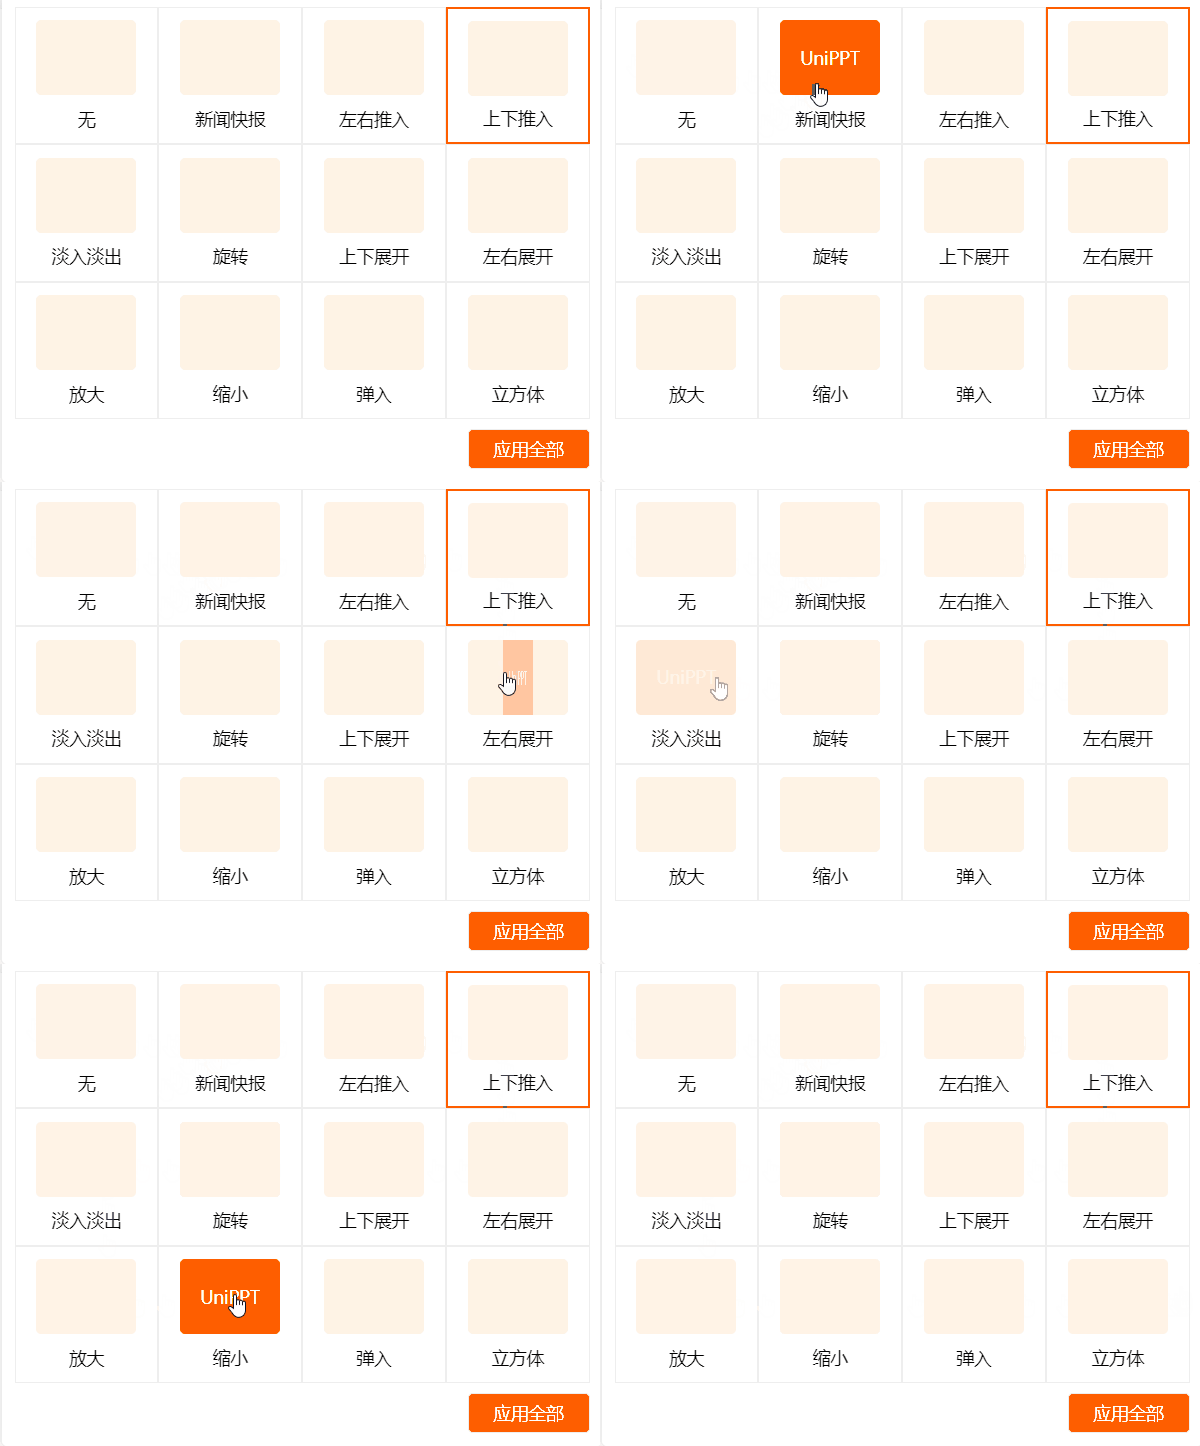
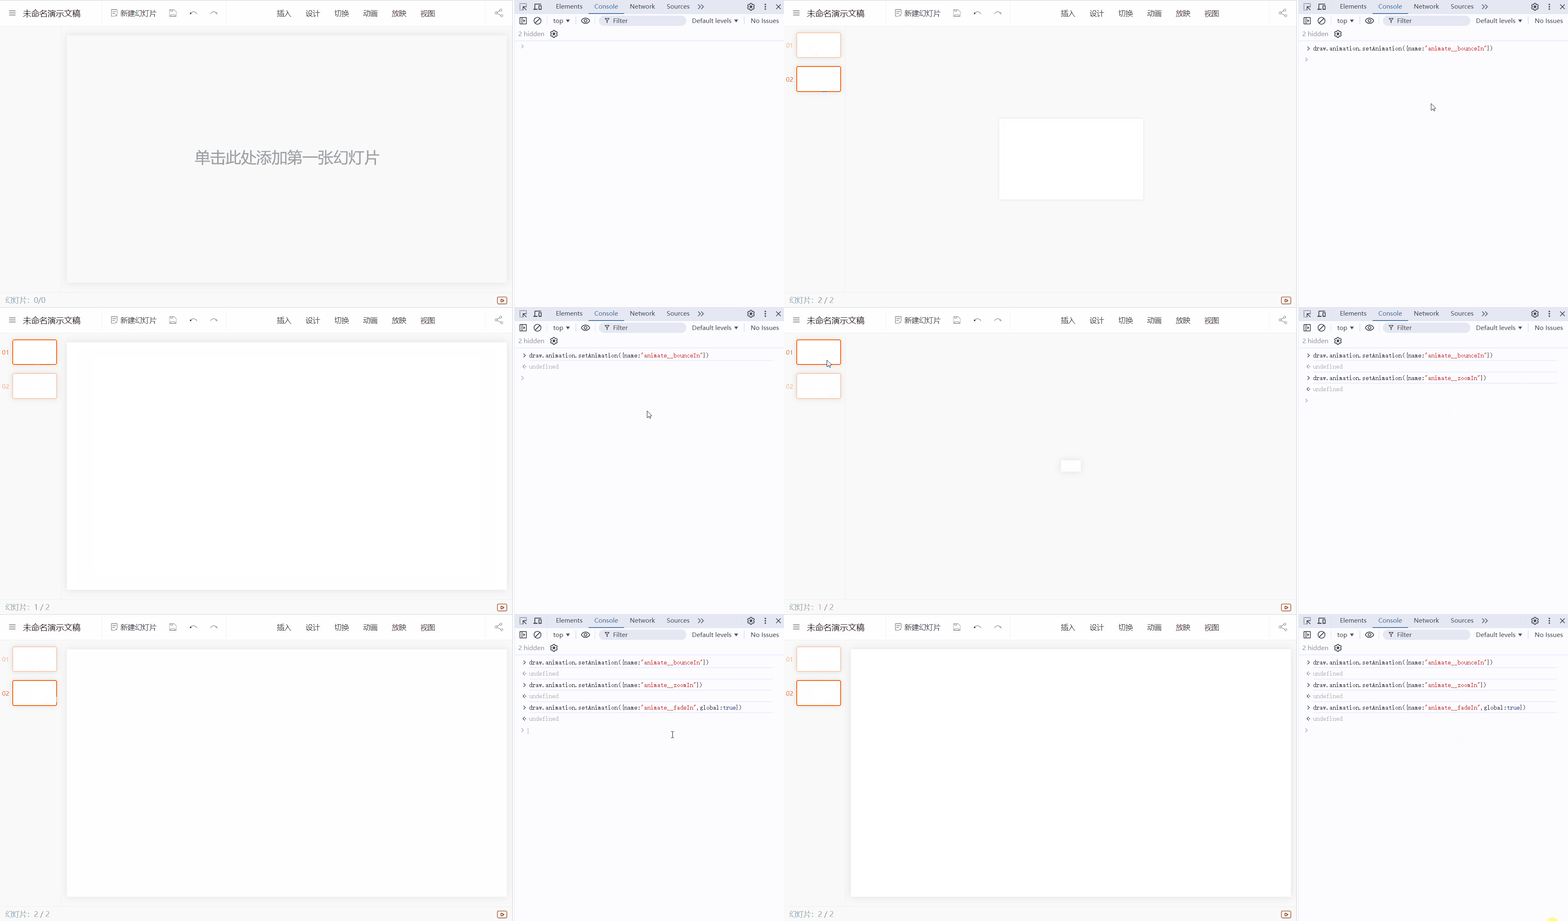
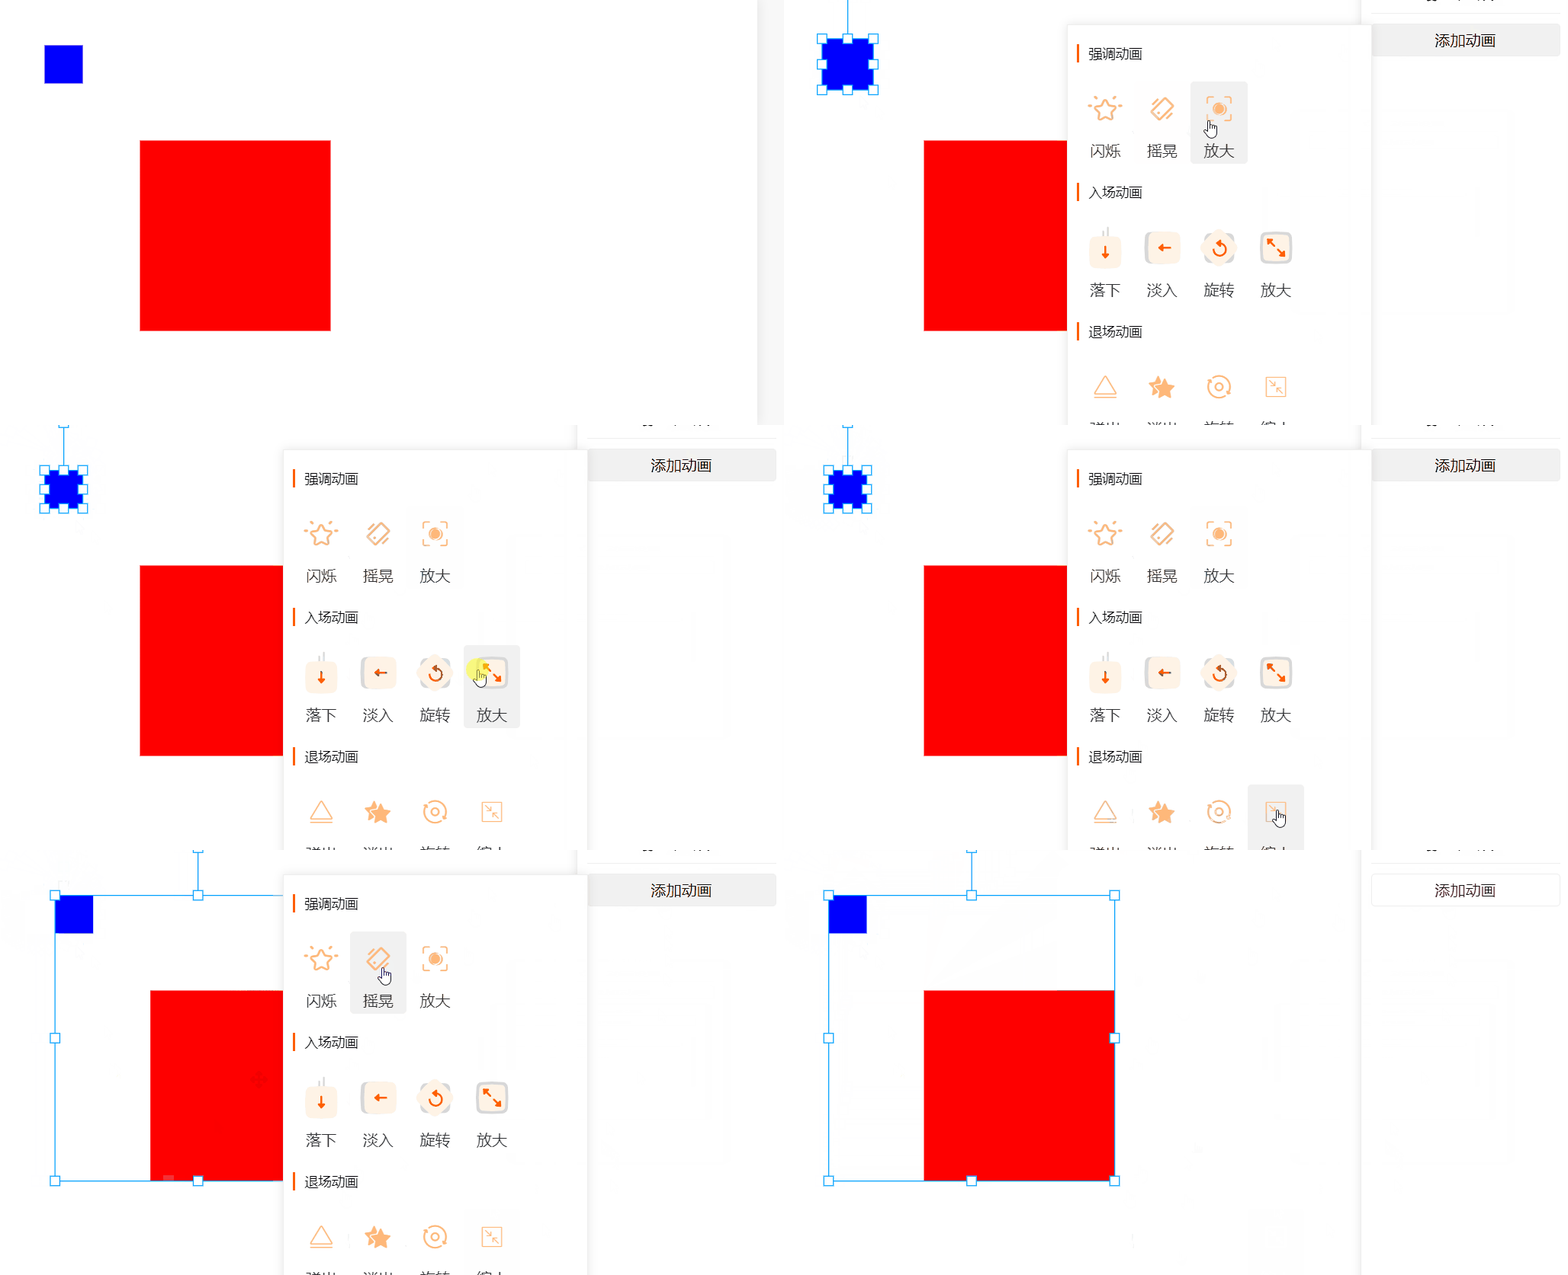
应用到实例上效果如下:
经过研究探讨,发现原生的 Konva.Tween 难以满足应用中复杂的强调、入场、退场动画,对节点的属性控制、播放节点控制能力较弱,而Konva.Animation 则是通过request Animation实现的动画,对时间的控制不够精确,整个属性过渡的效果需要自行实现,因此,决定采用 gsap 动画实现。gasp 官网 具体的API我就不介绍了哈,大家自行前往官网查看,我就举个例子说明项目中的应用:
const timeline = gsap.timeline();
timeline.pause();// 淡入
[KonvaAnimationMap.fadeIn]: () => {const tween = gsap.fromTo(node,{opacity: 0,scaleX: 0,scaleY: 0,x: node.x() + node.width() / 2,y: node.y() + node.height() / 2,},{opacity: 1,scaleX: 1,scaleY: 1,x: node.x(),y: node.y(),onComplete,});timeline.add(tween);return timeline;
}这里只是创建了补间动画及时间轴,并且默认是暂停状态,因为幻灯片中的元素动画应用是有’单击时‘、’上个动画同时‘、’上个动画结束‘,因此,将动画对象返回,根据合适的时机进行执行是最合适的(这里仅是对动画进行应用展示哈,后续的如何在预览时,根据时机播放,我们放在预览中说明)
对齐辅助线
我们参考官网的实现案例:How to snap canvas shape to other shapes,通过监听 dragmove dragend 来实现对齐辅助线:

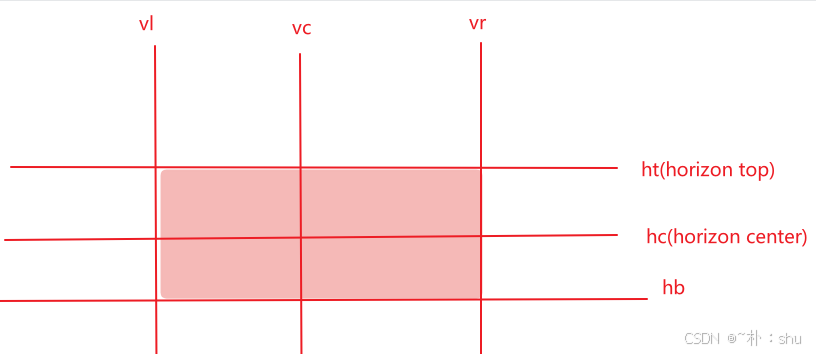
大致思路就是取拖动的六条线坐标,与当前画布节点进行比较,看是否有满足条件的节点,绘制直线即可,konva中的宽高在缩放后是不会改变的,因此,需要取其缩放比例,手动计算实际的宽高:
// 元素真实的宽高与缩放比例也有关系const node = e.target;const scaleX = node.scaleX() || 1;const scaleY = node.scaleY() || 1;const x = node.x();const y = node.y();const width = node.width() * scaleX;const height = node.height() * scaleY; 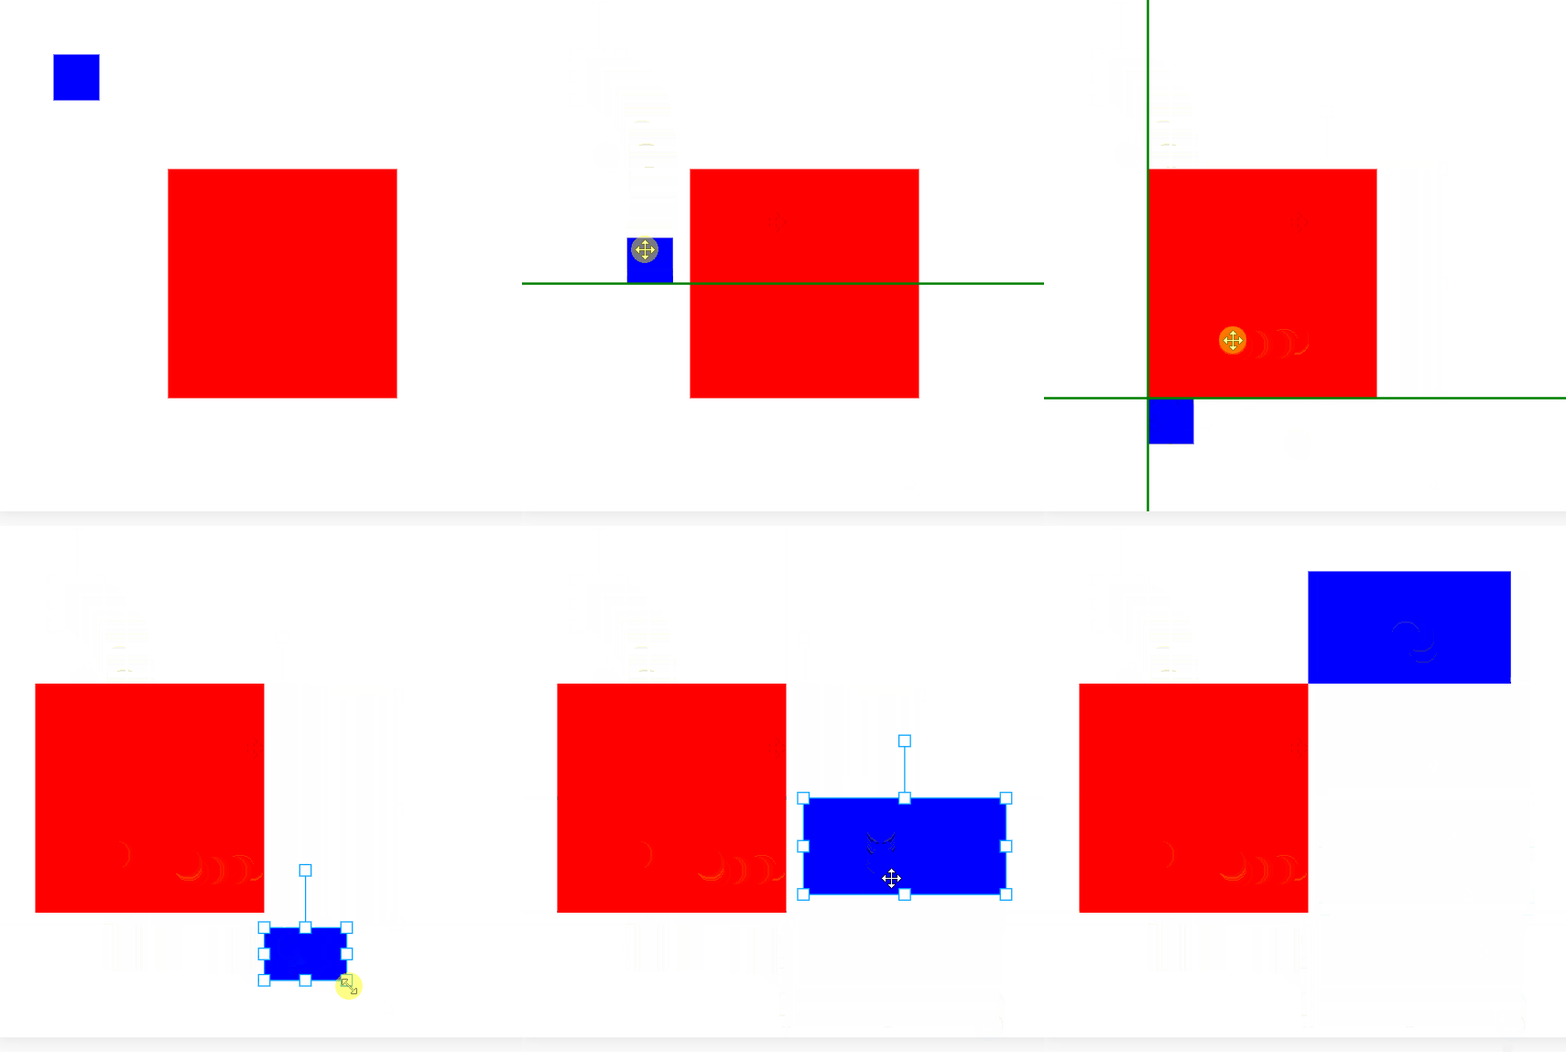
而磁吸效果实现的核心,就是在一定范围内,自动修正节点位置:
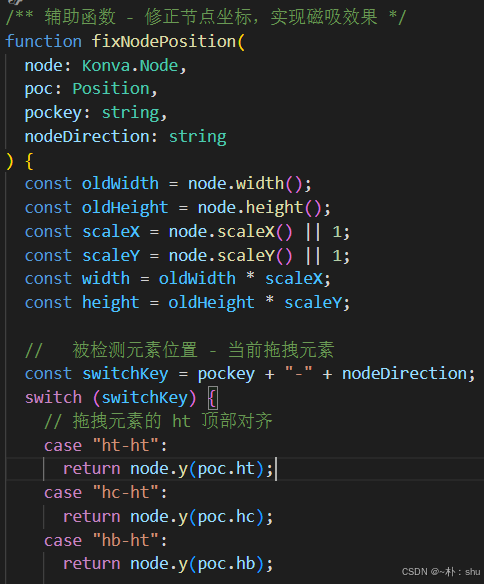
单选、多选、框选
单选通过监听 group.click 事件实现,多选就是用户按住 Ctrl Shift 键的时候,不清空之前的形变节点即可。
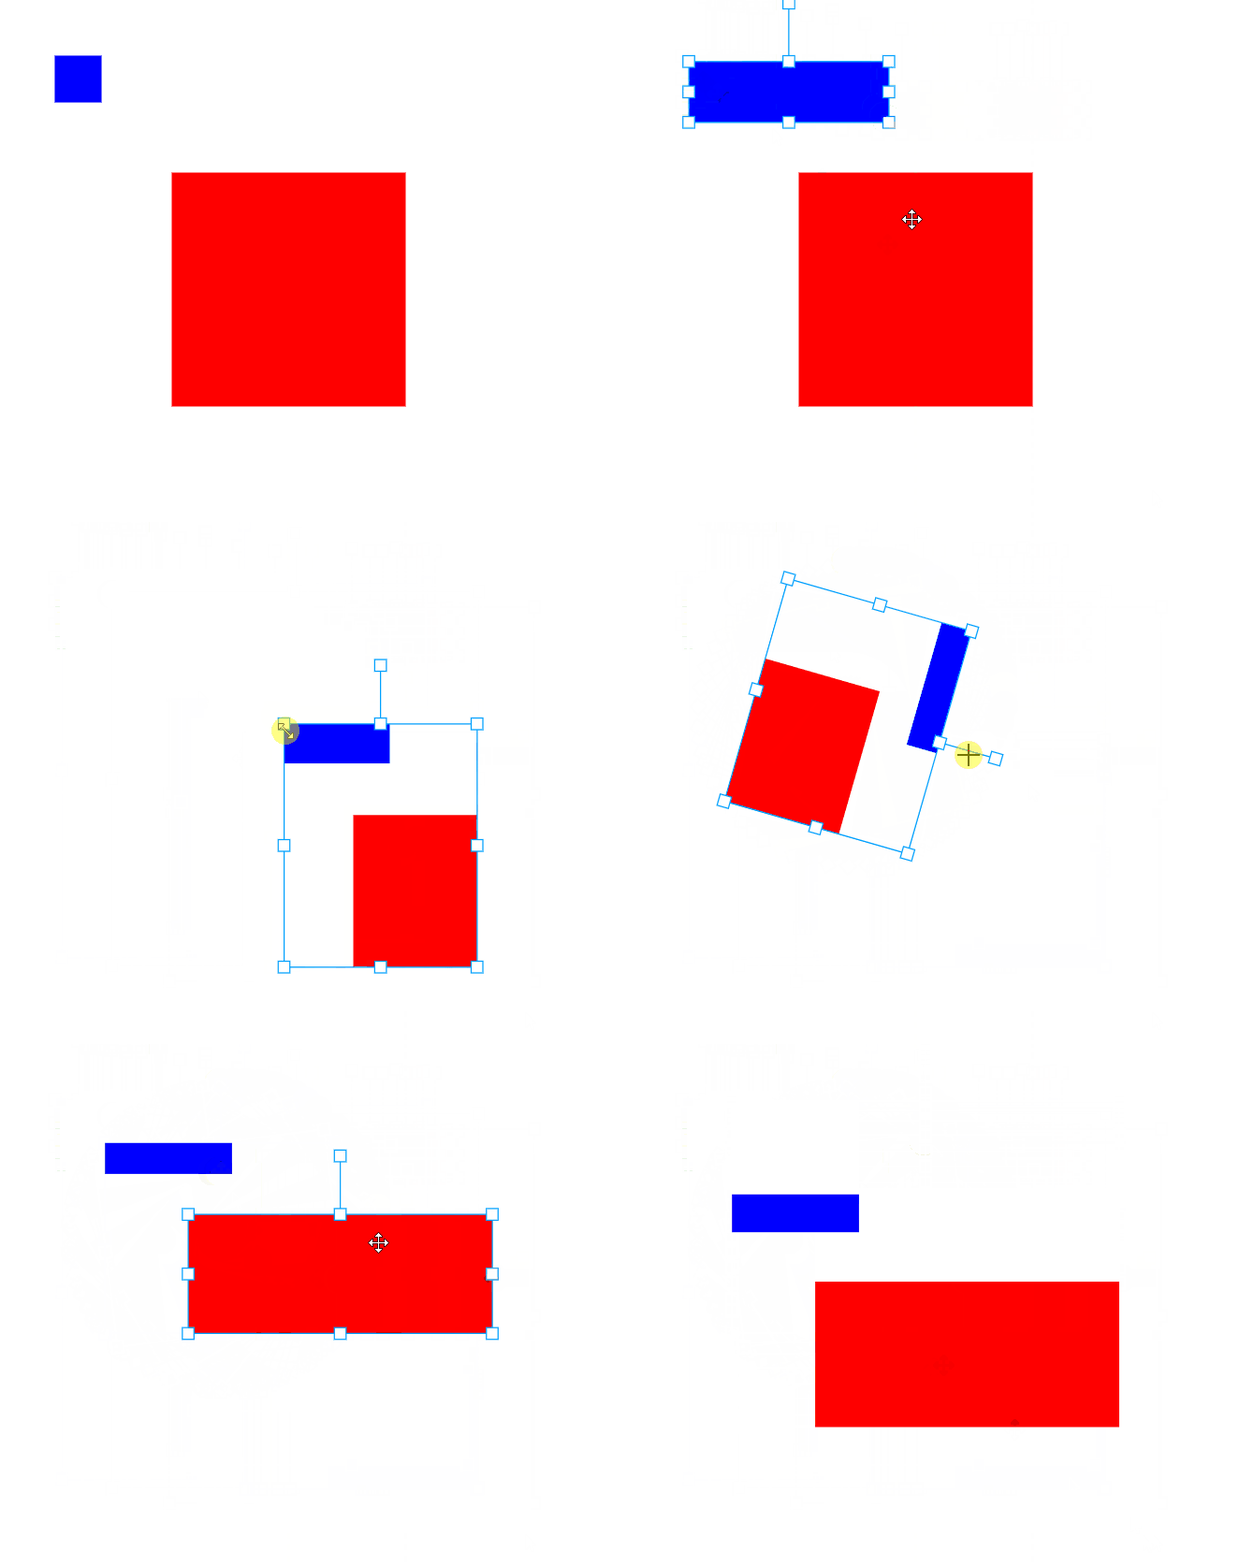
// 左键选中元素if (e.evt.button === 0) {const layer = draw.getLayer();if (!layer) return;const group = e.target.parent!;const { shiftKey, ctrlKey } = e.evt;// 是否多选if (shiftKey || ctrlKey) {// 标记激活状态group.setAttr("selected", true);groupMultiple(e, draw);return;}// 清空所有的形变 包括取消选中节点属性draw.clearTransformer({ selected: true });// 标记激活状态group.setAttr("selected", true);// 为当前节点创建形变节点groupTransformer(draw, group);}通过创建的 Konva.Transformer ,会自动识别宽高尺寸,旋转角度等,不需要我们处理:
框选实现,则通过监听鼠标 mousedown mousemove mouseup 事件,绘制合适的选区,计算位置关系,得出被框选的元素:
// mousedown//   记录初始位置
const ssx = e.evt.offsetX;
const ssy = e.evt.offsetY;
stage.setAttrs({selecting: true,ssx, // stage start xssy, // stage start y
});
const selectBoxCss = ".konva-root-container-frame_selected";
const selectBox = root.querySelector(selectBoxCss) as HTMLDivElement;
selectBox.style.left = ssx + "px";
selectBox.style.top = ssy + "px";
// mousemove// 解析位置
const { offsetX, offsetY } = e.evt;
//   计算偏移量
const dx = offsetX - ssx;
const dy = offsetY - ssy;const selectBoxCss = ".konva-root-container-frame_selected";
const selectBox = root.querySelector(selectBoxCss) as HTMLDivElement;if (dx > 0) selectBox.style.width = dx + "px";
else {// 如果小于 0 则反向框选,需要修改 left widthselectBox.style.left = offsetX + "px";selectBox.style.width = Math.abs(dx) + "px";
}if (dy > 0) selectBox.style.height = dy + "px";
else {selectBox.style.top = offsetY + "px";selectBox.style.height = Math.abs(dy) + "px";
}
// mouseup
stage.setAttrs({selecting: null,ssx: null,ssy: null,
});const selectBoxCss = ".konva-root-container-frame_selected";
const selectBox = root.querySelector(selectBoxCss) as HTMLDivElement;
selectBox.style.top = "0px";
selectBox.style.left = "0px";
selectBox.style.width = "0";
selectBox.style.height = "0";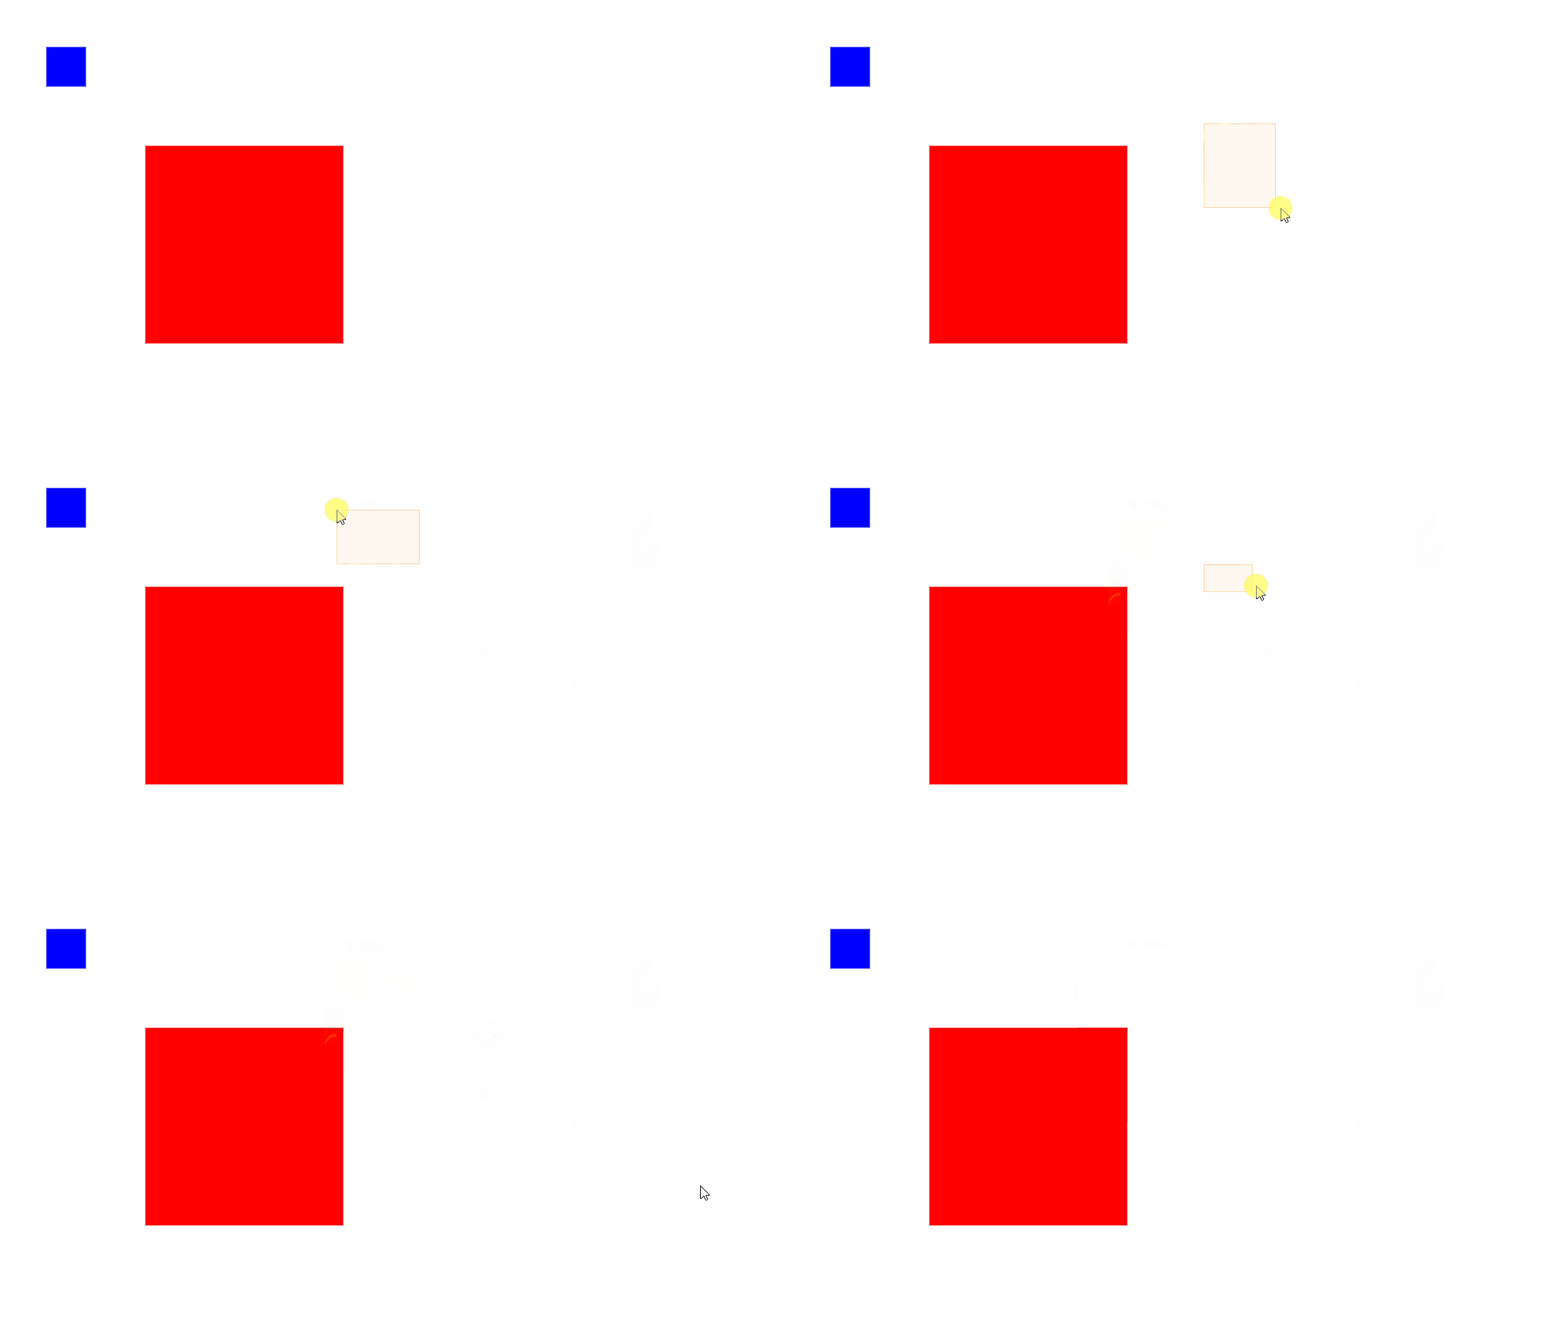
框选中判断节点是否被选中实现如下,则直接使用 Konva.Util.haveIntersection 工具函数即可:
/*** 判断节点是否在范围内* @param node 传入需要判断的Konva节点* @param range 传入范围 {x,y,width,height}*/
export function haveInterSection(node: Konva.Node,range: { x: number; y: number; width: number; height: number }
) {return Konva.Util.haveIntersection({ x: node.x(), y: node.y(), width: node.width(), height: node.height() },range);
}// mouseup 判断节点是否选中layer.find(".konva-base-group").filter((node) => {const range = { x: left, y: top, width, height };const isIntersection = haveInterSection(node, range);if (isIntersection) {// 给节点添加selected状态node.setAttrs({ selected: true });// 选中节点groupTransformer(draw, node);}});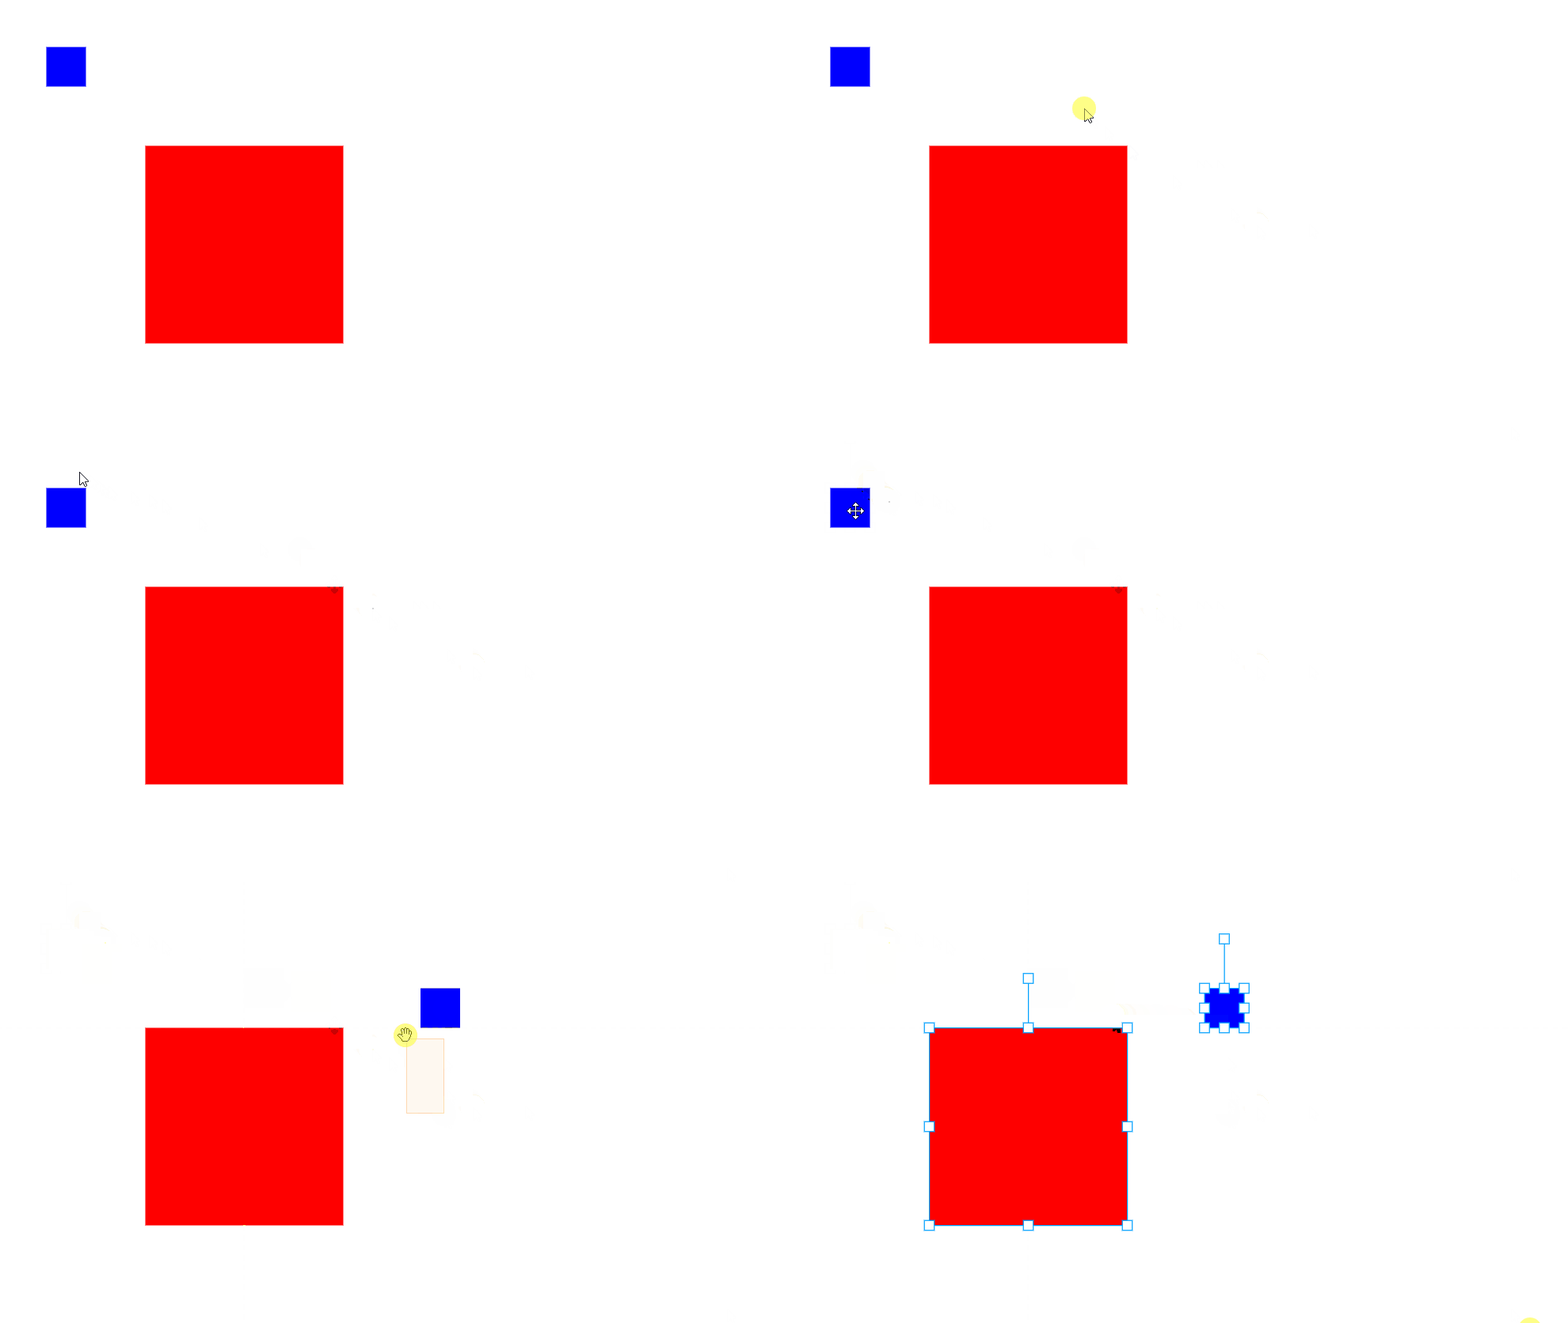
拓展konva类型
图片
图片的处理上篇已经讲述过实现原理了哈,这里不再赘述;
媒体资源
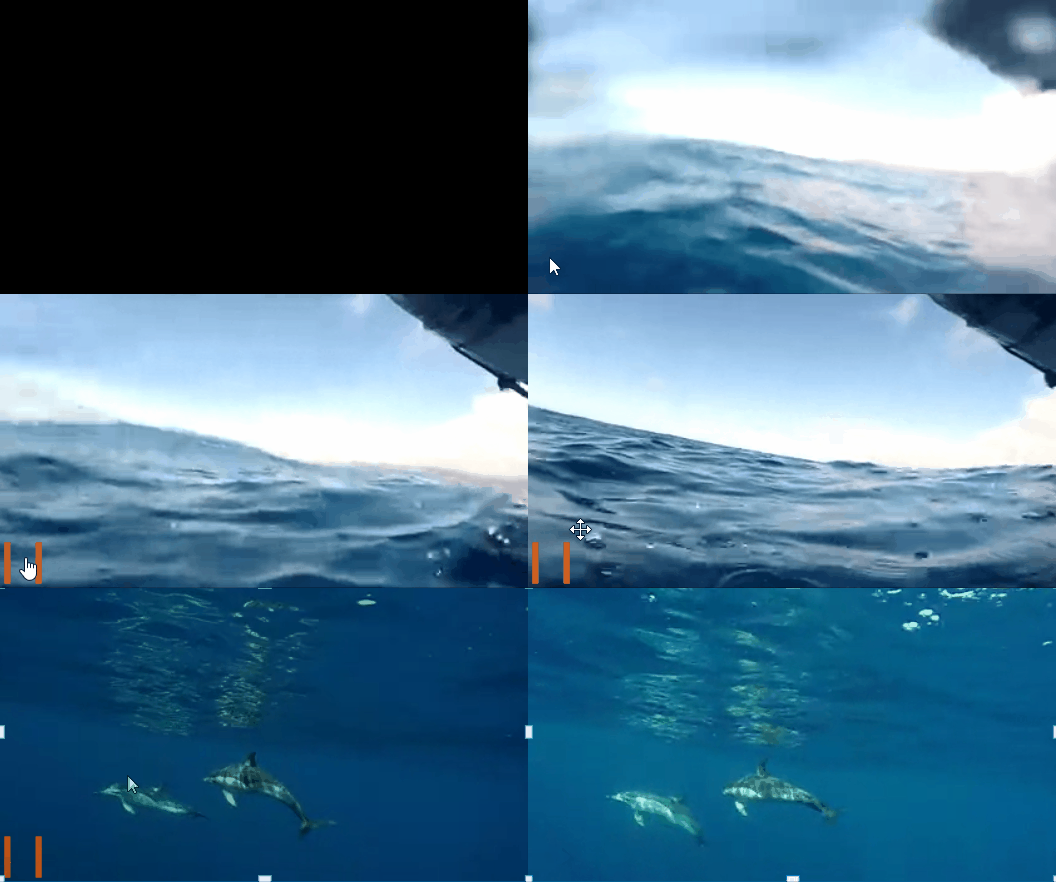
媒体资源实现的方案是Konva.Image 实现的,因为Image的image属性支持类型如下,可参考官网案例:How to display video on Canvas:

表格
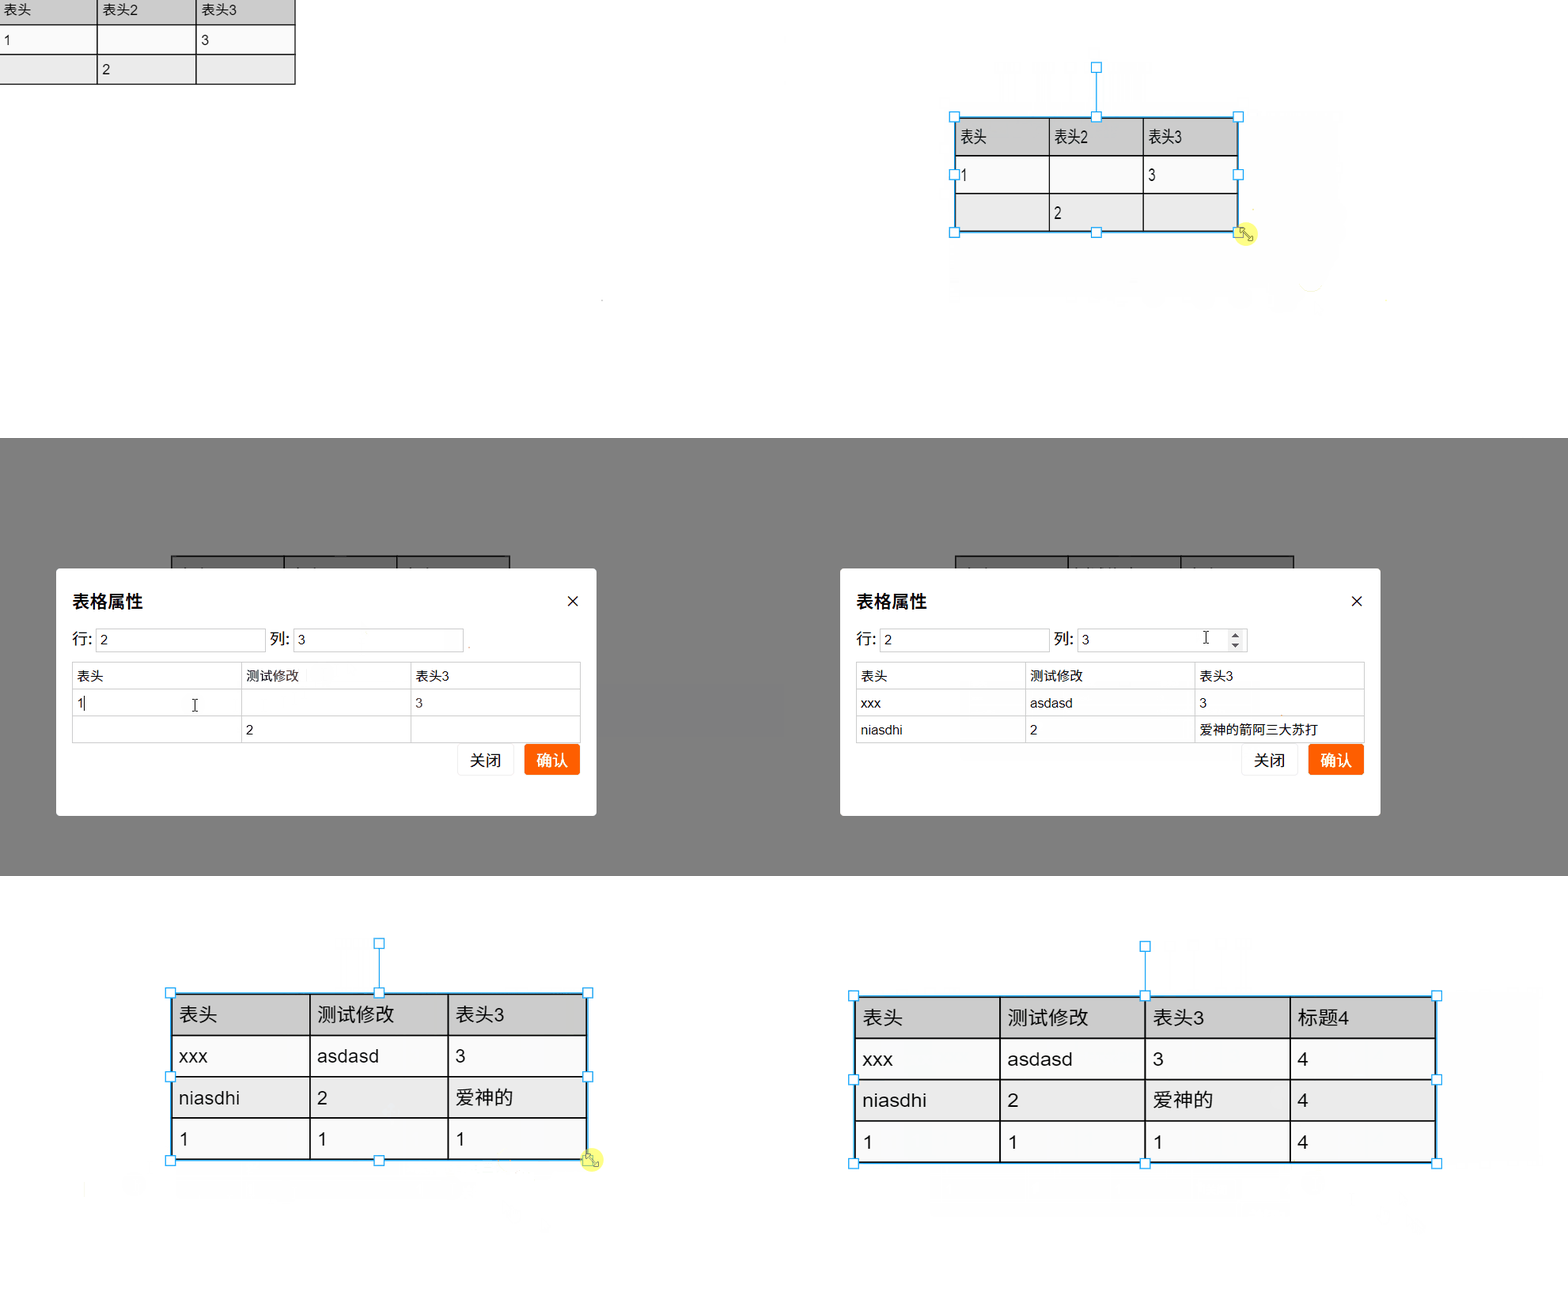
表格实现是基于Konva自定义图形,通过定义形状绘制方法与事件响应范围来实现:
// table - 表格public Table(payload: IKonvaTableConfig & Konva.ShapeConfig) {const group = this.getGroup(payload);const data = [["Name", "Age", "Gender"],["Alice", 25, "Female"],["Bob", 30, "Male"],["Charlie", 35, "Male"],["Diana", 28, "Female"],];const columnWidths = [100, 100, 100]; // 列宽const rowHeight = 30; // 行高const width = 300;const height = 150;// 自定义表格var table = new Konva.Shape({...payload,width,height,fill: "#fff",stroke: "#000",/*** 定义绘制方法 数据属性放置在 attrs 上,调用 render 即可重新渲染* @param ctx* @param shape*/sceneFunc: (ctx, shape) => {ctx.beginPath();for (let i = 0; i < data.length; i++) {for (let j = 0; j < data[i].length; j++) {const cellX = 100 * j;const cellY = i * rowHeight;const cellWidth = columnWidths[j];const cellHeight = rowHeight;// 绘制单元格边框 - 奇偶行实现斑马纹ctx.fillStyle = i % 2 ? "#fafafa" : "#fff";if (i === 0) ctx.fillStyle = "rgba(0,0,0,0.2)";ctx.fillRect(cellX, cellY, cellWidth, cellHeight);// 是否启用边框ctx.strokeRect(cellX, cellY, cellWidth, cellHeight);// 绘制单元格内容;ctx.fillStyle = "#000"; // 设置文本颜色为黑色ctx.font = "14px Arial"; // 设置字体样式ctx.fillText(data[i][j].toString(), cellX + 5, cellY + 20); // 绘制文本内容}}ctx.fillStrokeShape(shape); // (!) Konva specific method, it is very important},// 绘制事件响应区域hitFunc: function (ctx, shape) {ctx.beginPath();ctx.rect(0, 0, width, height);ctx.closePath();ctx.fillStrokeShape(shape);},});// 处理事件 - 双击进行数据编辑group.on("dblclick", () => {console.log("table dblclick");});group.add(table);this.overwriteGraph(group);return group;}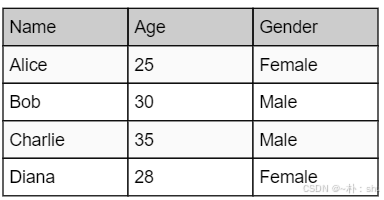
表格的更新,通过自定义属性,记录初始数据,动态生成table,确认后再转为 shape 的属性:
统计图
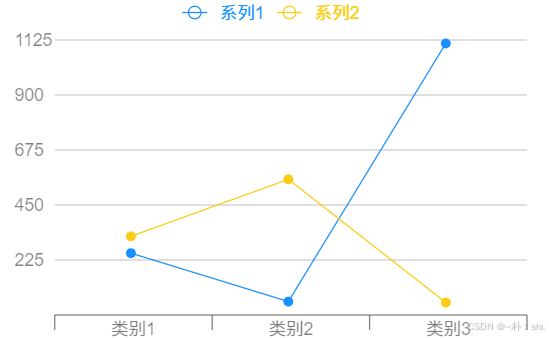
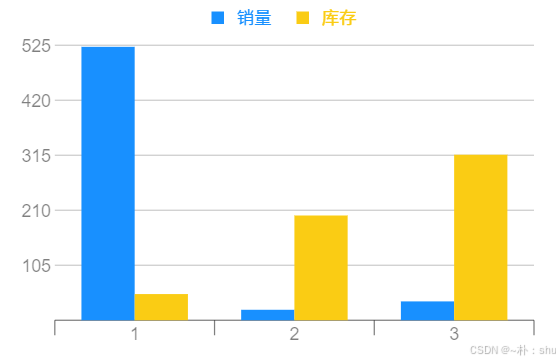
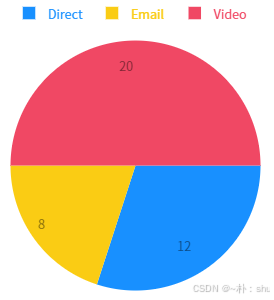
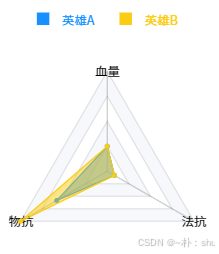
本应用使用的统计图较为简单,就不引入其他库了,手动绘制实现,还是通过 Konva.Shaph 自定义图形哈,具体的绘制过程就不展示了,就是基础的canvas绘图能力。
文本
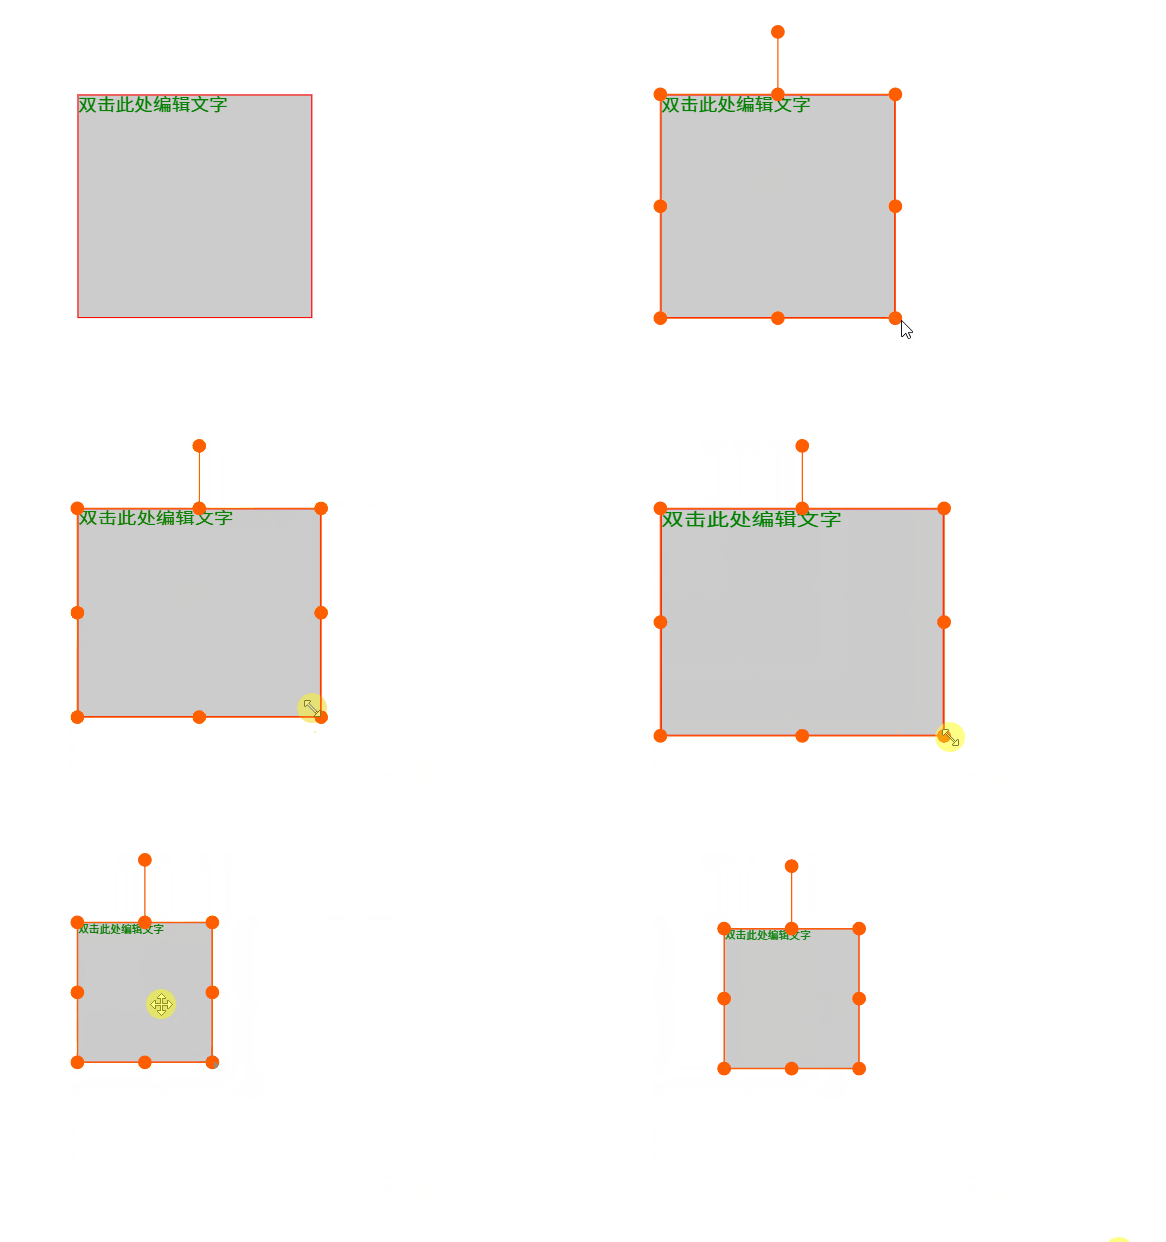
文本这里的处理有一个难点哈,也是前期的一个坑,现在来填一下,在我们最初设计的时候,文本是跟随group一起移动的对吧,但是缩放也会跟着缩放!如下:
但是,WPS 的效果可不是这样的哦:
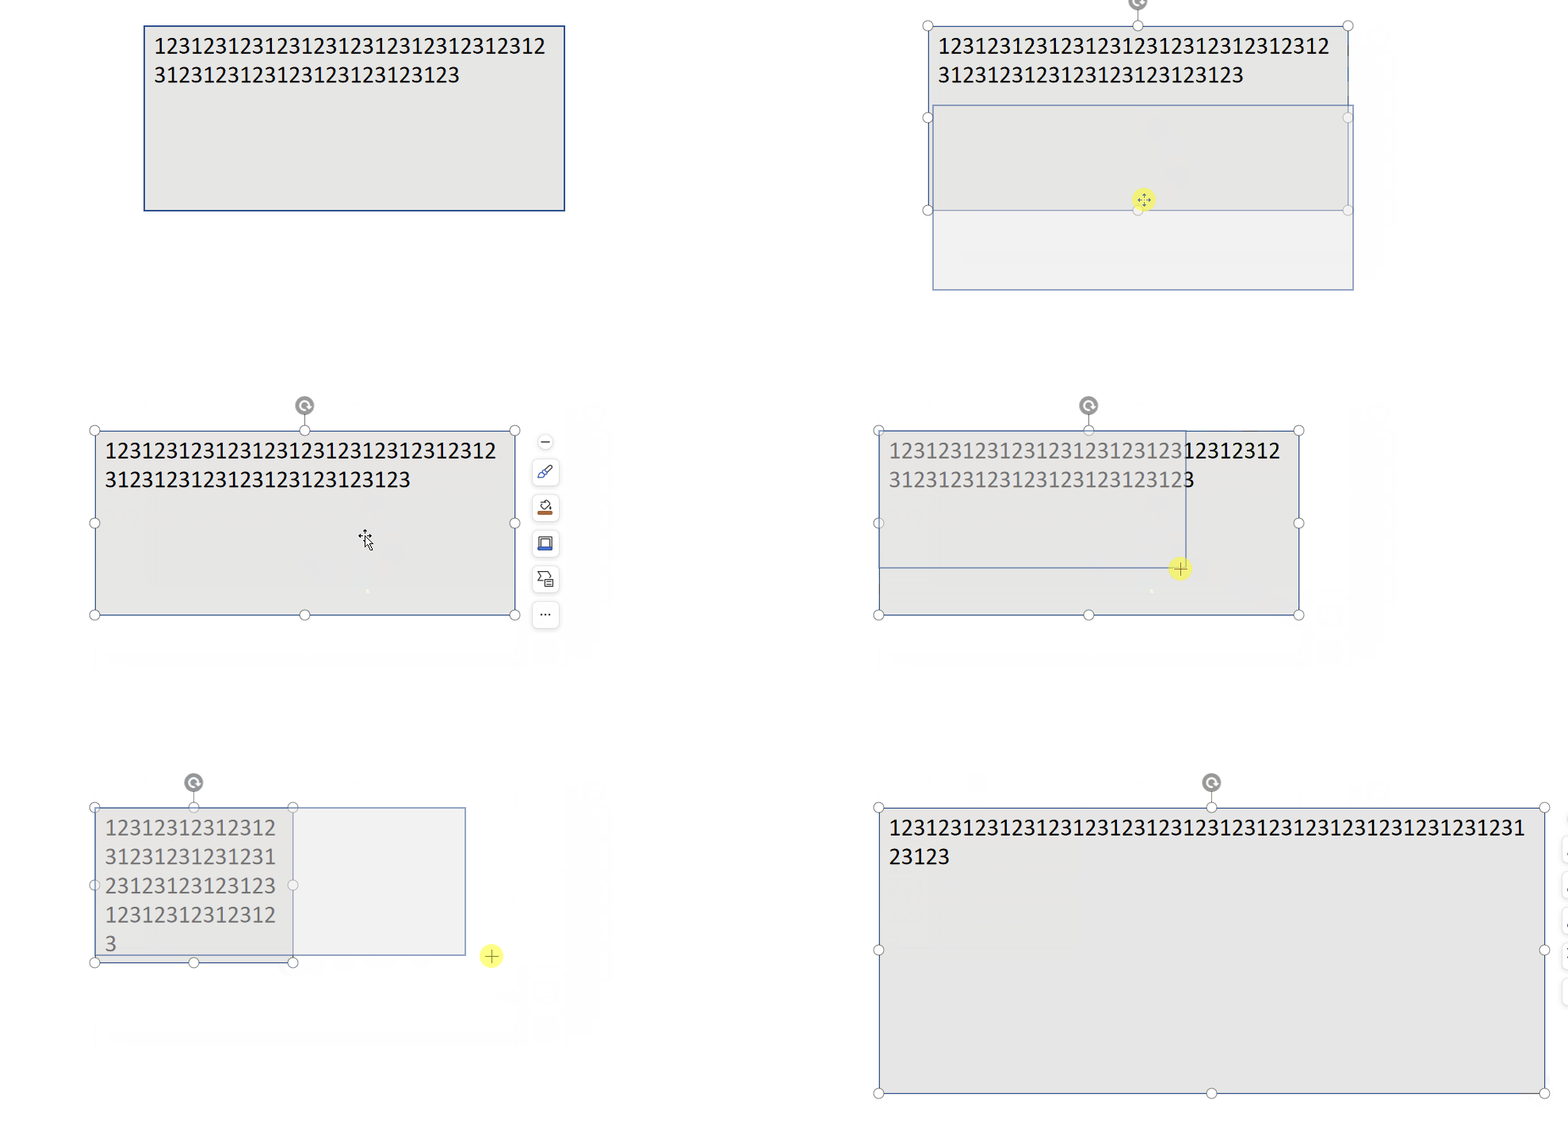
因此,实现文本自适应是最重要的!网上查阅了相关资料,都没有好的办法处理,都说需要动态设置文本的缩放比例,太过复杂! 既然是缩放过程中文本被迫缩放了,那么,不让他跟随缩放不就完了嘛?

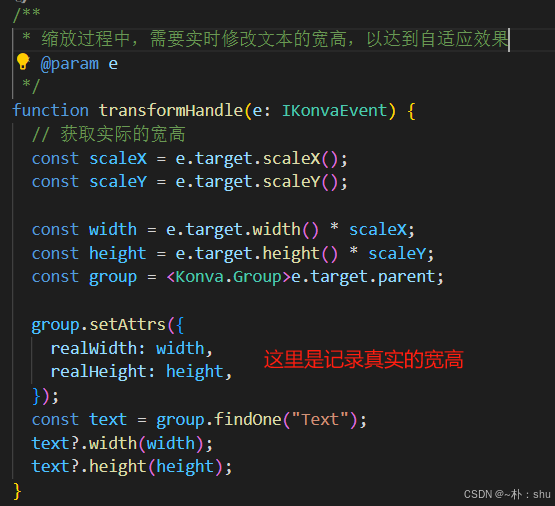
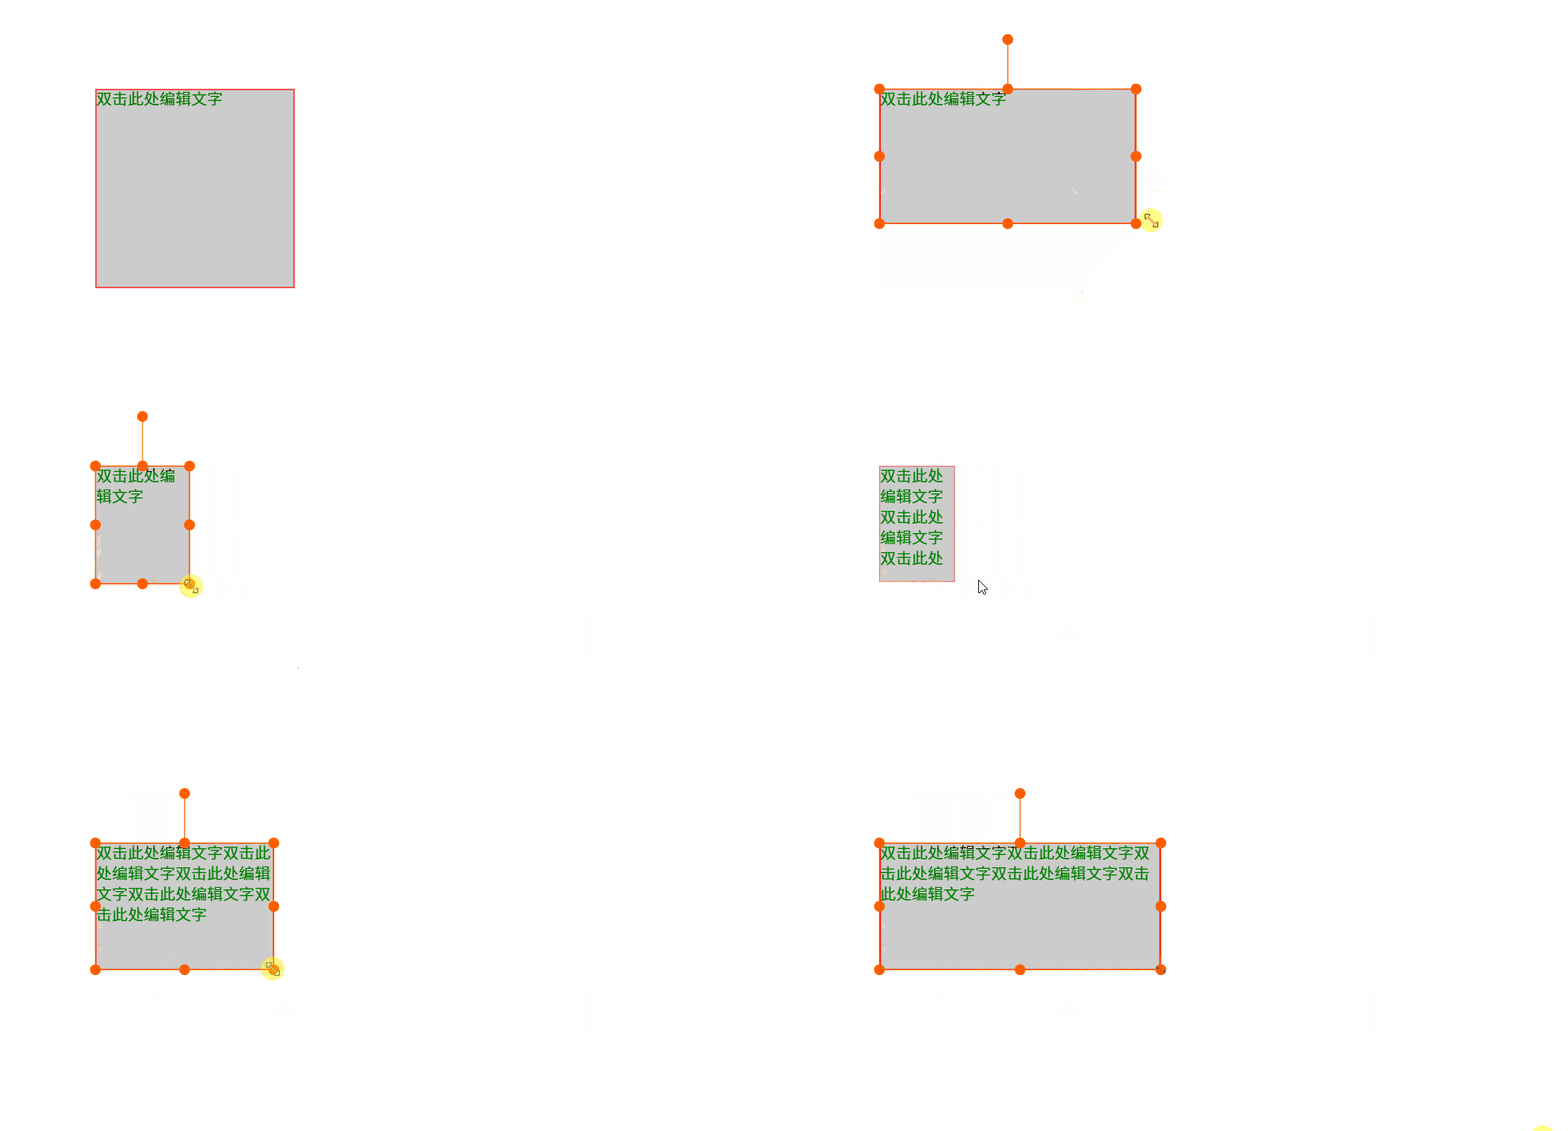
大家要理解这里面的层级关系哈:外层 Group 负责draggable,Rect 负责缩放,文本才能自适应.
公式
公式的实现比较难,大家有什么好的库推荐下,这里使用的是 mathlive,很多的插件,都是提供 latex 编辑器,然后提供预览功能,其实这样是非常难用的,我们无法直观的查看及编辑公式内容;而 mathlive 则能够直接提供直观的公式编辑页面:

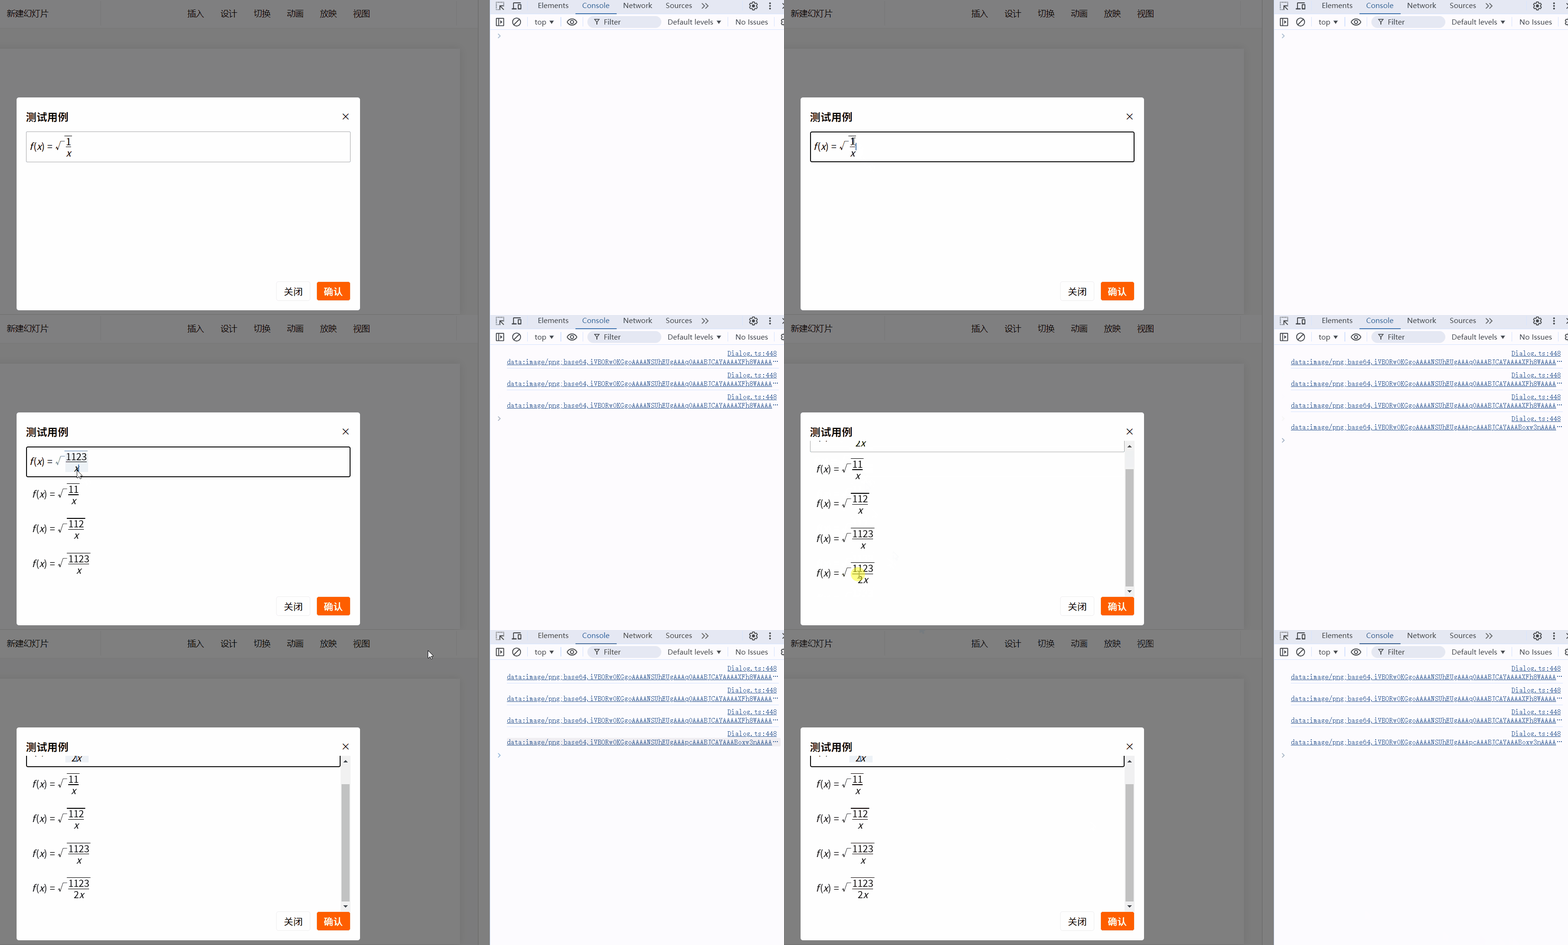
mathLive功能演示:
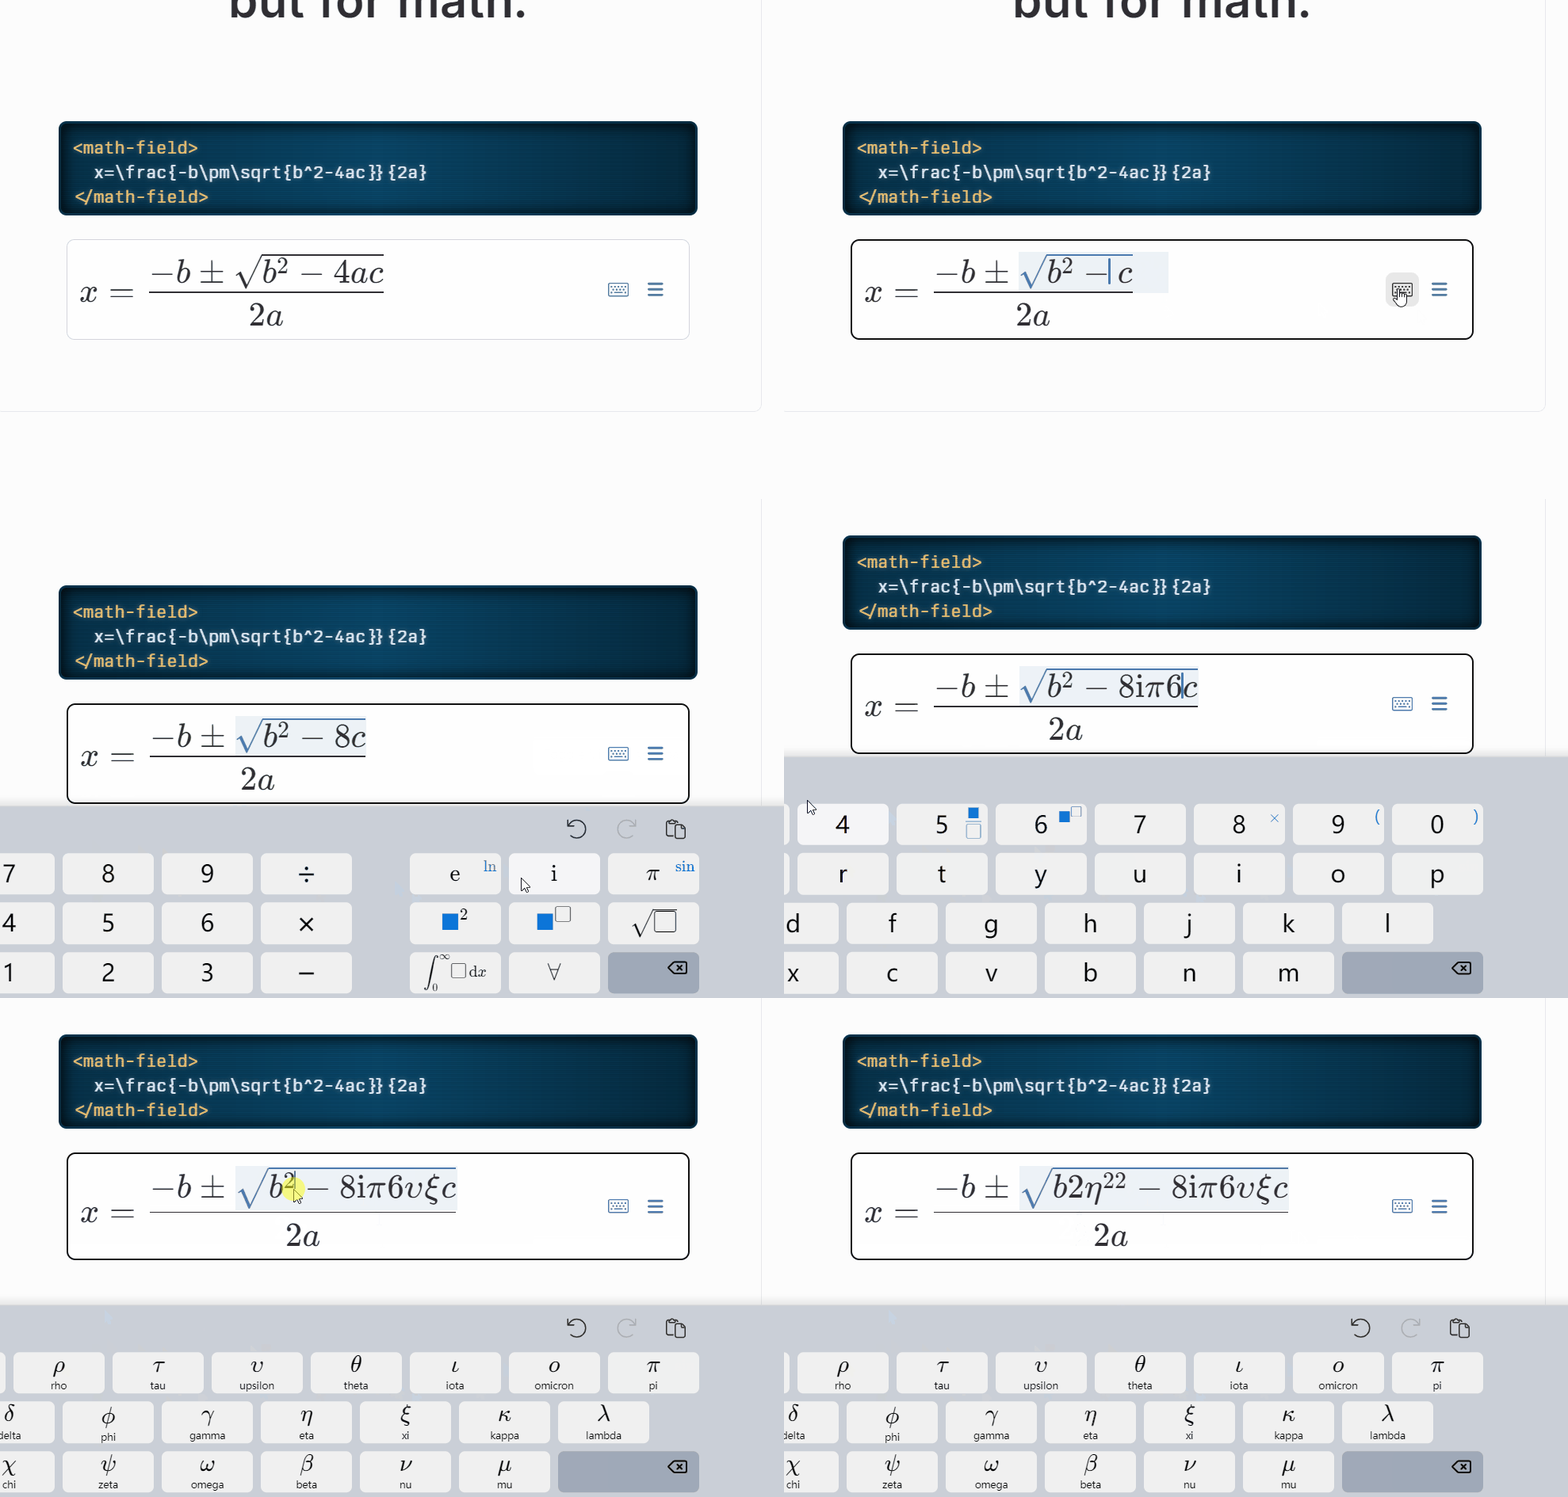
但是目前没有比较完善的文章将mathlive的使用、导出等功能进行讲解,只能自我摸索,边看文档边实践;同时,本文也不重点关注这块,如果感兴趣,后期可以出一篇文章讲解mathlive 的使用哈,我只重点讲述遇到的难点:
隐藏菜单、键盘:
我是不使用默认的功能哈,公式的插入手动实现,当然,大家也可以直接使用默认功能。
/** 隐藏公示栏的菜单及键盘按钮 **/
@media not (pointer: coarse) {math-field::part(virtual-keyboard-toggle) {display: none;}math-field::part(menu-toggle) {display: none;}
}
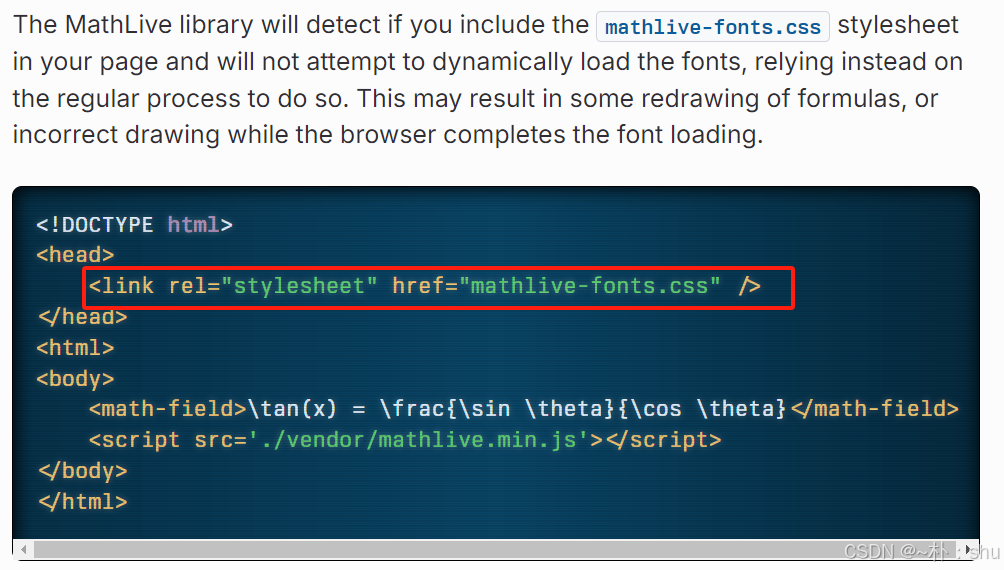
引入样式文件:
转成 html:
这里是为了转图片做准备的哈
const html= convertLatexToMarkup(mfe.value);转图片:
这里使用的库是mathlive官网使用的:html-to-image :
toPng(div).then(function (dataUrl) {/* do something */console.log(dataUrl);});插入公式:
官网给我们提供了 command 命令,可以执行一些常用的操作,比例插入,撤销重做等。同时,还提供了所有 LaTex command,将常见的公式也封装了,只需要执行响应的命令,就可以插入公式:
比如现在要插入(根号3):
mfe.executeCommand("insert", "\\sqrt{3}");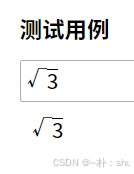
注意:一定是 \ 转义一次哈,不然得到的可就不是 根号3 而是字符串了:
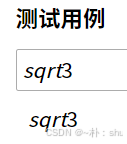
效果如下:
历史记录
历史记录的实现,大家可以参考官网给出的案例,在大型应用中,如果直接使用 toJSON 保存历史记录的话,会丢失很多关键信息,例如事件、过滤器等,因此我们不适用json保存。
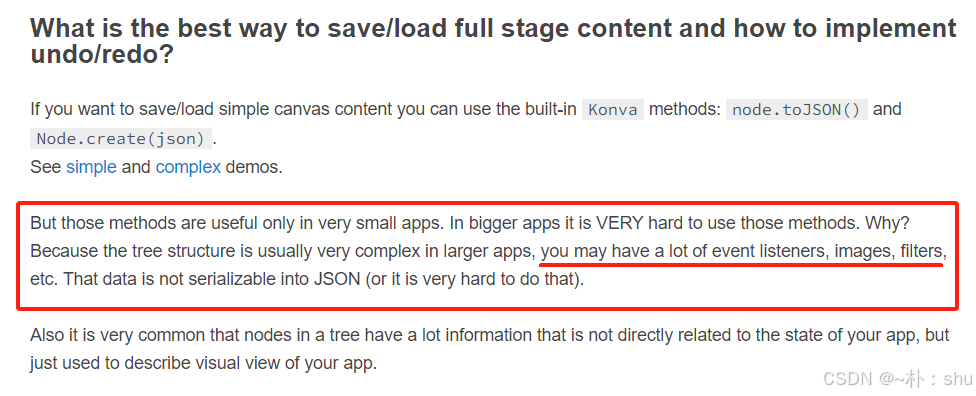
看了官网的案例,是通过保存整个stage,然后撤销重做时,重新进行事件绑定,这种方案在我们的应用中,也是不可取的。我们封装了group ,为group 添加了这么多事件,如果都重写,那工作量可多了。

【解决方案】:在图层管理中,缓存的是layer数据,layer是可以直接进行赋值操作,事件也不会丢失,因此,采用layer进行历史记录缓存。
// undo 栈private undoStack: Konva.Layer[] = [];// redo 栈private redoStack: Konva.Layer[] = [];// 最大历史记录数private maxRecordCount = maxRecordCount; /** 添加记录 */public patchHistory() {const layer = this.draw.getLayer()?.clone()!;// 当前图层的JSON串 - 不直接使用 toJSON(),避免后续修改const layerJson = JSON.stringify(layer?.toObject());// 被添加图层与最后缓存的记录是否一致const lastLayer = this.undoStack[this.undoStack.length - 1];const lastLayerJson = JSON.stringify(lastLayer?.toObject());if (layerJson === lastLayerJson) return console.error("记录已存在");layer.find("Transformer").forEach((tr) => tr.destroy());// 不然直接添加到 undoStackconsole.log("patchHistory");this.undoStack.push(layer);// 如果记录数大于 maxRecordCount,则删除最前的记录while (this.undoStack.length > this.maxRecordCount) this.undoStack.shift();} // 撤销动作public undo() {// 需要保留背景图层,因此 撤销栈不能为0if (this.undoStack.length <= 1) return console.log("不可撤销");// 获取当前图层,放到 redoStack,并删除 undoStackconst layer = this.undoStack.pop()!;this.redoStack.push(layer);// 重新渲染图层this.render();} // 重做动作public redo() {if (this.redoStack.length <= 0) return console.log("不可重做");// 获取当前图层,放到 undoStack,并删除 redoStackconst layer = this.redoStack.pop()!.clone();this.undoStack.push(layer.clone());// 重新渲染图层this.render();} /** 重新渲染图层 */private render() {// 取出上一次的图层,并添加到当前图层const lastLayer = this.undoStack[this.undoStack.length - 1];const layerClone = lastLayer.clone(); // 这里一定要 clone 避免图层引用导致的历史记录异常问题// 进行图层更新this.draw.clearLayer(); // 删除layerthis.draw.setLayer(layerClone); // 修正 layerthis.draw.getStage().add(layerClone);this.draw.render({ patchHistory: false });}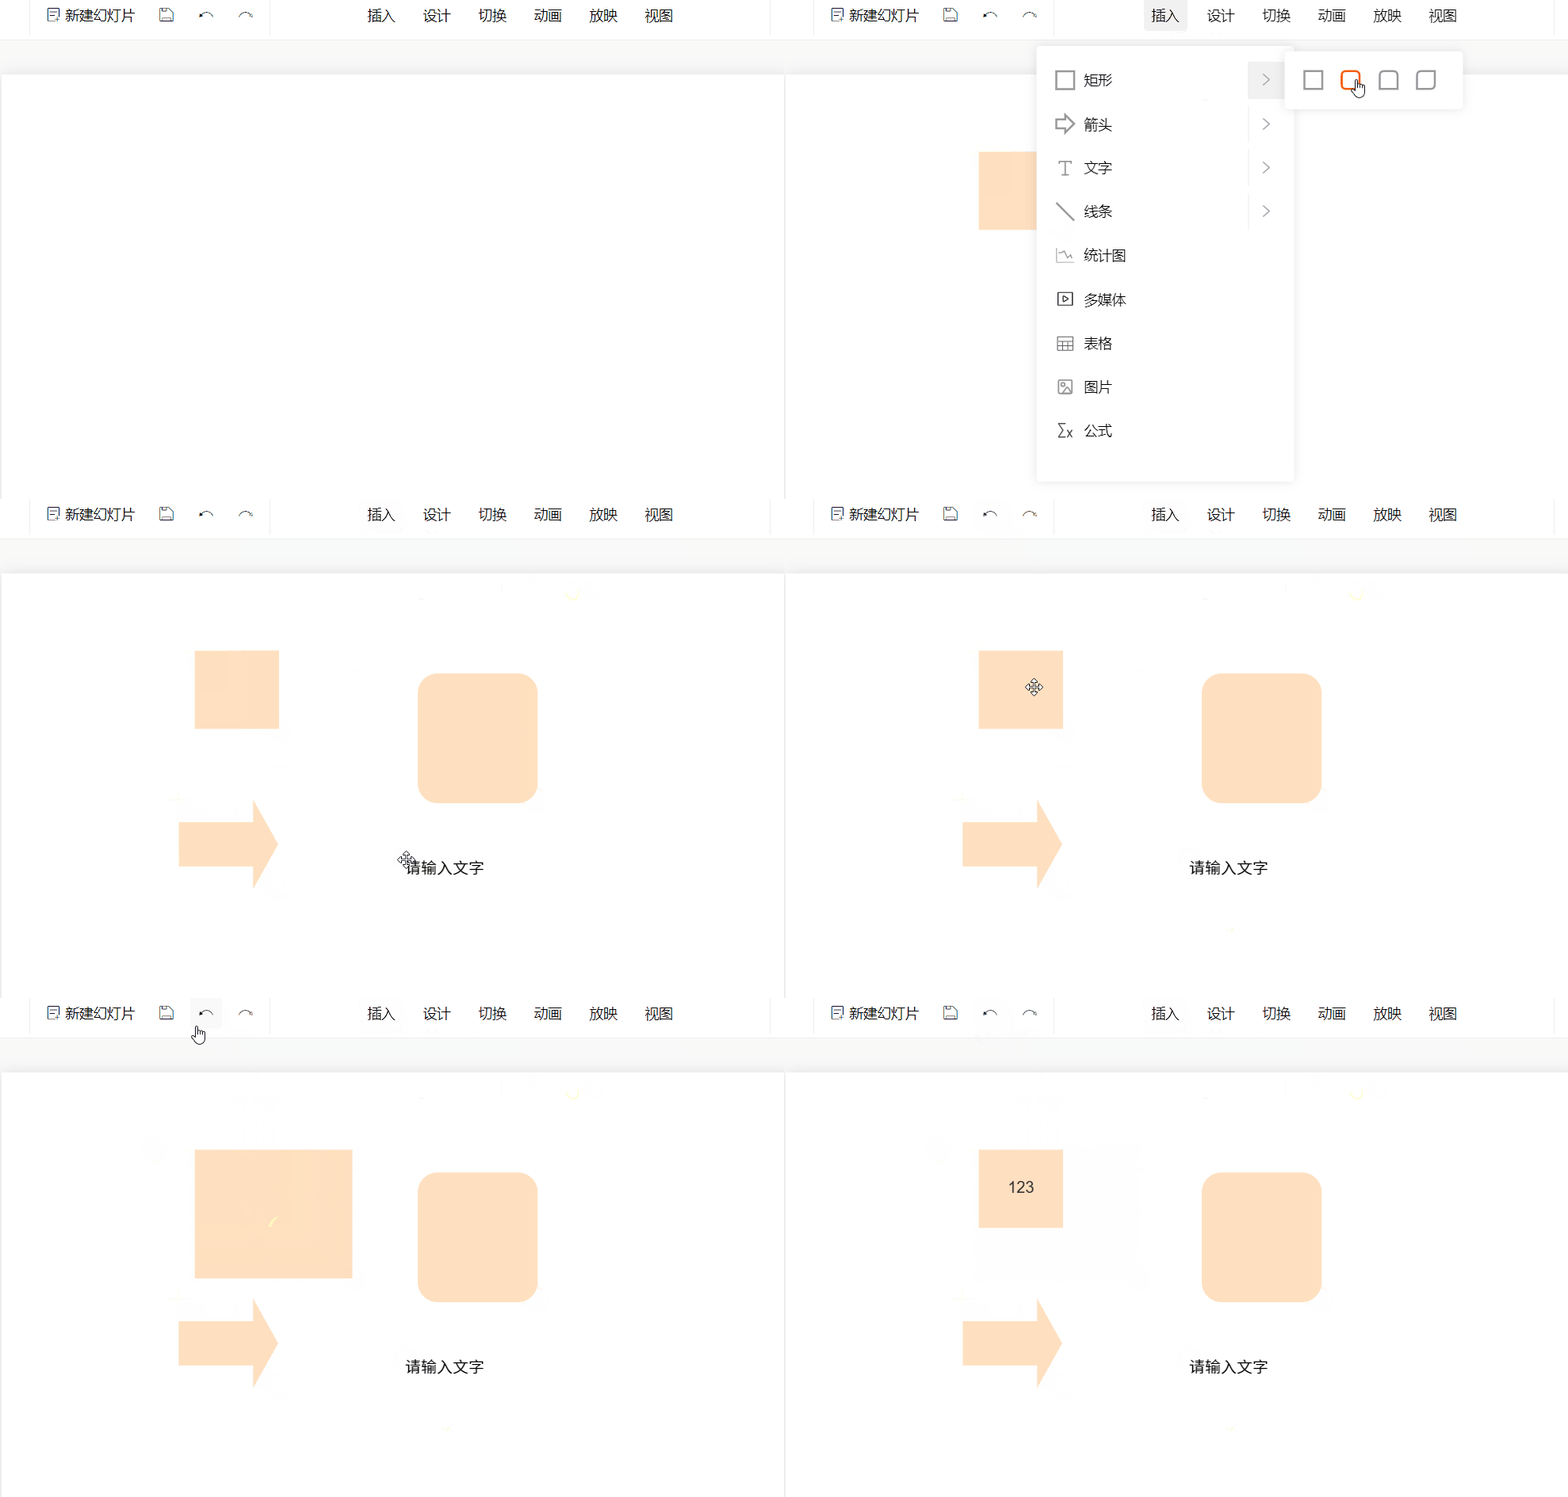
总结
经过这么多天的沉淀,现在已经大体实现了幻灯片新增、删除,支持元素-矩形、箭头、文字、统计图、表格、图片多媒体、公式类型的新增删除编辑操作;实现了基本的动画系统、历史记录管理器。
下一步将是对预览系统进行完善,并考虑预览中的动画播放问题,同时,还将提供设计功能,为整个幻灯片提供基础的配色方案及预设功能;将完善相关功能,优化用户体验。


