学习源码可以看我的个人前端学习笔记 (github.com):qdxzw/frontlearningNotes
觉得有帮助的同学,可以点心心支持一下哈(笔记是根据b站上学习的尚硅谷的前端视频【张天禹老师】,记录一下学习笔记,用于自己复盘,有需要学习的可以去b站学习原版视频)
一、标签的 ref 属性
作用:用于注册模板引用。
- 用在普通DOM标签上,获取的是DOM节点。
- 用在组件标签上,获取的是组件实例对象。
子组件:
<template><div class="person"><h1>尚硅谷</h1><h2 ref="title2">前端</h2><h3>Vue</h3><button @click="showLog">点我输出这个元素</button></div>
</template><!-- 子组件Person.vue中要使用defineExpose暴露内容 -->
<script lang="ts" setup name="Person">
import { ref, defineExpose } from 'vue'
// 数据
let title2 = ref()
let name = ref('张三')
let age = ref(18)
/****************************/
/****************************/
function showLog () {console.log(title2.value)
}
// 使用defineExpose将组件中的数据交给外部
defineExpose({ name, age })
</script><style>
.person {background-color: skyblue;box-shadow: 0 0 10px;border-radius: 10px;padding: 20px;
}
button {margin: 0px 5px;
}
</style>
父组件:
<!-- 父组件App.vue -->
<template><Person ref="ren" /><button @click="test">测试</button>
</template><script lang="ts" setup name="App">
import Person from './components/Person.vue'
import { ref } from 'vue'let ren = ref()function test () {console.log(ren.value)// console.log(ren.value.name)// console.log(ren.value.age)
}
</script>
二、props
父组件传递值给子组件
// 定义一个接口,限制每个Person对象的格式
export interface PersonInter {
id:string,
name:string,age:number
}// 定义一个自定义类型Persons
export type Persons = Array<PersonInter>
App.vue中代码:
<template><Person :list="persons"/>
</template><script lang="ts" setup name="App">
import Person from './components/Person.vue'
import {reactive} from 'vue'import {type Persons} from './types'let persons = reactive<Persons>([{id:'e98219e12',name:'张三',age:18},{id:'e98219e13',name:'李四',age:19},{id:'e98219e14',name:'王五',age:20}])
</script>
Person.vue中代码:
<template>
<div class="person">
<ul><li v-for="item in list" :key="item.id">{{item.name}}--{{item.age}}</li></ul>
</div>
</template><script lang="ts" setup name="Person">
import {defineProps} from 'vue'
import {type PersonInter} from '@/types'// 第一种写法:仅接收
// const props = defineProps(['list'])// 第二种写法:接收+限制类型
// defineProps<{list:Persons}>()// 第三种写法:接收+限制类型+指定默认值+限制必要性
let props = withDefaults(defineProps<{list?:Persons}>(),{list:()=>[{id:'asdasg01',name:'小猪佩奇',age:18}]
})
console.log(props)
</script>
三、生命周期
解析流程:index.html=>main.ts=>person(子组件)=>app(父组件) 【先解析子组件再父组件】
- 概念:Vue组件实例在创建时要经历一系列的初始化步骤,在此过程中Vue会在合适的时机,调用特定的函数,从而让开发者有机会在特定阶段运行自己的代码,这些特定的函数统称为:生命周期钩子
- 规律:生命周期整体分为四个阶段,分别是:创建、挂载、更新、销毁,每个阶段都有两个钩子,一前一后。
Vue2的生命周期
创建阶段:beforeCreate、created挂载阶段:beforeMount、mounted更新阶段:beforeUpdate、updated销毁阶段:beforeDestroy、destroyed
- 实例代码:
子组件
<template><div class="person"><h2>当前求和为:{{ sum }}</h2><button @click="add">点我sum+1</button></div>
</template><script>
export default {/* eslint-disable */name: 'Person',// 数据data() {return {sum: 1}},// 方法methods: {add() {this.sum += 1}},// 创建前beforeCreate() {console.log('创建前')},// 创建完毕created() {console.log('创建完毕')},// 挂载前beforeMount() {console.log('挂载前')},// 挂载完毕mounted() {console.log('挂载完毕')},// 更新前beforeUpdate() {console.log('更新前')},// 更新完毕updated() {console.log('更新完毕')},// 销毁前beforeDestroy() {console.log('销毁前')},// 销毁完毕destroyed() {console.log('销毁完毕')}
}
</script>
父组件:
<template><div id="app"><Person v-if="isshow" /></div>
</template><script>
import Person from './components/Person.vue'export default {name: 'App',components: {Person},data () {return {isshow: true}}
}
</script>
Vue3的生命周期
创建阶段:setup挂载阶段:onBeforeMount、onMounted更新阶段:onBeforeUpdate、onUpdated卸载阶段:onBeforeUnmount、onUnmounted
- 常用的钩子:onMounted(挂载完毕)、onUpdated(更新完毕)、onBeforeUnmount(卸载之前)
- 示例代码:
子组件:
<template><div class="person"><h2>当前求和为:{{ sum }}</h2><button @click="changeSum">点我sum+1</button></div>
</template><!-- vue3写法 -->
<script lang="ts" setup name="Person">
import {ref,onBeforeMount,onMounted,onBeforeUpdate,onUpdated,onBeforeUnmount,onUnmounted
} from 'vue'// 数据
let sum = ref(0)
// 方法
function changeSum () {sum.value += 1
}
console.log('setup')
// 生命周期钩子
onBeforeMount(() => {console.log('挂载之前')
})
onMounted(() => {console.log('子---挂载完毕')
})
onBeforeUpdate(() => {console.log('更新之前')
})
onUpdated(() => {console.log('更新完毕')
})
onBeforeUnmount(() => {console.log('卸载之前')
})
onUnmounted(() => {console.log('卸载完毕')
})
</script>
父组件:
<template><Person v-if="isShow" />
</template><script lang="ts" setup name="App">
import Person from './components/Person.vue'
import { ref, onMounted } from 'vue'
let isShow = ref(true)
onMounted(() => {console.log('父---挂载完毕')
})
</script>
四、自定义hook
- 什么是hook?—— 本质是一个函数,把setup函数中使用的Composition API进行了封装,类似于vue2.x中的mixin。
- 自定义hook的优势:复用代码, 让setup中的逻辑更清楚易懂。
示例代码:
- useSum.ts中内容如下:
import { ref, onMounted } from "vue";export default function () {let sum = ref(0);const increment = () => {sum.value += 1;};const decrement = () => {sum.value -= 1;};onMounted(() => {increment();});//向外部暴露数据return { sum, increment, decrement };
}- useDog.ts中内容如下:
import { reactive, onMounted } from "vue";
import axios, { AxiosError } from "axios";export default function () {let dogList = reactive<string[]>([]);// 方法async function getDog() {try {// 发请求let { data } = await axios.get("https://dog.ceo/api/breed/pembroke/images/random");// 维护数据dogList.push(data.message);} catch (error) {// 处理错误const err = <AxiosError>error;console.log(err.message);}}// 挂载钩子onMounted(() => {getDog();});//向外部暴露数据return { dogList, getDog };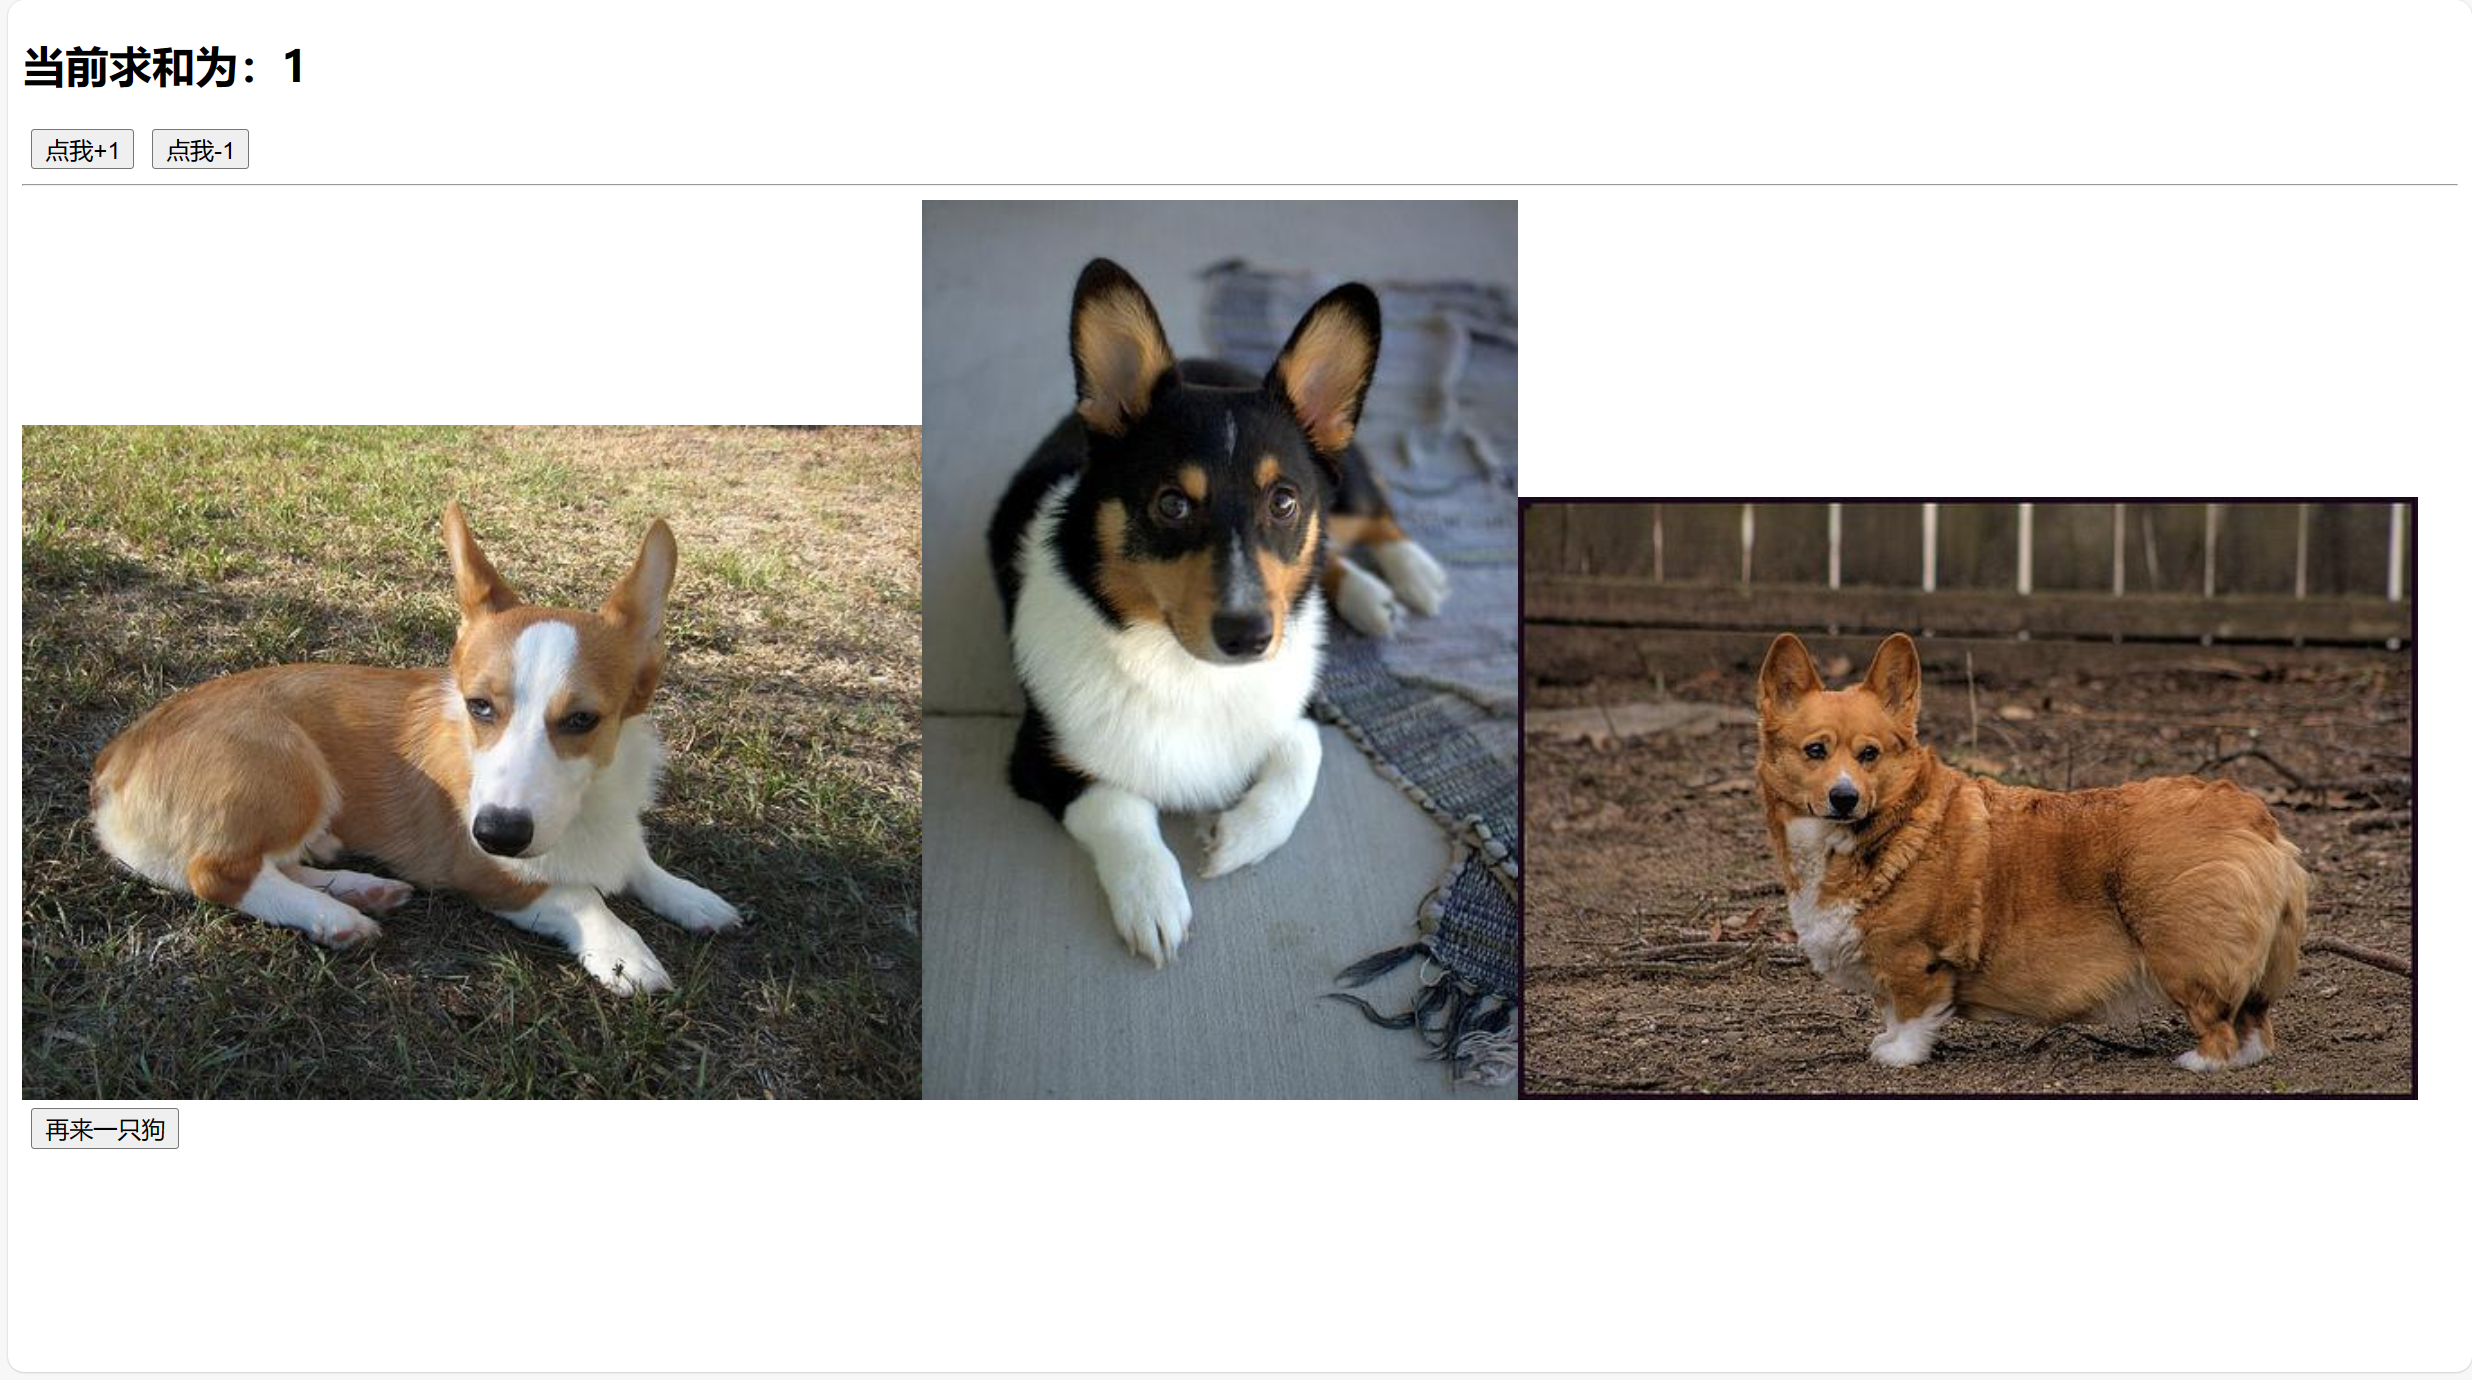
}- 组件中具体使用:
<template><h2>当前求和为:{{ sum }}</h2><button @click="increment">点我+1</button><button @click="decrement">点我-1</button><hr /><img v-for="(u, index) in dogList" :key="index" :src="u" /><br /><button @click="getDog">再来一只狗</button>
</template><script lang="ts">
import { defineComponent } from 'vue'export default defineComponent({name: 'App'
})
</script><script setup lang="ts">
import useSum from '../hooks/useSum'
import useDog from '../hooks/useDog'let { sum, increment, decrement } = useSum()
let { dogList, getDog } = useDog()
</script>
<style>
.person {background-color: skyblue;box-shadow: 0 0 10px;border-radius: 10px;padding: 20px;
}
button {margin: 0px 5px;
}
</style>