theme: cyanosis
本系列,将通过 Flutter 实现一个全平台的像素编辑器应用。源码见开源项目 【pix_editor】
- 《Flutter 像素编辑器#01 | 像素网格》
- 《Flutter 像素编辑器#02 | 配置编辑》
- 《Flutter 像素编辑器#03 | 像素图层》
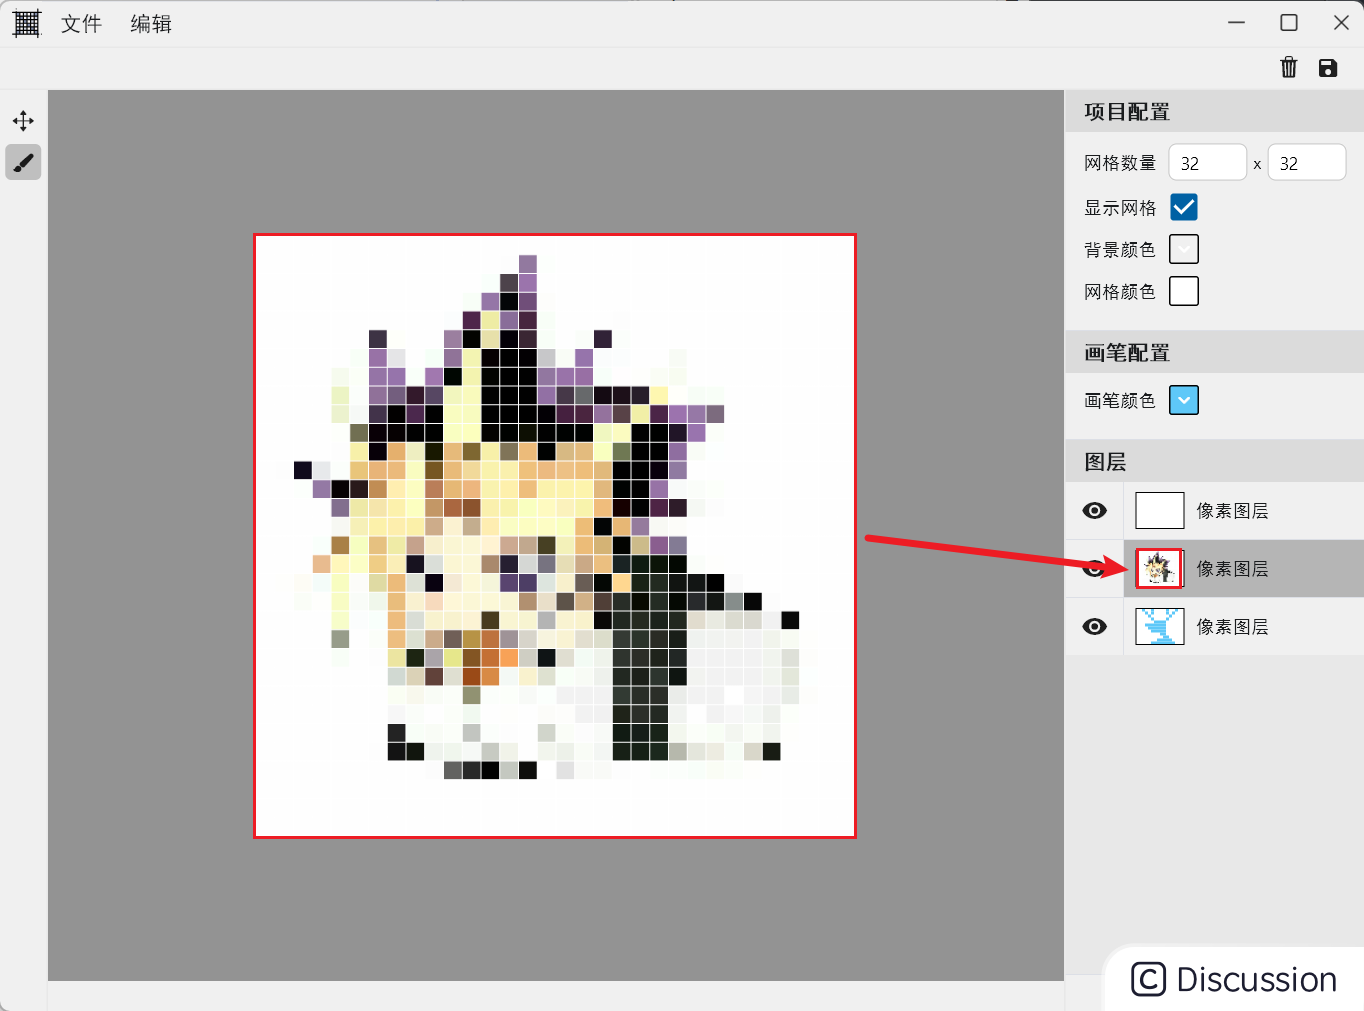
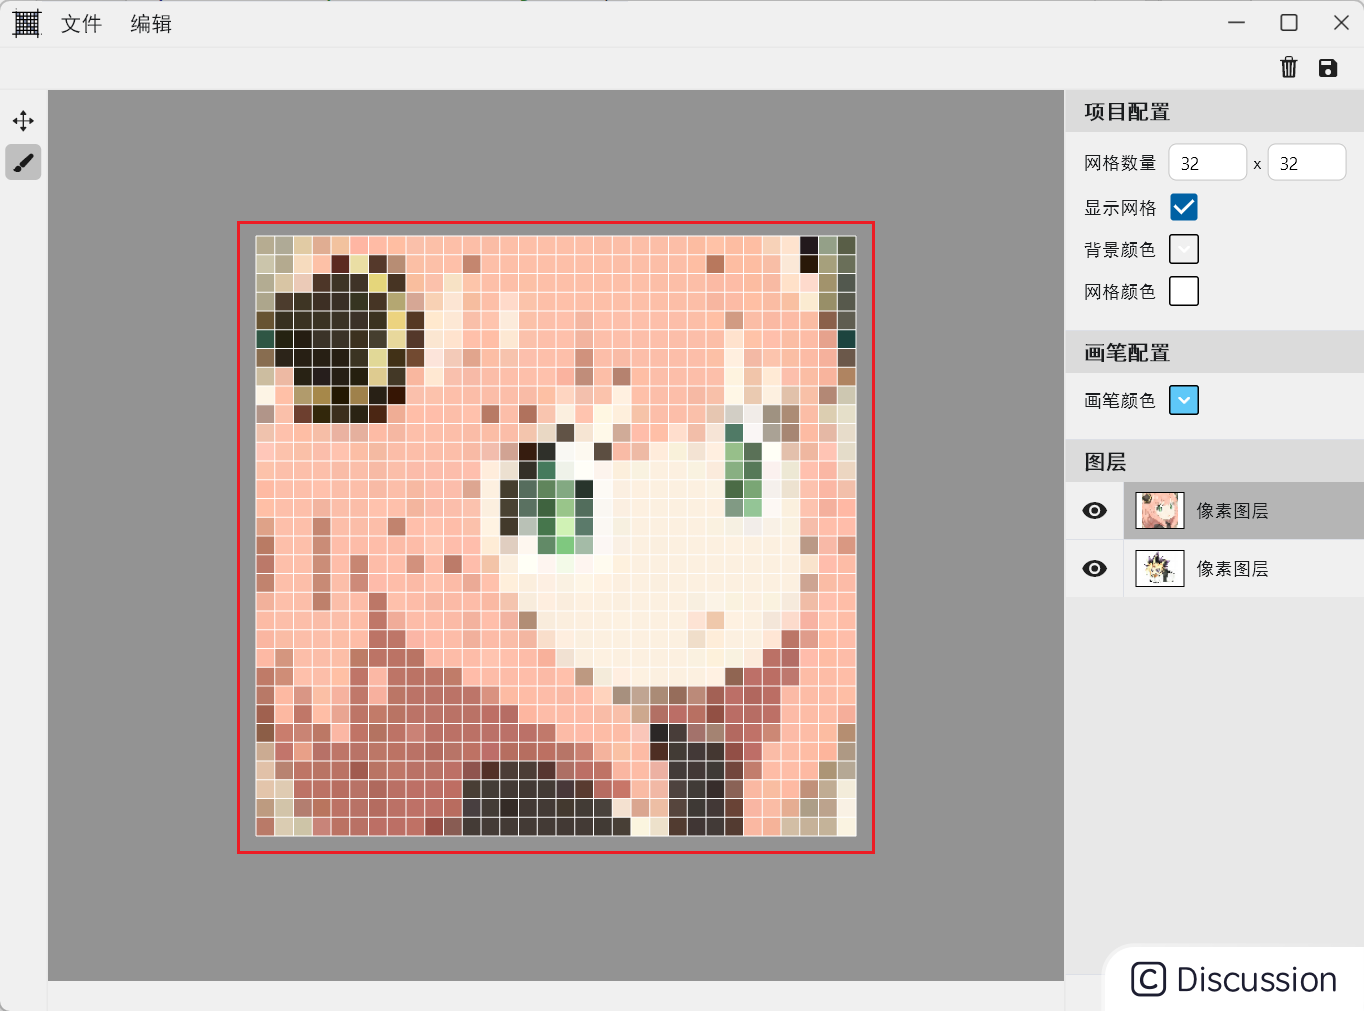
- 上一篇我们实现了编辑配置,可以设置网格数、背景色、画笔颜色。本篇将引入 图层 的概念,支持新建图层进行绘制,各图层间的像素内容互不干涉,可以点击切换激活的图层进行编辑,效果如下:
1. 需求分析与数据规划
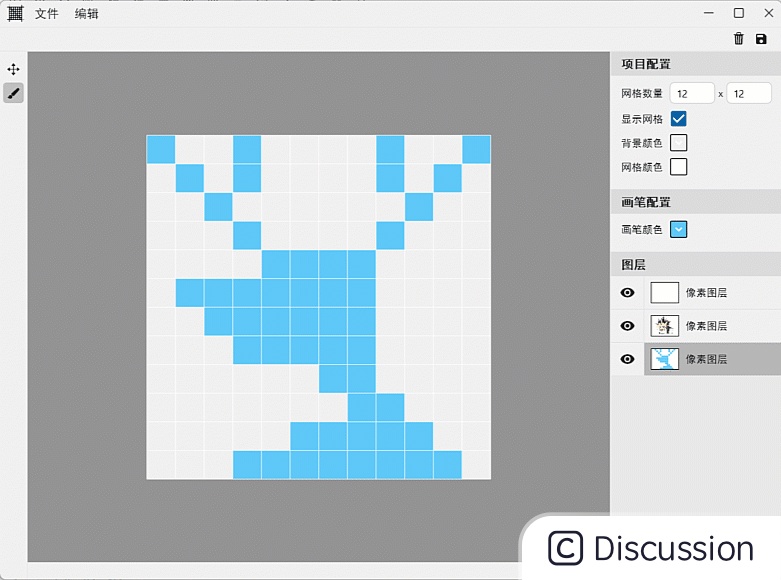
在当前功能中,展示数据由单个变为了列表。此时希望每个图层都可以独立配置网格数量,可以将行列数视为视图中的数据,每层独立维护。另外,有一个很重要的优化点:
如下所示,需要在图层中展示缩小版的当前内容。如果重新画一遍,那么每次视图变化就会绘制 两次相同内容,包括遍历像素点数据,这是颜色、绘制矩形。有种方式可以优化这种绘制场景,那就是 canvas.drawPicture :
将两处的绘制使用同一个 Picture 图形,通过缩放的方式实现大小的不同。如下所示,定义 PaintLayer 作为图层的顶层抽象,其中持有 Picture 数据,通过 update 方法创建或更新图形数据。这里绘制视口统一使用 1024*1024 ; 并抽象出 paint 方法,处理绘制逻辑:
```dart abstract class PaintLayer { static Size kPaintViewPort = const Size(1024, 1024); String name; final String id;
late Picture picture;
PaintLayer({ required this.id, this.name = '新建图层', });
void update() { PictureRecorder recorder = PictureRecorder(); Canvas canvas = Canvas(recorder); paint(canvas, kPaintViewPort); picture = recorder.endRecording(); }
void paint(Canvas canvas, Size size); } ```
然后派生出 PixLayer 负责绘制像素图层,其中持有行列格数和像素数据列表 pixCells。然后实现 paint 方法,在 1024*1024 的画板上绘制内容:
```dart class PixLayer extends PaintLayer { int row; int column; final List pixCells;
PixLayer({ required this.row, required this.column, required this.pixCells, super.name, required super.id, });
@override void paint(Canvas canvas, Size size) { Paint cellPaint = Paint(); double side = min(size.width, size.height); double stepH = side / column; double stepW = side / row; for (int i = 0; i < pixCells.length; i++) { PixCell cell = pixCells[i]; double top = cell.position.$1 * stepW; double left = cell.position.$2 * stepH; Rect rect = Rect.fromLTWH(top, left, stepW, stepH); canvas.drawRect(rect.deflate(-0.2), cellPaint..color = cell.color); } } } ```
2.业务逻辑处理
此时处理绘制逻辑的 PixPaintLogic 类,需要维护 PaintLayer 列表数据,由于需要切换激活的图层,使用维护 activeLayerId 作为激活索引。另外,基于激活图层和图层列表,可以提供一些 get 方法便于访问数据:
```dart class PixPaintLogic with ChangeNotifier {
String activeLayerId = ''; final List _layers = [];
PixLayer get activePixLayer => _layers.whereType ().singleWhere((e) => e.id == activeLayerId);
List get pixCells => activePixLayer.pixCells;
int get row => activePixLayer.row;
int get column => activePixLayer.column; ```
- 添加图层:
addPixLayer处理逻辑
使用 Uuid 作为唯一标识,创建 PixLayer 对象,并加入 _layers 列表中,如果有激活的索引,插入在它上方:并触发 changeActiveLayer 方法,更新激活索引
```dart PixPaintLogic() { addPixLayer(); }
void addPixLayer() { int activeIndex = 0; if (activeLayerId.isNotEmpty) { activeIndex = _layers.indexWhere((e) => e.id == activeLayerId); } String id = const Uuid().v4(); PixLayer pixLayer = PixLayer(name: "像素图层", row: 32, column: 32, pixCells: [], id: id) ..update(); _layers.insert(activeIndex, pixLayer); changeActiveLayer(id); } ```
- 激活图层:
changeActiveLayer处理逻辑
激活图层非常简单,需要更新 activeLayerId ,并通过 activePixLayer.update 更新图层中的 picture 数据即可。这样在 notifyListeners 之后,两处的绘制逻辑中访问的就是新版的 picture 对象。
dart void changeActiveLayer(String layerId) { activeLayerId = layerId; activePixLayer.update(); notifyListeners(); }
- 删除激活图层:
removeActiveLayer处理逻辑
删除图层时,当只有一个时禁止删除。如果当前激活图层不是最后一个,删除后会激活下一个图层。如果激活图层是最后一个,则激活前一个:
```dart void removeActiveLayer() { if (_layers.length == 1) { return; }
int currentIndex = 0; int activeIndex = 0;
if (activeLayerId.isNotEmpty) { currentIndex = _layers.indexWhere((e) => e.id == activeLayerId); } if (currentIndex == _layers.length - 1) { activeIndex = currentIndex - 1; } else { activeIndex = currentIndex + 1; } activeLayerId = _layers[activeIndex].id; _layers.removeAt(currentIndex); notifyListeners(); } ```
3. 视图层处理
首先中间区域的 PixEditorPainter 绘制逻辑中,通过缩放的方式,对激活图层中的 picture 进行绘制:
```dart @override void paint(Canvas canvas, Size size) { Paint bgPaint = Paint()..color = config.backgroundColor; canvas.drawRect(Offset.zero & size, bgPaint);
/// 绘制激活图层的 picture canvas.save(); double rate = size.height / PaintLayer.kPaintViewPort.height; canvas.scale(rate); canvas.drawPicture(pixPaintLogic.activePixLayer.picture);
canvas.restore(); if (config.showGrid) { drawGrid(canvas, size); } } ```
缩略图封装为 LayerPreview 组件,使用 LayerPreviewPainter 进行绘制。其中绘制的内容也是激活图层中的 picture 对象,以此实现了两个绘制区域,使用同一份绘制资源:

```dart class LayerPreview extends StatelessWidget { final Picture picture;
const LayerPreview({super.key, required this.picture});
@override Widget build(BuildContext context) { return CustomPaint( painter: LayerPreviewPainter(picture), ); } }
class LayerPreviewPainter extends CustomPainter { final Picture picture;
LayerPreviewPainter(this.picture);
@override void paint(Canvas canvas, Size size) { canvas.drawRect(Offset.zero & size, Paint()..color = Colors.white); canvas.save(); canvas.translate((size.width - size.height) / 2, 0); double rate = size.height / PaintLayer.kPaintViewPort.height; canvas.scale(rate); canvas.drawPicture(picture); canvas.restore();
canvas.drawRect(Offset.zero & size, Paint()..style = PaintingStyle.stroke);}
@override bool shouldRepaint(covariant LayerPreviewPainter oldDelegate) { return picture != oldDelegate.picture; } } ```
图层的操作面板,使用 ListView 展示 PaintLayer 列表数据。条目构造的细节没什么难度,就不多说了,可以详见源码。
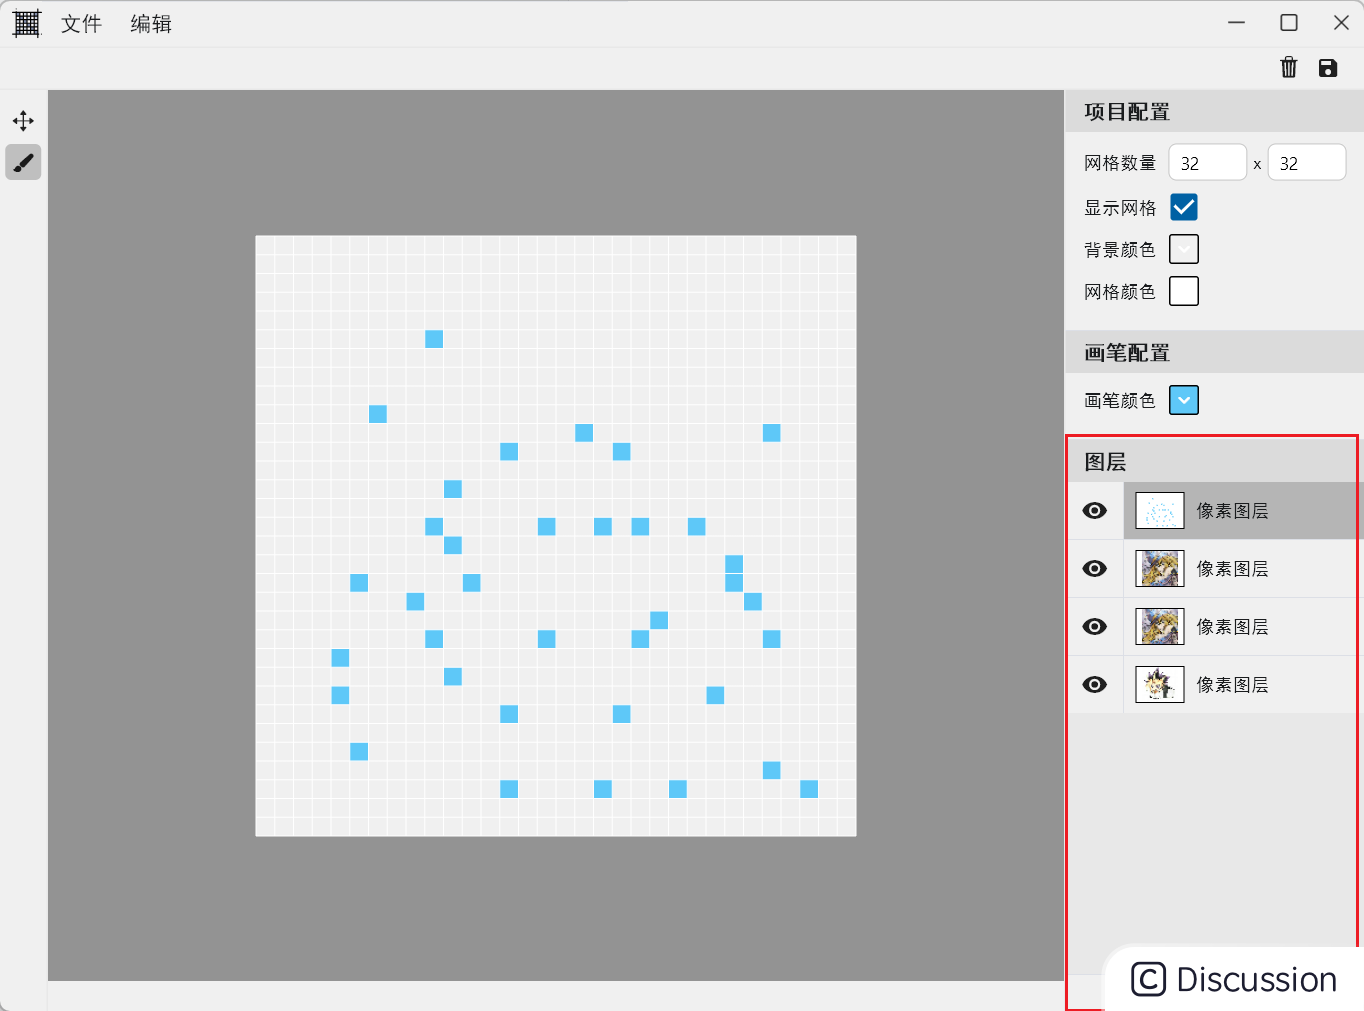
dart ListView.separated( separatorBuilder: (_, __) => const Divider(), itemBuilder: (_, index) => LayerItem( onSelectLayer: (layer) { logic.changeActiveLayer(layer.id); }, active: layers[index].id == logic.activeLayerId, layer: layers[index], ), itemCount: layers.length, ),
目前为止,已经引入了图层的概念,并且支持新建、删除、切换图层。至于图层更多的功能、比如锁定、合并、复制、编辑等,将在后续逐渐完善。那本文就到这里,谢谢观看~