1.复合选择器

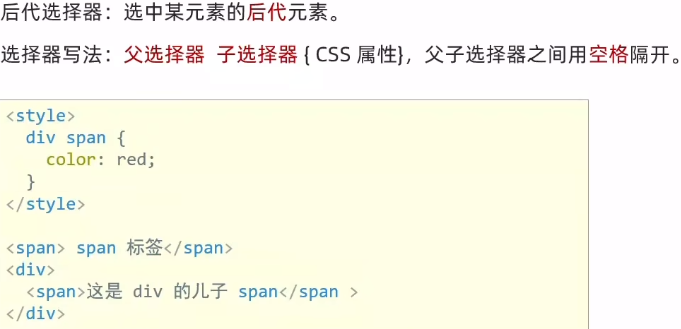
(1.1)后代选择器
代码:
<!DOCTYPE html>
<html lang="en">
<head><meta charset="UTF-8"><meta name="viewport" content="width=device-width, initial-scale=1.0"><title>后代选择器</title><style>/* 使div里的span颜色是红色 *//* 后代选择器会选中所有后代,包括儿子孙子等等 */div span {color: red;}</style>
</head>
<body><span>span标签</span><div><span>这是div的儿子span</span><p><span>这是div的孙子span</span><p><span>这是div的重孙子span</span></p></p><span>这是div的第二个儿子span</span></div>
</body>
</html>
后代选择器会选择所有满足条件的后代,比如上面的代码就是找到嵌套在div标签里的所有span标签把它们变成红色
效果:

发现确实是所有div里的后代span都变红色了
(1.2)子代选择器
与上面的后代选择器不同,只想选中儿子元素而不想选其他后代元素

代码:
<!DOCTYPE html>
<html lang="en">
<head><meta charset="UTF-8"><meta name="viewport" content="width=device-width, initial-scale=1.0"><title>子代选择器</title><style>/* 只让div的儿子span变红 */div > span {color: red;}</style>
</head>
<body><div><span>儿子span</span><p><span>孙子span</span></p></div>
</body>
</html>
效果:

(1.3)并集选择器
可以同时选中多组标签
注意一定要按照你代码里面标签的顺序来,不然无法正确设置

代码:
<!DOCTYPE html>
<html lang="en">
<head><meta charset="UTF-8"><meta name="viewport" content="width=device-width, initial-scale=1.0"><title>并集选择器</title><style>div,p,span,em,strong {color: red;}</style>
</head>
<body><div>div标签</div><p>p标签</p><span>span标签</span><em>em标签</em><strong>strong标签</strong>
</body>
</html>
效果:

如果我们调整一下并集选择器的顺序:
<style>div,p,span,strongem{color: red;}</style>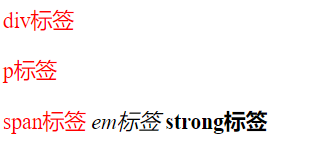
我们发现错误的顺序的标签没有变色
(1.4)交集选择器
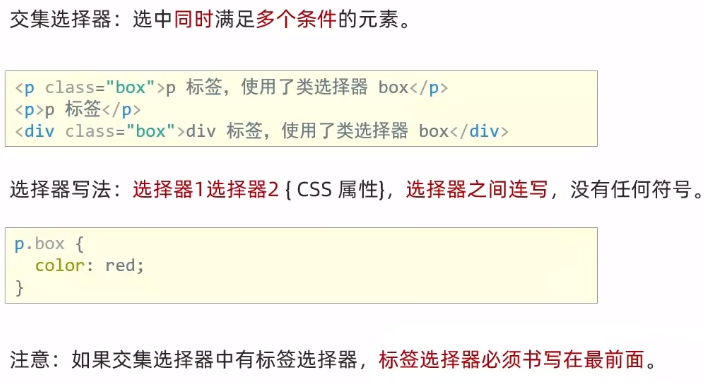
<!DOCTYPE html>
<html lang="en">
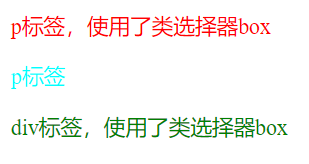
<head><meta charset="UTF-8"><meta name="viewport" content="width=device-width, initial-scale=1.0"><title>交集选择器</title><style>/* 第一个p标签颜色是红色 *//* 既是p标签又有box类 */p.box {color: red;}p {color: aqua;}div.box {color: green;}</style>
</head>
<body><p class="box"> p标签,使用了类选择器box </p><p> p标签 </p><div class="box"> div标签,使用了类选择器box </div>
</body>
</html>
效果:
(1.5)伪类选择器
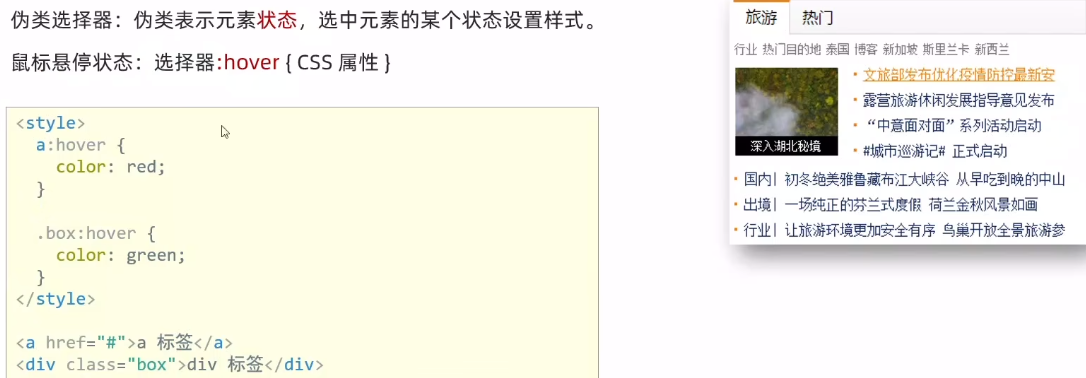
作用:让鼠标停在文字上时,文字变色,常用于链接
<!DOCTYPE html>
<html lang="en">
<head><meta charset="UTF-8"><meta name="viewport" content="width=device-width, initial-scale=1.0"><title>伪类选择器</title><style>/* 任何标签都可以设置鼠标悬停状态 *//* 通过标签选择器选择 */a:hover {color: green;}/* 通过类选择器选择 */.box:hover {color: red;}</style>
</head>
<body><a href="#">a标签,超链接</a><div class="box">div标签</div>
</body>
</html>
效果

鼠标停在超链接时,超链接变绿了
(1.5.1)伪类-超链接

<!DOCTYPE html>
<html lang="en">
<head><meta charset="UTF-8"><meta name="viewport" content="width=device-width, initial-scale=1.0"><title>伪类超链接</title><style>/* a:link { color: red;}a:visited {color: green;}a:hover {color: blue;}a:active {color: orange;}  *//* 工作中,一个a标签选择器设置超链接样式,hover状态特殊设置 */a {color: aqua;}a:hover {color: yellowgreen;}</style>
</head>
<body><a href="#"> a标签,测试伪类</a>
</body>
</html>
工作中一般仅设置整体的链接样式,以及鼠标悬停的样式即可
2.CSS特性
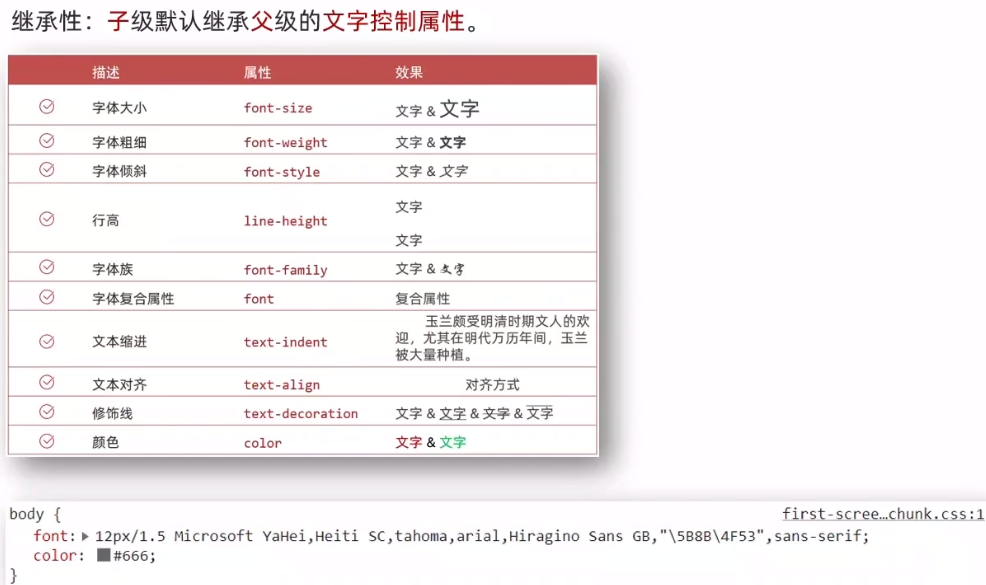
(2.1)继承性
<!DOCTYPE html>
<html lang="en">
<head><meta charset="UTF-8"><meta name="viewport" content="width=device-width, initial-scale=1.0"><title>继承性</title><style>body {font-size: 30px;color: green;font-weight: 700;}</style>
</head>
<body><div>div标签</div><p>p标签</p><span>span标签</span><!-- 如果标签自己有样式,则生效自己的样式,不继承 --><a href="#">a标签</a><h1>h1标题</h1>
</body>
</html>
直接将想要设置的样式写在body里面,可以让全部标签生效,但是如果标签本身有自己的样式,则不会继承
效果:
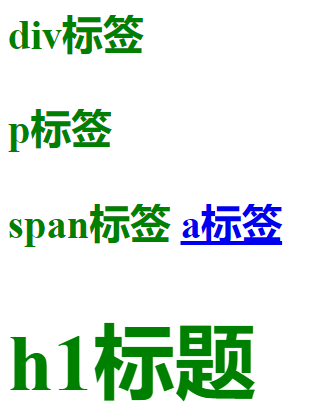
比如a标签自带蓝色,他就不会继承颜色,只会继承字体大小和粗细等,h1标签自带大小,就不会继承大小,而是继承粗细和颜色等
(2.2)层叠性

<!DOCTYPE html>
<html lang="en">
<head><meta charset="UTF-8"><meta name="viewport" content="width=device-width, initial-scale=1.0"><title>层叠性</title><style>/* 相同属性会覆盖,不同属性会叠加 */div {color: red;font-weight: 700;}div {color: green;font-size: 30px;}</style>
</head>
<body><div>div标签</div>
</body>
</html>
如果在代码中给相同的标签前后都设置了属性,那么在后面的相同属性会覆盖,不同属性会叠加
最终效果:

后面的绿色覆盖了前面的红色,而不同的属性:字体和粗细则都叠加应用在了div标签上
(2.3)优先级

<!DOCTYPE html>
<html lang="en">
<head><meta charset="UTF-8"><meta name="viewport" content="width=device-width, initial-scale=1.0"><title>优先级</title><style>/* 选择器选中标签范围越大,优先级越低 */div {color: green;}/* !important 提高优先级到最高,慎用 */* {color: red !important;}.box {color: blue;}#test {color: orange;}</style>
</head>
<body><div class="box" id="test" style="color: purple;">div标签</div>
</body>
</html>
优先级越低,则选择器能选中的范围越大
行内样式就是直接在div标签这一行写style
!important是将该选择器优先级设置到最大,如上面的代码,将本是最低优先级的通配符选择器设置为最大,所以div标签变成了红色

(2.3.1)优先级-叠加计算

<!DOCTYPE html>
<html lang="en">
<head><meta charset="UTF-8"><meta name="viewport" content="width=device-width, initial-scale=1.0"><title>优先级叠加计算</title><style>/* (行内样式,id选择器个数,类选择器个数,标签选择器个数) *//* (0,2,0,0) */#father #son {color: blue;}/* (0,1,1,1) */#father p .c2 {color: black;}/* (0,0,2,2) */div .c1 p .c2 {color: red;}/* 虽然有!important优先级最高,但是对father生效,son是继承,优先级最低 */#father {color: green !important;}/* 对div father c1生效,son是继承,优先级最低 */div #father .c1 {color: yellow;}</style>
</head>
<body><div id="father" class="c1"><p id="son" class="c2">这行文本是什么颜色</p></div>
</body>
</html>
先看有没有!important和继承,然后看公式判断优先级,公式类似于字典序,先看行内样式,如果数量一样就比较id选择器个数,还是一样就继续比较类选择器以及标签选择器个数,多的优先级就大
比如上面的代码,可以发现蓝色那一条的id选择器数量是2,其他的都是1,所以蓝色优先级最大
效果:

(2.4)Emmet写法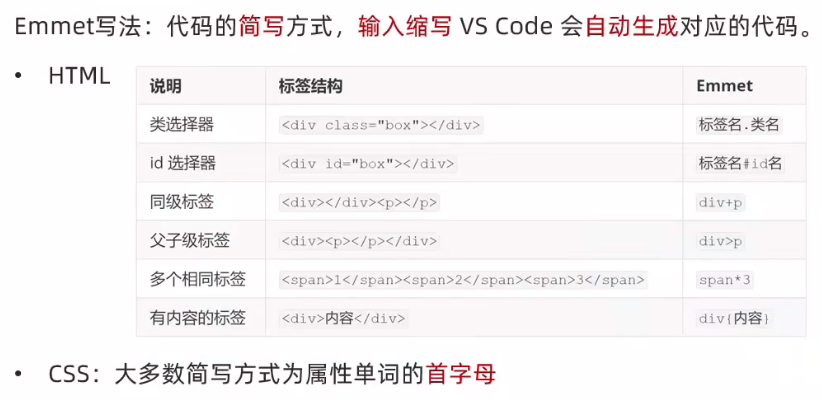
3.背景属性
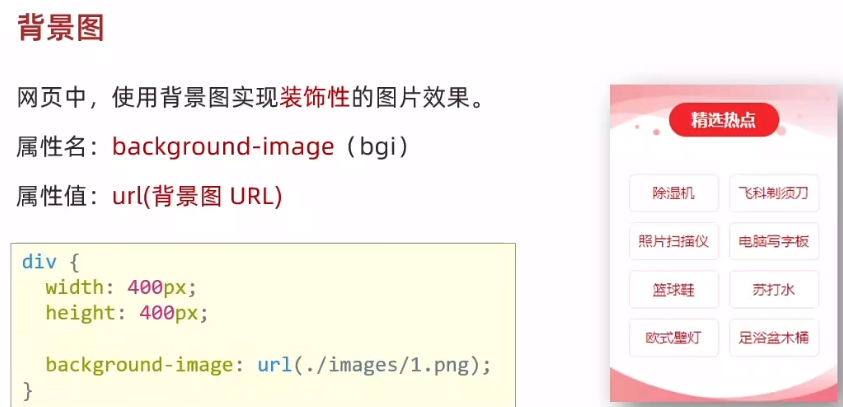
(3.1)背景图
<!DOCTYPE html>
<html lang="en">
<head><meta charset="UTF-8"><meta name="viewport" content="width=device-width, initial-scale=1.0"><title>Document</title><style>div {width: 400px;height: 400px;/* 背景图默认效果平铺 */background-image: url(./image/diagram.png);}</style>
</head>
<body><div>div标签</div>
</body>
</html>
效果:
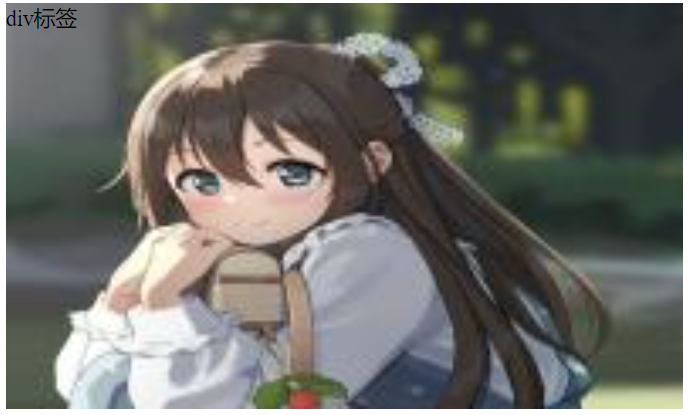
发现没显示完全,因为背景图是平铺,如果你设置的标签尺寸小,图片就只会显示一部分,尺寸大,图片就会复制多份填充
(3.2)背景图平铺方式

<style>div {width: 400px;height: 400px;/* 背景图默认效果平铺 */background-color: pink;background-image: url(./image/3.jpg);}</style>我们同时设置背景颜色和背景图
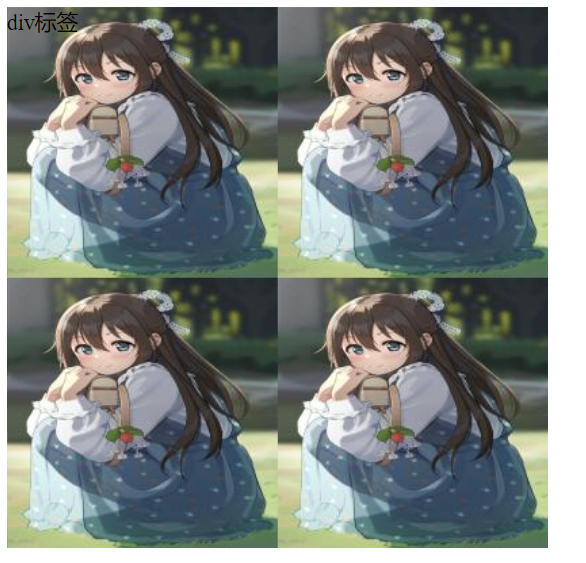
发现背景颜色被背景图覆盖了,这是因为背景图默认平铺
<style>div {width: 400px;height: 400px;/* 背景图默认效果平铺 */background-color: pink;background-image: url(./image/3.jpg);background-repeat: no-repeat;}</style>设置不平铺,则按图片原尺寸和数量输出,只有左上角一张背景图

设置向x向y平铺则会沿这两个轴进行平铺
(3.3)背景图位置
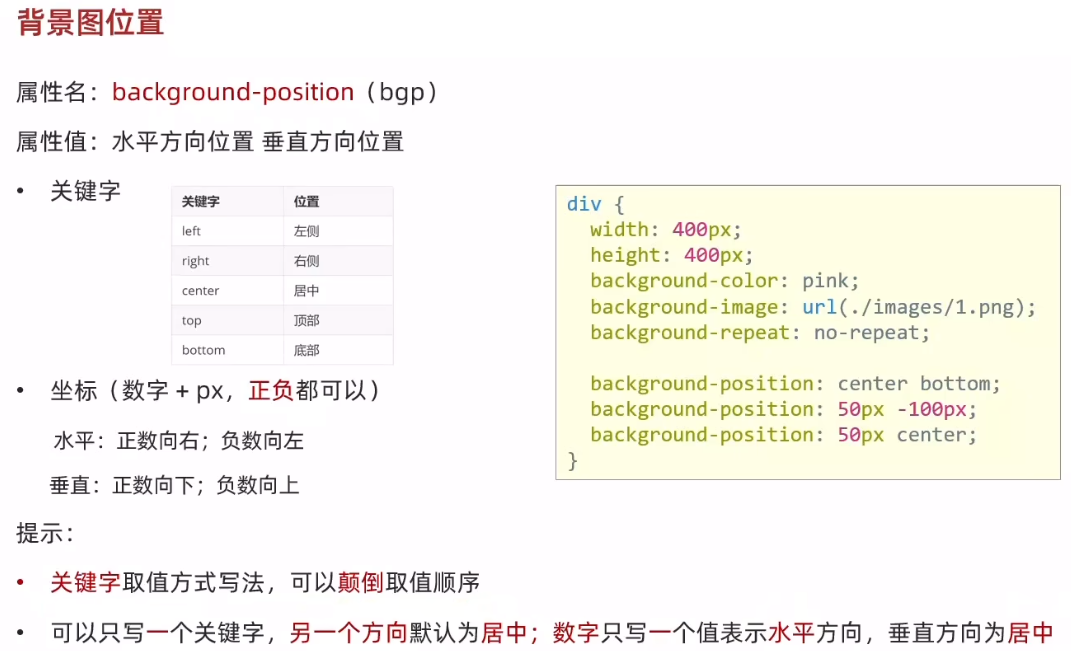
代码:
<!DOCTYPE html>
<html lang="en">
<head><meta charset="UTF-8"><meta name="viewport" content="width=device-width, initial-scale=1.0"><title>Document</title><style>div {width: 400px;height: 400px;/* 背景图默认效果平铺 */background-color: pink;background-image: url(./image/3.jpg);background-repeat: no-repeat;/* 0 0表示左上角,是默认 *//* background-position: left top;这也是左上角 *//* 水平方向:正数向左移动,负数向右移动 *//* background-position: 50px 0; *//* background-position: -50px 0; *//* 垂直方向:正数向下,负数向上 *//* background-position: 0 100px; *//* background-position: 0 -100px; *//* background-position: 50px center; *//* 特殊写法 *//* background-position: bottom left; *//* 关键字只写一个,另一个方式默认居中 *//* background-position: bottom; *//* 只写一个数字表示水平方向,垂直方向居中 */background-position: 50px;}</style>
</head>
<body><div>div标签</div>
</body>
</html>
按照代码进行多次实验即可看到背景图位置变化
(3.4)背景图缩放

代码:
<!DOCTYPE html>
<html lang="en">
<head><meta charset="UTF-8"><meta name="viewport" content="width=device-width, initial-scale=1.0"><title>Document</title><style>div {width: 500px;height: 300px;/* 背景图默认效果平铺 */background-color: pink;background-image: url(./image/3.jpg);background-repeat: no-repeat;/* contain:如果图的宽或高跟盒子尺寸相等则停止缩放,可能导致盒子有露白 *//* background-size: contain; *//* cover:图片完全覆盖盒子,可能导致盒子显示不全 *//* background-size: cover; *//* 100%表示图片宽度和盒子宽度一样,图片高度按照图片比例等比缩放 */background-size: 100%;}</style>
</head>
<body><div>div标签</div>
</body>
</html>
效果:
contain:如果图的宽或高跟盒子尺寸相等则停止缩放,可能导致盒子有露白
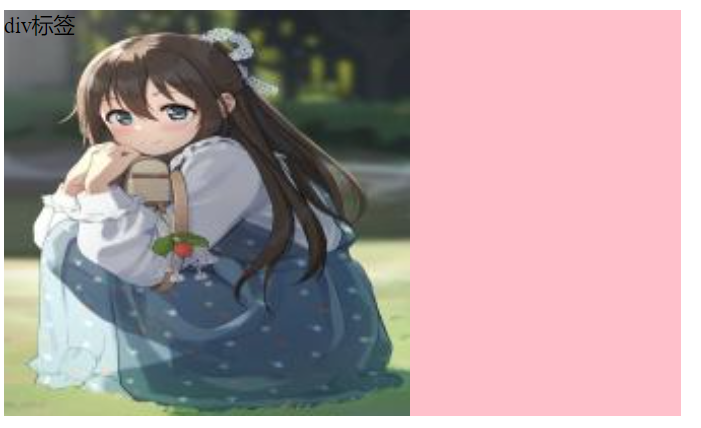
cover:图片完全覆盖盒子,可能导致盒子显示不全
(3.5)背景图固定

代码:
<!DOCTYPE html>
<html lang="en">
<head><meta charset="UTF-8"><meta name="viewport" content="width=device-width, initial-scale=1.0"><title>Document</title><style>body {background-image: url(./image/6.jpg);background-repeat: no-repeat;background-position: center top;/* 实现背景图固定 */background-attachment: fixed;}</style>
</head>
<body><p>测试文字,撑开body,让浏览器有滚动条</p><p>测试文字,撑开body,让浏览器有滚动条</p><p>测试文字,撑开body,让浏览器有滚动条</p><p>测试文字,撑开body,让浏览器有滚动条</p><p>测试文字,撑开body,让浏览器有滚动条</p><p>测试文字,撑开body,让浏览器有滚动条</p><p>测试文字,撑开body,让浏览器有滚动条</p><p>测试文字,撑开body,让浏览器有滚动条</p><p>测试文字,撑开body,让浏览器有滚动条</p><p>测试文字,撑开body,让浏览器有滚动条</p><p>测试文字,撑开body,让浏览器有滚动条</p><p>测试文字,撑开body,让浏览器有滚动条</p><p>测试文字,撑开body,让浏览器有滚动条</p><p>测试文字,撑开body,让浏览器有滚动条</p><p>测试文字,撑开body,让浏览器有滚动条</p><p>测试文字,撑开body,让浏览器有滚动条</p><p>测试文字,撑开body,让浏览器有滚动条</p><p>测试文字,撑开body,让浏览器有滚动条</p><p>测试文字,撑开body,让浏览器有滚动条</p><p>测试文字,撑开body,让浏览器有滚动条</p><p>测试文字,撑开body,让浏览器有滚动条</p><p>测试文字,撑开body,让浏览器有滚动条</p><p>测试文字,撑开body,让浏览器有滚动条</p><p>测试文字,撑开body,让浏览器有滚动条</p><p>测试文字,撑开body,让浏览器有滚动条</p><p>测试文字,撑开body,让浏览器有滚动条</p><p>测试文字,撑开body,让浏览器有滚动条</p><p>测试文字,撑开body,让浏览器有滚动条</p><p>测试文字,撑开body,让浏览器有滚动条</p><p>测试文字,撑开body,让浏览器有滚动条</p><p>测试文字,撑开body,让浏览器有滚动条</p><p>测试文字,撑开body,让浏览器有滚动条</p><p>测试文字,撑开body,让浏览器有滚动条</p><p>测试文字,撑开body,让浏览器有滚动条</p>
</body>
</html>
发现之后再滚动,背景图位置始终不变

(3.6)背景复合属性

代码:
<!DOCTYPE html>
<html lang="en">
<head><meta charset="UTF-8"><meta name="viewport" content="width=device-width, initial-scale=1.0"><title>Document</title><style>div {width: 400px;height: 400px;/* background: pink url(./image/3.jpg) no-repeat center bottom/cover; */background: pink url(./image/3.jpg) no-repeat center bottom/contain;}</style>
</head>
<body><div>div标签</div>
</body>
</html>
可以实现上面的背景图的所有属性
4.显示模式
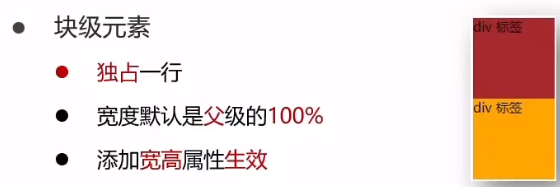
块级元素:独占一行,宽度默认是父级的100%,加宽高生效
行内元素:一行共存多个,尺寸随内容多少而变化,加宽高不生效
行内块:一行共存多个,默认尺寸随内容大小而变化(如图片),加宽高生效
代码:
<!DOCTYPE html>
<html lang="en">
<head><meta charset="UTF-8"><meta name="viewport" content="width=device-width, initial-scale=1.0"><title>Document</title><style>/* 块级:独占一行,宽度默认是父级的100%,加宽高生效 */div {width: 100px;height: 100px;}.div1 {background-color: red;}.div2 {background-color: orange;}/* 行内元素:一行共存多个,尺寸随内容多少而变化,加宽高不生效 */span {width: 200px;height: 200px;}.span1 {background-color: red;}.span2 {background-color: orange;}/* 行内块:一行共存多个,默认尺寸随内容大小而变化(如图片),加宽高生效 */img {width: 100px;height: 100px;}</style>
</head>
<body><!-- 块元素 --><div class="div1">div标签1</div><div class="div2">div标签2</div><!-- 行内元素 --><span class="span1">span1</span><span class="span2">span2</span><!-- 行内块元素 --><img src="./image/3.jpg" alt=""><img src="./image/3.jpg" alt=""></body>
</html>
打开浏览器检查可以查看这些元素的尺寸

5.转换显示模式

工作中常用转换成block和inline-block
代码:
<!DOCTYPE html>
<html lang="en">
<head><meta charset="UTF-8"><meta name="viewport" content="width=device-width, initial-scale=1.0"><title>Document</title><style>/* 块级:独占一行,宽度默认是父级的100%,加宽高生效 */div {width: 100px;height: 100px;/* 转换成行内块 */display: inline-block; /* display: inline; */}.div1 {background-color: red;}.div2 {background-color: orange;}/* 行内元素:一行共存多个,尺寸随内容多少而变化,加宽高不生效 */span {width: 200px;height: 200px;/* 转换为块 */display: block; }.span1 {background-color: red;}.span2 {background-color: orange;}/* 行内块:一行共存多个,默认尺寸随内容大小而变化(如图片),加宽高生效 */img {width: 100px;height: 100px;/* 转换为块 */display: block;}</style>
</head>
<body><!-- 块元素 --><div class="div1">div标签1</div><div class="div2">div标签2</div><!-- 行内元素 --><span class="span1">span1</span><span class="span2">span2</span><!-- 行内块元素 --><img src="./image/3.jpg" alt=""><img src="./image/3.jpg" alt=""></body>
</html>
效果:

将div(块)转换成行内块(一行共存多个,加宽高生效);
span(行内)转换成块(独占一行,加宽高生效);
img(行内块)转换成块(独占一行,加宽高生效)。
案例1
<!DOCTYPE html>
<html lang="en">
<head><meta charset="UTF-8"><meta name="viewport" content="width=device-width, initial-scale=1.0"><title>热词</title><style>/* 默认效果 */a {/* 转换显示模式为块 */display: block;width: 200px;height: 80px;/* 背景颜色 */background-color: #3064bb;/* 文字颜色 */color: white;/* 去除下划线 */text-decoration: none;/* 水平居中 */text-align: center;/* 行高 */line-height: 80px;/* 字体大小 */font-size: 18px;}/* 鼠标悬停效果 */a:hover {/* 悬停背景颜色变色 */background-color: #608dd9;}</style>
</head>
<body><a href="#">HTML</a><a href="#">CSS</a><a href="#">JavaScript</a><a href="#">Vue</a><a href="#">React</a>
</body>
</html>
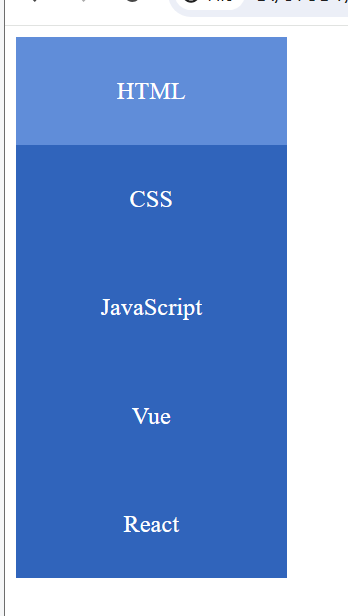
使用了这一节的伪类,显示模式等
效果:
案例2
布局大区域基本用div
<!DOCTYPE html>
<html lang="en">
<head><meta charset="UTF-8"><meta name="viewport" content="width=device-width, initial-scale=1.0"><title>banner效果</title><style>.banner {height: 500px;background-color: #f3f3f4;background-image: url(./image/test.jpg);background-repeat: no-repeat;background-position: left bottom;/* 文字控制属性,继承给子级 *//* 所有子级的文字都是黑色,右对齐 */text-align: right;color: #333;}.banner h2 {font-size: 36px;font-weight: 400;line-height: 100px;} .banner p {font-size: 20px;}.banner a {/* 块不行,块独占一行,不能右对齐 */display: inline-block;width: 125px;height: 40px;background-color: #f06b1f;text-align: center;line-height: 40px;color: white;/* 去下划线 */text-decoration: none ;/* 字号大小 */font-size: 20px;}</style>
</head>
<body><div class="banner"><h2>让创造产生价值</h2><p>我们希望小游戏平台提供无限可能</p><a href="#">我要报名</a></div>
</body>
</html>
最终效果:


