先占个坑,后续再整理。
文章目录
- 创建Tensor
- 创建随机Tensor
- 创建Zeros Tensor
- 创建Ones Tensor
- 从内存中读取数据创建Tensor
- 从Opencv Mat数据创建Tensor
- 从Tensor数据创建Opencv Mat
- 其他
- 切片
- 判断/设置Tensor内存连续
- 强转数据类型
- 切换Tensor Device
- Squeeze/Unsqueeze使用
- Permute使用
- Interpolation使用
- Flip使用
- Clip使用
- Rot90使用
- 关闭梯度跟踪
- VSCODE配置
libtorch官方文档链接:https://pytorch.org/cppdocs/
创建Tensor
创建随机Tensor
#include <torch/torch.h>
#include <iostream>int main()
{auto options = torch::TensorOptions().dtype(torch::kFloat32).layout(torch::kStrided).device(torch::kCPU)  // device(torch::kCUDA, 1).requires_grad(false);torch::Tensor tensor = torch::rand({2, 3}, options);std::cout << tensor << std::endl;std::cout << tensor.sizes() << std::endl;std::cout << tensor.dtype() << std::endl;return 0;
}
创建Zeros Tensor
torch::Tensor tensor = torch::zeros({2, 3});
创建Ones Tensor
torch::Tensor tensor = torch::ones({2, 3});
从内存中读取数据创建Tensor
#include <torch/torch.h>
#include <iostream>int main()
{   float data[6] = {1., 2., 3., 4., 5., 6.};auto options = torch::TensorOptions().dtype(torch::kFloat32).layout(torch::kStrided).device(torch::kCPU)  // device(torch::kCUDA, 1).requires_grad(false);torch::Tensor tensor = torch::from_blob(data, {3, 2}, options);std::cout << tensor << std::endl;return 0;
}
从Opencv Mat数据创建Tensor
#include <iostream>
#include <torch/torch.h>
#include <opencv2/opencv.hpp>using namespace torch::indexing;int main()
{std::string img_path = "lena.jpg";cv::Mat img = cv::imread(img_path);std::cout << "size: " << img.size() << std::endl;std::cout << "channels: " << img.channels() << std::endl;std::cout << "dtype: " << img.type() << std::endl;cv::Mat img_fp32;img.convertTo(img_fp32, CV_32FC3);std::cout << "dtype: " << img_fp32.type() << std::endl;std::cout << cv::format(img_fp32(cv::Rect(0, 0, 3, 3)), cv::Formatter::FMT_NUMPY) << std::endl;auto options = torch::TensorOptions().dtype(torch::kFloat32).layout(torch::kStrided).device(torch::kCPU).requires_grad(false);torch::Tensor img_tensor = torch::from_blob(img_fp32.data,{img_fp32.rows, img_fp32.cols, img_fp32.channels()},options);std::cout << img_tensor.index({Slice(0, 3), Slice(0, 3), Slice()}) << std::endl;return 0;
}
从Tensor数据创建Opencv Mat
#include <iostream>
#include <torch/torch.h>
#include <opencv2/opencv.hpp>using namespace torch::indexing;int main()
{   torch::manual_seed(1234);auto options = torch::TensorOptions().dtype(torch::kFloat32).layout(torch::kStrided).device(torch::kCPU).requires_grad(false);torch::Tensor img_tensor = torch::randn({224, 224, 3}, options);std::cout << img_tensor.index({Slice(0, 3), Slice(0, 3), Slice()}) << std::endl;auto shape = img_tensor.sizes();cv::Mat img(shape[0], shape[1], CV_32FC3, (float *) img_tensor.data_ptr());std::cout << "size: " << img.size() << std::endl;std::cout << "channels: " << img.channels() << std::endl;std::cout << "dtype: " << img.type() << std::endl;std::cout << cv::format(img(cv::Rect(0, 0, 3, 3)), cv::Formatter::FMT_NUMPY) << std::endl;return 0;
}
其他
切片
#include <torch/torch.h>
#include <iostream>using namespace torch::indexing;int main()
{// torch::manual_seed(1234);  // 固定随机数种子torch::Tensor tensor = torch::rand({1, 3, 512, 512});std::cout << tensor.sizes() << std::endl;// tensor[:, :, 10:100, 10:100]torch::Tensor slice_tensor = tensor.index({Slice(), Slice(), Slice(10, 100), Slice(10, 100)});std::cout << slice_tensor.sizes() << std::endl;return 0;
}
注意,这里的切片操作是引用,如果对切片区域进行inplace操作,会影响原数据,可以看下下面的例子:
#include <torch/torch.h>
#include <iostream>using namespace torch::indexing;int main()
{torch::manual_seed(1234);torch::Tensor tensor = torch::rand({5, 5});std::cout << tensor << std::endl;torch::Tensor slice_tensor = tensor.index({Slice(0, 2), Slice(0, 2)});std::cout << slice_tensor << std::endl;slice_tensor.add_(5);std::cout << slice_tensor << std::endl;std::cout << tensor << std::endl;return 0;
}
如果需要新创建一块内存可以在切片后加个clone操作。
#include <torch/torch.h>
#include <iostream>using namespace torch::indexing;int main()
{torch::manual_seed(1234);torch::Tensor tensor = torch::rand({5, 5});std::cout << tensor << std::endl;torch::Tensor slice_tensor = tensor.index({Slice(0, 2), Slice(0, 2)}).clone();std::cout << slice_tensor << std::endl;slice_tensor.add_(5);std::cout << slice_tensor << std::endl;std::cout << tensor << std::endl;return 0;
}
判断/设置Tensor内存连续
#include <torch/torch.h>
#include <iostream>using namespace torch::indexing;int main()
{torch::Tensor tensor = torch::rand({3, 2});std::cout << tensor.is_contiguous() << std::endl;// 这里切片后并不是内存连续的torch::Tensor new_tensor = tensor.index({Slice(), 0});std::cout << new_tensor.is_contiguous() << std::endl;new_tensor = new_tensor.contiguous();std::cout << new_tensor.is_contiguous() << std::endl;return 0;
}
强转数据类型
#include <torch/torch.h>
#include <iostream>int main()
{torch::Tensor tensor = torch::rand({3, 2}) * 10;std::cout << tensor << std::endl;torch::Tensor new_tensor = tensor.to(torch::kInt32);std::cout << new_tensor << std::endl;return 0;
}
切换Tensor Device
#include <torch/torch.h>
#include <iostream>int main()
{torch::Tensor tensor = torch::rand({3, 2}, torch::kCPU);std::cout << tensor << std::endl;torch::Tensor new_tensor = tensor.to(torch::Device(torch::kCUDA, 0));std::cout << new_tensor << std::endl;return 0;
}
Squeeze/Unsqueeze使用
Squeeze可以压缩维度,Unsqueeze可以新增维度。下面代码中使用的是inplace操作,即对原始数据进行处理不会生成新的数据,如果想生成新的数据需要使用不带下划线的对应函数。
#include <torch/torch.h>
#include <iostream>int main()
{torch::Tensor tensor = torch::rand({3, 512, 512});tensor.unsqueeze_(0);  // inplace// torch::Tensor new_tensor = tensor.unsqueeze(); // no inplacestd::cout << tensor.sizes() << std::endl;tensor.squeeze_(0);  // inplace// torch::Tensor new_tensor = tensor.squeeze();  // no inplacestd::cout << tensor.sizes() << std::endl;return 0;
}
Permute使用
#include <torch/torch.h>
#include <iostream>namespace F = torch::nn::functional;int main()
{// [N, C, H, W]torch::Tensor tensor = torch::rand({1, 3, 512, 512});std::cout << tensor.sizes() << std::endl;// [N, C, H, W] -> [N, H, W, C]torch::Tensor new_tensor = tensor.permute({0, 2, 3, 1});std::cout << new_tensor.sizes() << std::endl;return 0;
}
Interpolation使用
#include <torch/torch.h>
#include <iostream>namespace F = torch::nn::functional;int main()
{torch::Tensor tensor = torch::rand({1, 3, 512, 512});std::cout << tensor.sizes() << std::endl;int64_t h = 1024;int64_t w = 1024;auto cfg = F::InterpolateFuncOptions().size(std::vector<int64_t>{h, w}).mode(torch::kBilinear).align_corners(false);torch::Tensor new_tensor = F::interpolate(tensor, cfg);std::cout << new_tensor.sizes() << std::endl;return 0;
}
Flip使用
Flip在RGB和BGR互转的情况下非常常用:
#include <torch/torch.h>
#include <iostream>int main()
{torch::Tensor tensor = torch::rand({3, 2});std::cout << tensor << std::endl;torch::Tensor new_tensor = tensor.flip({1});std::cout << new_tensor << std::endl;return 0;
}
Clip使用
#include <torch/torch.h>
#include <iostream>int main()
{torch::Tensor tensor = torch::randn({3, 2});std::cout << tensor << std::endl;tensor.clip_(0., 1.);  // inplace// torch::Tensor new_tensor = tensor.clip(0., 1.);  // no inplacestd::cout << tensor << std::endl;return 0;
}
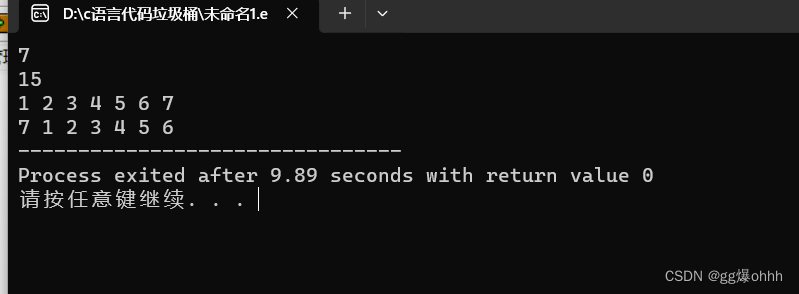
Rot90使用
#include <torch/torch.h>
#include <iostream>int main()
{torch::Tensor tensor = torch::randn({1, 1, 3, 2});std::cout << tensor << std::endl;// torch.rot90(tensor, k=1, dims=[2, 3])// 逆时针旋转90度, 如果要顺时针将dims改为[3, 2]torch::Tensor new_tensor = torch::rot90(tensor, 1, {2, 3});std::cout << new_tensor << std::endl;return 0;
}
关闭梯度跟踪
如果仅仅是当推理框架使用,可以把梯度相关功能给关闭掉。这样能够获得更好的性能。
Compared to NoGradMode, code run under this mode gets better performance by disabling autograd related work like view tracking and version counter bumps.
#include <torch/torch.h>
#include <iostream>int main()
{   // like python torch.inference_mode()torch::InferenceMode();torch::Tensor tensor = torch::rand({1, 3, 512, 512});std::cout << tensor.sizes() << std::endl;return 0;
}
VSCODE配置
CMakeLists.txt配置:
cmake_minimum_required(VERSION 3.18 FATAL_ERROR)
project(example-app)find_package(Torch REQUIRED)
set(CMAKE_CXX_FLAGS "${CMAKE_CXX_FLAGS} ${TORCH_CXX_FLAGS}")add_executable(example-app example-app.cpp)
target_link_libraries(example-app "${TORCH_LIBRARIES}")
set_property(TARGET example-app PROPERTY CXX_STANDARD 17)
tasks.json配置,注意需要将-DCMAKE_PREFIX_PATH配置成libtorch文件夹绝对路径:
{"version": "2.0.0","tasks": [{"label": "mkdir","type": "shell","command": "mkdir","args": ["-p", "build"],"options": {"cwd": "${workspaceFolder}"},            },{"label": "cmake","type": "shell","command": "cmake","args": ["-DCMAKE_PREFIX_PATH=/absolute/path/to/libtorch","../"],"options": {"cwd": "${workspaceFolder}/build"},           "dependsOn": ["mkdir"] },{"label": "make","type": "shell","command": "cmake","args": ["--build",".","--config", "Release"],"options": {"cwd": "${workspaceFolder}/build"}, "dependsOn": ["cmake"]},{"label": "build","dependsOn": ["make"]},],
}
launch.json配置:
{"version": "0.2.0","configurations": [{"name": "Build and debug active file","type": "cppdbg","request": "launch","program": "${workspaceFolder}/build/${fileBasenameNoExtension}","args": [],"stopAtEntry": false,"cwd": "${workspaceFolder}","environment": [],"externalConsole": false,"MIMode": "gdb","setupCommands": [{"description": "Enable pretty-printing for gdb","text": "-enable-pretty-printing","ignoreFailures": true}],"preLaunchTask": "build","miDebuggerPath": "/usr/bin/gdb"}]
}
如果需要添加相关头文件方便使用智能补全的,可以配置c_cpp_properties.json文件:
{"configurations": [{"name": "linux","intelliSenseMode": "linux-gcc-x64","compilerPath": "/usr/bin/gcc","cStandard": "c17","cppStandard": "gnu++17","includePath": ["/usr/local/include/opencv4/","/usr/local/include/opencv4/opencv2/","/absolute/path/to/libtorch/include","/absolute/path/to/libtorch/include/torch/csrc/api/include"]}],"version": 4
}