小程序
三、微信公众平台
开发者通过公众号向用户提供咨询和服务的平台!!!
Mp.weixin.qq.com
- 账号分类
订阅号、服务号、企业微信、小程序(小游戏)
订阅号
订阅号:为媒体和个人提供一种新的信息传播方式,主要功能是在微信侧给用户传达资讯;(功能类似报纸杂志,提供新闻信息或娱乐趣事)
适用人群:个人、媒体、企业、政府或其他组织。
群发次数:订阅号(认证用户、非认证用户)1天内可群发1条消息。
所在位置:
服务号
服务号:为企业和组织提供更强大的业务服务与用户管理能力,主要偏向服务类交互(功能类似12315,114,银行,提供绑定信息,服务交互的);
适用人群:媒体、企业、政府或其他组织。
群发次数:服务号1个月(按自然月)内可发送4条群发消息。
所在位置:
直接显示在微信好友对话列表中
企业微信(企业号)
企业的专业办公管理工具。与微信一致的沟通体验,提供丰富免费的办公应用,并与微信消息、小程序、微信支付等互通,助力企业高效办公和管理。
小程序
小程序是一种新的开放能力,开发者可以快速地开发一个小程序。小程序可以在微信内被便捷地获取和传播,同时具有出色的使用体验。
微信小程序,小程序的一种,英文名Wechat Mini Program,是一种不需要下载安装即可使用的应用,它实现了应用“触手可及”的梦想,用户扫一扫或搜一下即可打开应用。
全面开放申请后,主体类型为企业、政府、媒体、其他组织或个人的开发者,均可申请注册小程序。微信小程序、微信订阅号、微信服务号、微信企业号是并行的体系。
类似于app一样的产品,嵌入到微信客户端的
四、微信小程序
- 优缺点
1.1优点
不需要下载,即用即走
开发成本低
开发难度低(html+css+js)
1.2缺点
工程大小有限制 (只有2M,使用分包,16m)
入口比较深 (依托微信)
不能直接分享到朋友圈 【更新 安卓beta测试版,】
2. 应用场景/发展前景
应用场景
电商、社交、娱乐、家政服务等等
发展前景
微信生态圈
-
接入微信小程序
3.1 注册
3.2 完善信息
3.3 开发
3.4 发布上线 -
开放范围
• 个人
18岁以上有国内身份信息的微信实名用户
• 企业
• 政府
• 媒体
• 其他组织

-
账号注册
第一步:
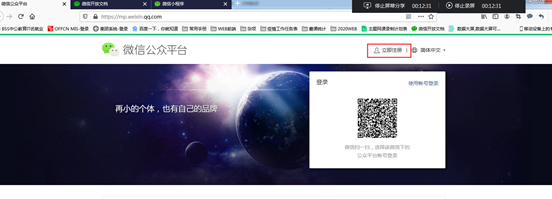
第二步:

第三步:
每个邮箱仅能申请一个小程序

第四步:
邮箱激活 ,点击激活链接
第五部:


五、后台管理系统
- 完善小程序信息
Tips:
服务类目:(千万不要选择游戏)

- 版本管理
2.1开发版本

点击上传按钮,生成的版本
2.2审核版本
点击开发版本提交审核按钮之后生成的版本,此版本也是微信审核团队正在审核的版本
2.3线上版本

审核版本通过审核之后,点击发布按钮生成的版本,此版本就是线上正常运行的版本
2.4体验版本
在开发版本点击选为体验版本即可生成
- 成员管理
3.1 管理员
当前小程序的拥有者
3.2 项目程序
协助管理员进行小程序开发及运营维护,同样能够使用体验版小程序
3.3 体验成员
使用体验版小程序
- 开发设置
AppID(小程序ID) wx1b41fefe4f9411d6
AppSecret(小程序密钥)
fc01150d1f8c04a2164444979adac85b
服务器域名:
服务器、域名、备案、域名绑定和解析
域名: 必须要提前进行配置(上线之前)
域名一定要加https

六、工具
-
下载
https://developers.weixin.qq.com/miniprogram/dev/devtools/stable.html -
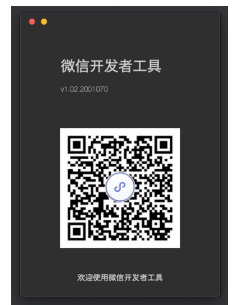
运行及页面介绍


七、初始化项目
类似于 vue-cli

八、目录结构(重点)

app.js 小程序入口文件(逻辑文件js),相当于vue的 main.js ==> new Vue({})
app.json 全局的配置文件
app.wxss 全局样式文件 (参考css)
Project.config.json 项目的配置文件【项目针对于编辑器的配置文件】
Sitemap.json 站点地图( 当前小程序页面,允不允许在微信客户端进行索引[搜索] )
Pages: 所有的页面目录

每一个页面都是由4个文件构成:
[page].wxml 页面结构 —》html
[page].js 页面逻辑 --》js
[page].wxss 页面样式 --》css
[page].json 页面配置 --》json
Utils 工具目录
Tips:
- 只要提到逻辑,说的就是js
- 只要提到配置文件,说的就是json文件
- App是不能发生改变的
总结:


Pages:
九、全局配置app.json
“entryPagePath”: “pages/c/c”, 默认首页

Pages 页面的路径列表
未指定 entryPagePath 时,数组的第一项代表小程序的初始页面(首页)。
注意事项:
Pages 路径原生前面不要加任何东西
每一个元素是以逗号分隔,最后一个元素后面不能加逗号
Json文件使用双引号
Json配置文件,不能够加注释
所有的页面必须在pages属性中提前定义好
Window
用于设置小程序的状态栏、导航条、标题、窗口背景色。
"navigationBarBackgroundColor": "#ffff00","navigationBarTitleText": "小程序","navigationBarTextStyle": "black","navigationStyle": "default" "enablePullDownRefresh": true, 开启全局下拉刷新"backgroundColor": "#123456","backgroundTextStyle": "light"
Tabbar底部tab
最多5个,最少2个
List: 底部tab Array
"tabBar": {"color": "#000000","selectedColor": "#f00","backgroundColor": "#654321","borderStyle": "white","position": "bottom","custom": false,"list":[{"pagePath": "pages/index/index","text": "首页","iconPath": "tabs/index.png","selectedIconPath": "tabs/indexFull.png"},{"pagePath": "pages/cart/cart","text": "购物车","iconPath": "tabs/cart.png","selectedIconPath": "tabs/cartFull.png"},{"pagePath": "pages/my/my","text": "我的","iconPath": "tabs/my.png","selectedIconPath": "tabs/myFull.png"}]},
十.页面配置
页面配置只能配置window; 页面配置的优先级要高于全局配置
页面中配置项在当前页面会覆盖 app.json 的 window 中相同的配置项。
十一、sitemap.json(了解)
如果不加任何的设置,默认所有的页面都会被索引(搜索)
十二、场景值(了解 --面试)
场景值用来描述用户进入小程序的路径,也就是如何进入小程序的!!!
应用场景:
KFC :
- 搜索小程序进入外卖
- 店里直接扫码点餐
获取场景值的方式:
 App({// 生命周期函数onLaunch(options){  //初始化// 获取场景值// console.log(options.scene,'onLaunch')if(options.scene == 1011){// 扫描二维码进入小程序的,点餐页面console.log('我是直接点餐')}else if(options.scene == 1001){// 搜索进来,外卖页面console.log('我是外卖页面')}else{// 直接进入首页console.log('进入首页')}}
})
- 含义
设置当前小程序的页面允不允许在微信内进行索引(搜索)
“page”: “pages/index/index?id=XXX”
Inclusive:包含 --当前页面传递的参数 ,包含params里面的值
Exact: 与params参数完全一致,即可命中
Exclusive 与params参数交集为空的时候,即可命中
Partial 与params参数交集不为空的时候,即可命中
{"rules": [{"action": "allow","params": ["id","name"],"matching": "partial","page": "pages/index/index"},{"action": "disallow","page":"*"}]
}
Priority: 改变当前规则匹配的优先级的问题!!
谁的数大,就先匹配谁,如果没有,则从上到下依次进行匹配
{"rules": [{"action": "disallow","params": ["id","name"],"page": "pages/index/index"},{"action": "allow","params": ["id","name"],"page": "pages/index/index","priority":1    // 优先执行},{"action": "disallow","page":"*"}]
}
四、小程序逻辑层js
- 逻辑层的概念

小程序开发框架的逻辑层使用 JavaScript 引擎为小程序提供开发者 JavaScript 代码的运行环境以及微信小程序的特有功能。
在 JavaScript 的基础上,我们增加了一些功能,以方便小程序的开发:
• 增加 App 和 Page 方法,进行程序注册和页面注册。
• 增加 getApp 和 getCurrentPages 方法,分别用来获取 App 实例和当前页面栈。
• 提供丰富的 API,如微信用户数据,扫一扫,支付等微信特有能力。
• 提供模块化能力,每个页面有独立的作用域。
注意:小程序框架的逻辑层并非运行在浏览器中,因此 JavaScript 在 web 中一些能力都无法使用,如 window,document 等。
2. 注册小程序
App.js 文件中 App() 方法
App() 必须在 app.js 中调用,必须调用且只能调用一次。不然会出现无法预期的后果。
//  在app中,使用this获取app内的值
App({onShow(){// console.log('进入小程序或者切前台','onShow')// 获取userinfoconsole.log(this.userInfo)  //this是当前app实例this.say()},// 只能加载一次onLaunch(){// console.log('小程序初始化','onLaunch')},onHide(){console.log('切后台','onhide')},// 全局监听onError(error){console.log('错误信息',error)},// 当访问的页面不存在的时候,执行此函数onPageNotFound(){// console.log('次页面不存在')// 如果当前页面不存在,可以跳转到404页面wx.redirectTo({url: '/pages/page404/page404',})},userInfo:{name:"后羿",role:"射手"},say(){console.log('我正在说话')},run:function(){console.log('我正在跑步')}
})
在页面获取全局唯一的应用实例:
const  app =  getApp();
// console.log(app,'全局的唯一的应用实例')
console.log(app.userInfo);
- 注册页面
在页面的js文件中,使用Page()构造函数进行注册页面
注册小程序中的一个页面。接受一个 Object 类型参数,其指定页面的初始数据、生命周期回调、事件处理函数等。
// 注册页面
Page({
Data:{  }
})
Data:
data 是页面第一次渲染使用的初始数据。
字符串,数字,布尔值,对象,数组。获取: 在page中获取data的值使用 this.data.属性
更新: // 更新  视图会发生改变this.setData({message:"0511python"})
//视图不会发生改变
this.data.message = "0511python";
生命周期函数:
// 页面加载时触发。一个页面只会调用一次,可以在 onLoad 的参数中获取打开当前页面路径中的参数。onLoad(options){// 获取参数console.log('onload',options)},// 页面显示onShow(){console.log('onshow')},// 页面隐藏onHide(){console.log("onhide")},onReady(){console.log('onready')}
页面监听函数:
  // 1.页面下拉刷新onPullDownRefresh(){// console.log(123)// 改变当前data中message的值为0511python// 先获取// console.log(this.data.message)// 更新// this.setData({//     message:"0511python"// })this.data.message = "0511python";},// 2.上拉加载onReachBottom(){console.log('上拉加载')}
// 3.监听页面滚动的onPageScroll(e){console.log(e)}

Any: 自定义
username:"admin",// 自定义函数 -- 不要是用 methodsfn(){return "我是自定义fn函数"},
getCurrentPages()
获取当前页面栈(页面层级类似于 A(首页)-B-C-D(当前页))
4. 生命周期
进入小程序:
onLaunch - onShow - onLoad - onShow - onReady
离开小程序:
页面 onhide – 小程序的onhide
五、视图层
框架的视图层由 WXML 与 WXSS 编写,由组件来进行展示。
将逻辑层的数据反映成视图,同时将视图层的事件发送给逻辑层。
WXML(WeiXin Markup language) 用于描述页面的结构。
WXS(WeiXin Script) 是小程序的一套脚本语言,结合 WXML,可以构建出页面的结构。
WXSS(WeiXin Style Sheet) 用于描述页面的样式。
组件(Component)是视图的基本组成单元。
- 基础数据绑定
数据绑定使用 Mustache 语法(双大括号)将变量包起来,所有的数据来源都在js文件中的data属性内!!!
属性
Vue – :属性名称=“值”
关键字
True/false
true
使用时,双引号 + 花括号 + 关键字即可
<!-- 属性绑定 -->
<!-- 注意事项:1.所有的渲染的数据必须放在双花括号内,并且使用引号括起来,建议使用双引号2.只要是解析data中的变量属性,必须加{{}}-->
<view id="{{ id }}">属性绑定</view>
<view id='{{ id }}'>属性绑定</view><!-- 关键字 --><view hidden="{{   false   }}">true</view>
<!-- <view >{{ false }}</view> --><!-- 运算 -->
<!-- 三元运算  ==  三目运算    ?  :  --><view>{{ age >= 18  ? '成年' : '未成年'  }}</view><!-- 算数运算 -->
<view>1+2</view>
<view>{{ 1+2+age }}</view><!-- 字符串运算 -->
<view>{{ 1+2+age+'10' }}</view><!-- 路径运算 -->
<view>{{ arr[1] }}</view>
<view>{{ obj.name }}</view>
- 列表渲染
Wx:for=”{{ 数据 }}”
在组件上使用 wx:for 控制属性绑定一个数组,即可使用数组中各项的数据重复渲染该组件。
默认数组的当前项的下标变量名默认为 index,数组当前项的变量名默认为 item
使用 wx:for-item 可以指定数组当前元素的变量名,
使用 wx:for-index 可以指定数组当前下标的变量名:
<!-- 数组的渲染默认的下标变量:index  默认的元素的值:itemwx:for-index 改变下标  wx:for-item 改变元素-->
<!-- <view wx:for="{{ info }}">{{index }}---{{ item }}
</view> -->
============
<!-- <view wx:for="{{ info }}" wx:for-index="key" wx:for-item="val">{{key }}---{{ val }}
</view> -->
wx:key 与vue里面的key的作用完全相同
如不提供 wx:key,会报一个 warning, 如果明确知道该列表是静态,或者不必关注其顺序,可以选择忽略
使用key:
*this
唯一的属性
1.字符串,代表在 for 循环的 array 中 item 的某个 property,该 property 的值需要是列表中唯一的字符串或数字,且不能动态改变。
2. 保留关键字 *this 代表在 for 循环中的 item 本身,这种表示需要 item 本身是一个唯一的字符串或者数字。
并不是一个组件,它仅仅是一个包装元素,不会在页面中做任何渲染,只接受控制属性。
<block wx:for="{{ info }}"><text>{{ item }}</text>
</block>
- 条件渲染
<!-- 条件渲染  wx:if  wx:elif  wx:else -->
<!-- 单分支 -->
<view wx:if="{{ score >=60  }}">及格
</view><!-- 双分支 --><view wx:if="{{ score >=60  }}">及格
</view>
<view wx:else> 不及格
</view><!-- 多分支 --><view wx:if="{{ score >=0 && score < 60  }}">不及格
</view>
<view wx:elif="{{ score >= 60 && score < 80 }}">及格
</view>
<view wx:elif="{{ score >= 80 && score <= 100 }}">优秀
</view>
<view wx:else> 成绩不合格
</view>
======一般来说,wx:if 有更高的切换消耗而 hidden 有更高的初始渲染消耗。因此,如果需要频繁切换的情景下,用 hidden 更好,如果在运行时条件不大可能改变则 wx:if 较好。<view wx:if="{{ false }}">wx:if</view>
<view hidden="{{ true }}">hidden</view>
- 模板
解决代码复用的问题!!!
4.1定义
Template name
<!-- 头部的模板文件 -->
<template name="myHeader"><!-- header --><block wx:for="{{ menu }}"> <view>{{ item }}</view></block>
</template>
4.2 使用
Template is
<import src="/template/header.wxml"></import>
<template is="myHeader" data="{{ menu }}"></template>
4.3传参
Data
<template is="myHeader" data="{{ menu }}"></template>
- 引用
(1) Import 引入模板文件
(2) Include 除了wxs 及template 之外所以的文件内容
六、wxss样式
-
概念
WXSS (WeiXin Style Sheets)是一套样式语言,用于描述 WXML 的组件样式。 -
样式导入
/app.wxss/
@import “/wxss/header.wxss”; -
新单位 rpx
正常宽度的问题:
规定: 6 7 8 小米 三星 、 平板 ,屏幕宽度都是750rpx
实际的元素的大小/设备的大小 750rpx = 设计稿元素的大小 20rpx/设计搞的宽度 750prpx
<view></view>view{width: 750rpx;height: 20px;background-color: red;
}
4.选择器
目前支持的选择器有:
选择器	样例	样例描述
.class	.intro	选择所有拥有 class="intro" 的组件
#id	#firstname	选择拥有 id="firstname" 的组件
element	view	选择所有 view 组件
element, element	view, checkbox	选择所有文档的 view 组件和所有的 checkbox 组件
::after	view::after	在 view 组件后边插入内容
::before	view::before	在 view 组件前边插入内容
5.静态样式/动态样式
静态样式 使用的wxss样式文件操作
动态样式 使用的style进行操作
笔记03
一、今日内容
- 事件系统
- 常用的组件
- 模块化 (小程序如何去使用)
- 组件化 (使用)
二、事件系统 - 什么事件?
• 事件是视图层(wxml)到逻辑层(js)的通讯方式。
• 事件可以将用户的行为反馈到逻辑层进行处理。
• 事件可以绑定在组件上,当达到触发事件,就会执行逻辑层中对应的事件处理函数。
• 事件对象可以携带额外信息,如 id, dataset, touches。 - 怎么去绑定事件?
传统的: On + 事件类型 = 事件函数
Vue: @ v-on
小程序:
Bind + 事件类型 = 事件函数
Catch + 事件类型 = 事件函数 - 事件函数的编写?
// 简写方式_bindtap(){// console.log("_bindtap",this)},// key +val_bindtapKey:function(){// console.log("key+val",this)// let _this = this;// setInterval(function(){// _this.data.num++; //自己本身加1// // 获取自己本身付给自己,渲染到视图层// _this.setData({// num:_this.data.num// })// },1000)setInterval(()=>{this.data.num++; //自己本身加1// 获取自己本身付给自己,渲染到视图层this.setData({num:this.data.num})},1000)},// 箭头函数_bindtapJt:()=>{// this == undefined// console.log("箭头函数",this)},_catchtap(){console.log("_catchtap")}
- 事件的传参和接参
传参:
Id传参
Data-*
data-item-id 复合类型传参 itemId
接参:
fun1(e){// console.log(e)console.log(e.target.id);console.log(e.currentTarget.id);},
- 事件的分类
事件分为冒泡事件和非冒泡事件: - 冒泡事件:当一个组件上的事件被触发后,该事件会向父节点传递。
- 非冒泡事件:当一个组件上的事件被触发后,该事件不会向父节点传递。
Bind + 事件类型可以对外冒泡 == 可以进行冒泡 - 事件对象
Bind /catch 有什么区别?
Bind允许事件向外冒泡
Catch阻止事件向外冒泡
Target 属性内的值 ,存的是当前事件事件源(点击谁触发了当前的函数)上面的值;
currentTarget 只获取当前事件绑定到的组件上的值
三、作业(开灯关灯)
四、组件
- 组件介绍

• 组件是视图层的基本组成单元。
• 组件自带一些功能与微信风格一致的样式。
• 一个组件通常包括 开始标签 和 结束标签,属性 用来修饰这个组件,内容 在两个标签之内。
Content goes here …
注意:所有组件与属性都是小写,以连字符-连接
公共属性 :所有的组件都有的属性
所有组件都有以下属性:
属性名 类型 描述 注解
id String 组件的唯一标示 保持整个页面唯一
class String 组件的样式类 在对应的 WXSS 中定义的样式类
style String 组件的内联样式 可以动态设置的内联样式
hidden Boolean 组件是否显示 所有组件默认显示
data-* Any 自定义属性 组件上触发的事件时,会发送给事件处理函数
bind* / catch* EventHandler 组件的事件 详见事件
2.组件使用
2.1基础组件视
2.1.1 text
<!-- text组件user-select 是否能够选择space 处理空格decode 解码-->
<text user-select="{{ true }}">hello wolrd</text>
<view></view>
<text user-select="{{ true }}" space="nbsp">hello wolrd</text>
<text decode>hello>wolrd</text>
2.1.2 icon
<!-- icon  -->
<icon type="download"></icon>
<icon type="download" size="30"></icon>
<icon type="download" size="30" color="red"></icon>
2.1.3 rich-text 富文本 v-html (了解)
<!-- rich-text<h2>我是h2标签</h2>nodes: string:array:--><!-- <h2>我是H2标签</h2>我是h2标签 --><!-- <rich-text nodes="<h2>我是h2标签</h2>"></rich-text> --><rich-text nodes="{{ info }}"></rich-text>

2.2 视图组件
2.2.1 view 视图
<!-- view --><view class="box"hover-class="active"hover-start-time="2000"hover-stay-time="5000"
>box</view>
2.2.2  swiper滑块视图容器
<!-- swpier 组件 滑块视图容器  width: 100%; height:  240px其中只可放置swiper-item组件,swiper-item : 宽高自动设置为100%。--><swiper class="swiper"indicator-dotsindicator-color="#000"indicator-active-color="#fff"autoplayinterval="1000"circular="{{ true }}"><swiper-item wx:for="{{ banners }}"><image src="{{ item }}"></image></swiper-item><!-- <swiper-item><image src="/logo/2.jpg"></image></swiper-item><swiper-item><image src="/logo/3.jpg"></image></swiper-item> --></swiper>
封装面板指示点:
<!-- 封装 -->
<view class="costom-container"><swiper bindchange="_change" class="swiper" autoplay interval="1000" circular="{{ true }}"><swiper-item wx:for="{{ banners }}"><image src="{{ item }}"></image></swiper-item></swiper><view  class="costom-dots"><text class="{{ index == current ? 'active' : '' }}" wx:for="{{ banners }}"></text></view>
</view>
Js:
data: {banners:["/logo/1.jpg","/logo/2.jpg","/logo/3.jpg",],current:0,},_change(e){// console.log(e)let current = e.detail.current;this.setData({current,})},
Detail : 组件私有的事件,里面默认的值都在detail里面获取
2.2.3 scroll-view 滚动视图
- scroll-y 纵向滚动 true 给scroll-view设置固定高度
- scroll-x 横向滚动 true 子元素 使用inline-block, white-space: nowrap
案例:
Wxml:
<!-- 案例 -->
<view class="gategory"><scroll-view class="left" scroll-y><view bindtap="change" data-cateid="cateid0">手机</view><view bindtap="change" data-cateid="cateid1">电脑</view><view bindtap="change" data-cateid="cateid2">冰箱</view><view bindtap="change" data-cateid="cateid3">洗衣机</view><view bindtap="change" data-cateid="cateid4">电视</view></scroll-view><scroll-view class="right" scroll-y  scroll-into-view="{{ cateid }}"><view class="father"  id="cateid0"><view>小米手机</view><view>苹果手机</view><view>华为手机</view></view><view class="father" id="cateid1"><view>小米电脑</view><view>苹果电脑</view><view>华为电脑</view></view><view class="father" id="cateid2"><view>小米冰箱</view><view>苹果冰箱</view><view>华为冰箱</view></view><view class="father" id="cateid3"><view>小米洗衣机</view><view>苹果洗衣机</view><view>华为洗衣机</view></view><view class="father" id="cateid4"><view>小米电视</view><view>苹果电视</view><view>华为电视</view></view></scroll-view>
</view>
js:
Page({data: {cateid:"cateid0"},change(e){this.setData({cateid : e.target.dataset.cateid})}
})
3.媒体组件
3.1 image
src
Bindload //当图片载入完毕时触发Binderror //当错误发生时触发show-menu-by-longpress //开启长按图片显示识别小程序码菜单lazy-load 懒加载 ****
4.表单组件
<!--pages/form/form.wxml-->
<!-- input:bindinput   监听input值的变化-->
<view class="container"><view class="title">请填写一下信息</view>
<form bindsubmit="formSubmit" bindreset="formReset"><!-- 姓名 --><view class="question">姓名:</view><!-- <input  placeholder="请输入姓名"  value="1" class="_input" /> --><input name="username" placeholder="请输入姓名" bindinput="_input" type="text" class="_input" /><!-- 联系 --><view class="question">联系方式:</view><input name="phone" placeholder="请输入电话号码"  type="number" class="_input" /><!-- 密码 --><view class="question">密码</view><input name="password"  placeholder="请输入密码"  type="text" password class="_input" /><!-- 性别 --><view class="question">您的性别是:</view><radio-group  bindchange="_radioChange" name="sex"><radio value="男" checked>男</radio><radio value="女" disabled>女</radio><radio value="保密" color="red">保密</radio></radio-group><!-- 爱好 --><view class="question">您的爱好是:</view><checkbox-group  bindchange="_checkboxChange" name="hobby"><checkbox value="唱歌" checked>唱歌</checkbox><checkbox value="跳舞" disabled>跳舞</checkbox><checkbox value="直播" color="red">直播</checkbox><checkbox value="游戏" color="red">游戏</checkbox><checkbox value="睡觉" color="red">睡觉</checkbox></checkbox-group><view class="question">是否同意我们联系您:</view><!-- <switch type="switch"></switch> --><switch name="isAgree" type="checkbox" bindchange="_switchChange"></switch><view class="btn"><button form-type="submit" size="mini" type="primary">提交</button><button form-type="reset" size="mini" type="warn">重置</button></view>
</form>
</view>
Js:
// pages/form/form.js
Page({/*** 页面的初始数据*/
data: {},_input(e){console.log(e)},_radioChange(e){console.log(e)},_checkboxChange(e){console.log(e)},_switchChange(e){console.log(e)},formReset(){console.log('重置')},formSubmit(e){console.log(e)}
})
笔记04
一、今日安排
- 导航组件/api
- 模块化/组件化
- 常用的api
- WEUI组件库
二、导航组件
Navigator /api
Target:
- 在自己本身小程序内部进行跳转
1.1 跳转
<!-- 页面链接 -->
<!--   navigate:  保留当前页面,不能跳转tab页面redirect: 关闭当前页面,不能跳转tab页面switchTab:跳转tab页面的reLaunch:  关闭所有页面,打开应用内某个页面navigateBack:关闭当前页面,返回上一页面或多级页面--><navigator target="self" open-type="navigate" url="/pages/cart/cart"><button>跳转到cart页面 -- navigate</button>
</navigator>
<navigator target="self" open-type="redirect" url="/pages/cart/cart"><button>跳转到cart页面 -- redirect</button>
</navigator>
<navigator target="self" open-type="switchTab" url="/pages/my/my"><button>跳转到my页面 -- switchTab</button>
</navigator>
<navigator target="self" open-type="reLaunch" url="/pages/my/my"><button>跳转到my页面 -- reLaunch</button>
</navigator>
<navigator target="self" open-type="reLaunch" url="/pages/cart/cart"><button>跳转到cart页面 -- reLaunch</button>
</navigator>
Api:
<button type="primary" bindtap="_jumpCart">跳转到cart页面 -- navigate -- api</button>
<button type="primary" bindtap="_jumpMy">跳转到MY页面 -- switchTab -- api</button>_jumpCart(){//   使用api进行跳转wx.navigateTo({url: '/pages/cart/cart',})},_jumpMy(){wx.switchTab({url: '/pages/my/my',success:(res)=>{console.log(res)}})}
1.2传参和接参
wx.switchTab 是不能够传递参数的!!!!
传参:
url="/pages/cart/cart?id=100&num=99"wx.navigateTo({// url: `/pages/cart/cart?username=${username}&password=${password}`,url: "/pages/cart/cart?username="+username+"&password="+password,})
接参:
在对应的页面的生命周期函数接: onLoadonLoad: function (options) {console.log(12345678)console.log(options)},
- 跳转到其他小程序(了解)
wx8fc369471215e8ae<navigator target="miniProgram" app-id="wx8fc369471215e8ae">跳转到其他小程序</navigator>
三、模块化
- 模块化(功能)
可以将一些公共的代码抽离成为一个单独的 js 文件,作为一个模块。模块只有通过 module.exports 或者 exports 才能对外暴露接口。Es6也安全支持 - common.js规范
// 定义配置变量
const  BaseUrl = "http://localhost:3000";
// 对外暴露
// module.exports  = BaseUrl;
module.exports  = {BaseUrl,
};
// 引入
const  Config =  require('../../utils/config');
console.log(Config.BaseUrl)
3.es6规范
暴露:
// export  {
//     BaseUrl,
//     username,
//     password
// }
export  default  BaseUrl;
导入:
// import {BaseUrl,username,password}  from  "../../utils/config"
// console.log(BaseUrl,username,password)import Config  from  "../../utils/config"
console.log(Config)
四、组件化
- 创建组件
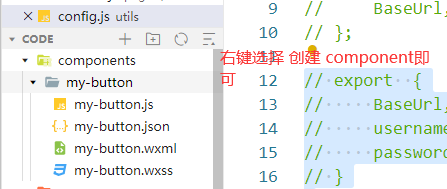
文件:
Json文件:

Component({/*** 组件的属性列表*/properties: {},/*** 组件的初始数据*/data: {},/*** 组件的方法列表*/methods: {}
})
- 使用组件
2.1 全局注册

2.2局部注册


- 封装组件(丰富组件)
对外开放的属性: 调用出用来传递的参数都要在当前属性中进行定义; 如果里面的属性和data属性重复,则以当前属性值为准。
 properties: {size:{type:String,  //当前size的数据类型value:"default"//  当前size的默认值},name:{type:String,value:"admin"},color:{type:String,value:"red"}},
// data 就是当前组件自己私有的属性,不能再调用处进行传值改变data: {// size:"default"age:"30"},// 自定时事件函数都在methods中进行操作。之前在page中的所有的操作,在当前js中都可以正常使用!!!methods: {click(){console.log(this.properties.size) // this.setData({//     age:40// })}}
五、Api
- api的介绍
监听api
以on开头的是监听api
同步api
Sync ,有返回值的,和try catch 合用
异步api
Callback 回调函数
Promise 对象 (不写回调函数,返回一个promise对象)
.Then()
- 常用api
//1. 获取设备信息的// let system = wx.getSystemInfoSync();// console.log(system)wx.getSystemInfo({// success: (result) => {// console.log(result)// },}).then(res=>{console.log(res)})
2.wx.showToast(Object object)
显示消息提示框
 // 请求有返回结果之后wx.showToast({title: '您未登录,请先去登录,有更好的体验!!',//   icon:"success"icon:"none",image:"/logo/bulb.png",duration:3000})// wx.hideToast({})
showloading// 数据请求时,使用提示wx.showLoading({title: '数据加载中',})setTimeout(()=>{wx.hideLoading()},3000)
showActionSheet wx.showActionSheet({itemList: ["首页","确定","联系客服"],itemColor:"#ff0",success(res){// console.log(res)if(res.tapIndex == 1){//执行确定}}})
动态设置标题
wx.setNavigationBarTitle({title:options.name})隐藏 返回首页按钮
wx.hideHomeButton({success: (res) => {},})
- 缓存api
3.1设置缓存
// 执行缓存存储// let username = "root";// 同步存储 // 函数 : 没有返回值的函数// wx.setStorageSync('username', username);let carts = [{id:10,name:"abc"},{id:11,name:"bcd"}]wx.setStorage({data: carts,key: 'carts',success(res){console.log(res)}})
3.2获取缓存
_getStorage(){// 同步获取// const storage = wx.getStorageSync('cart') || [];// var newCarts = storage.map((item)=>{// return item.name;// })// console.log(newCarts)wx.getStorage({key:"carts",success(res){console.log(res)}})}
3.3.删除缓存
_removeStorage(){// 同步删除 (没有返回值)// const res = wx.removeStorageSync('username');// console.log(res)// 异步删除// wx.removeStorage({// key:"username",// success(res){// console.log(res)// }// })}
3.4清空缓存
_clearStorage(){// wx.clearStorageSync();wx.clearStorage({success(res){console.log(res)}})}
- 网络请求
 Wx.request({
Url:””,网络请求的地址
Method:“get/post”,
Headers:{},
Data:{},
Success(){}
})
报错信息:
Get请求:
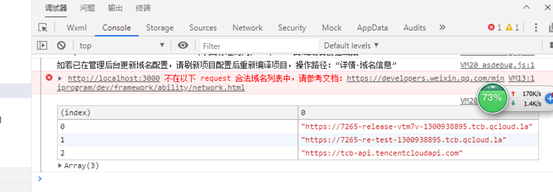
解决方法:

// getgetRequest(){let _this = this;wx.request({url: 'http://localhost:3000/products',method:"get", // get 也是默认值success(res){// console.log(res)_this.setData({products:res.data.result})}})}
Post请求
// postpostRequest(){let _this = this;wx.request({url: 'http://localhost:3000/login',method:"post", // get 也是默认值header:{"Content-Type":"application/json"},data:{username:"admin",password:123456},success(res){console.log(res)}})}
请求封装:
Config.js

http:

Api

Request.js
import {_login,_getProducts} from “…/…/utils/api”

六、WEUI
- 下载安装
(1) Npm
第一步:

第二步:

生成 package.json文件
第三步:

第四步:
工具-- 构建npm
App。Wxss:

Json:

导航:
<!-- 引入navigation -->
<mp-navigation-barbackground="#f00"title=""color="#fff"back="{{ false }}"
><!-- 左侧的返回按钮 --><view slot="left" class="nav-left"><text bindtap="back">返回</text> | <text>首页</text></view><!-- 标题 --><view slot="center"><mp-icon icon="search" type="field" color="#fff"></mp-icon> 订单查询</view>
</mp-navigation-bar>
Tabbar:
<mp-tabbar list="{{list}}" class="my-tabbar" bindchange="changeIndex"></mp-tabbar>data: {list:[{text:"订单查询",iconPath:"/icon/ddFull.png",selectedIconPath:"/icon/dd.png"},{text:"收获地址",iconPath:"/icon/ddFull.png",selectedIconPath:"/icon/dd.png"},{text:"会员等级",iconPath:"/icon/ddFull.png",selectedIconPath:"/icon/dd.png"},{text:"客服帮助",iconPath:"/icon/ddFull.png",selectedIconPath:"/icon/dd.png",badge:"2"}]},changeIndex(e){// swicth case // console.log(e)if(e.detail.index == 0){wx.switchTab({url: '/pages/index/index',})}else if(e.detail.index == 1){}else if(e.detail.index == 2){}else{wx.redirectTo({url: '/pages/cart/cart',})}},
笔记05
一、今日内容
- 分包加载
- 性能优化
- 开放能力
- 云开发
- 菜谱
二、分包加载

主包:
每个使用分包小程序必定含有一个主包。所谓的主包,即放置默认启动页面/TabBar 页面
目前小程序分包大小有以下限制:
• 整个小程序所有分包大小不超过 16M
• 单个分包/主包大小不能超过 2M
不使用分包结构,所有的页面程序都会直接编译和下载;(缺点)
- 使用分包
在app。Json,进行分包结构设置:
"subpackages":[{"root": "module/packageA", // 分包根路径"pages": [ // 分包的页面"cate/cate","dog/dog"]},{"root": "module/packageB","pages": ["tree/tree"]}]
当使用分包结构时,第一次进行小程序的时候,进入主包只会加载主包的内容,不会加载分包的内容。只要进入当前分包结构,就是加载分包内容。
直接进入分包结构,那么主包也会进行加载!!!
在分包中,同样可以使用主要下面的js文件的内容!!!
2. 独立分包
独立分包是小程序中一种特殊类型的分包,可以独立于主包和其他分包运行。从独立分包中页面进入小程序时,不需要下载主包。当用户进入普通分包或主包内页面时,主包才会被下载。
获取不到app.js中的内容!!!
console.log( getApp({allowDefault: true}) ) 可以获取到 app实例
三、性能优化(了解)
- 运行机制
- 基础库兼容
四、开放能力
1.关于授权
部分接口需要经过用户授权同意才能调用。我们把这些接口按使用范围分成多个 scope ,用户选择对 scope 来进行授权,当授权给一个 scope 之后,其对应的所有接口都可以直接使用。
2.获取用户信息
2.1 使用api
wx.getUserInfo({success(result){that.setData({userInfo:result.userInfo})}})
2.2 button
Wxml:
<button open-type="getUserInfo" bindgetuserinfo="_login">授权</button>Js:_login(e){// console.log(e)if( e.detail.errMsg == "getUserInfo:fail auth deny" ){wx.showToast({title: '请登录!!!',icon:"none"})return;}let userInfo = e.detail.userInfo;wx.setStorageSync('userInfo', userInfo)this.setData({userInfo,})wx.showToast({title: '登录成功',})}
第一次,进入小程序,获取用户信息,必须使用button’进行操作,授权
3.小程序登录
Wx.login()
let that = this;// 检测是否登录的wx.checkSession({success () {//session_key 未过期,并且在本生命周期一直有效// console.log('已经登录的效果')},fail () {// wx.login() 服务端 (php)// console.log('未登录的')wx.login({success(res){console.log(res.code);let code = res.code;let s = "5bc1d0659334e0acf22c0ae04513e92e";let appid = "wx1b41fefe4f9411d6";// 错误的案例wx.request({url: `https://api.weixin.qq.com/sns/jscode2session?appid=${appid}&secret=${s}&js_code=${code}&grant_type=authorization_code`, // url 服务端接口success(result){console.log(result)}})}})}})
四、云开发
1.什么是云开发?
开发者可以使用云开发开发微信小程序、小游戏,无需搭建服务器,即可使用云端能力。
云开发为开发者提供完整的原生云端支持和微信服务支持,弱化后端和运维概念,无需搭建服务器,使用平台提供的 API 进行核心业务开发,即可实现快速上线和迭代,同时这一能力,同开发者已经使用的云服务相互兼容,并不互斥。

云开发: 微信封装的api + (存储空间/数据库/函数)
2.云开发有哪些功能?

3.怎么去开通?
3.1 创建云开发项目:
新建文件夹,导入微信开发者工具,选择云开发,生成文件;
必须要使用真实的appid,不能使用测试账号!!!选择云开发选项;
miniprogramRoot : 小程序的根目录
cloudfunctionRoot: 云端代码的根路径
3.2 开通服务
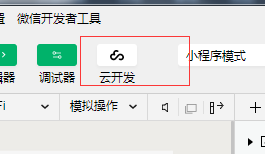
两套环境!!!免费的

环境名称自定义,ID自动生成,也可自定义。


4.具体操作
注意:
1) 小程序云能力初始化 ,告诉小程序使用哪一个环境

4.1 数据库
_openid: 当前用户的唯一标识-------- oMSJe5QCOMv-19fn6YASICmC3EtQ
增删改查!!
4.1.1 添加
add(){// 添加username password pic (_id)自动生成的let data = {username:"德玛西亚",password:123456,pic:null}// 数据添加db.collection('user').add({data,success:(res)=>{// console.log(res)if(res._id){wx.showToast({title: '添加成功',})}}})},
4.1.2 删除
(1)id
remove(){// 根据id进行删除 id作为条件使用doc()db.collection('user').doc('b5416b755f562f3e0150ddf02435cc2d').remove({success: function(res) {// console.log(res.data)wx.showToast({title: '删除成功',})}})
注意:
删除多条数据,不允许在小程序端删除,要在云端进行删除???
4.1.3 获取
1) 获取一条数据
// 获取内容
get(){
// 1. 根据id获取一条数据
// 65825b355f55e28800f09dc23f4cfbf3
db.collection('users').doc('65825b355f55e28800f09dc23f4cfbf3').get({
success(res){
console.log(res)
}
})
}
2) 获取多条
// 2.根据条件获取多条数据
let where = { password:123456 }
db.collection('users').where(where).get({
success(res){
console.log(res)
}
})
注意事项:
在小程序端,一次性获取最多20条数据,云端最多一次100条
可以使用 promise all 进行循环获取
4.1.4修改
update(){
// 1.根据id修改
// 65825b355f55e28800f09dc23f4cfbf3
db.collection('users').doc('65825b355f55e28800f09dc23f4cfbf3').update({
data:{
username:"张三疯"
},
success(res){
console.log(res)
}
})
// 2.根据条件修改 (在小程序端也是不能运行的,和删除多条是一样的)
}
4.2云函数(云端)
创建: cloudfunctions目录,右键 ,选择创建node.Js函数,起一个名字即可
编写:

// 云函数入口文件
const cloud = require('wx-server-sdk')
cloud.init()
// 云函数入口函数
exports.main = async (event, context) => {
// event  接受参数 return await db.collection(event.tables).where(event.where).remove()
}
找到编写之后的云函数,右键上传部署到云端即可!!
云函数调用!!!

wx.cloud.callFunction({ // 要调用的云函数名称 name: login, // 传递给云函数的event参数 data: { x: 1, y: 2, }}).then(res => { // output: res.result === 3}).catch(err => { // handle error})
删除/修改多条 !!!
4.3存储
4.3.1s上传
(1)选择图片
uplaodImage(){
// api
wx.chooseImage({
count: 1,
sizeType: ['original', 'compressed'],
sourceType: ['album', 'camera'],
success(res) {
// 临时的图片地址
const tempFilePaths = res.tempFilePaths
// console.log(tempFilePaths[0])
// 执行上传到云端存储空间
// 1.获取拓展名 根据.分割成数组
let extName = tempFilePaths[0].split(".").pop();
let fileName = new Date().getTime()+"."+extName;
// console.log(extName)
wx.cloud.uploadFile({
cloudPath: fileName, // 上传至云端的路径
filePath: tempFilePaths[0], // 小程序临时文件路径
success: res => {
// 返回文件 ID
// console.log(res.fileID,'上传成功')// 添加数据库
let data = {
username: "admin",
password: 123456,
pic: res.fileID
}
// 执行添加
db.collection('users').add({
// data:data, // 要插入的数据
data,
success: (res) => {
// console.log(res)
if (res._id) {
wx.showToast({
title: '插入成功',
})
}
}
})
},
fail: console.error
})
}
})
}
4.3.2下载
// 下载图片
download(e){
let fileID = e.currentTarget.dataset.fileid;
// 执行下载即可
wx.cloud.downloadFile({
fileID, // 文件 ID
success: res => {
// 返回临时文件路径
// console.log(res.tempFilePath)
wx.saveImageToPhotosAlbum({
filePath: res.tempFilePath
})
},
fail: console.error
})
}
五、项目
1.导入项目


笔记06–项目01
1.初始化项目
1.1. 更改 appid
1.2切换环境id

2.登录操作(个人中心)
2.1.进入当前个人中心页面,判断是否登录
onShow(){// 1.检测是否登录this._checkSession();},// 2.检测是否登录的函数_checkSession(){let _this = this; //保存页面this实例wx.checkSession({success () { // 已经登录_this.setData({isLogin:true,// 设置登录状态})},fail () {// 还未登录wx.showToast({title: '登录才能有想不到体验',icon:"none"})_this.setData({isLogin:false, //设置未登录状态})}})}
2.2执行登录
逻辑!!!
用户登录:
创建表 c-users
字段:
_id 唯一标识 自动生成
_openid 唯一用户标识 自动生成
userInfo 存储用户信息(对象)
在utils下面创建配置文件config.js

调用云端函数

登录代码总结:
// pages/personal/personal.js
// 导入配置文件和api
import  Api  from "../../utils/api"
import  Config  from "../../utils/config"
Page({data: {isLogin:false,  //判断当前用户是否登录userInfo:{}, //存储用户信息},onShow(){// 1.检测是否登录this._checkSession();},// 2.检测是否登录的函数_checkSession(){let  _this = this; //保存页面this实例wx.checkSession({success () {   // 已经登录_this.setData({isLogin:true,// 设置登录状态})},fail () {// 还未登录wx.showToast({title: '登录才能有想不到体验',icon:"none"})_this.setData({isLogin:false, //设置未登录状态})}})},// 3.执行登录_login(e){//  console.log(e)let  _this = this;// 用户未同意授权登录if(e.detail.errMsg == "getUserInfo:fail auth deny"){wx.showToast({title: '请先登录!!',icon:"none"})return;}// 用户同意授权// 1。获取到当前的用户信息 , 2. _openid wx.login({success(){// 不要code来获取openid,直接使用云开发函数即可
//  code --- 用户登录凭证wx.cloud.callFunction({name:"login",  // 云函数的名字,在控制台云函数列表中查询async success(res){// console.log(res)let _openid = res.result.openid; //获取自己的openidlet userInfo = e.detail.userInfo;// 获取自己的用户信息// 4.查询当前用户是否在用户表中,如果在,直接什么都不做let  allUsers = await Api.findAll( Config.tables.userTable, { _openid } )if(allUsers.data.length <=0){// 没有// 3.先去添加用户信息const addres = await Api.add( Config.tables.userTable , {userInfo} )}// 把openid , userinfo 插入到缓存中wx.setStorageSync('_openid', _openid);wx.setStorageSync('userInfo', userInfo);wx.showToast({title: '登录成功',})// 渲染页面 _this.setData({isLogin:true,userInfo,})}})},fail(){wx.showToast({title: '由于网络原因,登录失败!!!',icon:"none"})}})}})
2.3封装api

// 1.初始化数据库
const db = wx.cloud.database()// 1.添加api
const add = (collectionName, data = {}) => {// 返回一个promise对象return db.collection(collectionName).add({data});
}
// 2.查询api
const findById = () => {}// 2.根据条件进行查询(分页)
const find = () => {}// 3.根据条件查询
const findAll = async ( collectionName, where={} ) => {const MAX_LIMIT = 20;const countResult = await db.collection(collectionName).count()const total = countResult.total  //获取数据库的总数据的个数// 计算需分几次取const batchTimes = Math.ceil(total / 20)  //  2// 承载所有读操作的 promise 的数组const tasks = []; //用来存储所以得返回的promise对象// skip =  (page -  1) * limit for (let i = 0; i < batchTimes; i++) {const promise = db.collection(collectionName).skip(i * MAX_LIMIT).limit(MAX_LIMIT).get()// 把所有promise对象都放入数组中tasks.push(promise)}// 当没有数据的时候。直接返回一个和有数据相同数据结构的对象,只不过返回的data是一个空的数组if((await Promise.all(tasks)).length <=0){// 没有数据的return {data:[]};}// 等待所有return (await Promise.all(tasks)).reduce((acc, cur) => {return {data: acc.data.concat(cur.data),errMsg: acc.errMsg,}})
}export default {add,findAll
}
2.4判断是否为管理员登录
Config文件:

页面js文件:

3.管理员菜谱分类管理页面
3.1创建数据表
c-recipeType 菜谱分类表
字段:_id 唯一标识 自动生成_openid 唯一用户标识 自动生成typeName 菜谱名称
3.2类别添加
(1)先去查询菜谱分类是否存在

(2)菜谱分类添加
–1.先获取自己输入的内容


3.3类别查询

3.4类别删除
// 3.执行删除操作async _removeRecipeType(e){let id = e.currentTarget.dataset.id; //获取条件id// splice(index,1) let res = await Api.removeById( Config.tables.recipeTypeTable, id );// console.log(res,'删除操作')if(res.stats.removed == 1){wx.showToast({title: '删除成功!',})this._getRecipeTypes()}}
3.5类别修改
先查询,获取默认值

获取到你输入的新值
执行修改

4菜谱发布
c-recipes 菜谱表
字段:_id 唯一标识 自动生成_openid 唯一用户标识 自动生成recipeName 菜谱名称recipeTypeId 分类ID fields:[] 图片地址recipeMakes:string 菜谱做法follows: 收藏个数views: 浏览次数
(不存)nickName : 发布菜谱的用户 【可以存储,还有头像问题,也可以不存储,因为有openid,到时候可以利用openid,使用promise.all去用户表查询】
status: 是否删除 (1正常 2删除)
time: 添加时间
难点: 多图上传
4.1获取分类信息


4.2处理图片问题
//2.选择图片  _bindselectImage(e){// console.log(e)let  tempFilePaths =  e.detail.tempFilePaths; //获取图片临时路径// [{url:"XXX.jog"},{url:"xxx.jpg"}]let files = tempFilePaths.map((item)=>{return  {url:item};})// console.log(files)files = this.data.files.concat(files)  //拼接this.setData({files,})},
//  3.删除图片_deleteImage(e){// console.log(e)let  index = e.detail.index; //获取要删除的索引let  files  = this.data.files;files.splice(index,1); //删除当前图片this.setData({files,})},
4.3发布菜谱
// 发布菜谱async _doRecipes(e){// console.log(e)// 获取菜谱信息let {recipeName,recipeTypeId,recipeMakes} = e.detail.value;if(recipeName =="" ||recipeTypeId=="" || recipeMakes=="" ||this.data.files.length <= 0 ){wx.showToast({title: '请补全信息!!',icon:"none"})return;}// fields 图片的上传路径const fields = await this._uploaderFile(this.data.files);let data = {follows:0,views:0,status:1,time:new Date().getTime(),recipeName,recipeMakes,recipeTypeId,fields}// 执行添加let result = await Api.add( Config.tables.recipeTable,data );// console.log(result,'插入成功')if(result._id){wx.showToast({title: '菜谱发布成功',})setTimeout(()=>{wx.navigateBack({delta: 1,})},1500)}},//多图文件上传async _uploaderFile(files){// [{url:"xxx"},{url:"xxx"}]let allFilesPromise = []; // 全部的promise对象files.forEach((item,index)=>{let extName = item.url.split('.').pop(); //获取拓展名let fileName = new Date().getTime()+'_'+index+'.'+extName; //文字let promise = wx.cloud.uploadFile({cloudPath: "c-recipes/"+fileName, // 上传至云端的路径filePath: item.url, // 小程序临时文件路径})allFilesPromise.push( promise )})return await Promise.all( allFilesPromise )}
笔记07
1.个人中心选项卡
第一步:
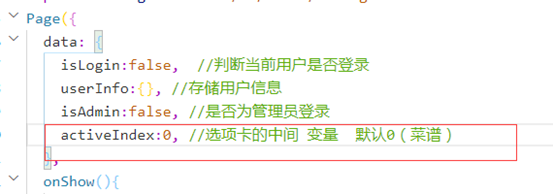
第二部:

第三部:

第四部:
显示选项卡对应的内容:

2.获取选项卡对应的数据库数据
定义:

调用:
在onshow里面也需要调用

3.获取自己发布的菜谱信息
条件: _openid , status = 1 orderBy (time,desc)获取: 不使用分页, 加排序 (findAll( 表,条件, ))// 获取自己发布的菜谱信息async _getSelfRecipes(){let where = {_openid : wx.getStorageSync('_openid'),status:1}// orderBy={field:"_id",sort:"desc"}let orderBy = { field:"time",sort:"desc" };let result = await Api.findAll( Config.tables.recipeTable,where,orderBy );this.setData({selfRecipeLists:result.data})}
4.菜谱删除
修改 status =0, 根据id修改
// 删除菜谱_doRemoveRecipe(e) {let id = e.currentTarget.dataset.id;let index = e.currentTarget.dataset.index;let selfRecipeLists =this.data.selfRecipeLists;let _this = this;wx.showModal({title: "危险提示",content: "您确定要删除么?",async success(res) {// console.log(res)if (res.confirm) {//执行删除let result = await Api.updateById(Config.tables.recipeTable, id, {status: 0});if (result.stats.updated == 1) {// 1.不请求数据库,直接在视图上操作selfRecipeLists.splice(index,1)_this.setData({selfRecipeLists})// _this._getSelfRecipes();}}}})}
5.首页数据加载
5.1 热门菜谱
Status = 1 , views 排序 desc排序 4个
通过菜谱的openid作为条件,获取用户信息:
(1)获取到opneid
(2)根据openid去users表查询
(3)重新将用户信息添加到菜谱列中
// 获取热门菜谱async _getHotRecipes(){let result = await Api.find( Config.tables.recipeTable,{status:1},4,1,{field:"views",sort:"desc"} );let usersAllPromise = []; //用来存放所以得promise用户对象的result.data.forEach((item,index)=>{// console.log(item._openid)// item._openidlet usersPromise = Api.find(Config.tables.userTable, {_openid: item._openid});usersAllPromise.push(usersPromise)})let users = await Promise.all( usersAllPromise )// 利用map函数,给result.data数据添加新的内容result.data.map((item,index)=>{item.userInfo = users[index].data[0].userInfo})this.setData({hotRecipeLists:result.data})}
5.2获取分类导航
 // 获取首页分类async  _getRecipeType(){let  result =  await Api.find( Config.tables.recipeTypeTable,{},2 )//  console.log(result,4567890)this.setData({recipeTypesList:result.data})}
6.加载菜谱分类列表
第一步:从首页进行跳转// 进入菜谱分类列表页面_goRecipeTypePage(){wx.navigateTo({url: '../typelist/typelist',})}
第二部:在当前页面
// 获取所以得类别async _getRecipeTypes(){let result = await Api.findAll( Config.tables.recipeTypeTable)// console.log(result,4567890)this.setData({recipeTypeLists:result.data})}
7.菜谱列表
分页 5个
7.1 普通分类进入菜谱列表
条件: 类别id, status = 1 , 时间time 排序, desc
顶部window显示内容: title tag=”ptfl”


7.2 热门菜谱进入菜谱列表
条件: status = 1, views 进行desc排序即可
tag=”rmcp”


7.3推荐菜谱进入菜谱列表
条件: status = 1, follows进行desc排序即可
Tag=”tjcp”


7.4搜索进入菜谱列表
条件:where (搜索的关键字) status = 1, 根据time desc,
Tag:search


Js:
where={status:1, // 正则匹配recipeName:Api.db.RegExp({regexp: title,options: 'i',})};orderBy={field:"time", sort:"desc"}
// 当第一次进入当前页面,获取数据为空时,显示没有发布过信息if(result.data.length <= 0 && page ==1){// 没有数据this.setData({tips:true,})return;} // 加载数据时,没有更多数据了if(result.data.length < limit){// 没有更多数据了this.setData({tip:true,})}
总结代码:
// pages/recipelist/recipelist.jsimport Api from "../../utils/api"
import Config from "../../utils/config"
Page({/*** 页面的初始数据*/data: {page:1, //  默认显示页recipeLists:[], //存放所有的菜谱tips:false, //判断当前菜谱下是否有菜谱tip:false, //没有更多数据},/*** 生命周期函数--监听页面加载*/onLoad: function (options) {let  {id,title,tag} = options;wx.setNavigationBarTitle({title,})this.data.id = id; //this.data.tag = tag;this.data.title = title;this._getRecipes(tag);},// 根据条件,获取菜谱信息async _getRecipes(tag){// 核心代码// console.log(tag)let where = {}, orderBy = {},limit=5,page=this.data.page,id=this.data.id;let title  =this.data.title;switch(tag){case "ptfl": //  普通分类// 设置搜索条件where = {recipeTypeId:id,status:1};orderBy={field:"time",sort:"desc"}break;case "rmcp":  // 热门菜谱// 设置搜索条件where = {status:1};orderBy={field:"views",sort:"desc"}break;case "tjcp":  // 推荐// 设置搜索条件where = {status:1};orderBy={field:"follows",sort:"desc"}break;case "search": // 搜索// 设置搜索条件where = {status:1,recipeName:Api.db.RegExp({regexp: title,options: 'i',}),}orderBy={field:"time",sort:"desc"}break;}// 链接数据库,进行查询let result = await Api.find( Config.tables.recipeTable,where,limit,page,orderBy )//  当第一次进入当前页面,获取数据为空时,显示没有发布过信息if(result.data.length <= 0 &&  page ==1){//  没有数据this.setData({tips:true,})return;}// 加载数据时,没有更多数据了if(result.data.length < limit){//  没有更多数据了this.setData({tip:true,})}let usersAllPromise = []; //用来存放所以得promise用户对象的result.data.forEach((item,index)=>{// console.log(item._openid)// item._openidlet usersPromise = Api.find(Config.tables.userTable, {_openid: item._openid});usersAllPromise.push(usersPromise)})let  users = await  Promise.all( usersAllPromise )// 利用map函数,给result.data数据添加新的内容result.data.map((item,index)=>{item.userInfo = users[index].data[0].userInfo})// 把新获取到的数据和原来的数据拼接在一个数组中result.data =  this.data.recipeLists.concat(result.data);this.setData({recipeLists:result.data})},onReachBottom(){// console.log('加载数据')//  下一页this.data.page++;// 继续调用获取菜谱方法this._getRecipes(this.data.tag)}})
笔记08
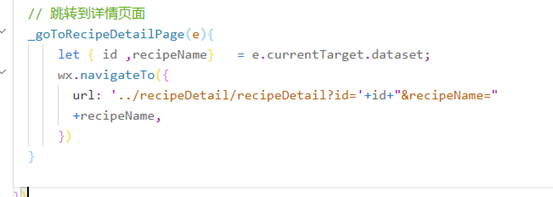
1.跳转到详情页面
参数: 菜谱的id, 菜谱的名称
2.详情页面
2.1获取内容
通过菜谱的id,// 获取菜谱详情的方法async _getRecipeDetail(){let _id = this.data.id; //获取条件idlet result = await Api.findById( Config.tables.recipeTable, _id );// 根据当前菜谱的openid,去用户表中查询对应发布人的信息let users = await Api.find( Config.tables.userTable,{_openid:result.data._openid} );// console.log(users)result.data.userInfo = users.data[0].userInfo;this.setData({recipe:result.data})}
2.2 views的变化
步进为1,只要进入菜谱详情页面,就加+1
// 修改views热度值,每次+1let updateViews = await Api.updateById( Config.tables.recipeTable, _id, { views: _.inc(1) } )// 操作视图result.data.views++;
2.3follows关注
(1)先去followTable查询已经关注
a) 条件
菜谱的id,自己的openid
// 判断一下,当前菜谱,当前用户是否关注了// 查询followTable let where = {_openid:wx.getStorageSync('_openid'), //自己的openidrecipeID:_id}// 查询let followResult = await Api.find( Config.tables.followTable,where )console.log(followResult)this.setData({recipe:result.data,// 如果 关注表中查询的结果数组的长度大于0,证明已经关注该菜谱// 反之,没有关注isFollows:followResult.data.length > 0 ? true : false})
(2)关注/未关注
A) 先判断是否登录/登录之后才可以进行关注与取消关注的操作// 使用缓存中的openid进行判断是否登录let  _openid =  wx.getStorageSync('_openid') || null;if(_openid == null){wx.showToast({title: '您还未登录,关注请先去登录!',icon:"none",})setTimeout(()=>{wx.switchTab({url: '../personal/personal',})},1500)// 未登录return;}B)进行关注
recipeID// 进行关注// recipeID// 插入follow表let  addres =  await  Api.add( Config.tables.followTable,{recipeID: this.data.id} )// 菜谱表更新 follows字段let  updateViews = await  Api.updateById( Config.tables.recipeTable, this.data.id, { follows: _.inc(1) } )wx.showToast({title: '关注成功!',})this.setData({isFollows:true})C)取消关注//取消关注// 删除follows表中的对应的数据// 删除条件 (删除多条数据,不能再小程序端进行,必须在运行)let where = {_openid: wx.getStorageSync('_openid'), //自己的openidrecipeID: this.data.id}wx.cloud.callFunction({name: "remove",data: {table: Config.tables.followTable,where,},success: async (res) => {// console.log(res)if (res.result.stats.removed == 1) {// 更新 recipr菜谱表中的字段  -1let updateViews = await Api.updateById(Config.tables.recipeTable, this.data.id, {follows: _.inc(-1)})this.setData({isFollows:false})}}})// let  removeRes = await  Api.removeByWhere(Config.tables.followTable,where)// console.log(removeRes)
注意事项:
如果根据where条件进行删除,条件只能查处一条数据,那么也可以进行删除!!!
3.搜索页面
3.1搜索框
根据 关键词进行模糊搜索,进入菜谱列表页面

(2)跳转直接参考近期搜索操作即可
3.2热门搜索
根据菜谱的view字段,排序,前九个显示,进入详情页面
(1)获取热门搜索
async _getHotSearch(){let result = await Api.find( Config.tables.recipeTable, {status:1},4,1,{field:"views",sort:"desc"});// console.log(result);this.setData({hotSearch:result.data})},
(2)跳转页面,存入近期搜索缓存
  // 跳转到详情页面_goToRecipeDetailPage(e){let { id ,recipeName}   = e.currentTarget.dataset;// 讲搜索内容  recipename 存入缓存// ["123",“345,”5678“]let  search =  wx.getStorageSync('search') || [];let  findIndex = search.findIndex((item)=>{return item == recipeName;})if(findIndex ==  -1){//不存在search.unshift(recipeName) //插入到数组的最前面}else{//  存在search.splice(findIndex,1);search.unshift(recipeName) //插入到数组的最前面}wx.setStorageSync('search', search);wx.navigateTo({url: '../recipeDetail/recipeDetail?id='+id+"&recipeName="+recipeName,})
}
3.3近期搜索
根据 关键词进行模糊搜索,进入菜谱列表页面
(1)获取近期搜索数据
// 获取近期搜索记录_getJinSearch(){let jinSearch = wx.getStorageSync('search') || [];this.setData({jinSearch,})},
(2)添加点击事件

(3)跳转页面,存储
// 跳转到菜谱列表页面_recipePage(e){let {id,title,tag} = e.currentTarget.dataset;this.setData({inputVal:""})// 讲搜索内容 recipename 存入缓存// ["123",“345,”5678“]let search = wx.getStorageSync('search') || [];let findIndex = search.findIndex((item)=>{return item == title;})if(findIndex == -1){//不存在search.unshift(title) //插入到数组的最前面}else{// 存在search.splice(findIndex,1);search.unshift(title) //插入到数组的最前面}wx.setStorageSync('search', search);// console.log(id,title,tag)wx.navigateTo({url: `../recipelist/recipelist?id=${id}&title=${title}&tag=${tag}`,})},
4.个人中心页面(菜谱分类的获取)
4.1 去菜谱表中,根据自己的openid status =1 获取自己所有的发布的菜谱;(recipeTypeId)(可以忽略)
// 获取自己发布的菜谱 (已经存在data中了,直接获取即可)let selfRecipeLists = this.data.selfRecipeLists;
4.2将重复的去除
// 获取所有的类别idlet typeIds = selfRecipeLists.map((item)=>{return item.recipeTypeId})// 进行去重// new set() 数组去重,返回的不是一个真正的数组// Array.from() 转换为真正的数组let newTypeIds = Array.from(new Set(typeIds)) ;
4.3根据recipeTypeId去分类表中获取对应的菜谱分类信息
  let typeAllPromise = []; //存放所以得分类的数组newTypeIds.forEach((item,index)=>{let typePromise = Api.findById( Config.tables.recipeTypeTable,item )typeAllPromise.push(typePromise)})
//   Promise.all  等待所有都完成(或第一个失败)。let  recipeTypes = await  Promise.all(typeAllPromise)
4.4进行数据遍历

4.5点击事件

5.个人中心页面(获取自己关注的菜谱)
获取菜谱:!!!
5.1根据自己的openid ,获取自己关注的菜谱信息
//  openidlet _openid = wx.getStorageSync('_openid');let  follows = await  Api.findAll( Config.tables.followTable,{_openid} );let  recipeID =  follows.data.map((item)=>{return item.recipeID})
// console.log(recipeID)let recipeAllPromise = []; //存放所以得分类的数组recipeID.forEach((item,index)=>{let recipePromise = Api.findById( Config.tables.recipeTable,item)recipeAllPromise.push(recipePromise)})let  recipes = await  Promise.all(recipeAllPromise)// console.log(recipes)this.setData({followSelRecipes:recipes})
6.上线部署
http://localhost:3000/api/getbanner
https://www.zhaoyunuo.net/data.json
上线:
(1)修改自己的appid,换成真实的appid
(2)把所以得设计的服务器域名都要换成https开头
(3)所以得服务器域名都要在后台进行配置


Uni-app
开启msyql数据库:
Api接口:
Npm install
Npm start 运行即可
后台系统:
Npm install
Npm start
默认管理员: admin 123123
笔记09
https://dcloud.io/
一、原生app、混合app的概念
1.原生app
Ios: 官方提供的语言 object-c
Android: java
2.混合app
a) vue,react 前端框架 ,结合自己独有的渲染引擎,根据app的特性,包装出来的
Uni-app – vue
react-native—React
3.多端
Ios、安卓、H5、微信小程序、百度小程序、支付宝小程序、qq小程序、头条小程序。。。。
二、uni-app
1.uni-app介绍
Dcloud 流应用 2012
uni-app 是一个使用 Vue.js 开发所有前端应用的框架,开发者编写一套代码,可发布到iOS、Android、H5、以及各种小程序(微信/支付宝/百度/头条/QQ/钉钉/淘宝)、快应用等多个平台
uni-app在手,做啥都不愁。即使不跨端,uni-app也是更好的小程序开发框架(详见)、更好的App跨平台框架、更方便的H5开发框架。不管领导安排什么样的项目,你都可以快速交付,不需要转换开发思维、不需要更改开发习惯。
、
编辑器下载:


解压:使用即可(无需安装)
2.项目创建
2.1 HbuilderX编辑器 (重要)
(1)文件-新建-项目

选择好项目目录,填写好项目名称,编辑器会自动创建项目!!!
(2)运行
H5:
运行-运行到浏览器–选择浏览器即可
说明: 普通版的编译器,默认没有 scss/sass插件,需要安装
工具-插件安装-新插件 - 导入即可
小程序:


如果没有自动调用,自己手动导入即可;

2.2 vue-cli脚手架(了解)
npm install -g @vue/cli
vue create -p dcloudio/uni-preset-vue 项目名称

Npm run serve 直接运行(默认H5)
npm run dev:%PLATFORM% 运行
npm run build:%PLATFORM% 发布
2.3二者的区别
(1)编译器
位置不同/升级不同
(2) 开发者工具
D.ts (cli自带)
D.ts(H 不带的)
3.目录结构

  Uni.scss     uni-app内置的常用样式变量(设置当前项目标准)Pages.json     项目的配置文件(路由/导航样式)
Manifest.json   项目的应用配置(app头像,名字)
Main。Js   vue挂载文件
App.vue    跟组件  (生命周期,全局样式)
Static      静态文件(只能放置图片,视频等资源)
Pages     页面目录(vue)
Common  公共目录(js/css)
Components 公共组件
4.底部tab和配置
4.1创建页面

4.2创建tab
"tabBar":{"list":[{"pagePath":"pages/index/index","text":"首页","iconPath":"static/index.png","selectedIconPath":"static/indexFull.png"},{"pagePath":"pages/cart/cart","text":"购物车","iconPath":"static/cart.png","selectedIconPath":"static/cartFull.png"},{"pagePath":"pages/my/my","text":"我的","iconPath":"static/my.png","selectedIconPath":"static/myFull.png"}]}
4.3局部配置
{"path": "pages/index/index","style": {"navigationBarTitleText": "首页","navigationBarBackgroundColor":"#4CD964",// "navigationBarTitleText":"white""navigationBarTextStyle":"white"}}
三、语法操作
1.开发规范
• 页面文件遵循 Vue 单文件组件 (SFC) 规范
• 组件标签靠近小程序规范,详见uni-app 组件规范
• 接口能力(JS API)靠近微信小程序规范,但需将前缀 wx 替换为 uni,详见uni-app接口规范
• 数据绑定及事件处理同 Vue.js 规范,同时补充了App及页面的生命周期
• 为兼容多端运行,建议使用flex布局进行开发
2.回顾
基本操作:
<view class="">{{ message }}
</view>
<!-- 属性绑定  v-bind  : -->
<view :class="mybox"></view>
<!-- 事件绑定和传参   @ -->
<button type="primary" @click="fn()">fn</button>
<button type="primary" data-name="孙尚香" data-age="99" @click="fn1">fn1</button>
<button type="primary" data-name="孙尚香" data-age="99" @click="fn2($event,'李白')">fn2</button>
三元运算:
<!-- 三元运算 ? : --><view class="">{{ age >=18 ? "成年" :"未成年" }}</view><!-- 选项卡 --><button type="default" :class=" activeIndex == 0 ? 'bgColor' : '' " @click="changeIndex(0)">选项卡1</button><button type="default" :class=" activeIndex == 1 ? 'bgColor' : '' " @click="changeIndex(1)">选项卡2</button><button type="default" :class=" activeIndex == 2 ? 'bgColor' : '' " @click="changeIndex(2)">选项卡3</button>
在js中,获取和设置data中的值得时候,不需要再加data
3.组件的创建
Inject privide
3.1组件的创建

建议在根目录创建 components目录,右键选择创建组件选项!!
3.2引入组件
<template><view><!-- <v-child></v-child> --><child></child></view>
</template>// 引入子组件// import  vChild  from  "../../components/child.vue"import  child  from  "@/components/child.vue"
// 注册组件components:{child,},
3.3组件传值
父传子
Parent组件:


子传父

Parent组件:(父组件)


夸组件传值:


4.uni-app全局变量的使用
4.1公共模块

直接在页面使用:

全局:
Main。js
//全局的模块绑定
import baseUrl from “./utils/utils.js”;
Vue.prototype.baseUrl = baseUrl;

4.2全局变量globalData


笔记10
一、小U商城
服务端:
Node + express + mysql
前端:
Uni-app
目的:
熟练使用uni-app框架,
掌握开发流程
二、开始相关配置
数据库mysql
端口号 3306

接口运行
Npm install
Npm start
后台系统
Npm install
Npm start
三、UNI-app前端
1.导入静态页面
直接创建空目录,导入静态页面
2.设置api.js/config.js/http.js
3.首页一级分类
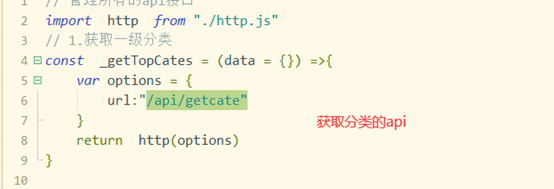


4.获取首页轮播图


5.获取首页秒杀活动信息

// 获取秒杀活动async _getseckill(){let result = await this.api._getseckill();// 处理图片result.data.list[0].img = this.baseUrl + result.data.list[0].img;this.seckill = result.data.list[0];this._setSeckill(this.seckill.endtime) //传入活动结束时间},// 处理倒计时的_setSeckill(endtime){if(this.timer) clearInterval(this.timer); this.timer = setInterval(()=>{console.log('234567890')//倒计时时间差计算let t = parseInt((endtime - new Date().getTime()) / 1000); // s 秒 let h,m,s;h = parseInt(t/3600); // 小时m = parseInt(t%3600 / 60) //分钟s = t % 60; // 秒数// 设置格式 h = h <10? "0"+h : ""+h;m = m <10? "0"+m : ""+m;s = s <10? "0"+s : ""+s;this.timeObj = {h,m,s};},1000)},
6.首页商品获取
6.1处理选项卡问题


7.首页一级分类跳转商品页面
跳转进入商品页面:


获取商品数据:
methods:{async _getcategoodPage(){// fid一级分类id,必填page请求页码,必填size分页偏移量,必填let {fid,page,size} = this; // let data ={// fid:this.fid,// page:this.page// }uni.showLoading({title:"请求中···"})let result = await this.api._getcategoodPage({fid,page,size})// 获取到的数据为null,证明没有商品了,直接返回,不进行处理图片路径问题if(result.data.list[1] == null){uni.hideLoading()return;}// 请求成功之后,隐藏加载loading图标if(result.data.list[1].length > 0){uni.hideLoading()}// 获取总页数this.totalPage = result.data.list[0];// 获取商品信息let products = result.data.list[1];// 处理图片路径products.map((item,index)=>{item.img = this.baseUrl + item.img})// 分页数据的拼接products = this.products.concat(products)this.products =products;console.log(result)}},
获取更多数据

8.获取全部分类 (classify)
Api:

页面:

9.获取商品详情
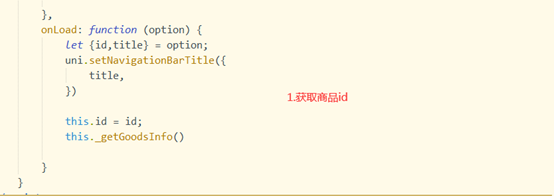

10.手机验证码
第一次登陆:
注册+登陆
第二次:
登陆
Code: 正常流程是不需要给前端返回的,(因为手机已经有了),需要后端人员吧code存入到session中,设置过期时间;
等前端人员点击登陆的时候,把输入的验证码和后端存储的session中验证码进行比较!!!
data() {return {codeMsg:"获取手机验证码",tel:null, //手机号timer:null,isSend:false, //false 没有发送 true 已经发送 (开关)}},async _getPhoneCode(){if(this.isSend){// 已经发送了return;}// console.log(this.tel)let tel = this.tel; //获取手机号// let regExp = /^1[34859]{9}$/let regExp = /^(0|86|17951)?(13[0-9]|15[012356789]|166|17[3678]|18[0-9]|14[57])[0-9]{8}$/;if(!regExp.test( tel )){uni.showToast({title:"请输入正确的手机号",icon:"none"})return;}// 发起请求,获取验证码let result = await this.api._sms({phone:tel});// console.log(result)if(result.data.list != null){// 获取到了验证码let num = 10;if(this.timer)clearInterval(this.timer)this.timer = setInterval(()=>{num--;this.codeMsg = num +"秒之后,重新获取验证码"if(num <=0){this.codeMsg = "获取手机验证码"this.isSend = false;clearInterval(this.timer)}},1000)this.isSend = true; //发送之后,改变发送状态uni.setStorageSync("code",result.data.list.code) //存储验证码}}
笔记11
1.登录 send页面
// 执行登录async _doLogin(){let code = this.code;let tel = this.tel;// 再一次使用正则匹配let regExp = /^(0|86|17951)?(13[0-9]|15[012356789]|166|17[3678]|18[0-9]|14[57])[0-9]{8}$/;if(!regExp.test( tel )){uni.showToast({title:"请输入正确的手机号",icon:"none"})return;}let sCode = uni.getStorageSync('code');if(code != sCode){uni.showToast({title:"验证码错误",icon:"none"})return;}// 执行登录// console.log('执行登录')let result = await this.api._wxDoLogin({phone:tel}) if(result.data.list != null){//登录成功let {token,uid,phone} = result.data.list;uni.setStorageSync('token',token)uni.setStorageSync('uid',uid,)uni.setStorageSync('phone',phone)// 登录成功之后,跳转到个人中心页面uni.showToast({title:"登录成功"})setTimeout(()=>{uni.switchTab({url:"../mine/mine"})},1500)}else{uni.showToast({title:"登录失败,检测网络",icon:"none"})}// console.log(result,'登录')}
2.进入项目,判断是否登录
// 项目初始化 (大门)async onLaunch() {// 检测是否登录let token = uni.getStorageSync('token');// token 不存在if(!token){uni.setTabBarItem({index:2,text:"未登录"})return;}// 存在let result = await this.api._checkToken({"authorization":token});// result.data.code == 200 成功的 500 失败if(result.data.code == 200){//登录成功的状态uni.setTabBarItem({index:2,text:"我的"})}else{uni.setTabBarItem({index:2,text:"未登录"})}}
3.个人中心页面

4.封装检测登录状态的方法utils.js
// 1检测是否登录const _checkToken= async (_this,token)=>{// token 不存在if(!token){uni.setTabBarItem({index:2,text:"未登录"})return false; // false 未登录的}// 存在let result = await _this.api._checkToken({"authorization":token})// result.data.code == 200 成功的 500 失败if(result.data.code == 200){//登录成功的状态uni.setTabBarItem({index:2,text:"我的"})return true; //登录}else{uni.setTabBarItem({index:2,text:"未登录"})return false;}}export default _checkToken;
5.加入购物车操作
async _cartAdd(){/*uid用户编号,必填项goodsid商品编号,必填项num数量,必填项checked是否选中,必填项 ,默认1 选中 0 不选中authorization header头中需要添加token后台验证条件*/let uid = uni.getStorageSync("uid");let goodsid = this.id; //商品idlet num = this.num; //购买数量let checked = 1; // 选中状态 0 非选中状态// 用来检测是否登录的let authorization = uni.getStorageSync('token');// 执行添加let result = await this.api._cartAdd({uid,goodsid,num,checked},{authorization})if(result.data.code == 500){//登录过期了uni.showToast({title:"登录已过期",icon:"none"})setTimeout(()=>{// uni.switchTab({// }) uni.navigateTo({url:"../send/send"})},1500)}else{//插入成功 (跳转到购物车页面)}// console.log(result)},
6.购物车操作
注意:
(1)有没有登录
(2)登录了有没有值
6.1购物车数据的获取
// 获取购物车信息async _getCarts() {let uid = uni.getStorageSync("uid");// 用来检测是否登录的let authorization = uni.getStorageSync('token');let result = await this.api._cartlist({uid}, {authorization});if (result.data.code == 500) {//登录状态过期this.loginStatus = false;} else {//正常的登录章台this.loginStatus =true;// 遍历数据if(result.data.list == null) return;result.data.list.forEach((item)=>{item.img = this.baseUrl + item.imgitem.checked = item.checked == 1 ? true : false;})this.carts = result.data.list;}}
6.2获取统计类的数据
(1)总数
// 购买的总件数_totalNum(){// 所有的被选中的商品的数量累计let total = 0;this.carts.forEach((item,index)=>{// if(item.checked){// total += item.num;// }item.checked ? total += item.num : "";})return total;}
(2)总价
// 总价格_totalPrice(){// 所有的被选中的商品的数量累计let total = 0;this.carts.forEach((item,index)=>{item.checked ? total += item.num * item.price : "";})return total;}
(3)全选状态
// 全选状态_allCheckedStatus(){// every some map foreach find findIndex filter// 必须全部选中 为真 ,有一个为false 就是falselet checked = this.carts.every((item)=>{return item.checked == true ; // ( 3>2, 4<5 )})// console.log(checked)return checked;}
7.购物车事件操作
7.1 加减问题
// 添加asc(index){this.carts[index].num++; //不做库存判断了},desc(index){this.carts[index].num--;if(this.carts[index].num <= 0){this.carts[index].num=1;}},
7.2全选状态
// 全选状态changeAllChecked(e){// console.log(e)this.carts.forEach((item)=>{item.checked = e.detail.value;})}
7.3,单个状态
// 单个状态属性改变changeChecked(e,index){this.carts[index].checked = e.detail.value;},
7.4修改全部状态
// 全选状态changeAllChecked(e){// console.log(e)this.carts.forEach((item)=>{item.checked = e.detail.value;})let authorization =uni.getStorageSync('token'); // this._editCart(index);this.carts.forEach((item,index)=>{let checked = item.checked ==true ? 1 : 0; // 处理每一个的值 this.api._editCart({id:item.id,num:item.num,checked},{authorization}) })},
7.5执行删除
// 执行删除操作deleteCarts(index,id){let authorization =uni.getStorageSync('token'); uni.showModal({title:"危险提示",content:"您确定要删除么?",success: (res) => {if(res.confirm){this.api._cartdelete({id},{authorization})this.carts.splice(index,1);}}})},
7.6.跳转到确认订单页面
// 跳转到确认订单页面_confirm(){// 获取被选中的所有的购物车商品let carts = this.carts.filter((item)=>{return item.checked == true;})// 将数据存入缓存uni.setStorageSync("carts",carts)if(carts.length <= 0){uni.showToast({title:"请至少选中一项",icon:"none"})return;}// 进行跳转uni.navigateTo({url:"../confirm/confirm"})},
8.订单页面
computed:{// 总价格_totalPrice(){// 所有的被选中的商品的数量累计let total = 0;this.cartsInfo.forEach((item,index)=>{item.checked ? total += item.num * item.price : "";})return total;},_confirmPrice(){let confirmPrice =   this._totalPrice + this.yhq;return confirmPrice;}},
_getCarts(){let cartsInfo = uni.getStorageSync("carts");this.cartsInfo = cartsInfo},// 添加asc(index){this.cartsInfo[index].num++;  //不做库存判断了this._editCart(index);},desc(index){this.cartsInfo[index].num--;if(this.cartsInfo[index].num <= 0){this.cartsInfo[index].num=1;}this._editCart(index);},// 封装修改cart数据的方法async   _editCart(index){let  { id,num,checked } = this.cartsInfo[index];checked = checked ==true ? 1 : 0;let  authorization  =uni.getStorageSync('token');   let result =  await  this.api._editCart({id,num,checked},{authorization})if (result.data.code == 500) {//登录状态过期this.loginStatus  = false;} },
笔记12
1.订单查询
// 获取全部信息async _getOrders(){let uid = uni.getStorageSync('uid');let authorization = uni.getStorageSync('token');let result = await this.api._orders({uid},{authorization});if(result.data.list ==null){// 没有数据this.onOff =false; }else{result.data.list.map((item,index)=>{item.child.map((val,ind)=>{val.img = this.baseUrl + val.img;})})console.log(result)this.onOff = true;this.orders = result.data.list;}}},
2.支付宝小程序/百度小程序(百度小程序不支持个人开发)(了解)
配置路径:

3.发布
H5, 微信小程序, 支付宝小程序, 安卓app
3.1H5


3,.2微信小程序


3.2APP


证书:


