一、增加rviz plugin插件
资料:http://admin.guyuehome.com/42336
https://blog.51cto.com/u_13625033/6126970
- 这部分代码只是将上面两个链接中的代码整合在了一起,整合在一起后可以更好的理解其中的关系
1、创建软件包
catkin_create_pkg rviz_teleop_commander roscpp rviz std_msgs
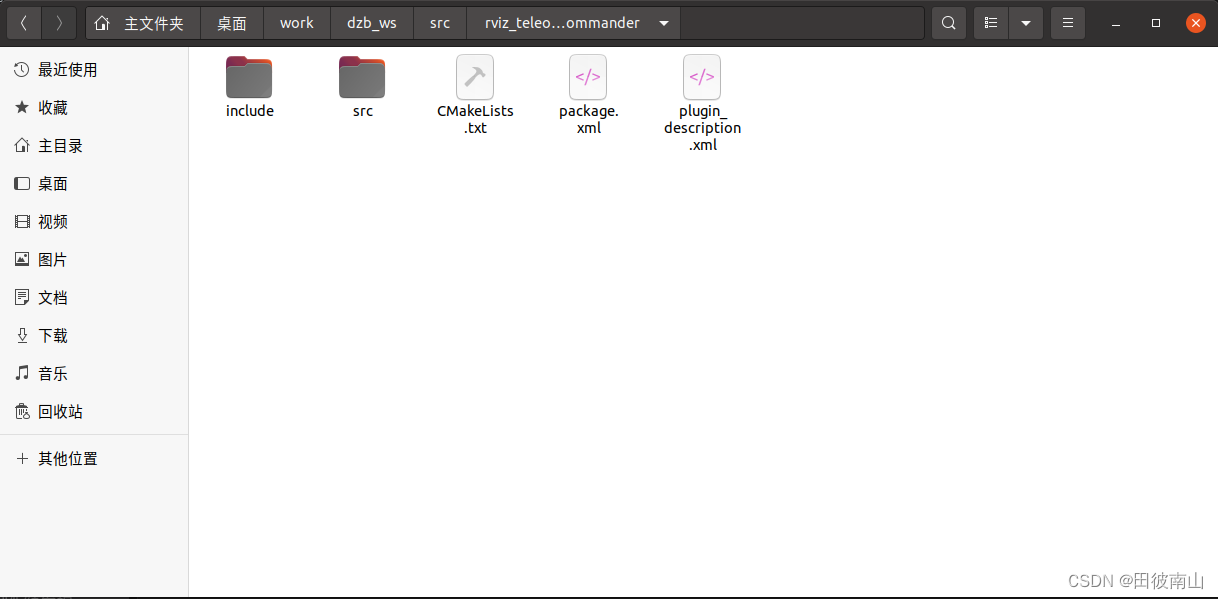
2、创建plugin_description.xml文件
- 最后只是生成了一个动态库so文件,一个库里可以有多个插件,所以只有一个library
<library path="lib/librviz_teleop_commander"><class name="rviz_teleop_commander/TeleopPanel"type="rviz_teleop_commander::TeleopPanel"base_class_type="rviz::Panel"><description>A panel widget allowing simple diff-drive style robot base control.</description></class><class name="rviz_teleop_commander/cmd_control"type="rviz_teleop_commander::cmd_control"base_class_type="rviz::Panel"><description>A panel widget allowing simple diff-drive style robot base control.</description></class>
</library>
3、处理package.xml文件
- 这部分不需要改太多,只在最后增加一个export即可
<?xml version="1.0"?>
<package format="2"><name>rviz_teleop_commander</name><version>0.0.0</version><description>The rviz_teleop_commander package</description><!-- One maintainer tag required, multiple allowed, one person per tag --><!-- Example:  --><!-- <maintainer email="jane.doe@example.com">Jane Doe</maintainer> --><maintainer email="wangyuanhao@todo.todo">wangyuanhao</maintainer><!-- One license tag required, multiple allowed, one license per tag --><!-- Commonly used license strings: --><!--   BSD, MIT, Boost Software License, GPLv2, GPLv3, LGPLv2.1, LGPLv3 --><license>TODO</license><!-- Url tags are optional, but multiple are allowed, one per tag --><!-- Optional attribute type can be: website, bugtracker, or repository --><!-- Example: --><!-- <url type="website">http://wiki.ros.org/rviz_teleop_commander</url> --><!-- Author tags are optional, multiple are allowed, one per tag --><!-- Authors do not have to be maintainers, but could be --><!-- Example: --><!-- <author email="jane.doe@example.com">Jane Doe</author> --><!-- The *depend tags are used to specify dependencies --><!-- Dependencies can be catkin packages or system dependencies --><!-- Examples: --><!-- Use depend as a shortcut for packages that are both build and exec dependencies --><!--   <depend>roscpp</depend> --><!--   Note that this is equivalent to the following: --><!--   <build_depend>roscpp</build_depend> --><!--   <exec_depend>roscpp</exec_depend> --><!-- Use build_depend for packages you need at compile time: --><!--   <build_depend>message_generation</build_depend> --><!-- Use build_export_depend for packages you need in order to build against this package: --><!--   <build_export_depend>message_generation</build_export_depend> --><!-- Use buildtool_depend for build tool packages: --><!--   <buildtool_depend>catkin</buildtool_depend> --><!-- Use exec_depend for packages you need at runtime: --><!--   <exec_depend>message_runtime</exec_depend> --><!-- Use test_depend for packages you need only for testing: --><!--   <test_depend>gtest</test_depend> --><!-- Use doc_depend for packages you need only for building documentation: --><!--   <doc_depend>doxygen</doc_depend> --><buildtool_depend>catkin</buildtool_depend><build_depend>roscpp</build_depend><build_depend>rviz</build_depend><build_depend>std_msgs</build_depend><build_export_depend>roscpp</build_export_depend><build_export_depend>rviz</build_export_depend><build_export_depend>std_msgs</build_export_depend><exec_depend>roscpp</exec_depend><exec_depend>rviz</exec_depend><exec_depend>std_msgs</exec_depend><!-- The export tag contains other, unspecified, tags --><export><!-- Other tools can request additional information be placed here --><rviz plugin="${prefix}/plugin_description.xml"/></export></package>
4、处理CMakeLists.txt文件
cmake_minimum_required(VERSION 3.0.2)
project(rviz_teleop_commander)## Compile as C++11, supported in ROS Kinetic and newer
# add_compile_options(-std=c++11)## Find catkin macros and libraries
## if COMPONENTS list like find_package(catkin REQUIRED COMPONENTS xyz)
## is used, also find other catkin packages
find_package(catkin REQUIRED COMPONENTSroscpprvizstd_msgs
)###################################
## catkin specific configuration ##
###################################
## The catkin_package macro generates cmake config files for your package
## Declare things to be passed to dependent projects
## INCLUDE_DIRS: uncomment this if your package contains header files
## LIBRARIES: libraries you create in this project that dependent projects also need
## CATKIN_DEPENDS: catkin_packages dependent projects also need
## DEPENDS: system dependencies of this project that dependent projects also need
catkin_package(
#  INCLUDE_DIRS include
#  LIBRARIES rviz_teleop_commander
#  CATKIN_DEPENDS roscpp rviz std_msgs
#  DEPENDS system_lib
)###########
## Build ##
############# Specify additional locations of header files
## Your package locations should be listed before other locations
include_directories(
# include${catkin_INCLUDE_DIRS}
)####################################################################################
####################################################################################
## 找到相关的库
find_package(Qt5 COMPONENTS Core Widgets REQUIRED)
set(QT_LIBRARIES Qt5::Widgets)## I prefer the Qt signals and slots to avoid defining "emit", "slots",
## etc because they can conflict with boost signals, so define QT_NO_KEYWORDS here.
add_definitions(-DQT_NO_KEYWORDS)## Here we specify which header files need to be run through "moc", Qt's meta-object compiler.
## 指定需要qt元编译的头文件
qt5_wrap_cpp(MOC_FILESsrc/teleop_pad.hsrc/cmd_control.h)## 定义SOURCE_FILES_1变量
message(MOC_FILES " ${MOC_FILES}")
set(SOURCE_FILES_1src/teleop_pad.cpp src/cmd_control.cpp ${MOC_FILES}
)## 生成库文件,定义库的名字与项目名字一样
add_library(${PROJECT_NAME} ${SOURCE_FILES_1})
## 连接qt和ros的库到目标库
target_link_libraries(${PROJECT_NAME} ${QT_LIBRARIES} ${catkin_LIBRARIES})    ## Install rules 复制文件到指定位置
install(TARGETS ${PROJECT_NAME}ARCHIVE DESTINATION ${CATKIN_PACKAGE_LIB_DESTINATION}LIBRARY DESTINATION ${CATKIN_PACKAGE_LIB_DESTINATION}RUNTIME DESTINATION ${CATKIN_PACKAGE_BIN_DESTINATION}
)install(FILES plugin_description.xmlDESTINATION ${CATKIN_PACKAGE_SHARE_DESTINATION})
5、编写代码
teleop_pad.h
#ifndef TELEOP_PAD_H
#define TELEOP_PAD_H//所需要包含的头文件
#ifndef Q_MOC_RUN
#include <ros/ros.h>
#include <ros/console.h>
#include <rviz/panel.h>   //plugin基类的头文件
#endifclass QLineEdit;namespace rviz_teleop_commander
{
// 所有的plugin都必须是rviz::Panel的子类
class TeleopPanel: public rviz::Panel
{
// 后边需要用到Qt的信号和槽,都是QObject的子类,所以需要声明Q_OBJECT宏
Q_OBJECT
public:// 构造函数,在类中会用到QWidget的实例来实现GUI界面,这里先初始化为0即可TeleopPanel( QWidget* parent = 0 );// 重载rviz::Panel积累中的函数,用于保存、加载配置文件中的数据,在我们这个plugin// 中,数据就是topic的名称virtual void load( const rviz::Config& config );virtual void save( rviz::Config config ) const;// 公共槽.
public Q_SLOTS:// 当用户输入topic的命名并按下回车后,回调用此槽来创建一个相应名称的topic publishervoid setTopic( const QString& topic );// 内部槽.
protected Q_SLOTS:void sendVel();                 // 发布当前的速度值void update_Linear_Velocity();  // 根据用户的输入更新线速度值void update_Angular_Velocity(); // 根据用户的输入更新角速度值void updateTopic();             // 根据用户的输入更新topic name// 内部变量.
protected:// topic name输入框QLineEdit* output_topic_editor_;QString output_topic_;// 线速度值输入框QLineEdit* output_topic_editor_1;QString output_topic_1;// 角速度值输入框QLineEdit* output_topic_editor_2;QString output_topic_2;// ROS的publisher,用来发布速度topicros::Publisher velocity_publisher_;// ROS节点句柄ros::NodeHandle nh_;// 当前保存的线速度和角速度值float linear_velocity_;float angular_velocity_;
};} // end namespace rviz_teleop_commander#endif // TELEOP_PANEL_H
teleop_pad.cpp
#include <stdio.h>#include <QPainter>
#include <QLineEdit>
#include <QVBoxLayout>
#include <QHBoxLayout>
#include <QLabel>
#include <QTimer>#include <geometry_msgs/Twist.h>
#include <QDebug>#include "teleop_pad.h"namespace rviz_teleop_commander
{// 构造函数,初始化变量
TeleopPanel::TeleopPanel( QWidget* parent ): rviz::Panel( parent ), linear_velocity_( 0 ), angular_velocity_( 0 )
{// 创建一个输入topic命名的窗口QVBoxLayout* topic_layout = new QVBoxLayout;topic_layout->addWidget( new QLabel( "Teleop Topic:" ));output_topic_editor_ = new QLineEdit;topic_layout->addWidget( output_topic_editor_ );// 创建一个输入线速度的窗口topic_layout->addWidget( new QLabel( "Linear Velocity:" ));output_topic_editor_1 = new QLineEdit;topic_layout->addWidget( output_topic_editor_1 );// 创建一个输入角速度的窗口topic_layout->addWidget( new QLabel( "Angular Velocity:" ));output_topic_editor_2 = new QLineEdit;topic_layout->addWidget( output_topic_editor_2 );QHBoxLayout* layout = new QHBoxLayout;layout->addLayout( topic_layout );setLayout( layout );// 创建一个定时器,用来定时发布消息QTimer* output_timer = new QTimer( this );// 设置信号与槽的连接// 输入topic命名,回车后,调用updateTopic()connect( output_topic_editor_, SIGNAL( editingFinished() ), this, SLOT( updateTopic() ));    // 输入线速度值,回车后,调用update_Linear_Velocity()    connect( output_topic_editor_1, SIGNAL( editingFinished() ), this, SLOT( update_Linear_Velocity() )); // 输入角速度值,回车后,调用update_Angular_Velocity()connect( output_topic_editor_2, SIGNAL( editingFinished() ), this, SLOT( update_Angular_Velocity() ));// 设置定时器的回调函数,按周期调用sendVel()connect( output_timer, SIGNAL( timeout() ), this, SLOT( sendVel() ));// 设置定时器的周期,100msoutput_timer->start( 100 );
}// 更新线速度值
void TeleopPanel::update_Linear_Velocity()
{// 获取输入框内的数据QString temp_string = output_topic_editor_1->text();// 将字符串转换成浮点数float lin = temp_string.toFloat();  // 保存当前的输入值linear_velocity_ = lin;
}// 更新角速度值
void TeleopPanel::update_Angular_Velocity()
{QString temp_string = output_topic_editor_2->text();float ang = temp_string.toFloat() ;  angular_velocity_ = ang;
}// 更新topic命名
void TeleopPanel::updateTopic()
{setTopic( output_topic_editor_->text() );
}// 设置topic命名
void TeleopPanel::setTopic( const QString& new_topic )
{// 检查topic是否发生改变.if( new_topic != output_topic_ ){output_topic_ = new_topic;// 如果命名为空,不发布任何信息if( output_topic_ == "" ){velocity_publisher_.shutdown();}// 否则,初始化publisherelse{velocity_publisher_ = nh_.advertise<geometry_msgs::Twist>( output_topic_.toStdString(), 1 );}Q_EMIT configChanged();}
}// 发布消息
void TeleopPanel::sendVel()
{if( ros::ok() && velocity_publisher_ ){geometry_msgs::Twist msg;msg.linear.x = linear_velocity_;msg.linear.y = 0;msg.linear.z = 0;msg.angular.x = 0;msg.angular.y = 0;msg.angular.z = angular_velocity_;velocity_publisher_.publish( msg );}
}// 重载父类的功能
void TeleopPanel::save( rviz::Config config ) const
{rviz::Panel::save( config );config.mapSetValue( "Topic", output_topic_ );
}// 重载父类的功能,加载配置数据
void TeleopPanel::load( const rviz::Config& config )
{rviz::Panel::load( config );QString topic;if( config.mapGetString( "Topic", &topic )){output_topic_editor_->setText( topic );updateTopic();}
}} // end namespace rviz_teleop_commander// 声明此类是一个rviz的插件
#include <pluginlib/class_list_macros.h>
PLUGINLIB_EXPORT_CLASS(rviz_teleop_commander::TeleopPanel,rviz::Panel )
// END_TUTORIAL
cmd_control.h
#ifndef CMD_CONTROL_H
#define CMD_CONTROL_H#include <stdio.h>//所需要包含的头文件
#include <ros/ros.h>
#include <ros/console.h>
#include <rviz/panel.h>   //plugin基类的头文件#include <QPainter>
#include <QLineEdit>
#include <QVBoxLayout>
#include <QHBoxLayout>
#include <QLabel>
#include <QTimer>
#include <QPushButton>
#include <geometry_msgs/Twist.h>
#include <QDebug>
#include <QCheckBox>
#include <QSlider>
namespace rviz_teleop_commander {
class cmd_control:public rviz::Panel
{Q_OBJECT
public:// 构造函数,在类中会用到QWidget的实例来实现GUI界面,这里先初始化为0即可cmd_control(QWidget* parent=0);// 重载rviz::Panel积累中的函数,用于保存、加载配置文件中的数据,在我们这个plugin中,数据就是topic的名称
//    virtual void load( const rviz::Config& config );virtual void save( rviz::Config config ) const;void move_base(char k,float speed_linear,float speed_trun);
public Q_SLOTS:void slot_cmd_control();void on_Slider_raw_valueChanged(int);// 内部变量.
protected:QPushButton* pushButton_i;QPushButton* pushButton_u;QPushButton* pushButton_o;QPushButton* pushButton_j;QPushButton* pushButton_l;QPushButton* pushButton_m;QPushButton* pushButton_back;QPushButton* pushButton_backr;QCheckBox* is_all_check;QSlider* yaw_slider;QSlider* linera_slider;// ROS的publisher,用来发布速度topicros::Publisher velocity_publisher_;QString output_topic_="cmd_vel";// The ROS node handle.ros::NodeHandle nh_;// 当前保存的线速度和角速度值float linear_velocity_;float angular_velocity_;};
}#endif // CMD_CONTROL_H
cmd_control.cpp
#include "cmd_control.h"
#include <stdio.h>#include <QPainter>
#include <QLineEdit>
#include <QVBoxLayout>
#include <QHBoxLayout>
#include <QLabel>
#include <QTimer>#include <geometry_msgs/Twist.h>
#include <QDebug>namespace rviz_teleop_commander {
cmd_control::cmd_control(QWidget* parent):rviz::Panel (parent)
{//初始化uiQVBoxLayout *mainlayout=new QVBoxLayout;pushButton_i=new QPushButton;pushButton_i->setText("i");//快捷键pushButton_i->setShortcut(QKeySequence(QLatin1String("i")));pushButton_i->setStyleSheet("QPushButton#pushButton_i:pressed{background-color:rgb(239, 41, 41)}");pushButton_u=new QPushButton;//快捷键pushButton_u->setShortcut(QKeySequence(QLatin1String("u")));pushButton_u->setText("u");pushButton_u->setStyleSheet("QPushButton#pushButton_i:pressed{background-color:rgb(239, 41, 41)}");pushButton_o=new QPushButton;//快捷键pushButton_o->setShortcut(QKeySequence(QLatin1String("o")));pushButton_o->setText("o");pushButton_o->setStyleSheet("QPushButton#pushButton_i:pressed{background-color:rgb(239, 41, 41)}");QHBoxLayout *first=new QHBoxLayout;first->addWidget(pushButton_u);first->addWidget(pushButton_i);first->addWidget(pushButton_o);mainlayout->addLayout(first);pushButton_j=new QPushButton;pushButton_j->setText("j");//快捷键pushButton_j->setShortcut(QKeySequence(QLatin1String("j")));pushButton_j->setStyleSheet("QPushButton#pushButton_i:pressed{background-color:rgb(239, 41, 41)}");is_all_check=new QCheckBox;is_all_check->setText("使用全向轮模式");//快捷键is_all_check->setShortcut(QKeySequence(QLatin1String("k")));pushButton_l=new QPushButton;pushButton_l->setText("l");//快捷键pushButton_l->setShortcut(QKeySequence(QLatin1String("l")));pushButton_l->setStyleSheet("QPushButton#pushButton_i:pressed{background-color:rgb(239, 41, 41)}");QHBoxLayout *second=new QHBoxLayout;second->addWidget(pushButton_j);second->addWidget(is_all_check);second->addWidget(pushButton_l);mainlayout->addLayout(second);pushButton_m=new QPushButton;//快捷键pushButton_m->setShortcut(QKeySequence(QLatin1String("m")));pushButton_m->setText("m");pushButton_m->setStyleSheet("QPushButton#pushButton_i:pressed{background-color:rgb(239, 41, 41)}");pushButton_back=new QPushButton;//快捷键pushButton_back->setShortcut(QKeySequence(QLatin1String(",")));pushButton_back->setText(",");pushButton_back->setStyleSheet("QPushButton#pushButton_i:pressed{background-color:rgb(239, 41, 41)}");pushButton_backr=new QPushButton;//快捷键pushButton_backr->setShortcut(QKeySequence(QLatin1String(".")));pushButton_backr->setText(".");
pushButton_backr->setStyleSheet("QPushButton#pushButton_i:pressed{background-color:rgb(239, 41, 41)}");
QHBoxLayout *third=new QHBoxLayout;
third->addWidget(pushButton_m);
third->addWidget(pushButton_back);
third->addWidget(pushButton_backr);
mainlayout->addLayout(third);QLabel *linera_label=new QLabel;
linera_label->setText("线速度(cm/s)");
linera_slider=new QSlider;
linera_slider->setOrientation(Qt::Horizontal);  // 水平方向
linera_slider->setRange(0,100);
linera_slider->setValue(50);
QHBoxLayout *five=new QHBoxLayout;
five->addWidget(linera_label);
five->addWidget(linera_slider);
mainlayout->addLayout(five);QLabel *yaw_label=new QLabel;
yaw_label->setText("角速度(cm/s)");
yaw_slider=new QSlider;
yaw_slider->setOrientation(Qt::Horizontal);  // 水平方向
yaw_slider->setRange(0,100);
yaw_slider->setValue(100);
QHBoxLayout *six=new QHBoxLayout;
six->addWidget(yaw_label);
six->addWidget(yaw_slider);
mainlayout->addLayout(six);setLayout(mainlayout);//绑定信号//绑定速度控制按钮connect(pushButton_i,SIGNAL(clicked()),this,SLOT(slot_cmd_control()));connect(pushButton_u,SIGNAL(clicked()),this,SLOT(slot_cmd_control()));connect(pushButton_o,SIGNAL(clicked()),this,SLOT(slot_cmd_control()));connect(pushButton_j,SIGNAL(clicked()),this,SLOT(slot_cmd_control()));connect(pushButton_l,SIGNAL(clicked()),this,SLOT(slot_cmd_control()));connect(pushButton_m,SIGNAL(clicked()),this,SLOT(slot_cmd_control()));connect(pushButton_back,SIGNAL(clicked()),this,SLOT(slot_cmd_control()));connect(pushButton_backr,SIGNAL(clicked()),this,SLOT(slot_cmd_control()));//创建发布者velocity_publisher_ = nh_.advertise<geometry_msgs::Twist>( output_topic_.toStdString(), 1 );}void cmd_control::slot_cmd_control()
{QPushButton* btn=qobject_cast<QPushButton*>(sender());char key=btn->text().toStdString()[0];//速度float liner=linera_slider->value()*0.01;float turn=yaw_slider->value()*0.01;bool is_all=is_all_check->isChecked();switch (key) {case 'u':move_base(is_all?'U':'u',liner,turn);break;case 'i':move_base(is_all?'I':'i',liner,turn);break;case 'o':move_base(is_all?'O':'o',liner,turn);break;case 'j':move_base(is_all?'J':'j',liner,turn);break;case 'l':move_base(is_all?'L':'l',liner,turn);break;case 'm':move_base(is_all?'M':'m',liner,turn);break;case ',':move_base(is_all?'<':',',liner,turn);break;case '.':move_base(is_all?'>':'.',liner,turn);break;}}
void cmd_control::move_base(char k,float speed_linear,float speed_trun)
{std::map<char, std::vector<float>> moveBindings{{'i', {1, 0, 0, 0}},{'o', {1, 0, 0, -1}},{'j', {0, 0, 0, 1}},{'l', {0, 0, 0, -1}},{'u', {1, 0, 0, 1}},{',', {-1, 0, 0, 0}},{'.', {-1, 0, 0, 1}},{'m', {-1, 0, 0, -1}},{'O', {1, -1, 0, 0}},{'I', {1, 0, 0, 0}},{'J', {0, 1, 0, 0}},{'L', {0, -1, 0, 0}},{'U', {1, 1, 0, 0}},{'<', {-1, 0, 0, 0}},{'>', {-1, -1, 0, 0}},{'M', {-1, 1, 0, 0}},{'t', {0, 0, 1, 0}},{'b', {0, 0, -1, 0}},{'k', {0, 0, 0, 0}},{'K', {0, 0, 0, 0}}};char key=k;//计算是往哪个方向float x = moveBindings[key][0];float y = moveBindings[key][1];float z = moveBindings[key][2];float th = moveBindings[key][3];//计算线速度和角速度float speed = speed_linear;float turn = speed_trun;// Update the Twist messagegeometry_msgs::Twist twist;twist.linear.x = x * speed;twist.linear.y = y * speed;twist.linear.z = z * speed;twist.angular.x = 0;twist.angular.y = 0;twist.angular.z = th * turn;// Publish it and resolve any remaining callbacksvelocity_publisher_.publish(twist);ros::spinOnce();
}// 重载父类的功能
void cmd_control::save( rviz::Config config ) const
{rviz::Panel::save( config );config.mapSetValue( "Topic", output_topic_ );
}}// 声明此类是一个rviz的插件
#include <pluginlib/class_list_macros.h>
PLUGINLIB_EXPORT_CLASS(rviz_teleop_commander::cmd_control,rviz::Panel )
// END_TUTORIAL
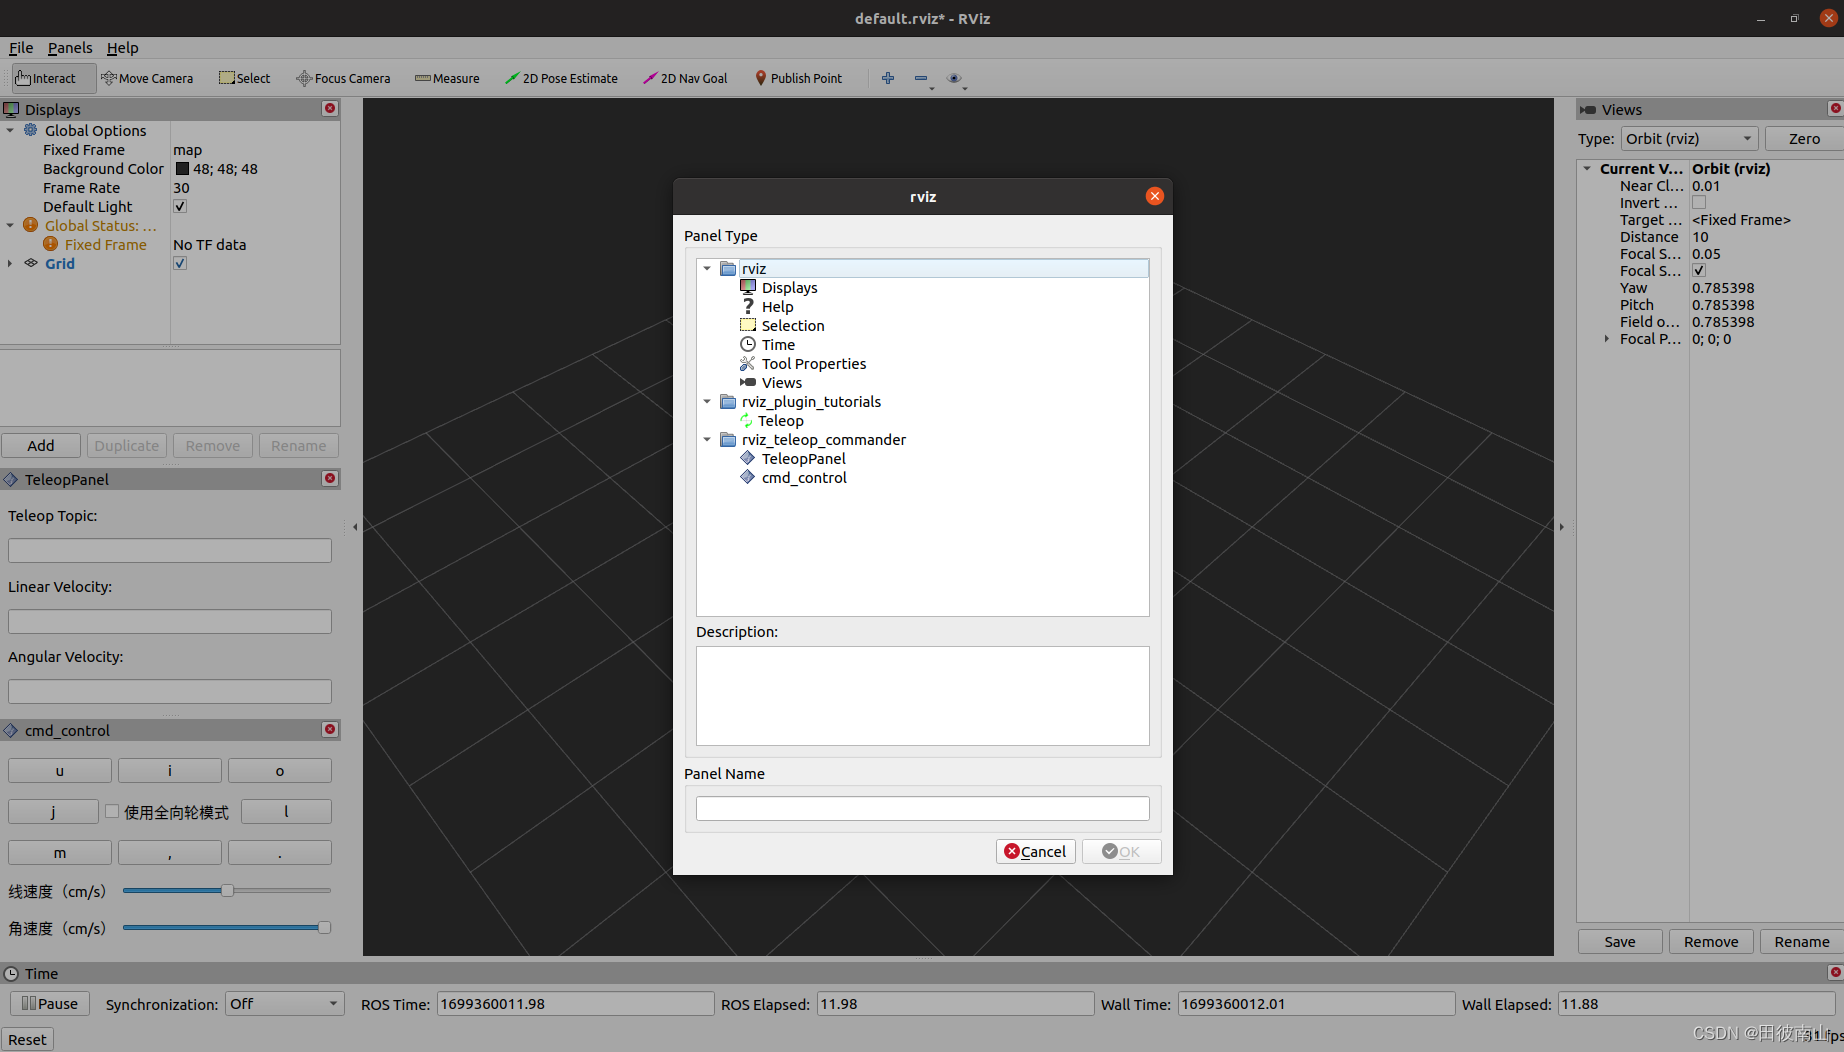
6、编译并使用
- 编译通过后,打开rviz即可调用插件
二、通过Qt可视化工具构建rviz插件
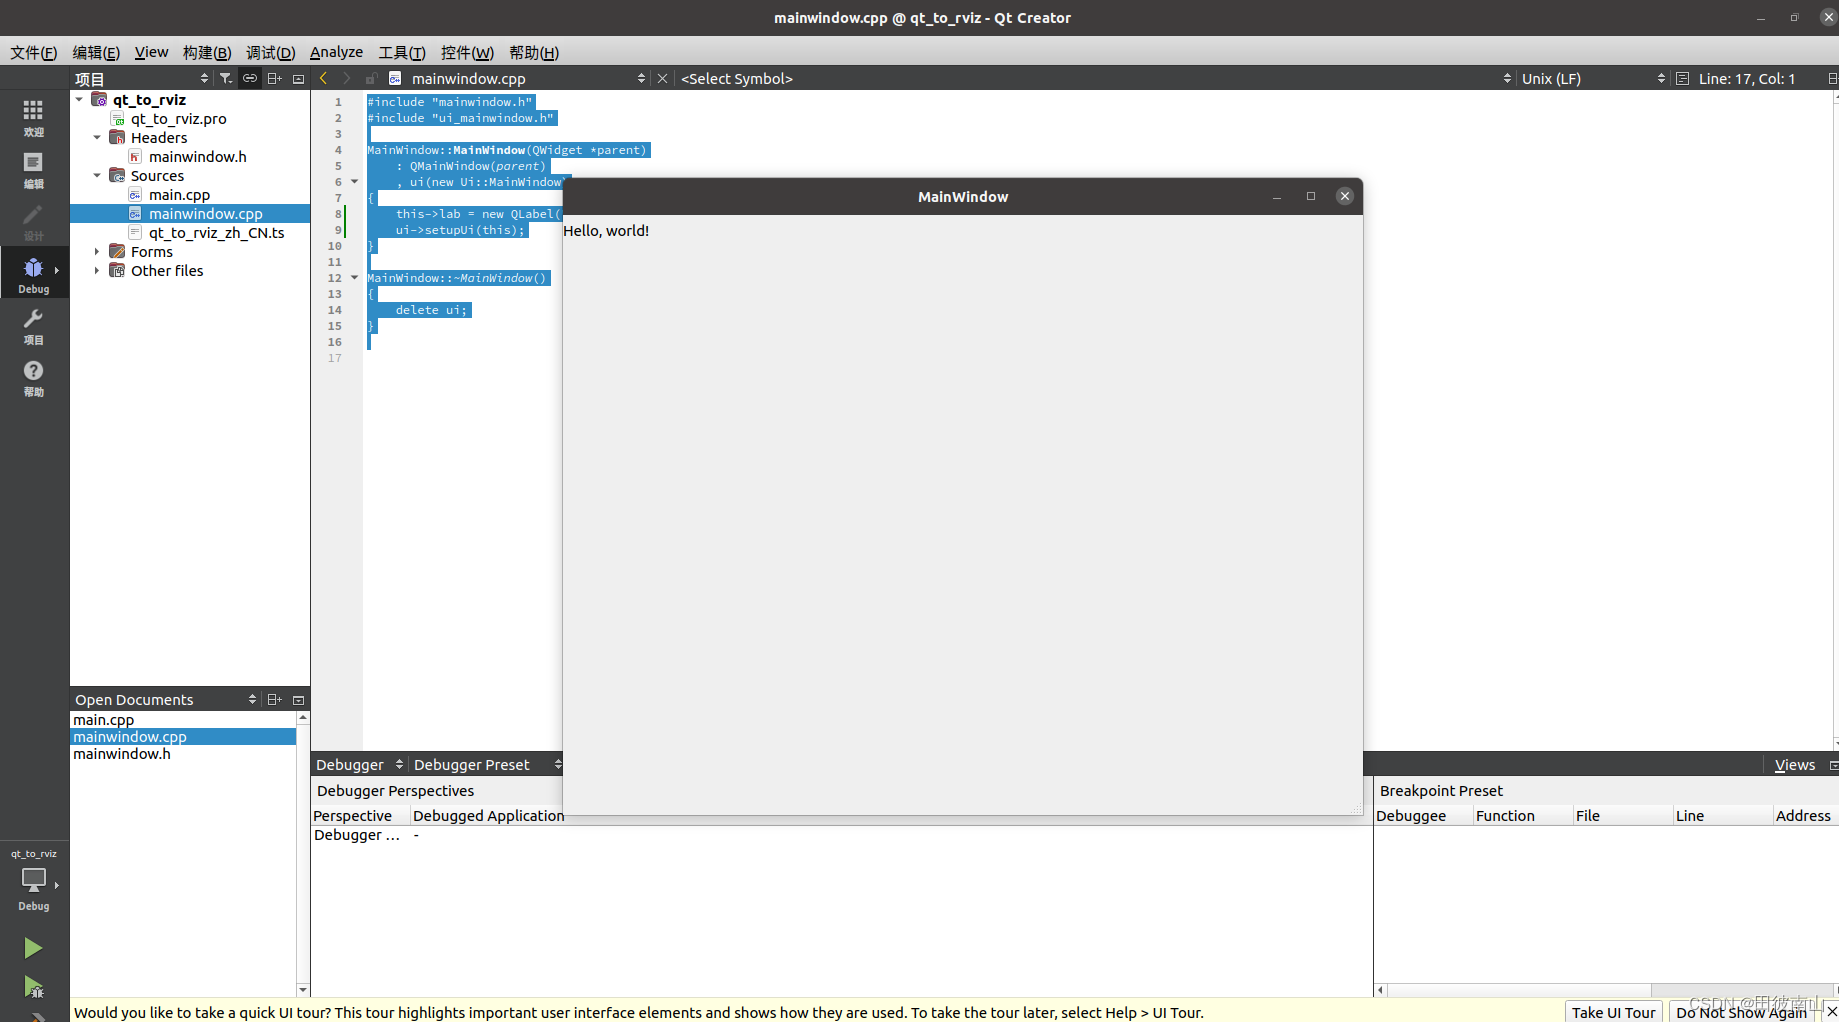
1、qt creator开发
- rviz插件的源代码的主要库是qt库,qt库的常见开发方式是使用qt creator,代码框架主要是主函数+定义ui界面的cpp文件和h文件。
- 主函数基本就是启动代码,不用修改。
#include "mainwindow.h"#include <QApplication>
#include <QLocale>
#include <QTranslator>int main(int argc, char *argv[])
{QApplication a(argc, argv);QTranslator translator;const QStringList uiLanguages = QLocale::system().uiLanguages();for (const QString &locale : uiLanguages) {const QString baseName = "qt_to_rviz_" + QLocale(locale).name();if (translator.load(":/i18n/" + baseName)) {a.installTranslator(&translator);break;}}MainWindow w;w.show();return a.exec();
}- 头文件中声明需要用到的组件
#ifndef MAINWINDOW_H
#define MAINWINDOW_H#include <QMainWindow>
#include <QLabel>
QT_BEGIN_NAMESPACE
namespace Ui { class MainWindow; }
QT_END_NAMESPACEclass MainWindow : public QMainWindow
{Q_OBJECTpublic:MainWindow(QWidget *parent = nullptr);~MainWindow();private:Ui::MainWindow *ui;
private:QLabel *lab;  //这里声明了一个标签组建,记得要引入对应组建的头文件
};
#endif // MAINWINDOW_H- cpp文件主要在构造函数中定义和启动组建
#include "mainwindow.h"
#include "ui_mainwindow.h"MainWindow::MainWindow(QWidget *parent): QMainWindow(parent), ui(new Ui::MainWindow)
{this->lab = new QLabel("Hello, world!", this);ui->setupUi(this);
}MainWindow::~MainWindow()
{delete ui;
}
- 这是普通qt程序的开发和使用方法,这里只有qt实现的界面可视化代码,没有增加业务功能代码。只要把这部分代码和业务代码耦合在一起就可以实现效果了
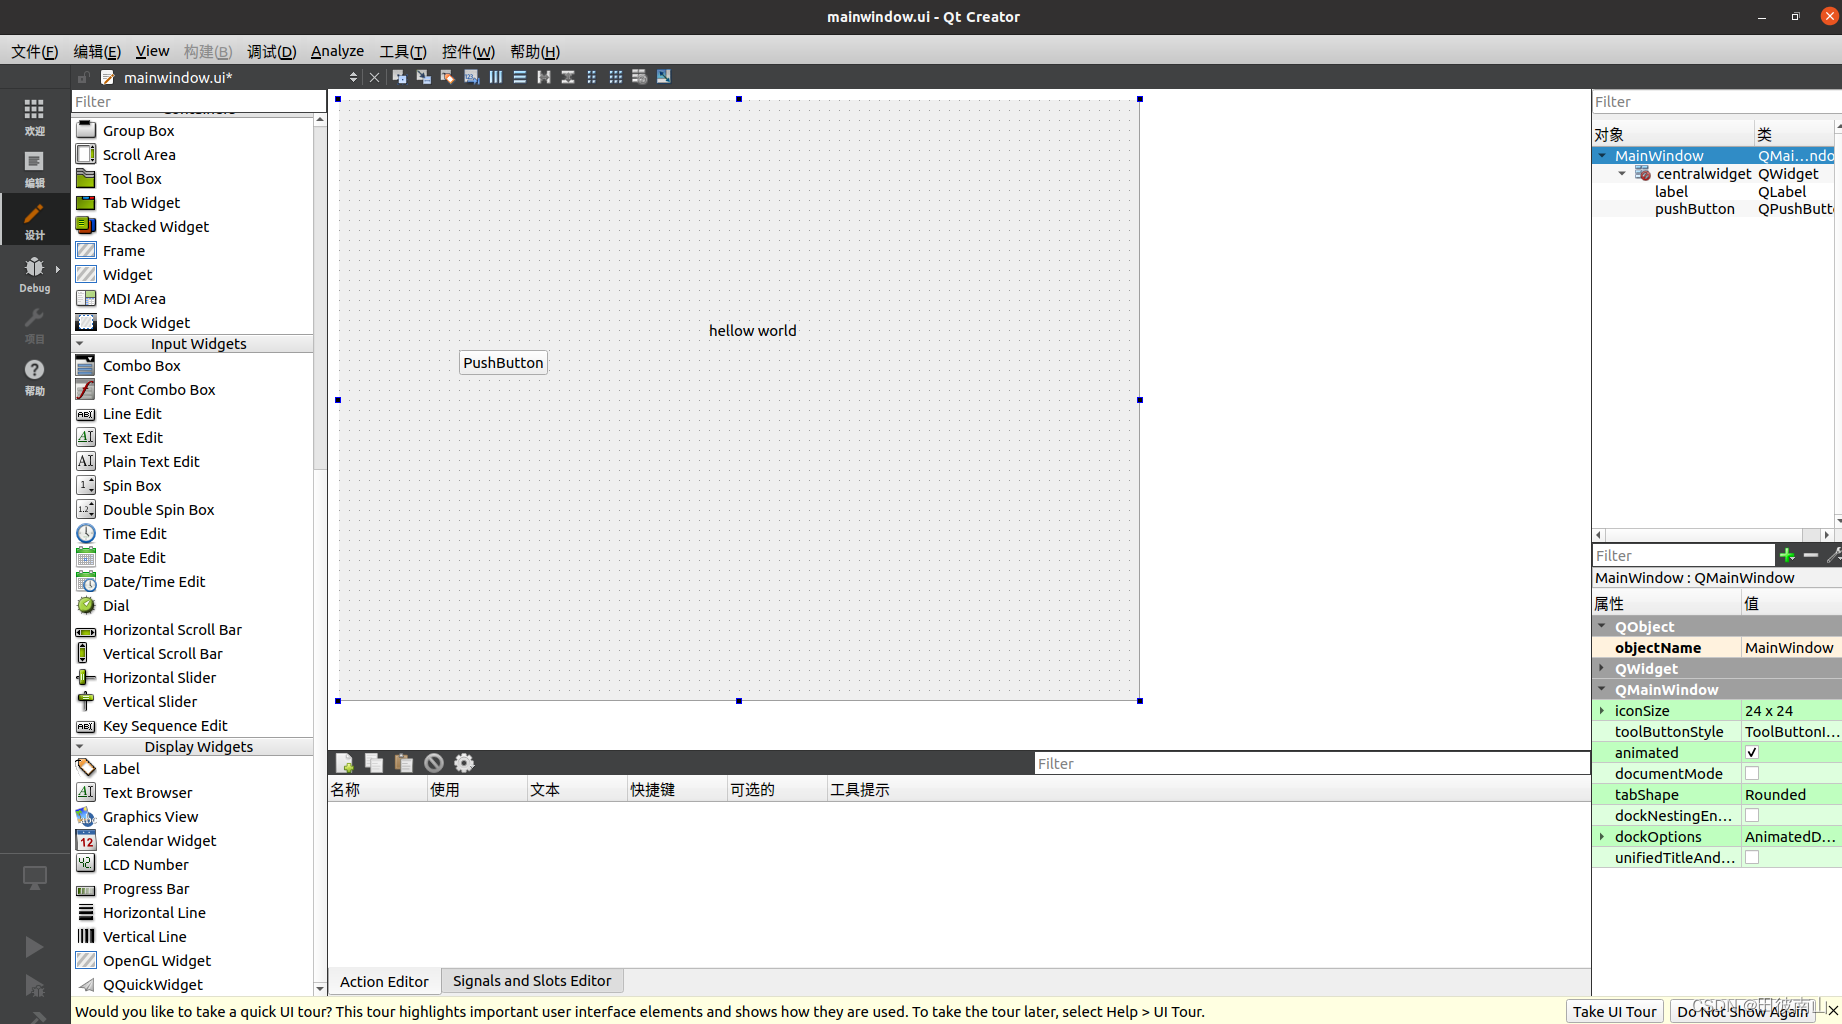
2、qt designer
- 还有一种方法是使用qt designer,这种工具通过可视化界面设计ui界面并设置相关配置,最后通过uic工具生成h文件,h文件中会有qt功能的主要代码,在其基础之上修改即可。
- 在qt designer中设计ui界面,保存为ui文件
 * 使用uic生成头文件,相关类可以从这个头文件中挑选和复用代码,不过还是有挺多要修改的
uic mainwindow.ui -o qwe.h
/********************************************************************************
** Form generated from reading UI file 'mainwindow.ui'
**
** Created by: Qt User Interface Compiler version 5.15.2
**
** WARNING! All changes made in this file will be lost when recompiling UI file!
********************************************************************************/#ifndef QWE_H
#define QWE_H#include <QtCore/QVariant>
#include <QtWidgets/QApplication>
#include <QtWidgets/QLabel>
#include <QtWidgets/QLineEdit>
#include <QtWidgets/QMainWindow>
#include <QtWidgets/QPushButton>
#include <QtWidgets/QWidget>QT_BEGIN_NAMESPACEclass Ui_MainWindow
{
public:QWidget *centralwidget;QPushButton *pushButton;QLabel *label;QLineEdit *lineEdit;void setupUi(QMainWindow *MainWindow){//主界面if (MainWindow->objectName().isEmpty())MainWindow->setObjectName(QString::fromUtf8("MainWindow"));MainWindow->resize(800, 600);//核心部件,管理者?centralwidget = new QWidget(MainWindow);centralwidget->setObjectName(QString::fromUtf8("centralwidget"));//按键部件pushButton = new QPushButton(centralwidget);pushButton->setObjectName(QString::fromUtf8("pushButton"));pushButton->setGeometry(QRect(120, 250, 89, 25));//标签部件label = new QLabel(centralwidget);label->setObjectName(QString::fromUtf8("label"));label->setGeometry(QRect(370, 220, 201, 21));//横线编辑框lineEdit = new QLineEdit(centralwidget);lineEdit->setObjectName(QString::fromUtf8("lineEdit"));lineEdit->setGeometry(QRect(250, 360, 113, 25));//设置核心部件MainWindow->setCentralWidget(centralwidget);//渲染retranslateUi(MainWindow);//连接槽位QMetaObject::connectSlotsByName(MainWindow);} // setupUivoid retranslateUi(QMainWindow *MainWindow){MainWindow->setWindowTitle(QCoreApplication::translate("MainWindow", "MainWindow", nullptr));pushButton->setText(QCoreApplication::translate("MainWindow", "PushButton", nullptr));label->setText(QCoreApplication::translate("MainWindow", "hellow world", nullptr));} // retranslateUi};namespace Ui {class MainWindow: public Ui_MainWindow {};
} // namespace UiQT_END_NAMESPACE#endif // QWE_H