陈拓 2023/10/21-2023/10/25
1. ESP-IDF开发环境
ESP-IDF的LVGL移植包括2个组件:
- lvgl
- lvgl_esp32_drivers
目前lvgl_esp32_drivers在ESP-IDF 5.0以上版本编译通不过,所以我们安装ESP-IDF 4.4.5。
从https://dl.espressif.cn/dl/esp-idf/下载
![]()
安装说明见《Windows系统安装ESP32 ESP-IDF开发环境》
https://blog.csdn.net/chentuo2000/article/details/133922505?spm=1001.2014.3001.5501
2. ESP-IDF lvgl和lvgl_esp32_drivers组件下载
- LVGL相关文档
https://docs.lvgl.io/8.3/

- lvgl和lvgl_esp32_drivers下载网址
在下面这个网址可以找到很多ESP-IDF组件,因为是国内网络下载比较容易。
https://components.espressif.com/
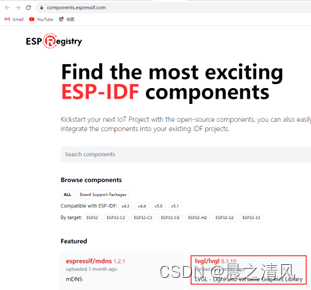
LVGL各个版本的组件也可以在这里找到,目前最新版本是8.3.10。
LVGL也可以从github下载。
下载LVGL之后还要从github下载lvgl_esp32_drivers。
下面我们从github下载lvgl和lvgl_esp32_drivers。
- 下载lvgl
lvgl和lvgl_esp32_drivers组件可以下载到ESP-IDF的components目录下面,也可以下载到项目的components下面。
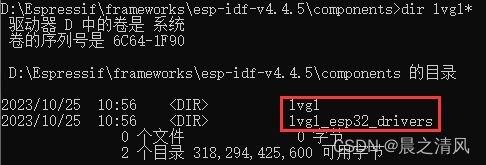
下面我们将两个组件下载到ESP-IDF的components目录下面。
进入components:
cd components
![]()
下载LVGL最新版本
https://github.com/lvgl/lvgl/tags

下载v8.3.10:
git clone -b v8.3.10 https://github.com/lvgl/lvgl.git

如果下载失败多选择几遍。
提示:
如果访问github超时或者下载速度慢,可以试试用Watt Toolkit加速,网址:
https://steampp.net/
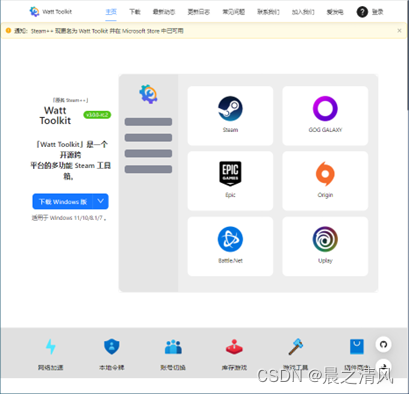
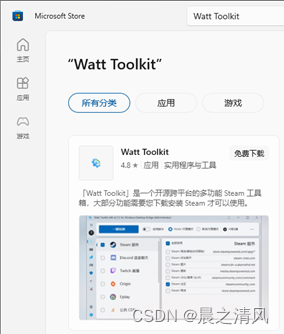
Watt Tookit可以从Microsoft Store直接安装:
- 下载lvgl_esp32_drivers
git clone https://github.com/lvgl/lvgl_esp32_drivers.git
3. 创建新项目
- 在F:盘上建一个工作目录esp

- 进入esp

- 在esp下再建一个项目目录esp32_lvgl
mkdir esp32_lvgl
![]()
- 复制测试项目到工作目录
xcopy D:\Espressif\frameworks\esp-idf-v4.4.5\examples\get-started\sample_project\ F:\esp\esp32_lvgl\ /E

- cd esp32_lvgl

4. 编译项目
4.1 编译LVGL
- 设定目标芯片
idf.py set-target esp32
![]()
- 配置项目
idf.py menuconfig
1) 将闪存设置为4MB

2) 选择显示屏控制芯片ILI9341

3) 定义引脚
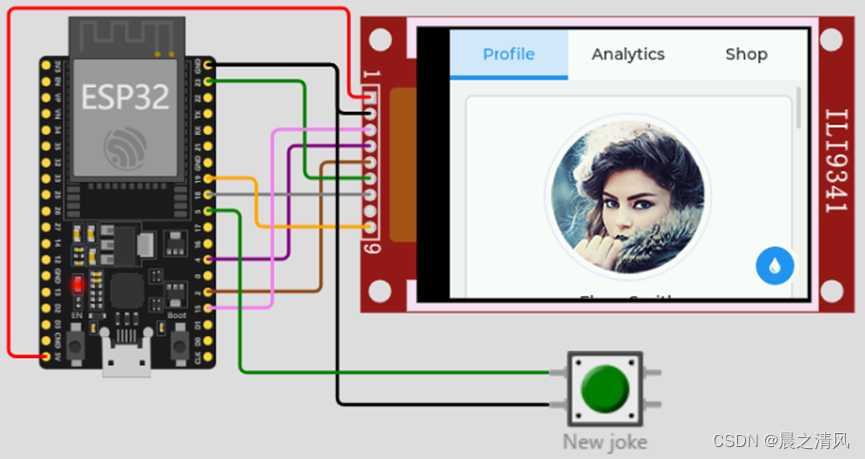
接线表(对照硬件电路):
ILI9341 ESP32
GND GND
VCC VIN
SCK D18
MOSI D23
RES D4
D/C D2
CS D15
LED 空
MISO 空

4) 无背光控制

5) 屏幕方向 - 横屏

6) 交换16位颜色的2个字节
ILI9341的颜色深度是16位,选择Color depth. (16:RGB565),颜色值用2字节表示,ESP32是小端Little Endian模式,先发送低位字节,如果颜色失真,可以选交换颜色值的高低字节。

保存,退出。
- 在lvgl_esp32_drivers\lvgl_helpers.h中添加宏定义
/**********************      DEFINES*********************/#define LV_HOR_RES_MAX 320
#define LV_VER_RES_MAX 240
#define SPI_HOST_MAX 3- 编译LVGL
idf.py build

看到这些提示LVGL编译就成功了。
4.2 编译项目
- 修改main.c
现在的main.c是空的:
/**********************      DEFINES*********************/#define LV_HOR_RES_MAX 320
#define LV_VER_RES_MAX 240
#define SPI_HOST_MAX 3
用下面的代码替换:
#include <stdio.h>
#include "freertos/FreeRTOS.h"
#include "freertos/event_groups.h"
#include "lvgl.h"
#include "freertos/semphr.h"
#include "esp_system.h"
#include "lvgl_helpers.h"/**********************      DEFINES*********************/
#define LV_TICK_PERIOD_MS 1/***********************  STATIC PROTOTYPES**********************/
static void lv_tick_task(void *arg);
static void guiTask(void *pvParameter);
static void create_demo_application(void);/***********************   APPLICATION MAIN**********************/
void app_main(void)
{// xTaskCreate(guiTask, "gui", 4096*2, NULL, 1, NULL);// xTaskCreatePinnedToCore(guiTask, "gui", 4096*2, NULL, 1, NULL, 1);/* NOTE: When not using Wi-Fi nor Bluetooth you can pin the guiTask to core 0 */xTaskCreatePinnedToCore(guiTask, "gui", 4096*2, NULL, 0, NULL, 1);
}/* Creates a semaphore to handle concurrent call to lvgl stuff* If you wish to call *any* lvgl function from other threads/tasks* you should lock on the very same semaphore! */
SemaphoreHandle_t xGuiSemaphore;static void guiTask(void *pvParameter)
{(void) pvParameter;xGuiSemaphore = xSemaphoreCreateMutex();lv_init();/* Initialize SPI or I2C bus used by the drivers */lvgl_driver_init();lv_color_t *buf1 = heap_caps_malloc(DISP_BUF_SIZE * sizeof(lv_color_t), MALLOC_CAP_DMA);assert(buf1 != NULL);/* Use double buffered when not working with monochrome displays */lv_color_t* buf2 = heap_caps_malloc(DISP_BUF_SIZE * sizeof(lv_color_t), MALLOC_CAP_DMA);assert(buf2 != NULL);static lv_disp_draw_buf_t disp_buf;uint32_t size_in_px = DISP_BUF_SIZE;/* Initialize the working buffer depending on the selected display. */lv_disp_draw_buf_init(&disp_buf, buf1, buf2, size_in_px);lv_disp_drv_t disp_drv;lv_disp_drv_init(&disp_drv);disp_drv.hor_res = LV_HOR_RES_MAX;disp_drv.ver_res = LV_VER_RES_MAX;disp_drv.flush_cb = disp_driver_flush;disp_drv.draw_buf = &disp_buf;lv_disp_drv_register(&disp_drv);/* Create and start a periodic timer interrupt to call lv_tick_inc */const esp_timer_create_args_t periodic_timer_args = {.callback = &lv_tick_task,.name = "periodic_gui"};esp_timer_handle_t periodic_timer;ESP_ERROR_CHECK(esp_timer_create(&periodic_timer_args, &periodic_timer));ESP_ERROR_CHECK(esp_timer_start_periodic(periodic_timer, LV_TICK_PERIOD_MS * 1000));/* Create the demo application */create_demo_application();while (1){/* Delay 1 tick (assumes FreeRTOS tick is 10ms */vTaskDelay(pdMS_TO_TICKS(10));lv_task_handler();/* Try to take the semaphore, call lvgl related function on success */if (pdTRUE == xSemaphoreTake(xGuiSemaphore, portMAX_DELAY)) {lv_task_handler();xSemaphoreGive(xGuiSemaphore);}}
}static void create_demo_application(void)
{/* Get the current screen  */lv_obj_t * scr = lv_disp_get_scr_act(NULL);    /*Create a Label on the currently active screen*/lv_obj_t * label1 =  lv_label_create(scr);/*Modify the Label's text*/lv_label_set_text(label1, "Hello\nworld");/* Align the Label to the center* NULL means align on parent (which is the screen now)* 0, 0 at the end means an x, y offset after alignment*/lv_obj_align(label1, LV_ALIGN_CENTER, 0, 0);
}static void lv_tick_task(void *arg) {(void) arg;lv_tick_inc(LV_TICK_PERIOD_MS);
}- 编译项目
idf.py build

在build目录下生成引导加载程序bootloader.bin、应用程序main.bin和分区表partition-table.bin三个ESP32运行所需的bin文件。
5. Wokwi仿真
详细说明见《用Wokwi仿真ESP-IDF项目》
https://blog.csdn.net/chentuo2000/article/details/133963728?spm=1001.2014.3001.5501
5.1 硬件模拟电路
- 打开Wokwi网页
https://wokwi.com/
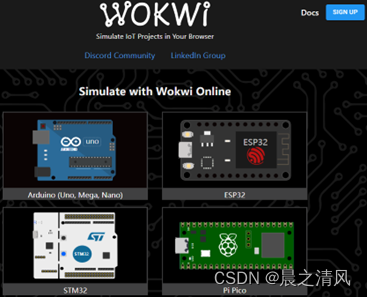
选择ESP32。
- 选择项目

打开ILI9341 TFT LCD显示屏项目。
- Wokwi编程、仿真界面
左边是arduino的程序代码编写区。右边是电路连接和仿真区。
5.2 仿真
- 在代码编辑器中按F1
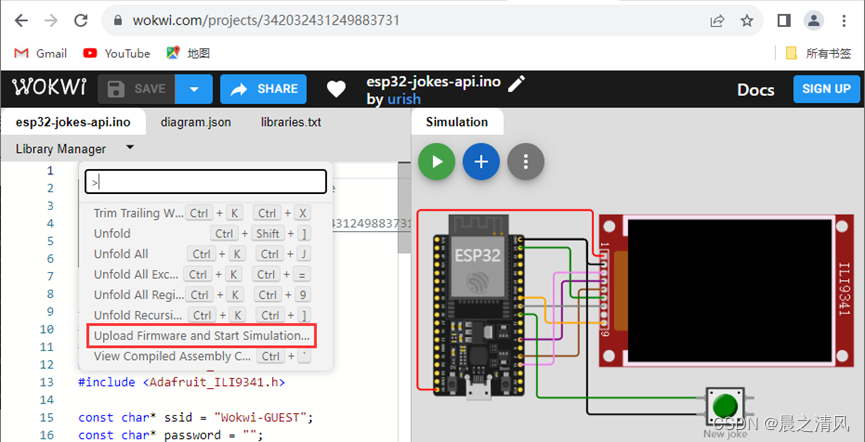
选择Upload Firmware and Start Simulation…
- 选择main.bin文件
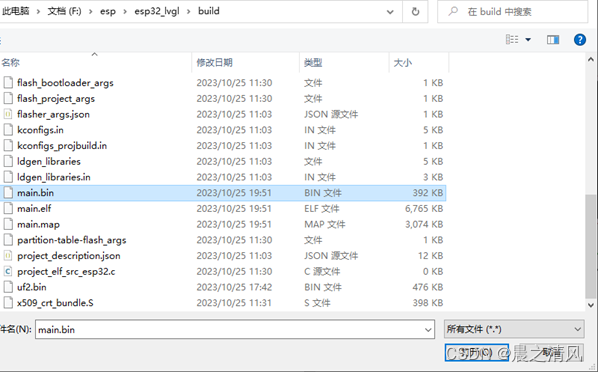
- Wokwi模拟器显示
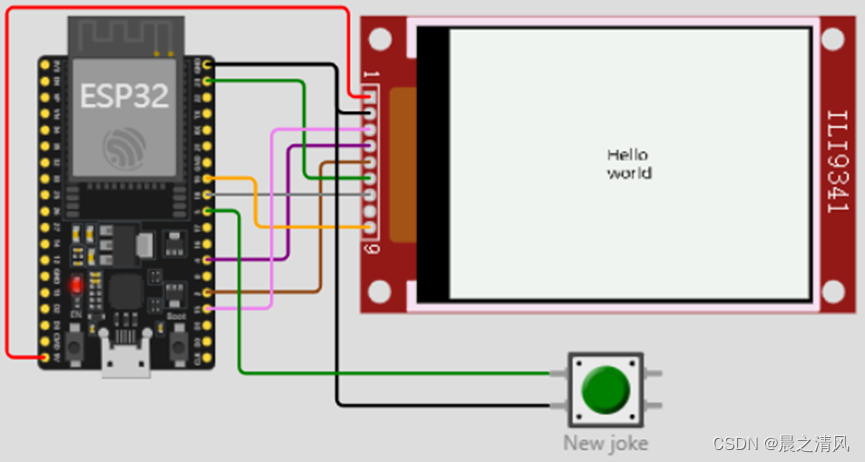
6. demos仿真
- 选择Show some widget和Enable slide show

- 修改main.c
添加头文件:
#include "demos/lv_demos.h"- 修改create_demo_application函数
static void create_demo_application(void)
{#if defined CONFIG_LV_USE_DEMO_WIDGETSlv_demo_widgets();#elif defined CONFIG_LV_USE_DEMO_KEYPAD_AND_ENCODERlv_demo_keypad_encoder();#elif defined CONFIG_LV_USE_DEMO_BENCHMARKlv_demo_benchmark();#elif defined CONFIG_LV_USE_DEMO_STRESSlv_demo_stress();#else#error "No demo application selected."#endif
}- 编译项目
idf.py build

内存不足,无法运行lv_demo_widget。请将LV_MEM_SIZE设置为至少38KB(38ul*1024ul)。建议使用48KB。

再编译成功。
- 仿真
参考文档
- ESP32 ESP-IDF LVGL8.3.3移植
https://blog.csdn.net/chentuo2000/article/details/128269394?spm=1002014.3001.5501


