文章目录
- 前言
- 一、官网下载ubuntu-base
- 二、挂载并构建文件系统
- 2.1、配置构建文件系统环境
- 2.2、编写挂载脚本mount.sh并安装相关工具
- 2.3、轻量级的桌面环境 lubuntu-desktop
- 2.4、卸载一些不必要的软件
- 2.5、添加用户
- 2.6 、允许root用户登录桌面
- 2.7、串口自动登录
- 2.8、添加分区释放的系统服务(重要)
- 三、制作文件系统rootfs分区固件
- 3.1、创建一个空镜像文件
- 3.2、将镜像文件挂载到空文件
- 3.3、修复及检测镜像文件系统
前言
很多厂商没有吧文件系统的构建方法开源出来,只是提供了一个rootfs.img的固件包,这不利于我们做二次开发,本文章实现一个自己构建的文件系统,并移植到RK的平台上使用
一、官网下载ubuntu-base
http://cdimage.ubuntu.com/ubuntu-base/releases/
本文章使用的是:buntu-base-20.04.5-base-arm64.tar.gz
解压:
mkdir ubuntu_rootfs
tar -zxvf ubuntu-base-20.04.5-base-arm64.tar.gz -C ubuntu_rootfs
二、挂载并构建文件系统
2.1、配置构建文件系统环境
配置网络配置
cp /etc/resolv.conf ubuntu_rootfs/etc/
配置仿真开发环境
sudo apt install qemu-user-static
sudo cp /usr/bin/qemu-aarch64-static ubuntu_rootfs/usr/bin/
更换软件源
sudo vim ubuntu_rootfs/etc/apt/sources.list
deb http://mirrors.aliyun.com/ubuntu-ports/ focal main restricted
deb http://mirrors.aliyun.com/ubuntu-ports/ focal-updates main restricted
deb http://mirrors.aliyun.com/ubuntu-ports/ focal universe
deb http://mirrors.aliyun.com/ubuntu-ports/ focal-updates universe
deb http://mirrors.aliyun.com/ubuntu-ports/ focal multiverse
deb http://mirrors.aliyun.com/ubuntu-ports/ focal-updates multiverse
deb http://mirrors.aliyun.com/ubuntu-ports/ focal-backports main restricted universe multiverse
deb http://mirrors.aliyun.com/ubuntu-ports/ focal-security main restricted
deb http://mirrors.aliyun.com/ubuntu-ports/ focal-security universe
deb http://mirrors.aliyun.com/ubuntu-ports/ focal-security multiverse
2.2、编写挂载脚本mount.sh并安装相关工具
挂载根文件系统运行需要的设备和目录
#!/bin/bash
function mnt() {echo "MOUNTING"sudo mount -t proc /proc ${2}procsudo mount -t sysfs /sys ${2}syssudo mount -o bind /dev ${2}dev#sudo mount -t devpts -o gid=5,mode=620 devpts ${2}dev/ptssudo mount -o bind /dev/pts ${2}dev/ptssudo chroot ${2}
}
function umnt() {echo "UNMOUNTING"sudo umount ${2}procsudo umount ${2}syssudo umount ${2}dev/ptssudo umount ${2}dev
}
if [ "$1" == "-m" ] && [ -n "$2" ];
thenmnt $1 $2
elif [ "$1" == "-u" ] && [ -n "$2" ];
thenumnt $1 $2
elseecho ""echo "Either 1'st, 2'nd or both parameters were missing"echo ""echo "1'st parameter can be one of these: -m(mount) OR -u(umount)"echo "2'nd parameter is the full path of rootfs directory(with tralling '/')"echo ""echo "For example: ch-mount -m /media/sdcard"echo ""echo 1st parameter : ${1}echo 2nd parameter : $[2]
fi
添加执行权限并挂载文件系统
sudo chmod +x mount.sh
./mount.sh -m ubuntu_rootfs/
挂载之后,开始安装文件系统中必要的一些软件
apt update
apt upgrade
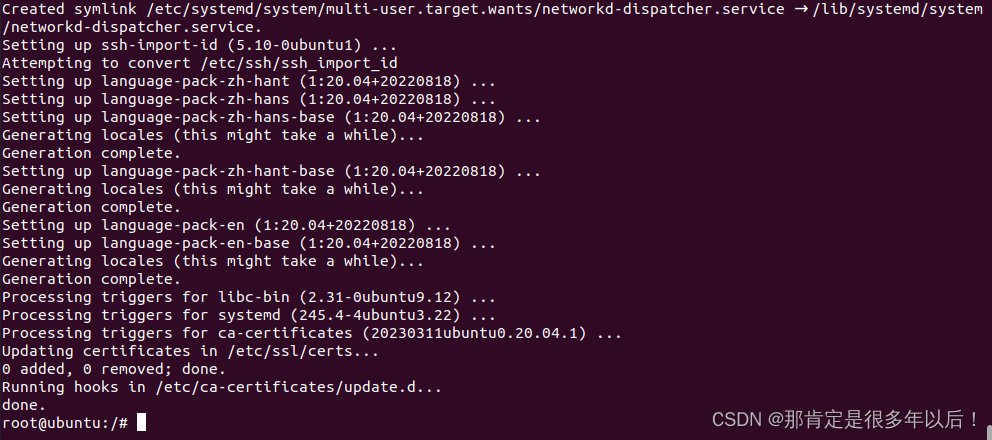
apt install sudo vim udev net-tools ethtool udhcpc netplan.io language-pack-en-base language-pack-zh-han* iputils-ping openssh-sftp-server ntp usbutils alsa-utils libmtp9
安装的过程中会让你选择地区和时区
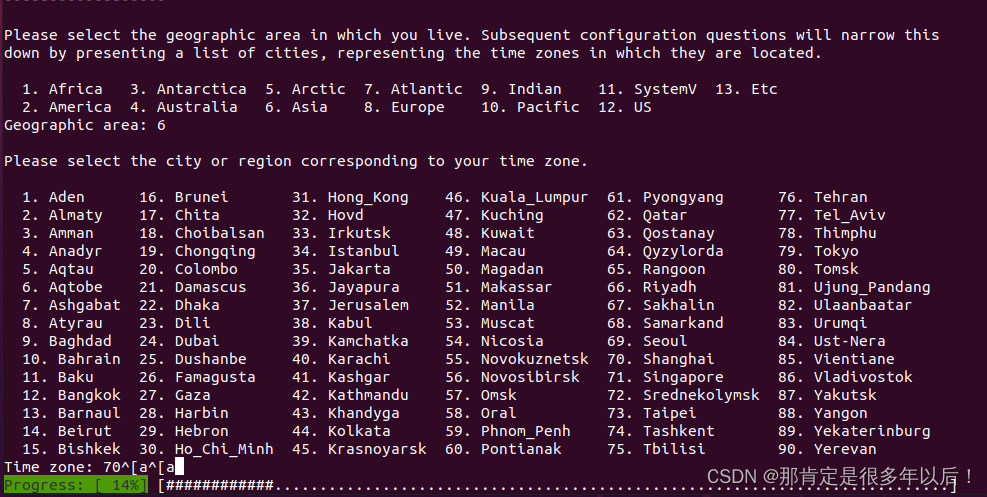
亚洲地区选择:6,Asia
中国时区选择:70,Shanghai
等待编译完成即可
2.3、轻量级的桌面环境 lubuntu-desktop
嵌入式平台选择轻量级的桌面环境lubuntu-desktop安装
apt install lubuntu-desktop
2.4、卸载一些不必要的软件
apt-get remove --purge lubuntu-update-notifier
apt-get remove --purge libreoffice*
2.5、添加用户
舔加用户
adduser ubuntu
增加管理员权限
adduser ubuntu sudo
2.6 、允许root用户登录桌面
gdm3设置允许root用户登录桌面,添加AllowRoot=true
vim /etc/gdm3/custom.conf
...
# Uncomment the line below to turn on debugging
# More verbose logs
# Additionally lets the X server dump core if it crashes
#Enable=true
AllowRoot=true
vim /etc/pam.d/gdm-password
注释:#auth required pam_succeed_if.so user != root quiet_success
#%PAM-1.0
auth    requisite       pam_nologin.so
#auth   required        pam_succeed_if.so user != root quiet_success
@include common-auth
auth    optional
2.7、串口自动登录
vim /lib/systemd/system/serial-getty\@.service
注释:ExecStart=-/sbin/agetty -o ‘-p – \u’ --keep-baud 115200,38400,9600 %I $TERM
修改:ExecStart=-/sbin/agetty --autologin root --noclear %I $TERM
[Service]
# The '-o' option value tells agetty to replace 'login' arguments with an
# option to preserve environment (-p), followed by '--' for safety, and then
# the entered username.
#ExecStart=-/sbin/agetty -o '-p -- \\u' --keep-baud 115200,38400,9600 %I $TERM
ExecStart=-/sbin/agetty --autologin root --noclear %I $TERM
Type=idle
Restart=always
UtmpIdentifier=%I
TTYPath=/dev/%I
TTYReset=yes
TTYVHangup=yes
KillMode=process
IgnoreSIGPIPE=no
SendSIGHUP=yes
最后关闭自动休眠
sudo systemctl mask sleep.target suspend.target hibernate.target hybrid-sleep.target
2.8、添加分区释放的系统服务(重要)
通过实验,rootfs分区烧录后,只有固件本身大小,需要做分区释放
vim etc/init.d/resize2fs.sh
#!/bin/bash -e
# resize filesystem mmcblk0p6
if [ ! -e "/usr/local/boot_flag" ] ;
thenecho "Resizing /dev/mmcblk0p6..."resize2fs /dev/mmcblk0p6touch /usr/local/boot_flag
fi
添加执行权限
chmod +x etc/init.d/resize2fs.sh
创建服务去运行脚本
vim lib/systemd/system/resize2fs.service
#start
[Unit]
Description=Setup rockchip platform environment
Before=lightdm.service
After=resize-helper.service
[Service]
Type=simple
ExecStart=/etc/init.d/resize2fs.sh
[Install]
WantedBy=multi-user.target
#end
#退出根文件系统
exit
#卸载挂载的根文件系统
./mount.sh -u ubuntu_rootfs/
三、制作文件系统rootfs分区固件
3.1、创建一个空镜像文件
dd if=/dev/zero of=ubuntu_rootfs.img bs=1M count=8192
将该文件格式化为ext4文件系统
mkfs.ext4 ubuntu_rootfs.img
3.2、将镜像文件挂载到空文件
mkdir ubuntu_base_rootfs
chmod 777 ubuntu_base_rootfs
mount ubuntu_rootfs.img ubuntu_base_rootfs
cp -rfp ubuntu_rootfs ubuntu_base_rootfs
umount ubuntu_base_rootfs/
3.3、修复及检测镜像文件系统
修复及检测镜像文件系统
e2fsck -p -f ubuntu_rootfs.img
resize2fs减小镜像文件的大小,上述的2.8小节中的释放rootfs分区大小与这里减少文件大小相关。
resize2fs -M ubuntu_rootfs.img
查看大小
du -sh ubuntu_rootfs.img
rootfs# du -sh ubuntu_rootfs.img
5.0G	ubuntu_rootfs.img