【重点】
1 创建 Spring 项目
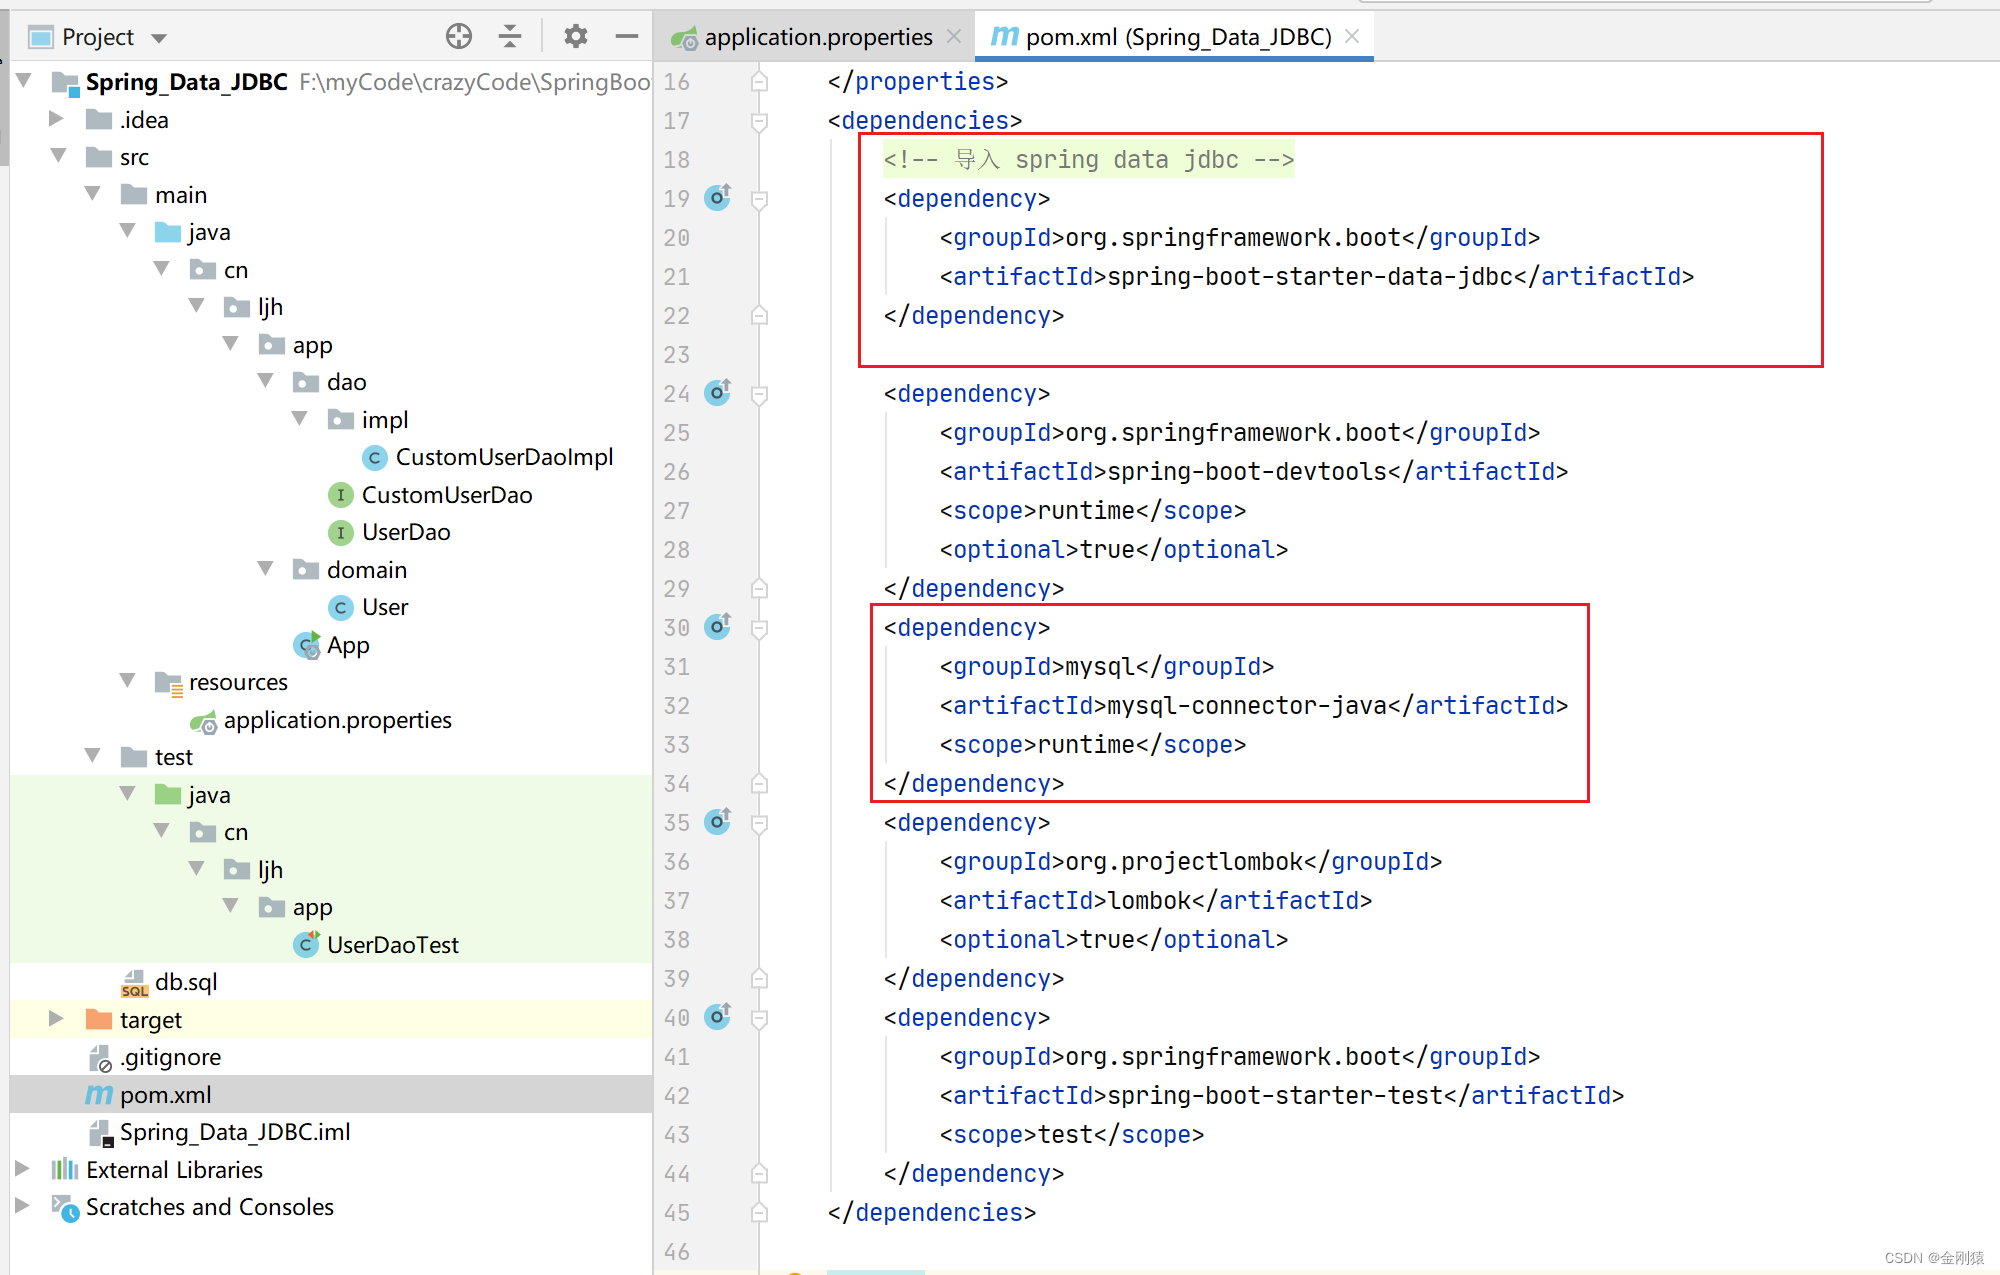
a.创建一个maven项目【maven的依赖导入,导一次用终身】
b.添加 spring-config.xml 依赖 【copy一下】
c.创建一个启动类(作用:为后续 Spring 容器中获取Bean做准备)
2.存储Bean
a.创建Bean对象
b.通过spring-config.xml <bean id="名称" class=“包名+类名”></bean>
3.读取Bean
a.得到Spring对象(ApplicationContext,BeanFactory)
b.通过Spring对象的getBean获取Bean对象【DI操作】
c.使用Bean
目录
一、为什么要开始学习框架,Servlet学的不挺香的吗?
二、Spring核心与设计思想(两个重点 Ioc、DI)
2.1什么是Spring
2.2什么是容器
2.3什么是IoC
2.4运用IoC前后对比举例
2.5什么是DI
三、Spring的创建和使用
一、为什么要开始学习框架,Servlet学的不挺香的吗?
运用Servlet写一个项目需要有如下过程:
1.配置Tomcat
2.引入响应jar包(加入依赖)
3.打war包发布
...... 熟悉Servlet的都知道只要一点点错误就会导致(致命)
痛点:
1.添加外部 jar 不⽅便,容易出错,⽐如添加了⼀个不匹配的外部 jar 版本;
2.运⾏和调试的时候需要配置 tomcat 不⽅便;
3.发布不⽅便,servlet 项⽬必须依靠外置的 tomcat(外置的 web 容器)运⾏。
4.路由配置不⽅便,⼀个访问地址对应⼀个 Servlet 类。
。。。。。。(英文的省略号已经不足以表达我的无语😶)
从开始学习框架开始,对比Servlet来说就会有如下优势 (SpringBoot VS Servlet)
1.无需配置Tomcat,点击"运行"就可以运行项目,Spring Boot 内置Web容器,可以直接运行
2.快速添加外部jar包
3.快速发布(使⽤ java -jar ⽅式就可以发布)
4.对象自动装配。
5........
二、Spring核心与设计思想(两个重点 Ioc、DI)
2.1什么是Spring
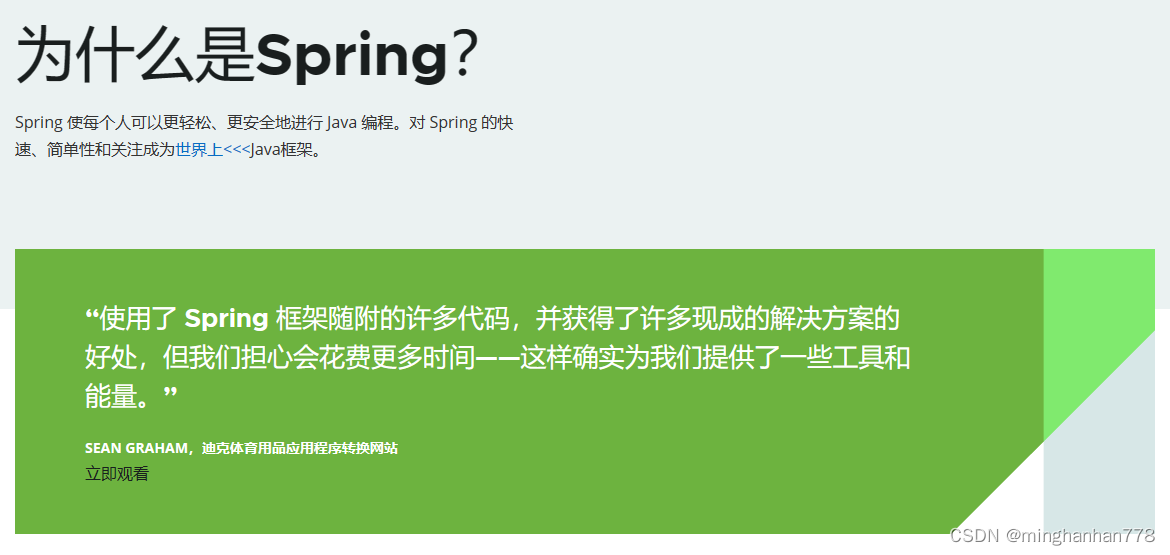
上图是在Spring官网上看到的关于一部分Spring的介绍(其实压根就没介绍)Spring 中文网 (springref.com)
2.2什么是容器
容器->装东西的"盒子" A容器->装A的"盒子"
Tomcat是web容器
List、Map是数据存储容器
Spring 是包含了众多⼯具⽅法的 IoC 容器
2.3什么是IoC
2.4运用IoC前后对比举例
a. 传统的程序开发
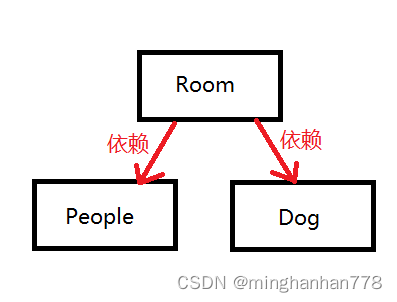
一个房间有人和狗
package com.spring.demo;/*** Created with IntelliJ IDEA.* Description:* User: 97175* Date: 2023-07-18* Time: 14:35*/
public class Room {private Human man1 = new Human();private Human man2 = new Human();private Dog dog1 = new Dog();private Dog dog2 = new Dog();public void print(){System.out.println("hi Room~");}
}
package com.spring.demo;/*** Created with IntelliJ IDEA.* Description:* User: 97175* Date: 2023-07-18* Time: 14:39*/
public class Dog {public void print(){System.out.println("hi Dog~");}
}
package com.spring.demo;/*** Created with IntelliJ IDEA.* Description:* User: 97175* Date: 2023-07-18* Time: 14:35*/
public class Human {public void print(){System.out.println("hi Human~");}}
这时候就能发现到如果我添加了或者修改了Human和Dog的构造方法,此时我就需要花费更多的时间去修改后期调用用构造方法初始化的对象,例如在Room中就要不停的修改Human()和Dog()。 也就是生成一个Room类,还要去管生成Human类和Dog类
耦合性极强 代码和代码直接产生极强的粘合性,一动全动 真的栓Q!
如果我们转变思路,
2.5什么是DI
实现IoC的过程叫做DI,IoC是思想,DI是实现
三、Spring的创建和使用
【1】创建Spring项目
【1.1】创建一个Spring项目
①创建Maven项目②添加Spring框架支持【依赖】(Spring-context、Spring-beans)③添加启动类
重点在于①配置国内源 File->settings->搜索maven【idea有两个settings,一个是本项目的,另一个是新项目的配置文件】
【如下操作是对本项目的maven进行配置】
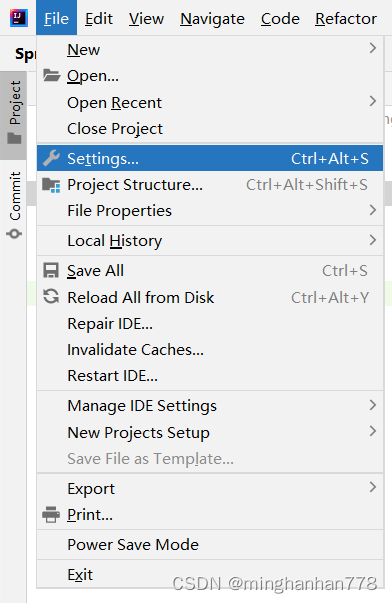
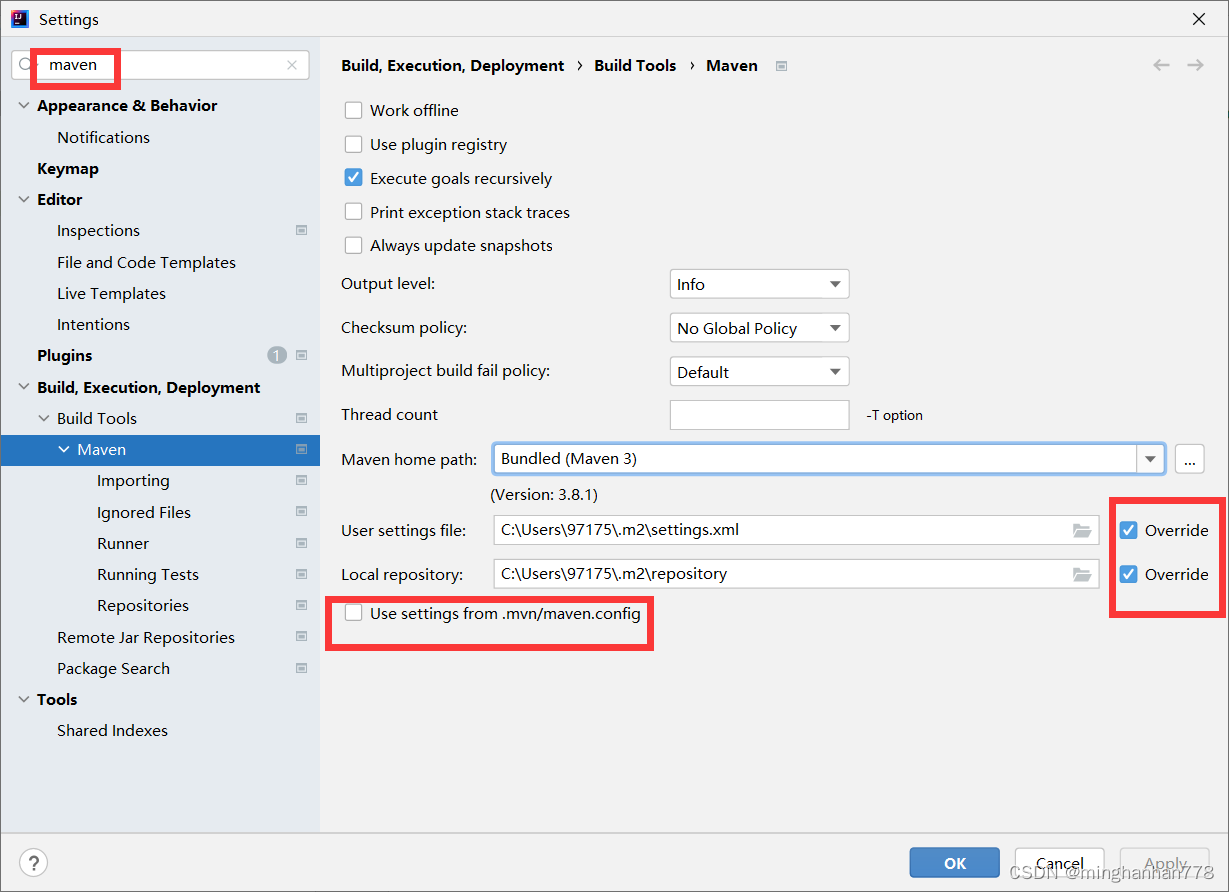
打开User settings File目录,如果能找到settings.xml,就在mirrors中加入下面这一段【配置阿里云maven国内源】
<mirror><id>alimaven</id><name>aliyun maven</name><url>http://maven.aliyun.com/nexus/content/groups/public/</url><mirrorOf>central</mirrorOf>
</mirror>如果没能找到settings.xml,将资源包里的settings.xml复制到对应路径去。
OK以后重新加载jar包
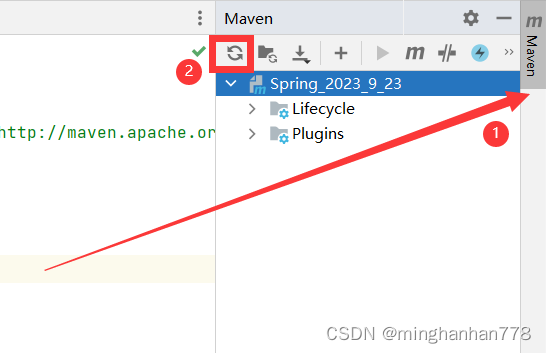
如上操作就完成了本项目的maven配置,同理要将新项目做同样的处理,新项目的settings寻找路径如下:
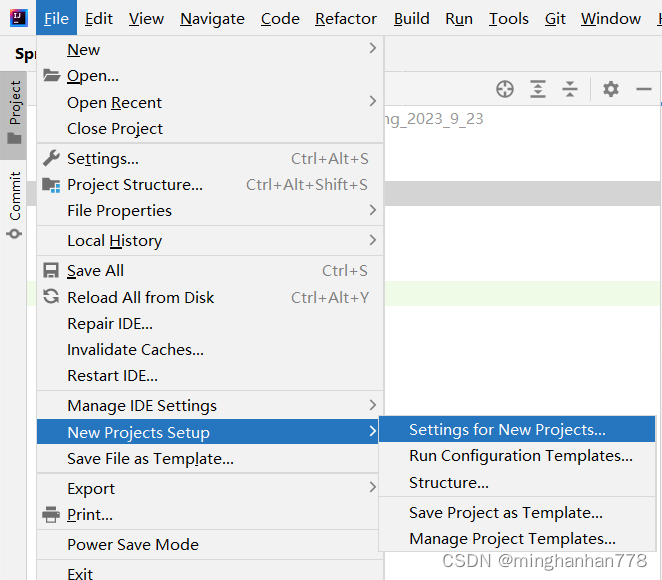
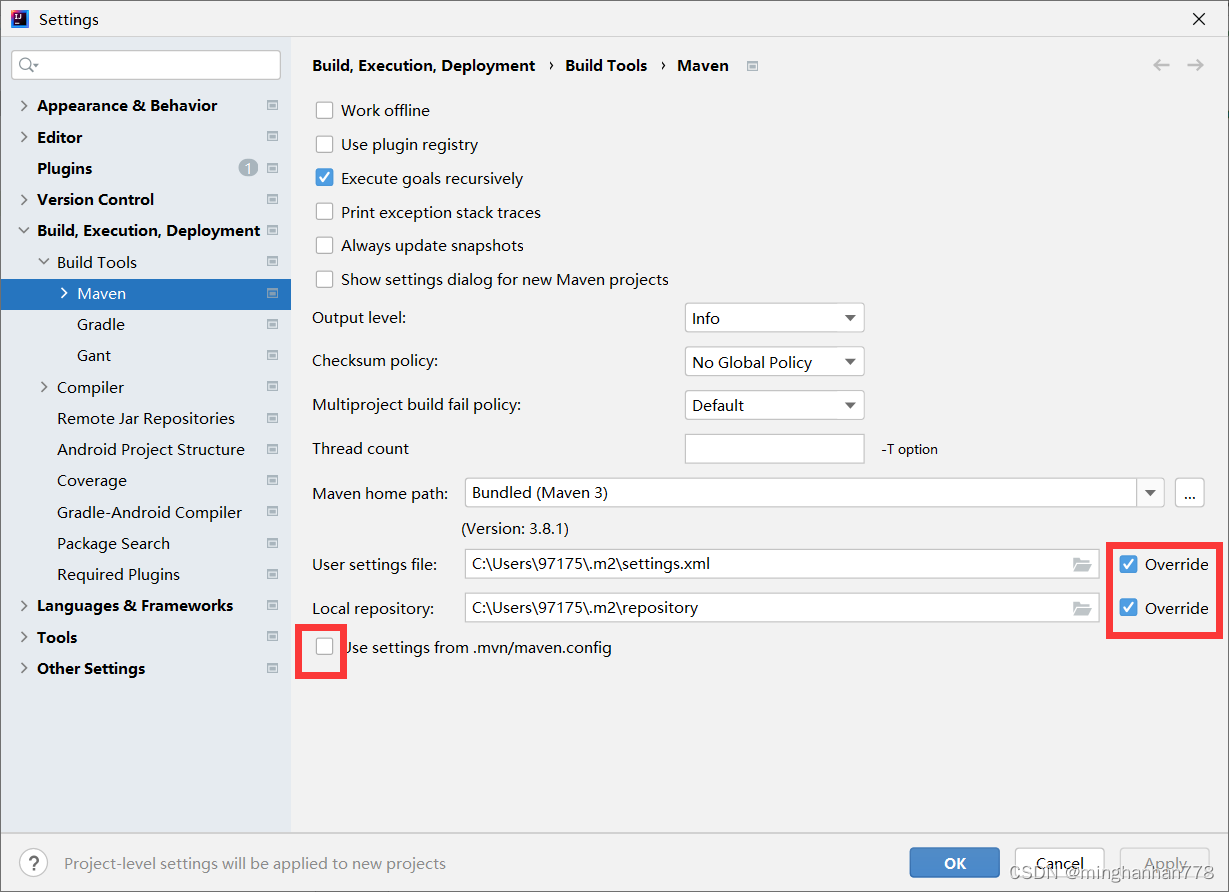
在重新加载jar包

【极特殊的情况,原先的jar包没有下载完成退出了,重新加载可能会下载不完全】
解决办法,把jar包全删了,重新加载。删除路径如下:
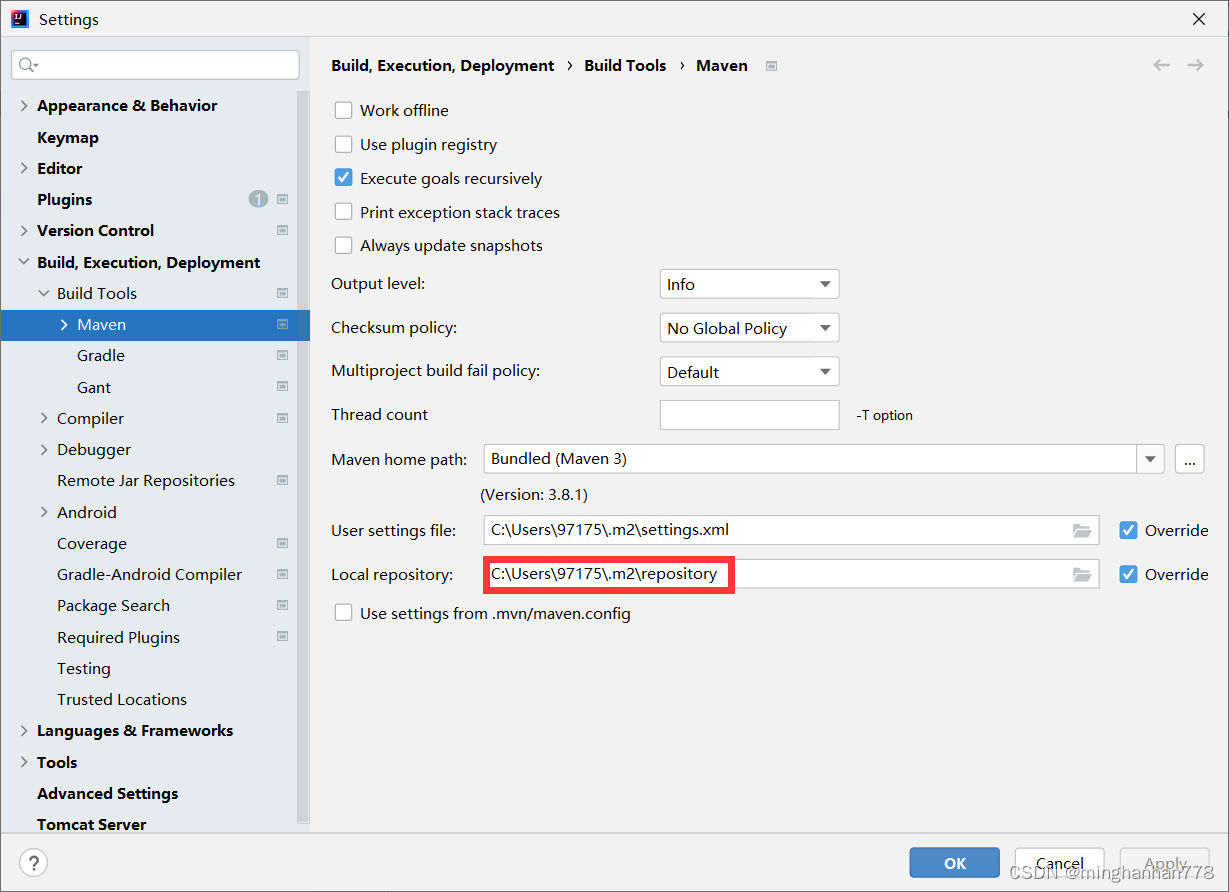
把repository目录下的所有文件全删除,重新再加载一次jar包。加载jar包方法如下:

一定要保证网络畅通,maven路径没有中文,配置路径正确,基本就会加载正确。
【1.2】在pom.xml添加Spring-context依赖
<dependencies><!-- https://mvnrepository.com/artifact/org.springframework/spring-context --><dependency><groupId>org.springframework</groupId><artifactId>spring-context</artifactId><version>5.3.23</version></dependency></dependencies>【1.3】添加一个启动类 在一个类里有一个main方法
public class application {public static void main(String[] args) {}
}
【2】将 Bean 对象存储到Spring当中
【2.1】创建一个Bean对象
public class Student {public void sayHi(){System.out.println("Hi");}
}
【2.2】将Bean存储到Spring容器当中 【先添加Spring配置文件】
在resource目录下创建spring-config.xml,将下面这段spring配置文件复制进去。
<?xml version="1.0" encoding="UTF-8"?>
<beans xmlns="http://www.springframework.org/schema/beans"xmlns:xsi="http://www.w3.org/2001/XMLSchema-instance"xmlns:content="http://www.springframework.org/schema/context"xsi:schemaLocation="http://www.springframework.org/schema/beans http://www.springframework.org/schema/beans/spring-beans.xsd http://www.springframework.org/schema/context https://www.springframework.org/schema/context/spring-context.xsd"><content:component-scan base-package="com.bit.service"></content:component-scan>
</beans>
添加 <bean> ,给出 id 和 class

【2.3】从 Spring 容器中读取到 Bean
1.先得到Spring(上下文)对象
【ApplicationContext会将spring-config.xml所有的对象初始化并存储到Spring中】
ApplicationContext context = new ClassPathXmlApplicationContext("spring-config.xml");【BeanFactory会将spring-config.xml中的对象用到哪个就初始化哪个】
BeanFactory beanFactory = new XmlBeanFactory(new ClassPathResource("spring-config.xml"));2. 从上下文对象中获取Bean和使用Bean
【ApplicationContext】
Student student = (Student)context.getBean("student");
student.sayHi();
【BeanFactory】
Student student = (Student) beanFactory.getBean("student");
student.sayHi();
再添加一个Teacher类,观察运行结果
【ApplicationContext】一次性加载,读取非常快,但费内存

【BeanFactory】调用时才会加载,读取慢,但节省内存

【经典面试题ApplicationContext与BeanFactory的区别】
对于获取Bean的三种方式
第一种 通过 id (名称) 获取【需要暴力强转】
Student student = (Student)context.getBean("student");第二种 通过类型进行获取【不需要强转 但若存在多个会报错】
Student student1 = context.getBean(Student.class)第三种 通过 id(名称)和类型进行获取【不需要强转】 推荐
Student student1 = context.getBean("student",Student.class);
