前端项目搭建 - vite+vue3.0+ant
vite比起webpack速度更快
vite搭建项目
https://cn.vitejs.dev/

步骤:
1.打开cmd
2.找到项目应该建的文件夹
比如直接建到桌面上
cd desktop

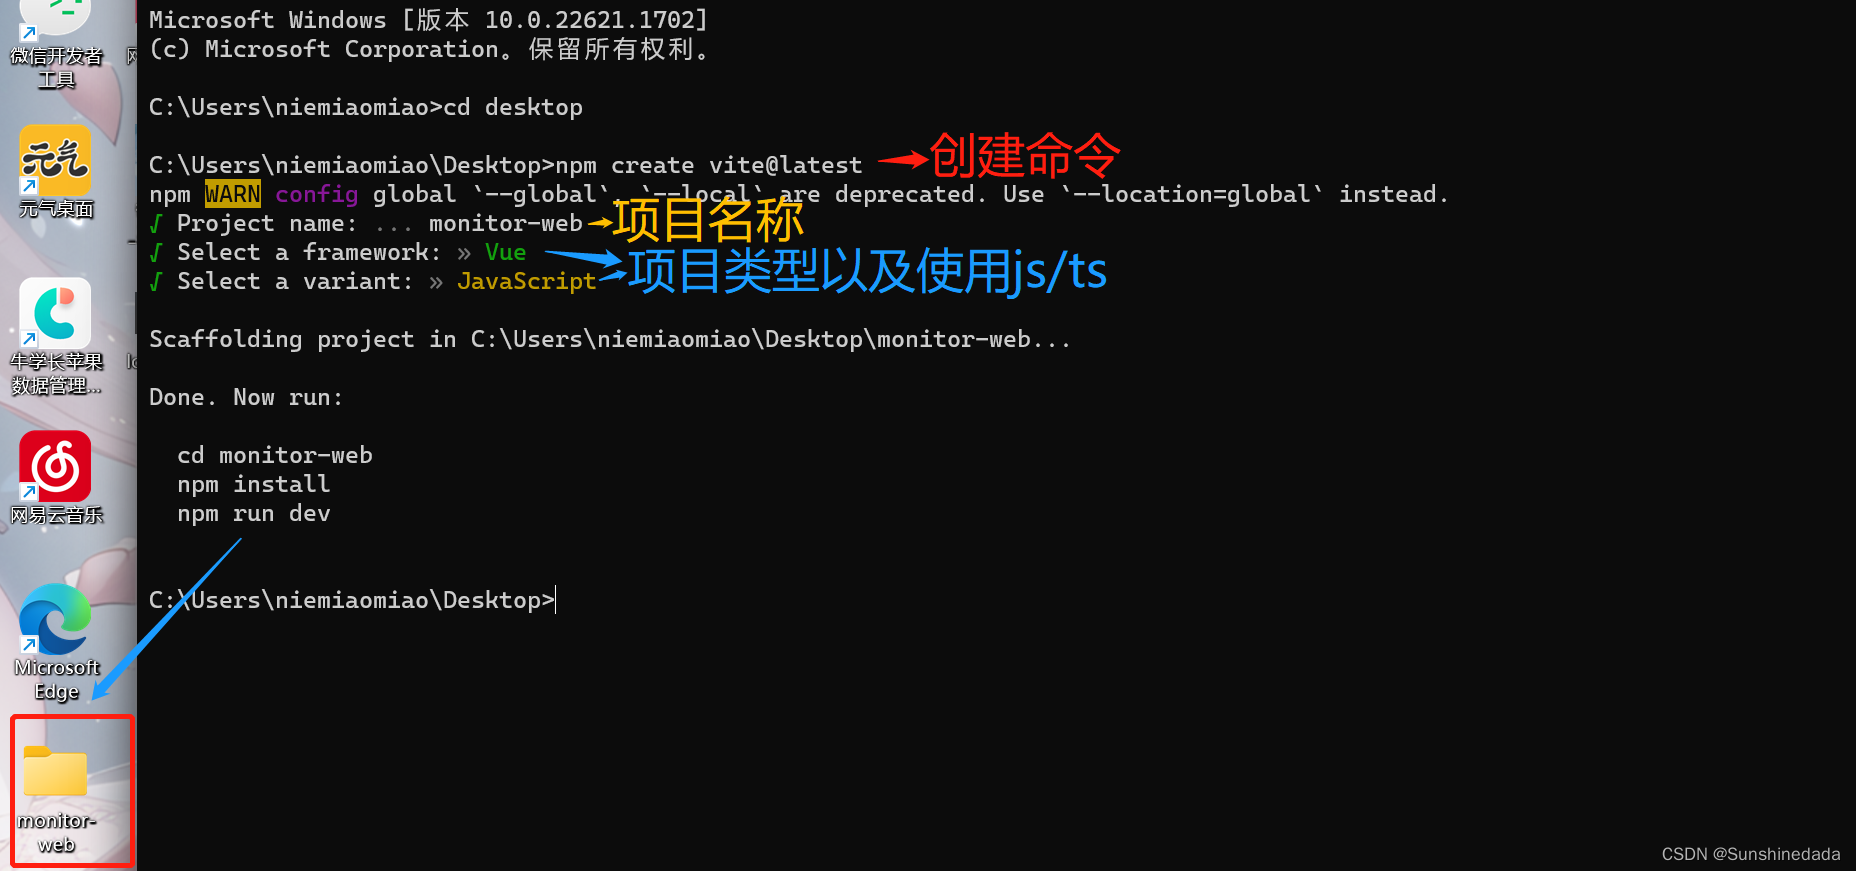
3.创建项目
使用创建项目命令,然后根据提示填写项目名称,以及要用的技术,vue和ts,这时候就会在桌面上看到这个项目
npm create vite@latest
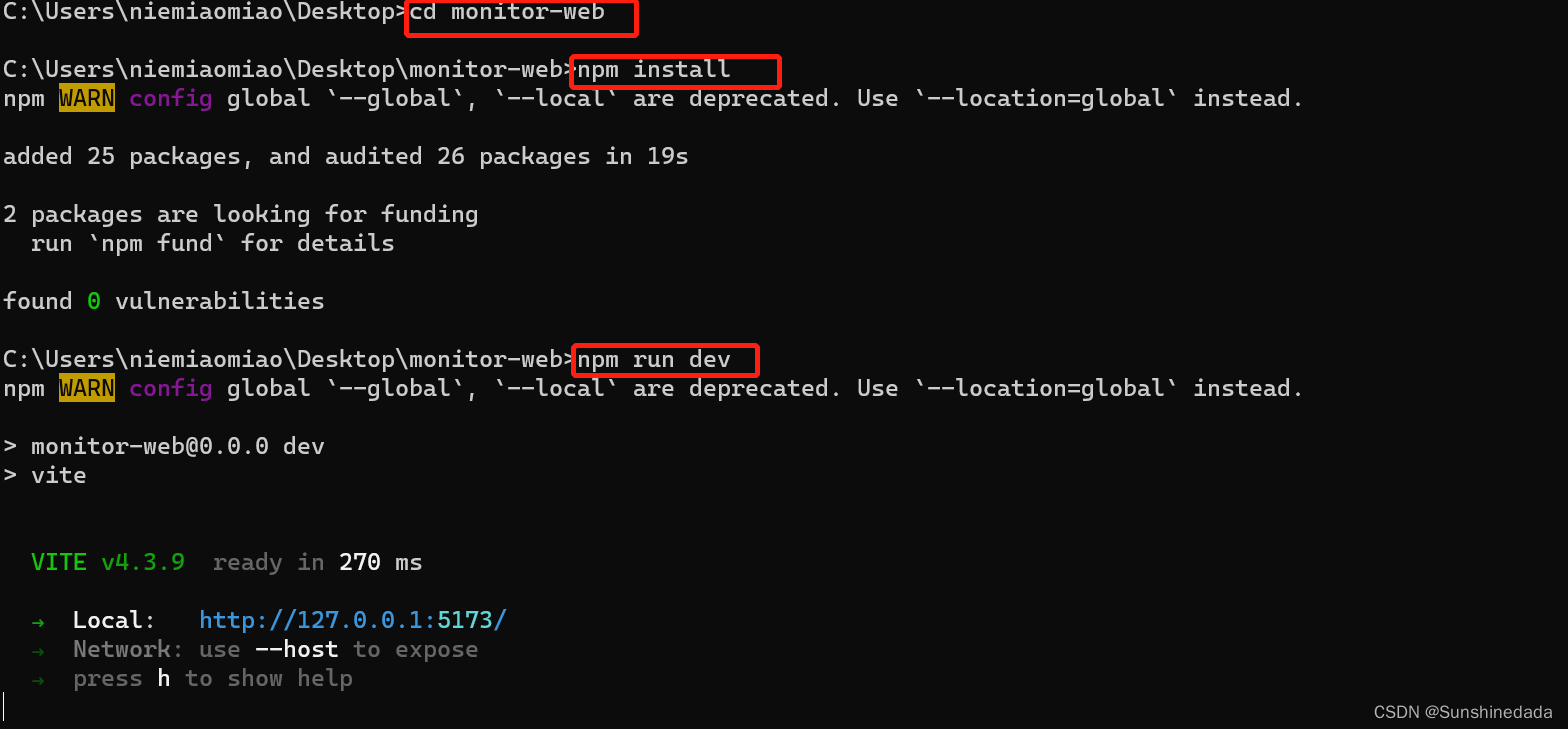
4.然后找到新建的项目,下载依赖,启动项目
npm install  //下载依赖
npm run dev  //启动项目
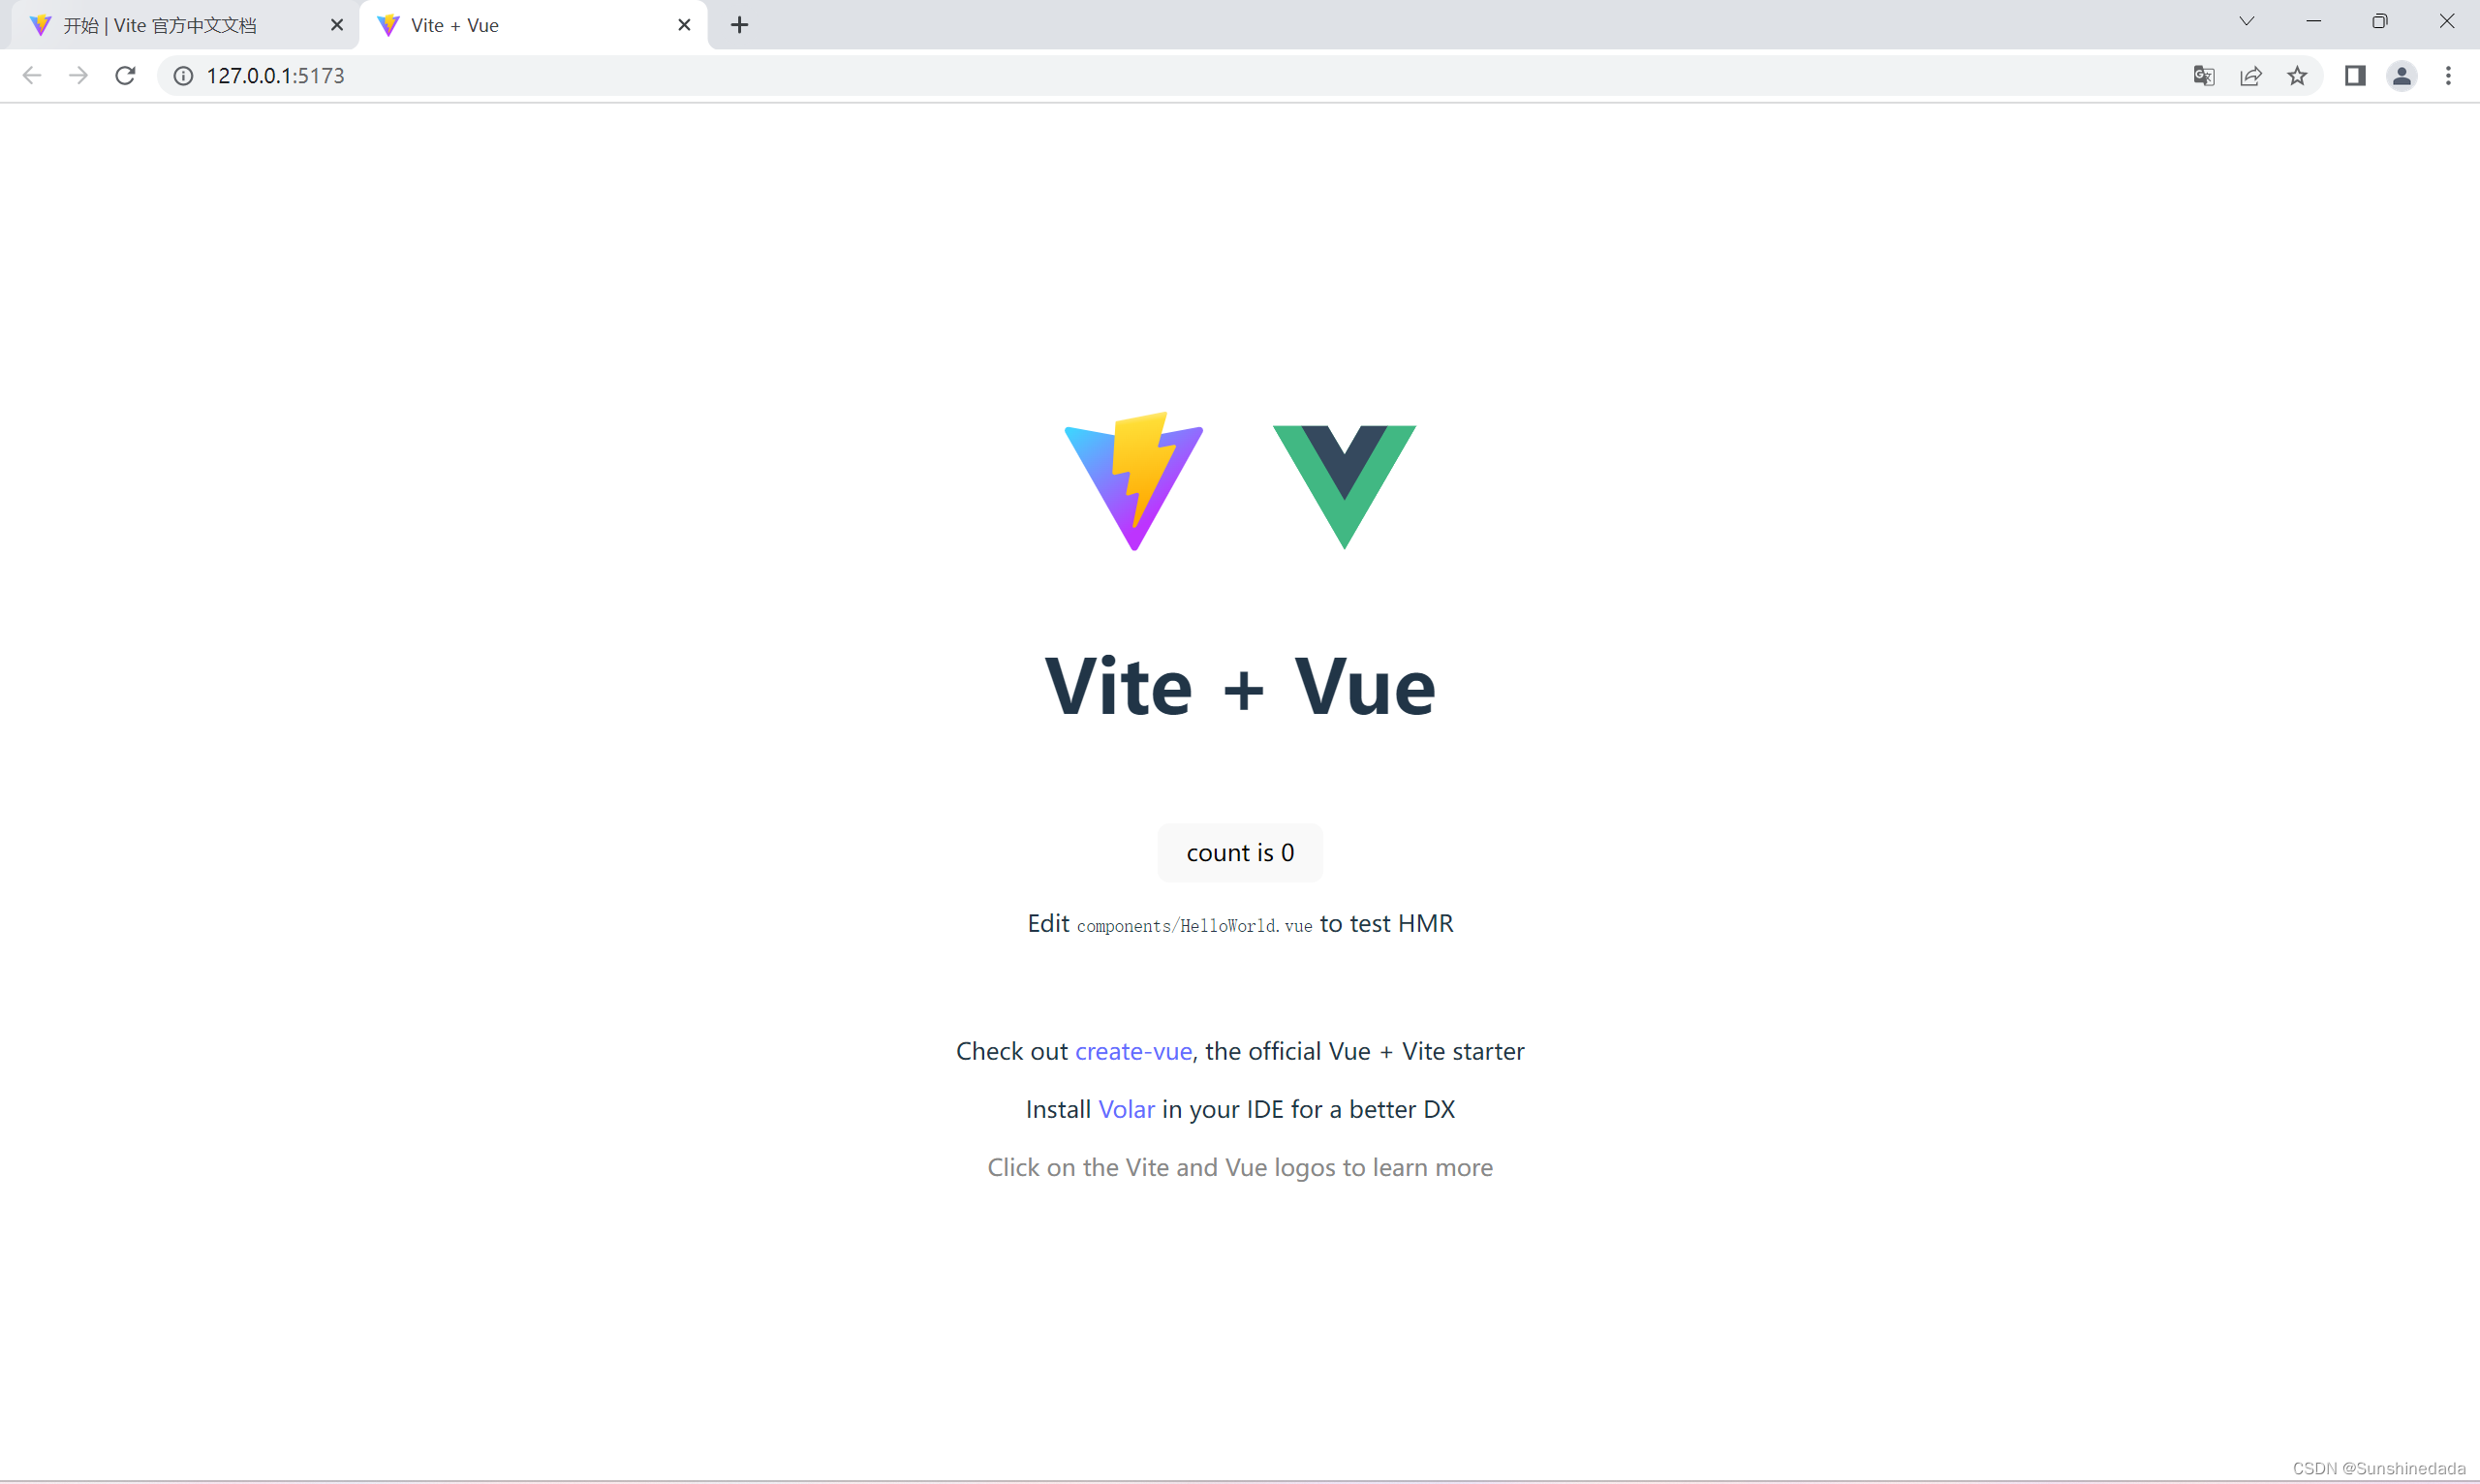
运行效果:
之后我们可以使用打包命令,可以看到会生成一个dist包。此时项目搭建完成。
npm run build
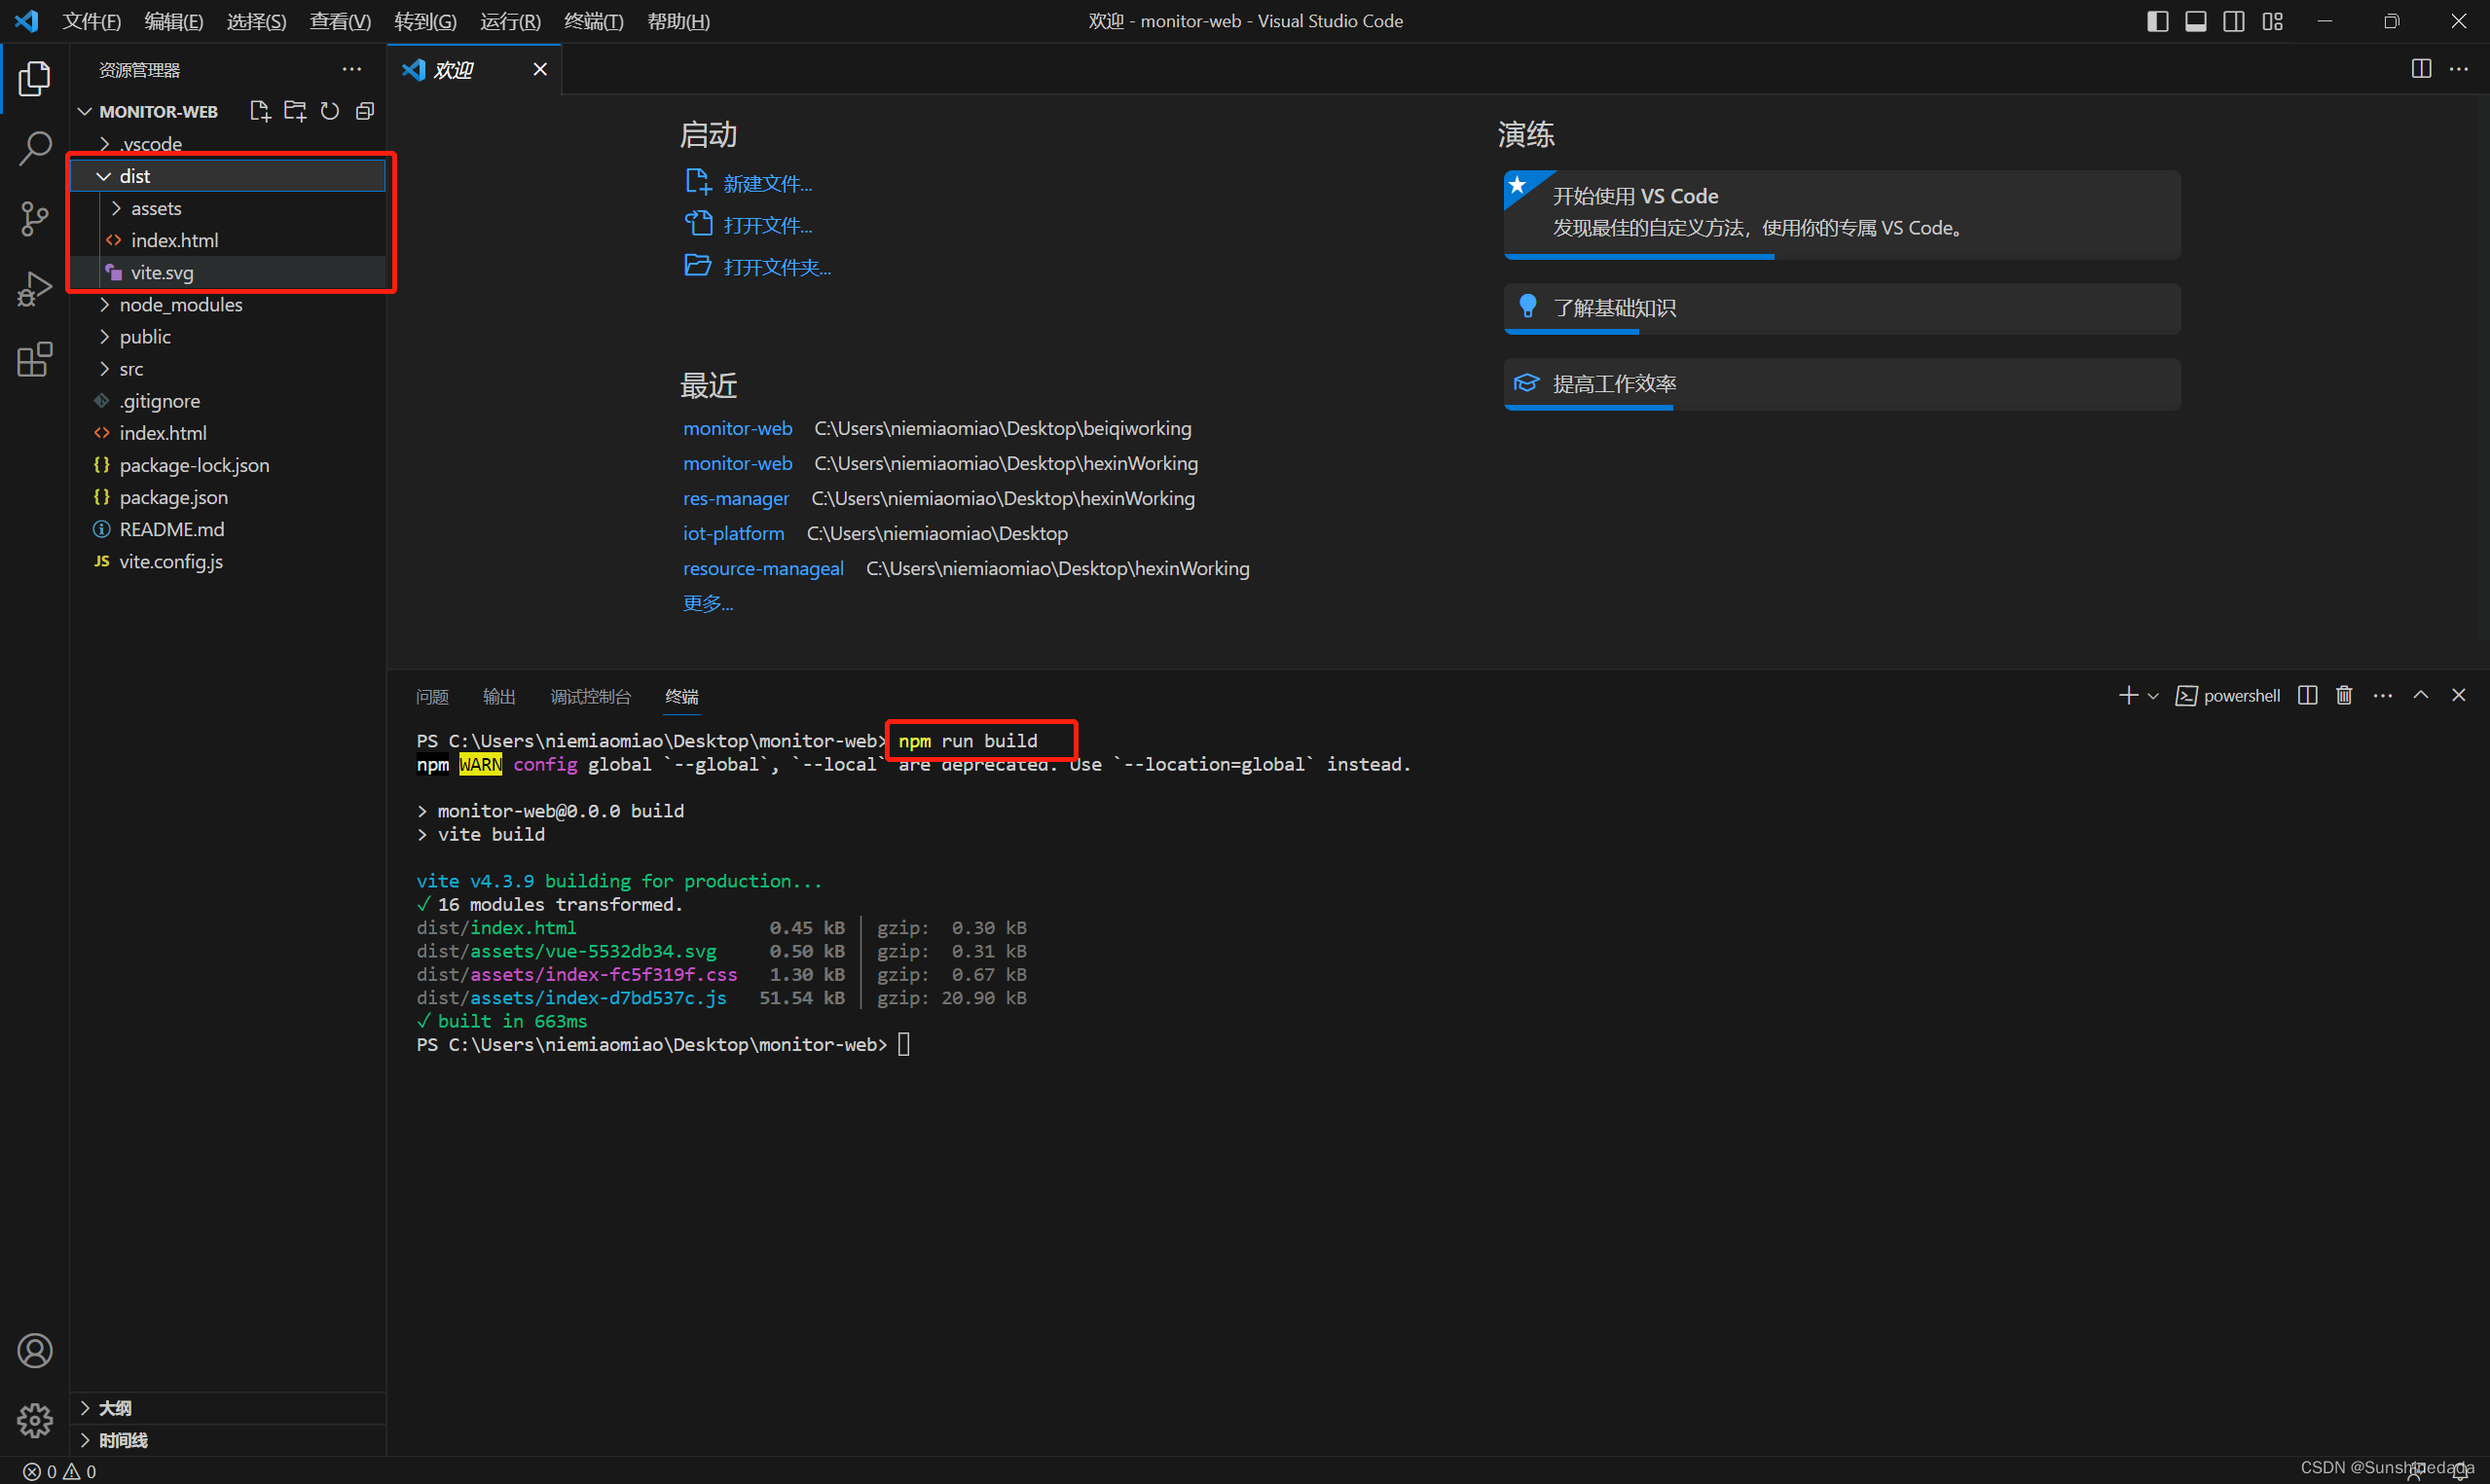
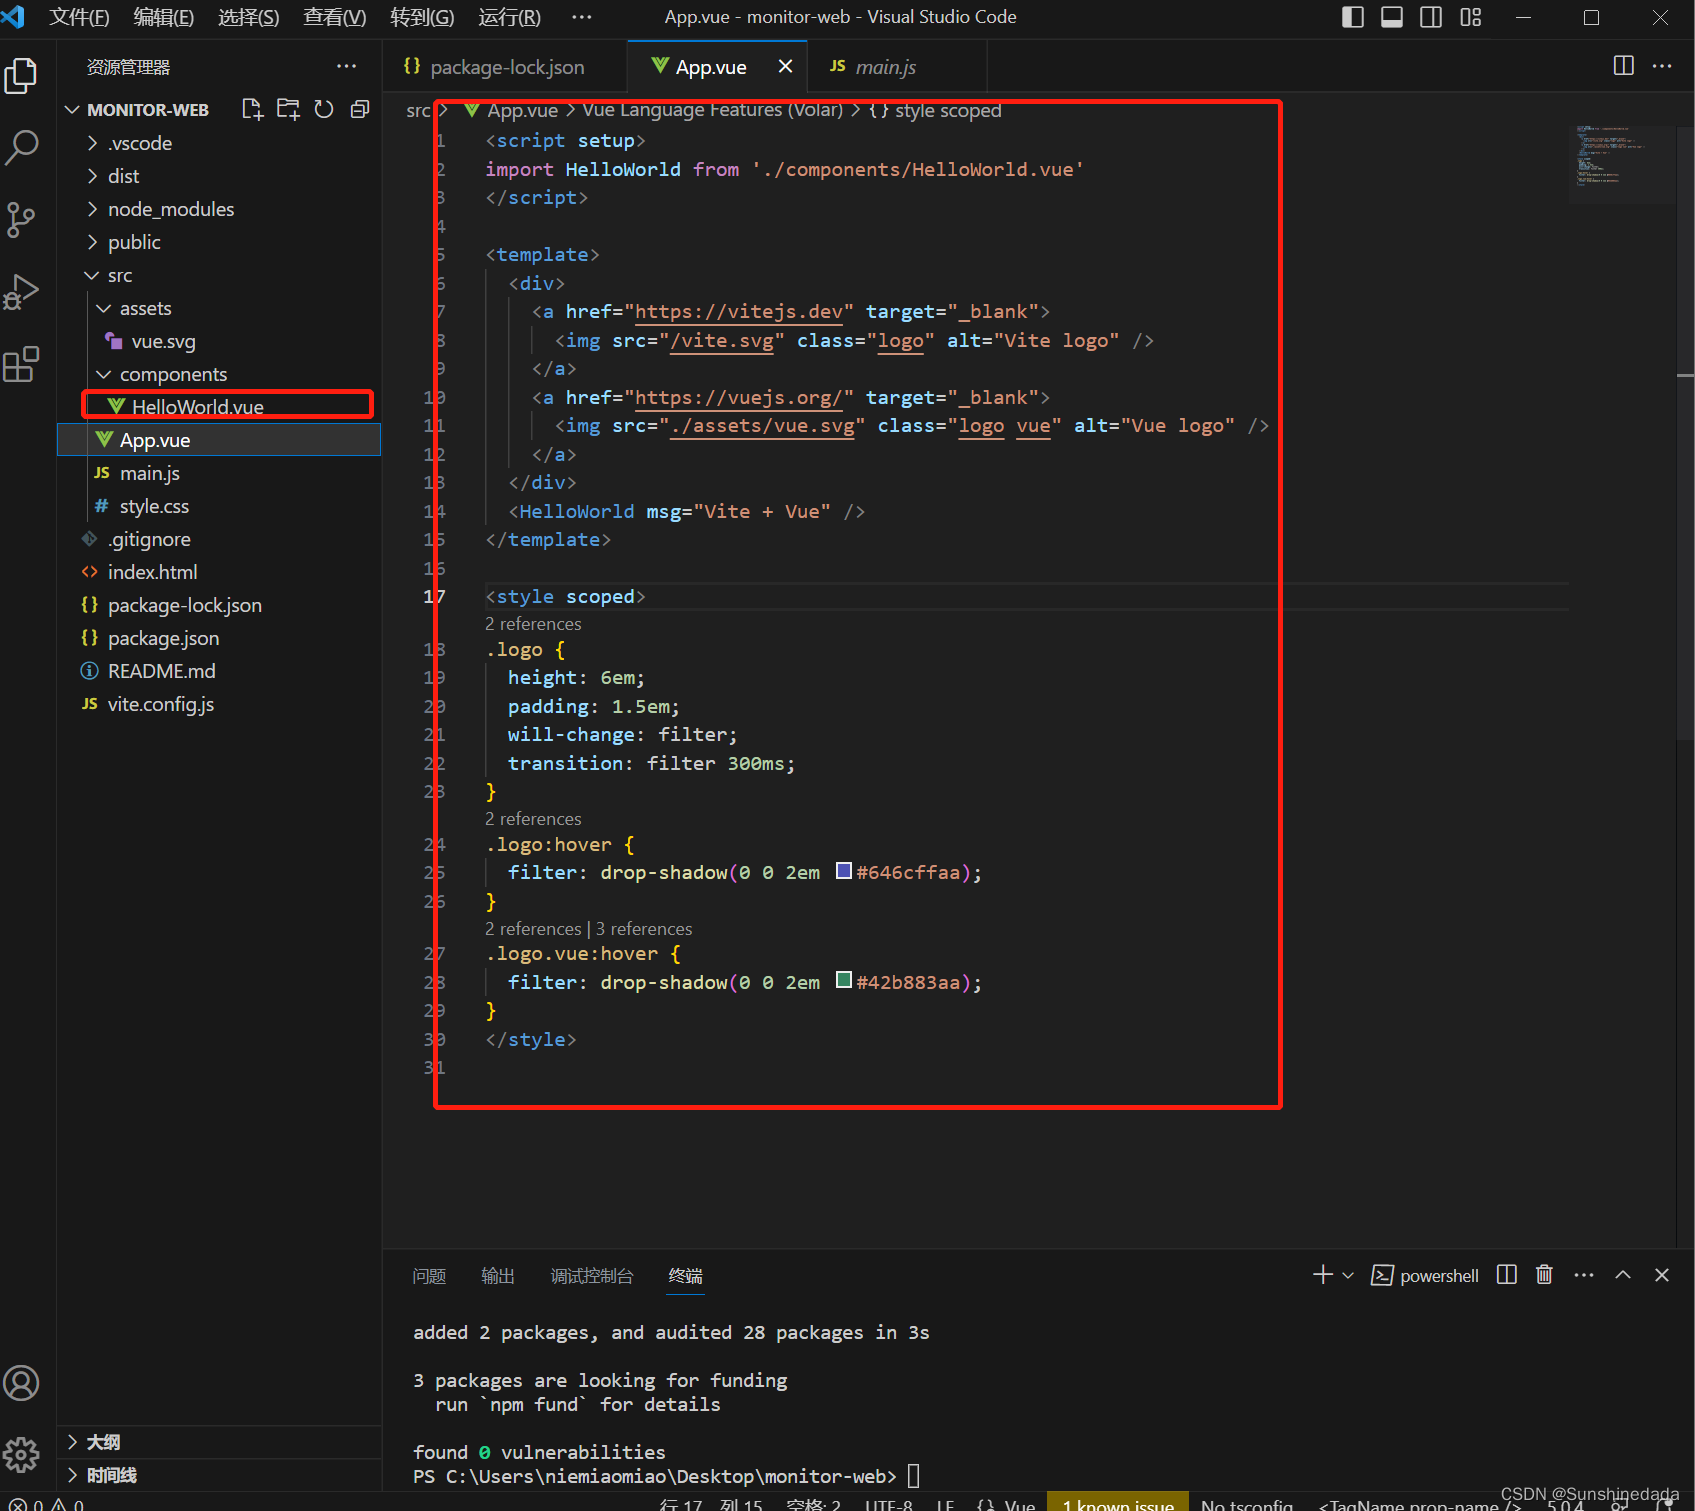
可以把像components里面的文件以及App.vue里面没有用的东西给删掉
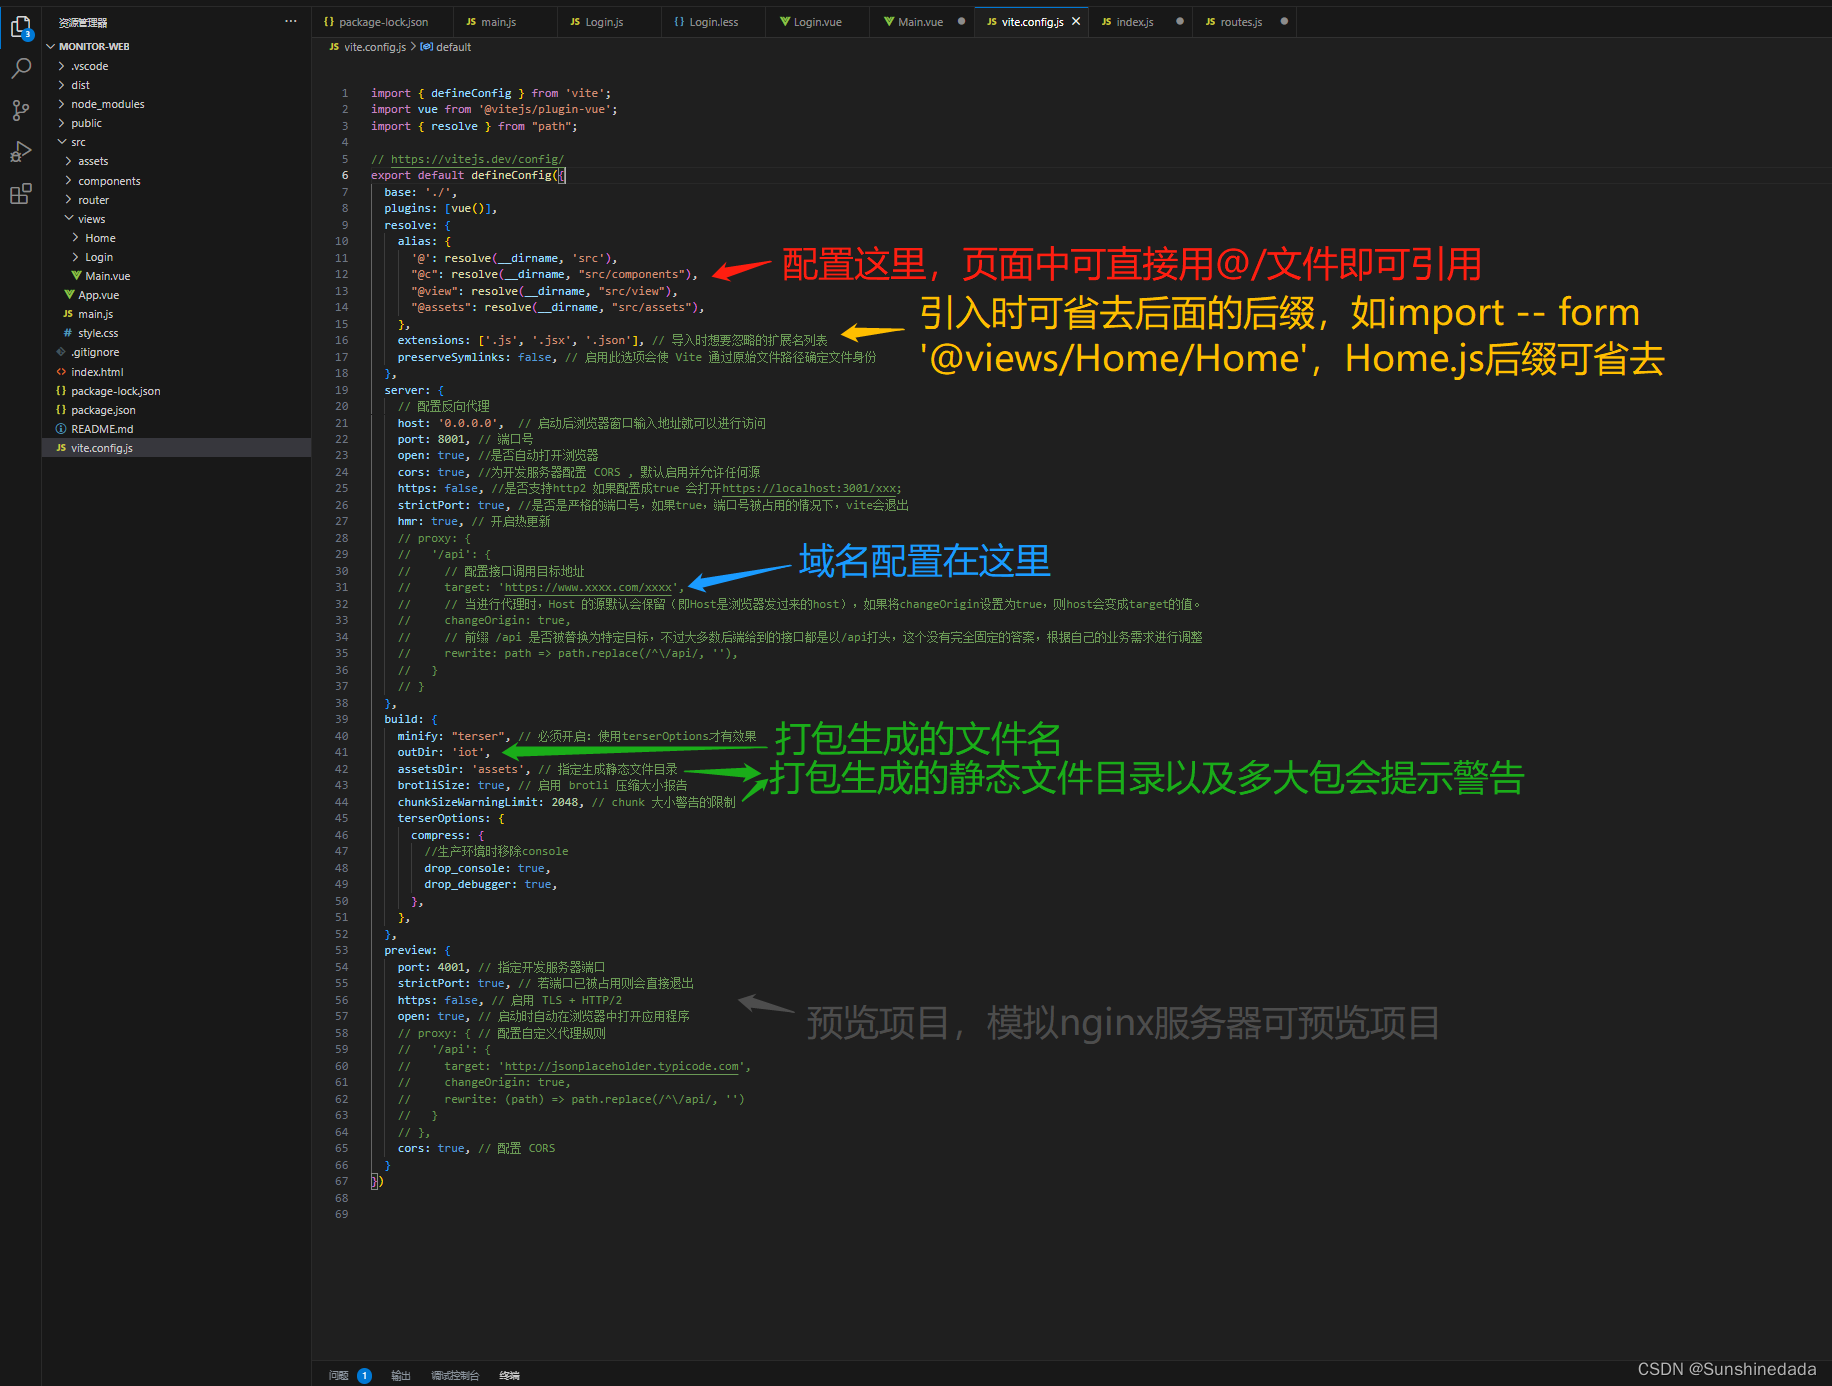
配置文件-vite.config.js
import { defineConfig } from 'vite';
import vue from '@vitejs/plugin-vue';
import { resolve } from "path";// https://vitejs.dev/config/
export default defineConfig({base: './', plugins: [vue()],resolve: {alias: {'@': resolve(__dirname, 'src'),"@c": resolve(__dirname, "src/components"),"@view": resolve(__dirname, "src/view"),"@assets": resolve(__dirname, "src/assets"),},extensions: ['.js', '.jsx', '.json'], // 导入时想要忽略的扩展名列表preserveSymlinks: false, // 启用此选项会使 Vite 通过原始文件路径确定文件身份},server: {// 配置反向代理host: '0.0.0.0',  // 启动后浏览器窗口输入地址就可以进行访问port: 8001, // 端口号open: true, //是否自动打开浏览器cors: true, //为开发服务器配置 CORS , 默认启用并允许任何源https: false, //是否支持http2 如果配置成true 会打开https://localhost:3001/xxx;strictPort: true, //是否是严格的端口号,如果true,端口号被占用的情况下,vite会退出hmr: true, // 开启热更新// proxy: {//   '/api': {//     // 配置接口调用目标地址//     target: 'https://www.xxxx.com/xxxx',//     // 当进行代理时,Host 的源默认会保留(即Host是浏览器发过来的host),如果将changeOrigin设置为true,则host会变成target的值。//     changeOrigin: true,//     // 前缀 /api 是否被替换为特定目标,不过大多数后端给到的接口都是以/api打头,这个没有完全固定的答案,根据自己的业务需求进行调整//     rewrite: path => path.replace(/^\/api/, ''),//   }// }},build: {minify: "terser", // 必须开启:使用terserOptions才有效果outDir: 'iot',assetsDir: 'assets', // 指定生成静态文件目录brotliSize: true, // 启用 brotli 压缩大小报告chunkSizeWarningLimit: 2048, // chunk 大小警告的限制terserOptions: {compress: {//生产环境时移除consoledrop_console: true,drop_debugger: true,},},},preview: {port: 4001, // 指定开发服务器端口strictPort: true, // 若端口已被占用则会直接退出https: false, // 启用 TLS + HTTP/2open: true, // 启动时自动在浏览器中打开应用程序// proxy: { // 配置自定义代理规则//   '/api': {//     target: 'http://jsonplaceholder.typicode.com',//     changeOrigin: true,//     rewrite: (path) => path.replace(/^\/api/, '')//   }// },cors: true, // 配置 CORS}
})
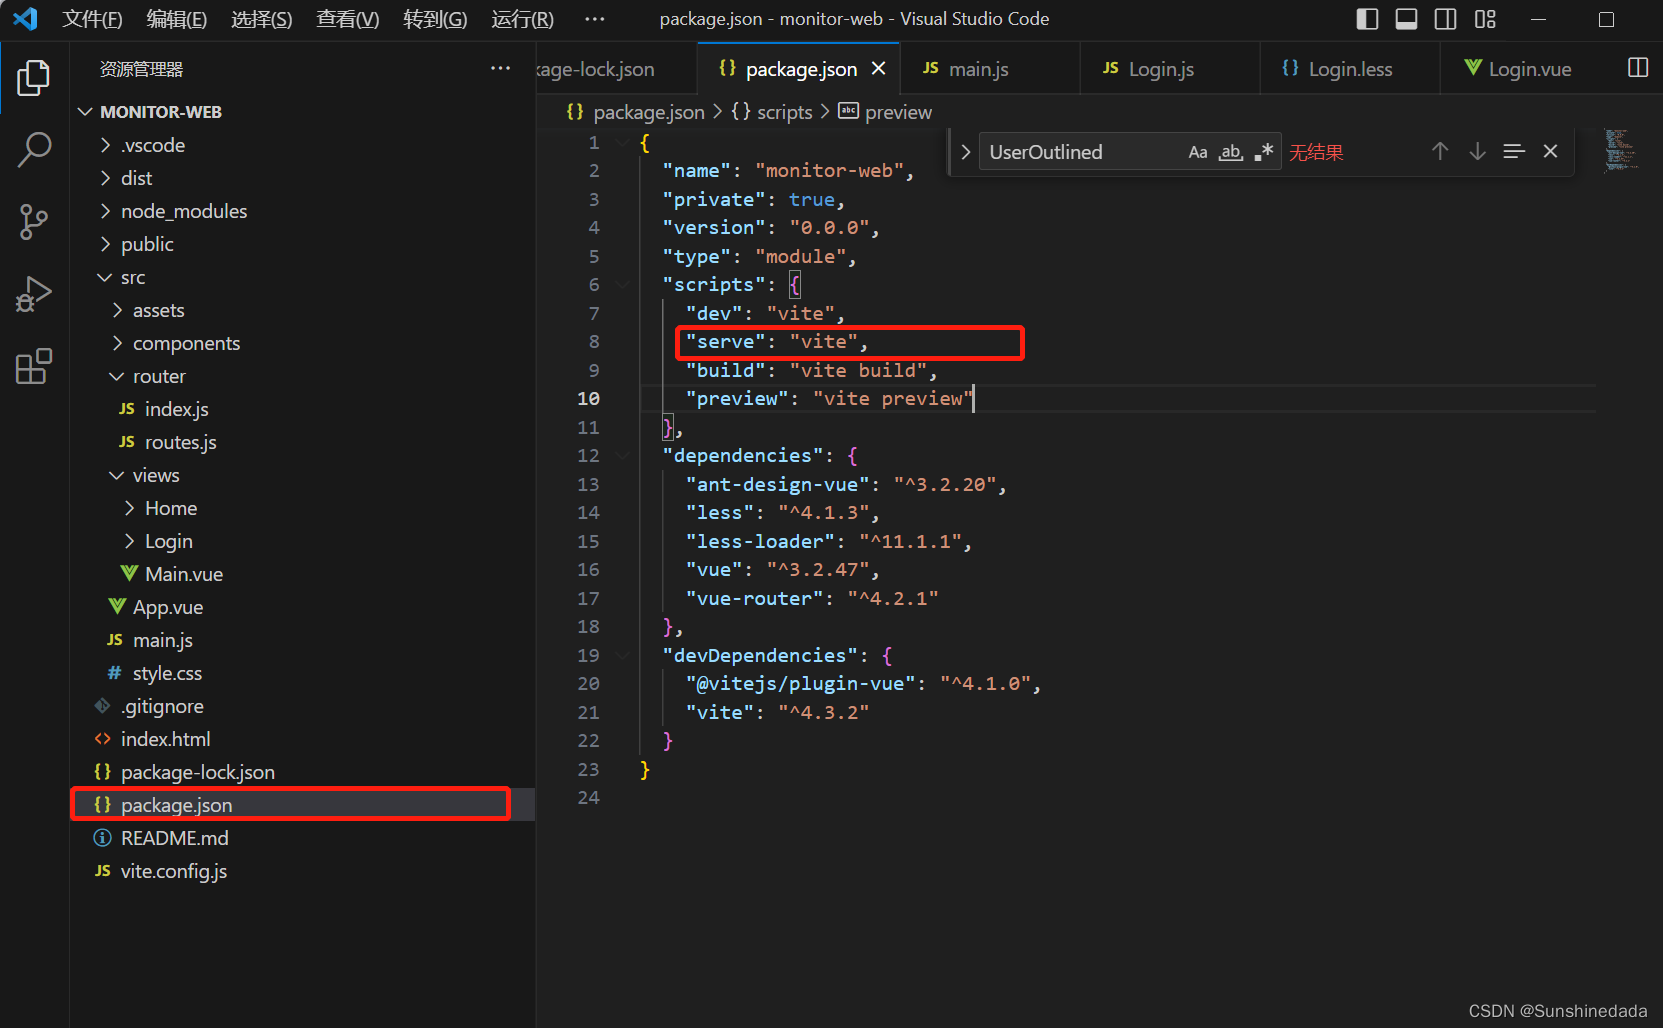
在package.json文件的scripts加上 “serve”: “vite”,启动时候可以用npm run serve启动。
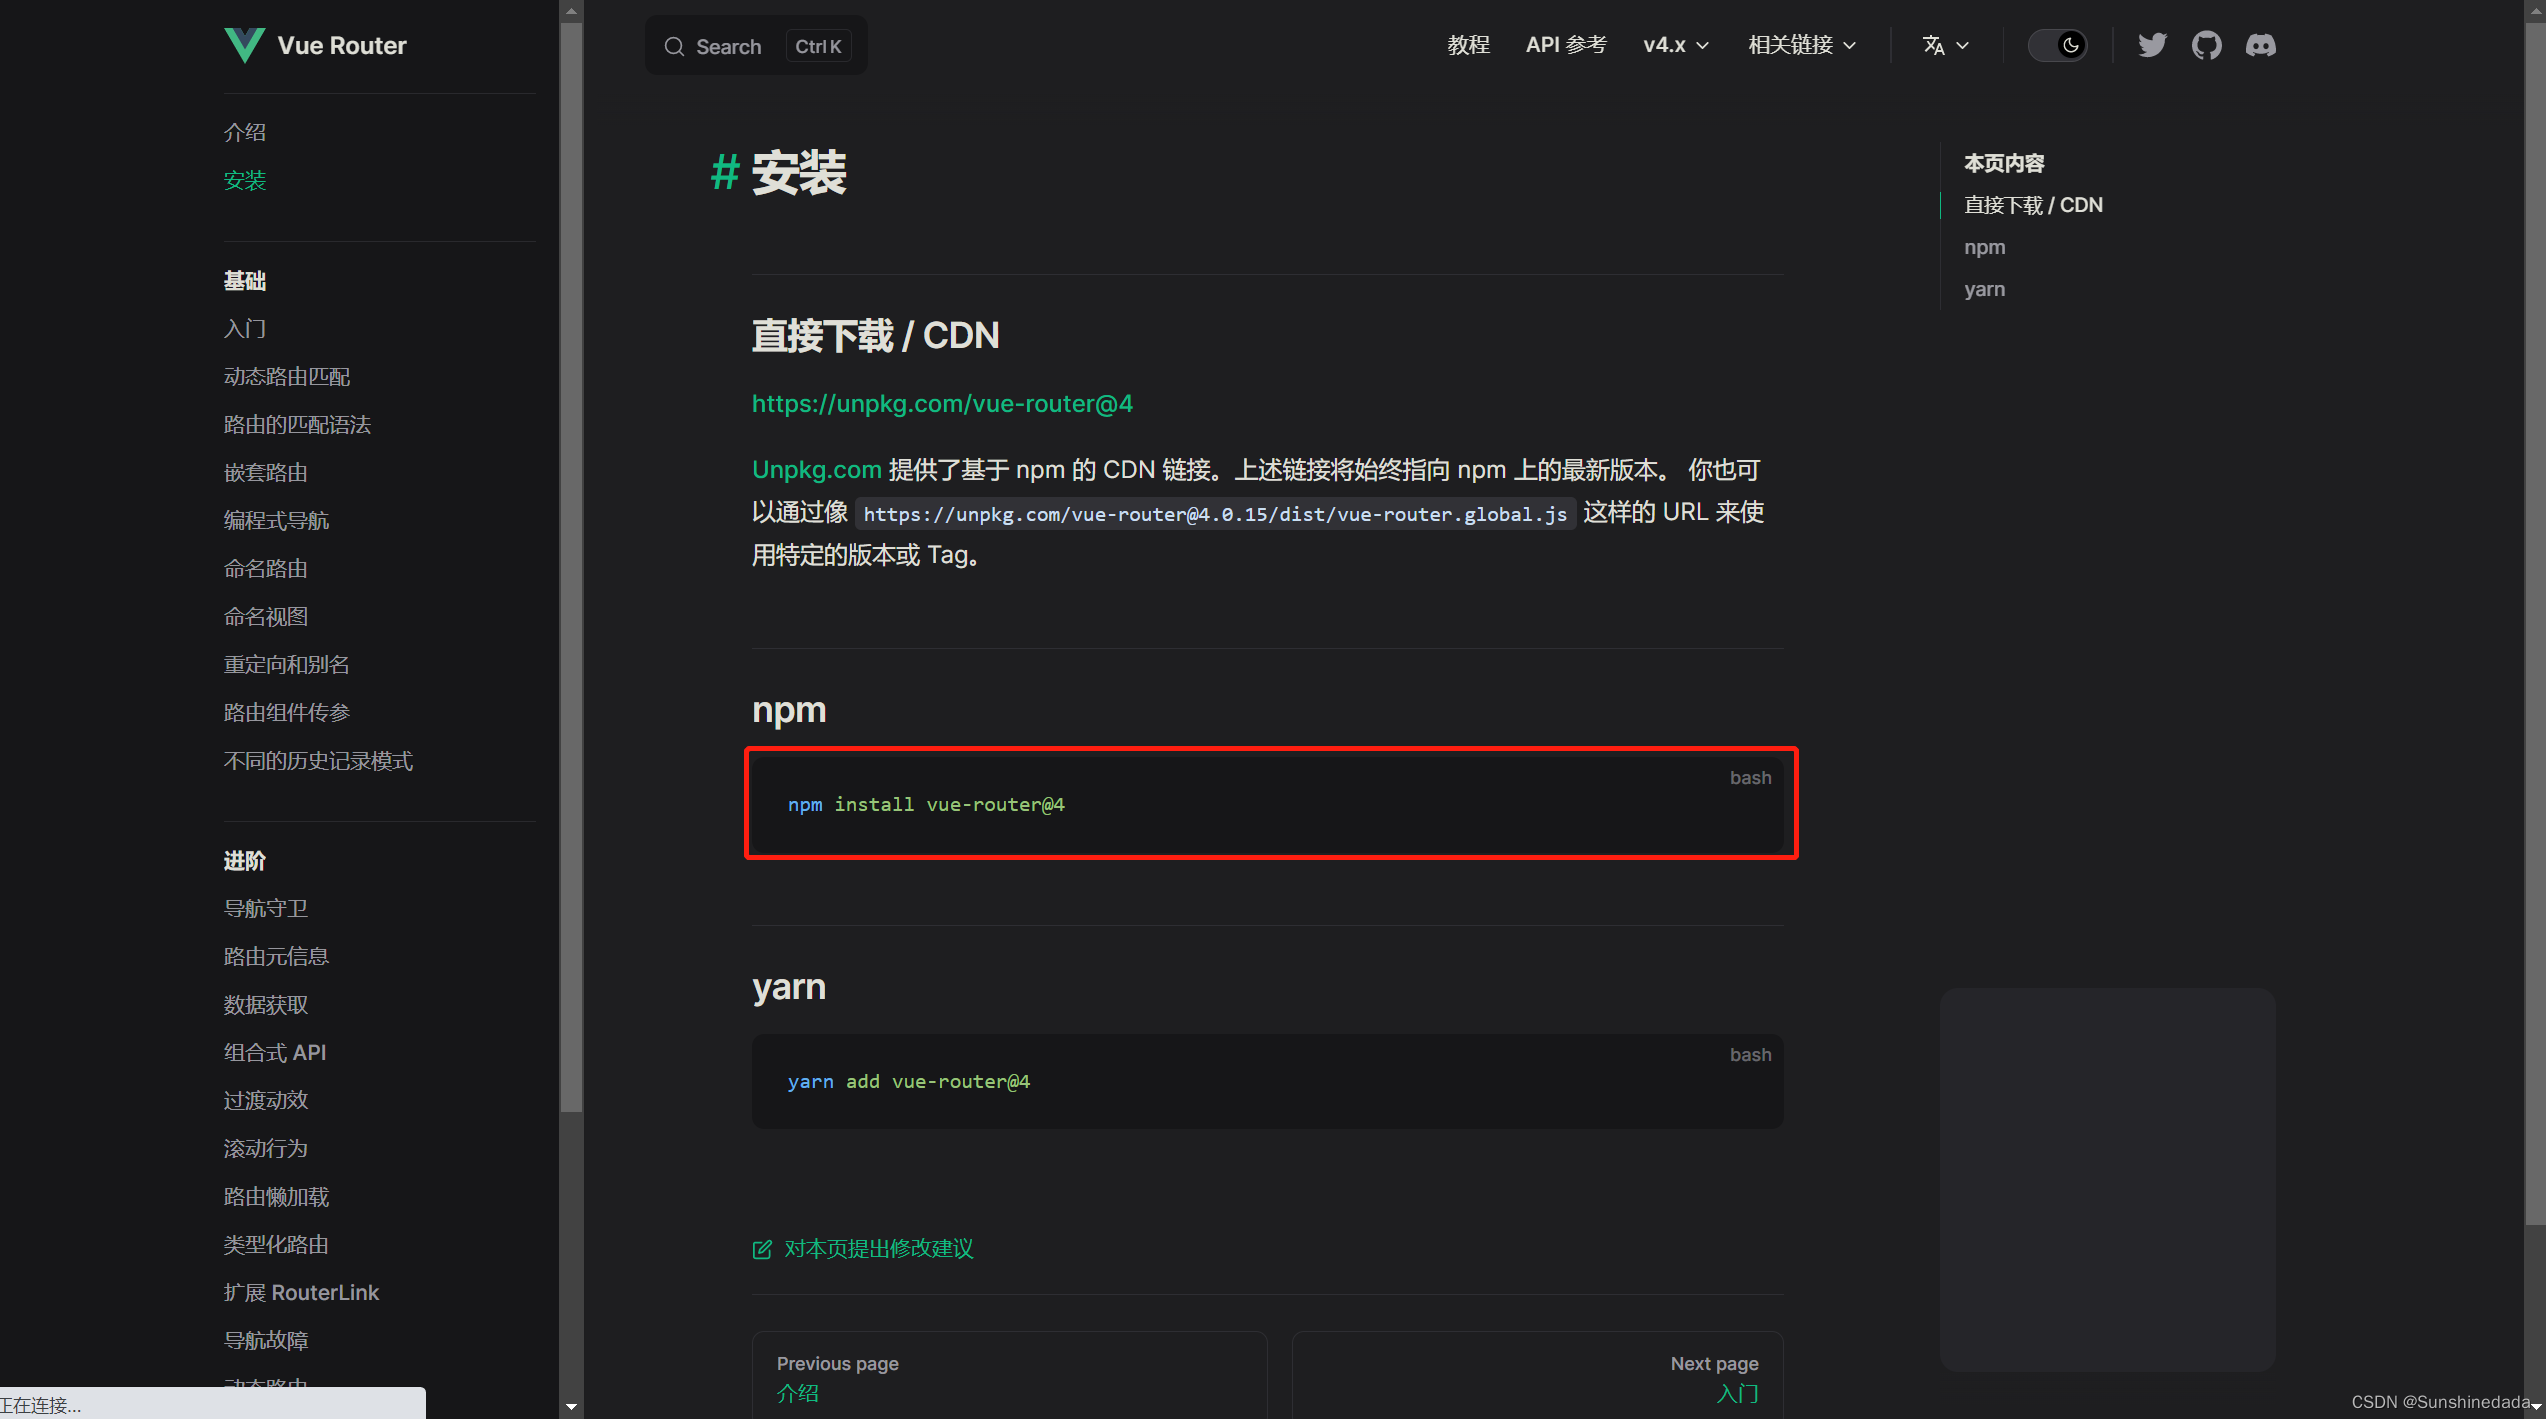
配置路由
vue-router
https://router.vuejs.org/
1.安装
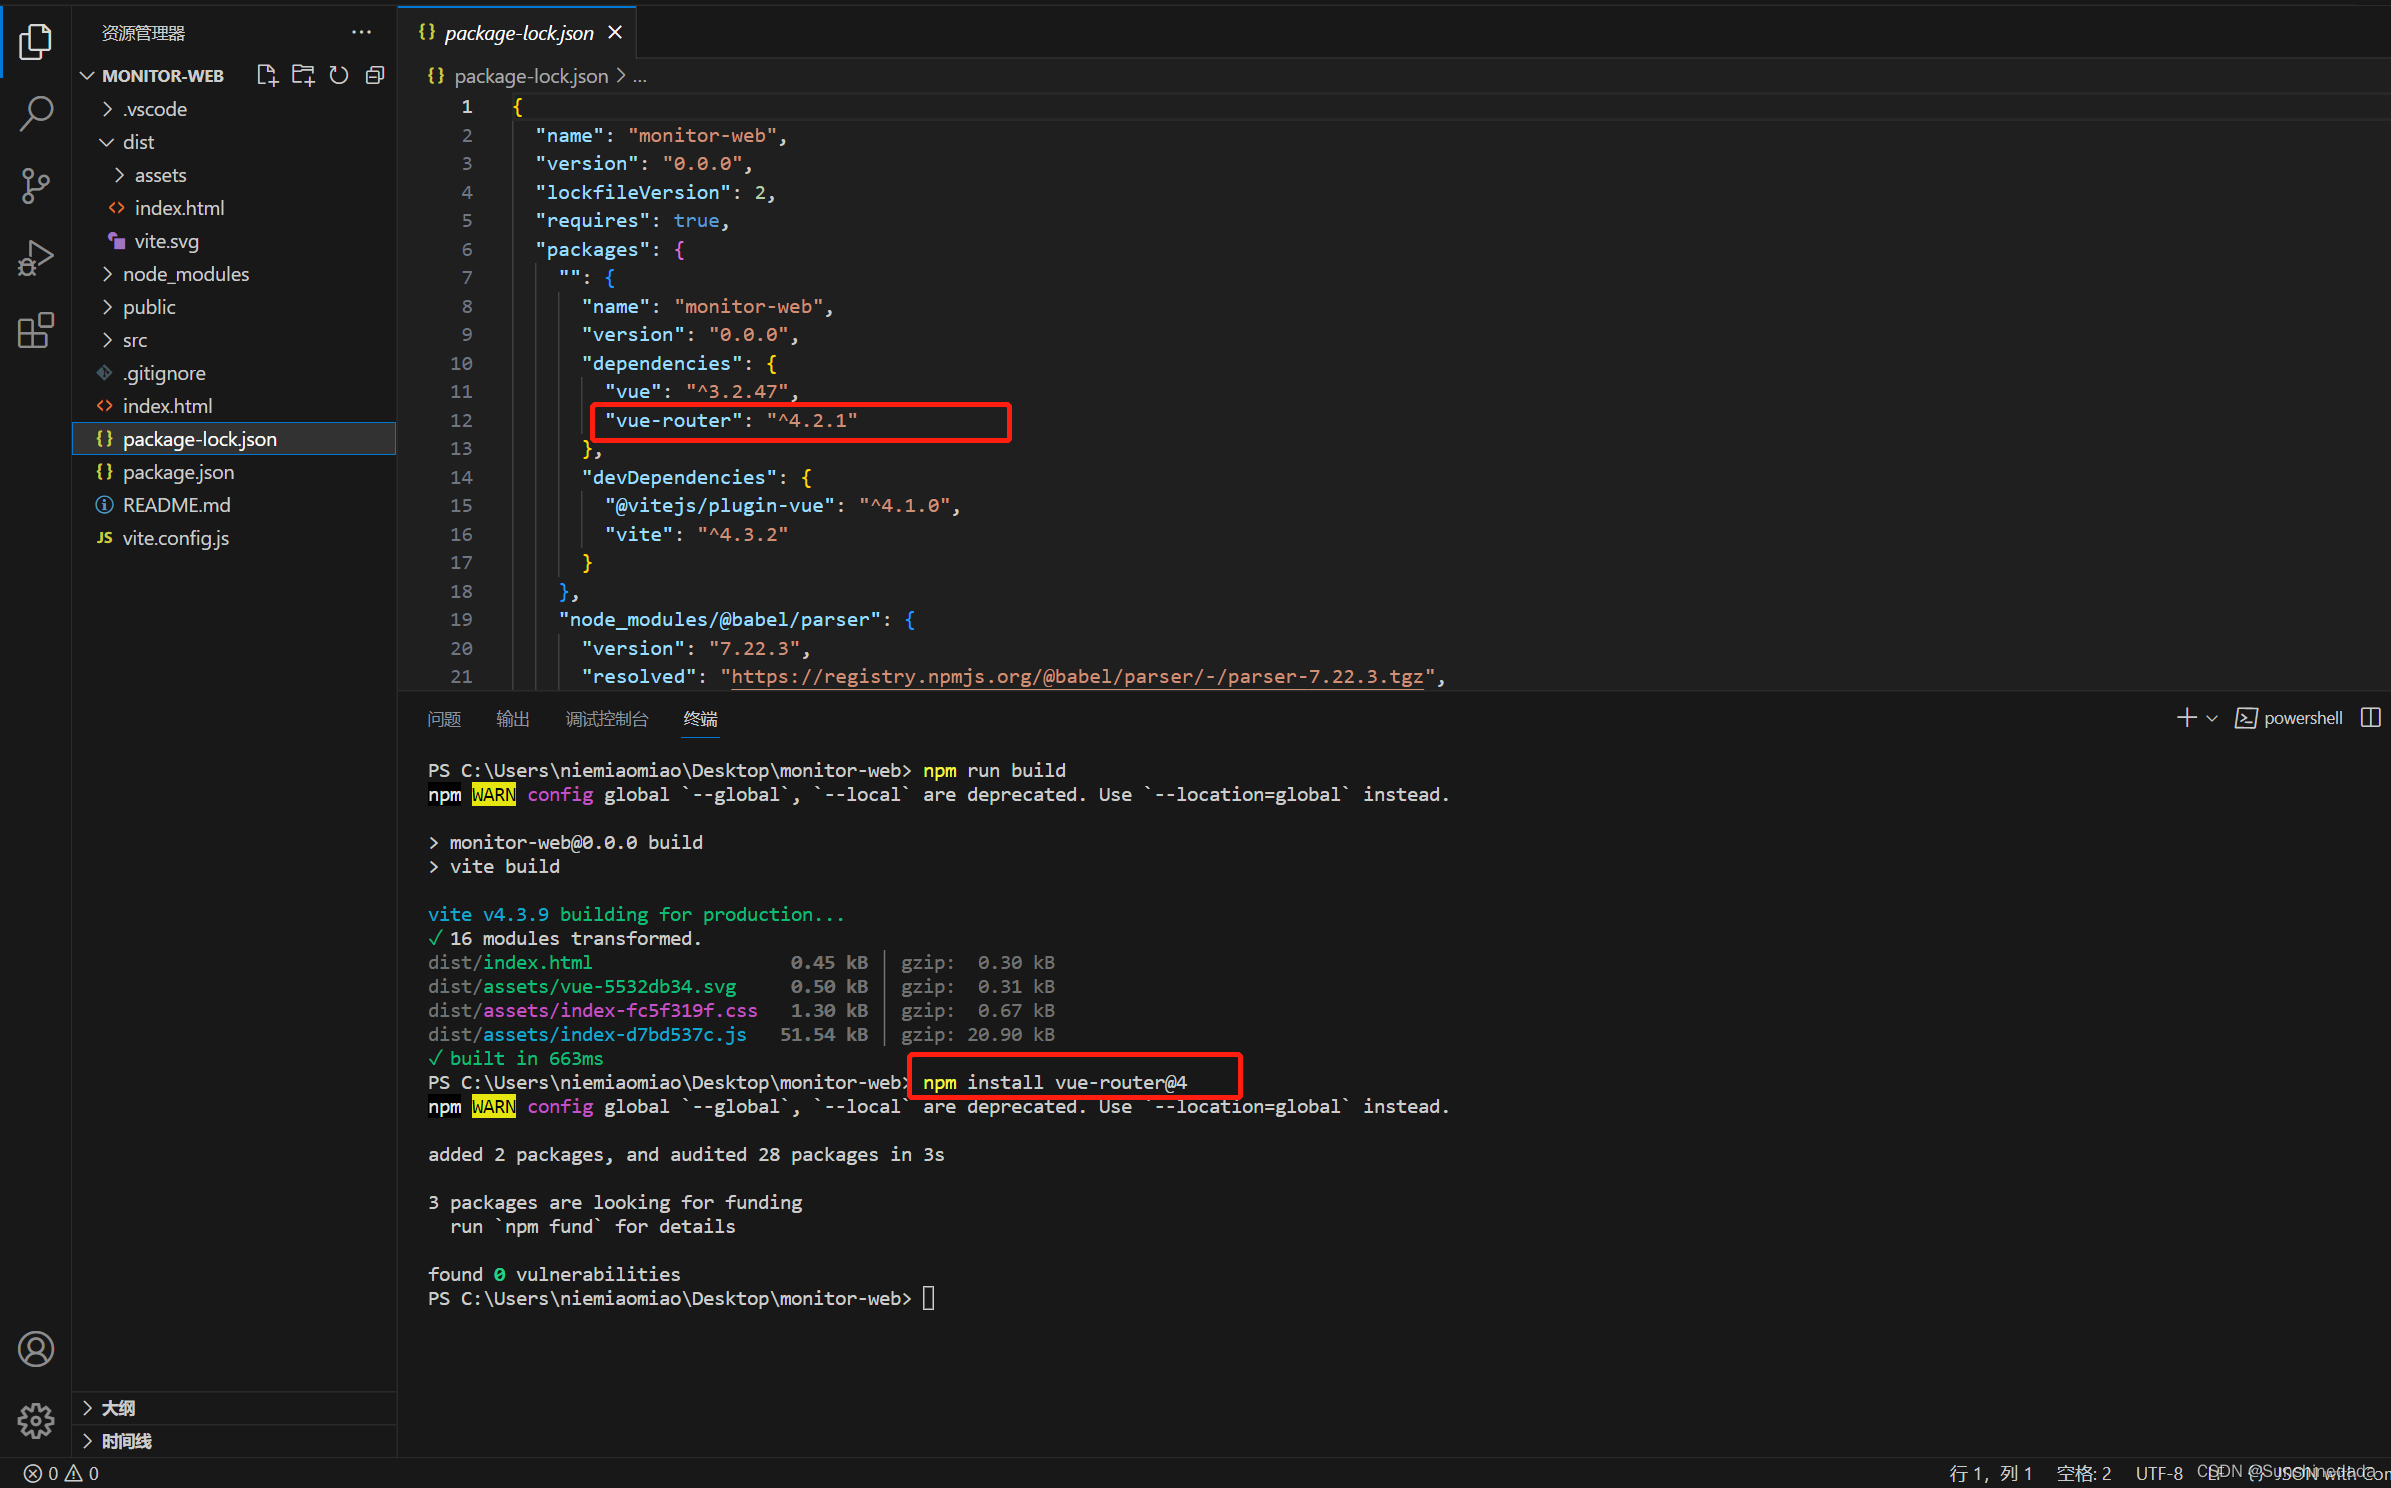
npm install vue-router@4
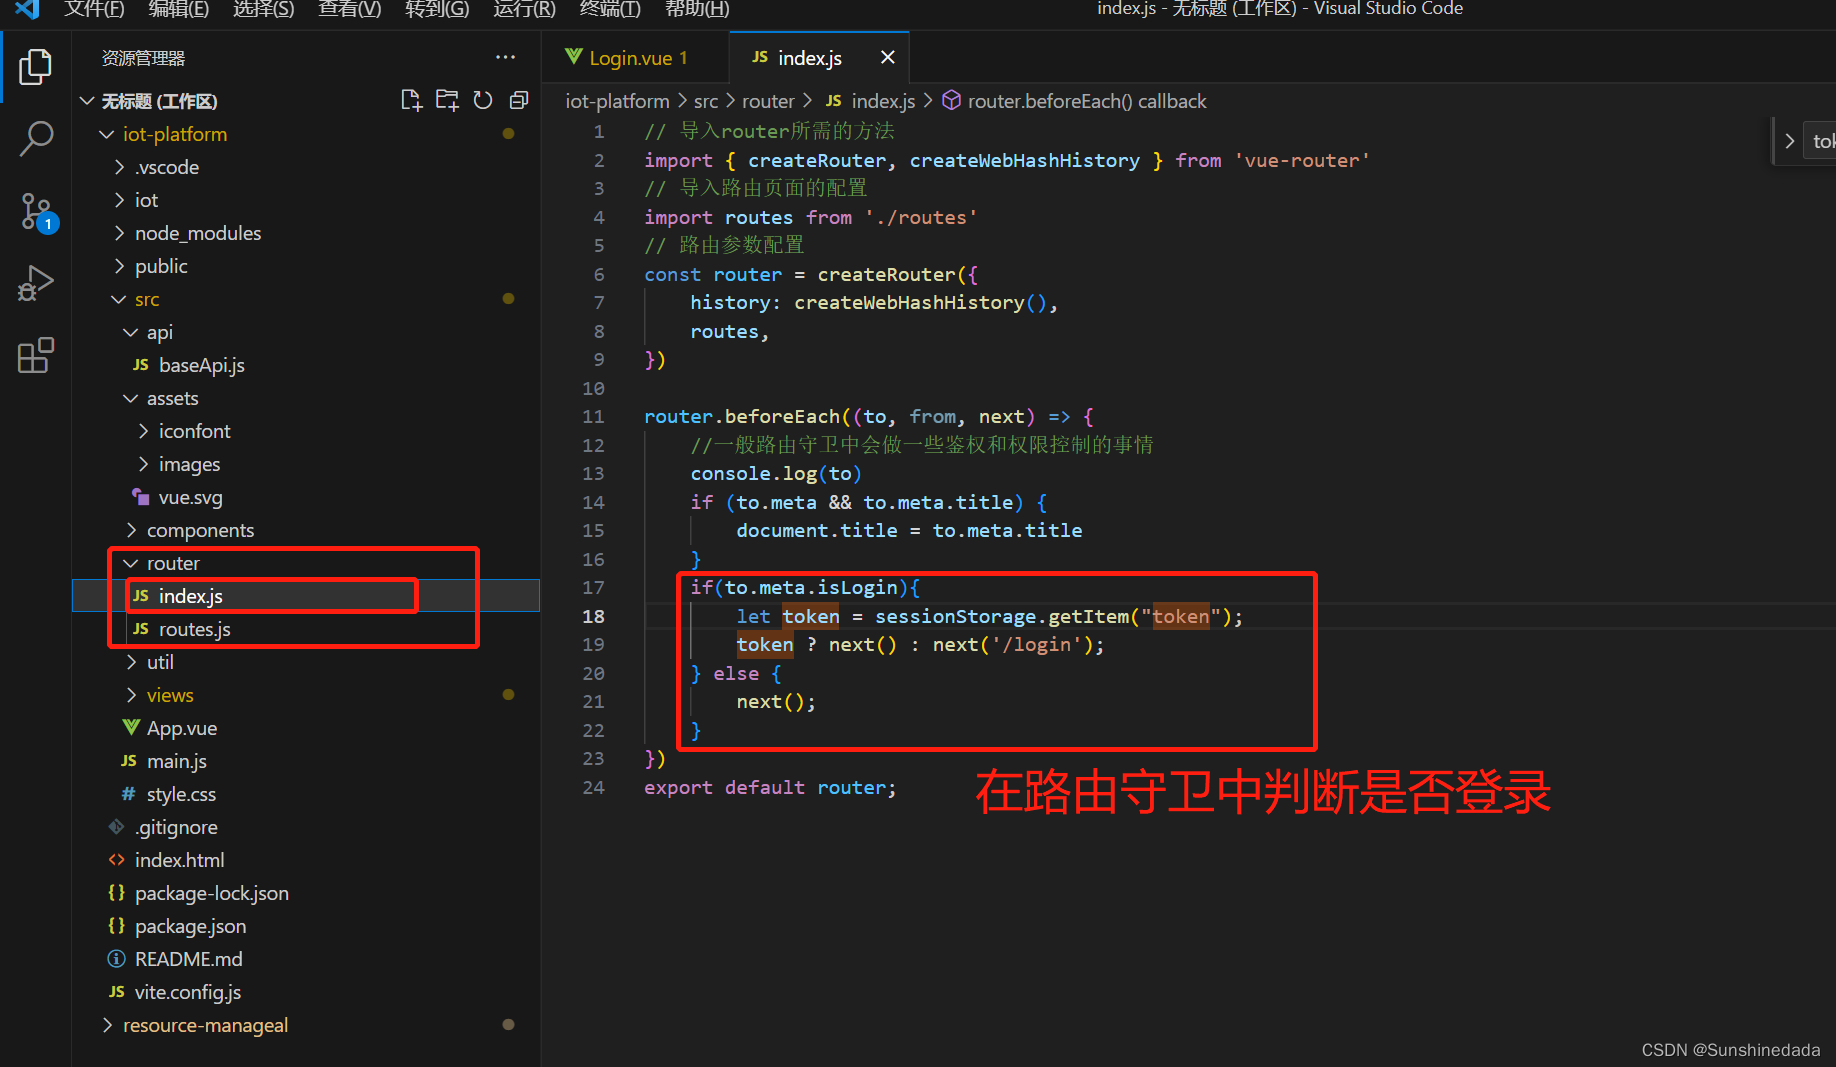
2.在src文件夹下面新建一个router文件夹,文件夹下面有index.js文件用于引入router所需的方法以及页面路径配置引入,还有参数配置以及路由守卫,判断是否有token是否登录,未登录跳转到登录页。还有routes.js文件专门用来配置页面路径的。
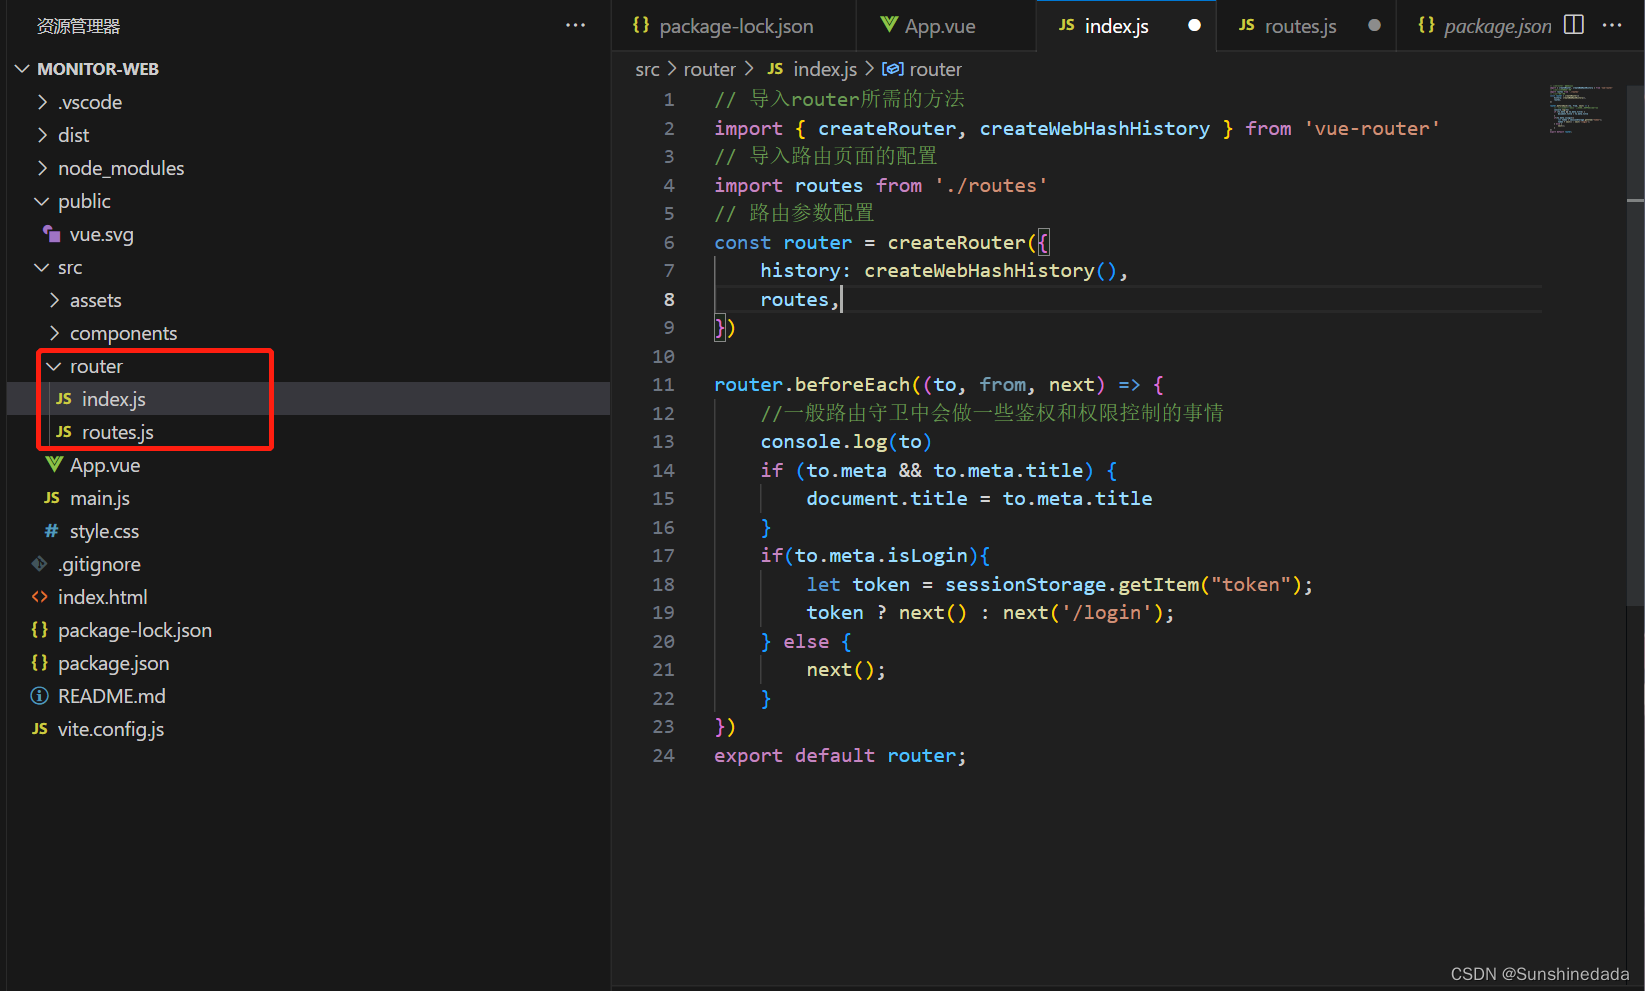
// 导入router所需的方法
import { createRouter, createWebHashHistory } from 'vue-router'
// 导入路由页面的配置
import routes from './routes'
// 路由参数配置
const router = createRouter({history: createWebHashHistory(),routes,
})router.beforeEach((to, from, next) => {//一般路由守卫中会做一些鉴权和权限控制的事情console.log(to)if (to.meta && to.meta.title) {document.title = to.meta.title}if(to.meta.isLogin){let token = sessionStorage.getItem("token");token ? next() : next('/login');} else {next();}
})
export default router;
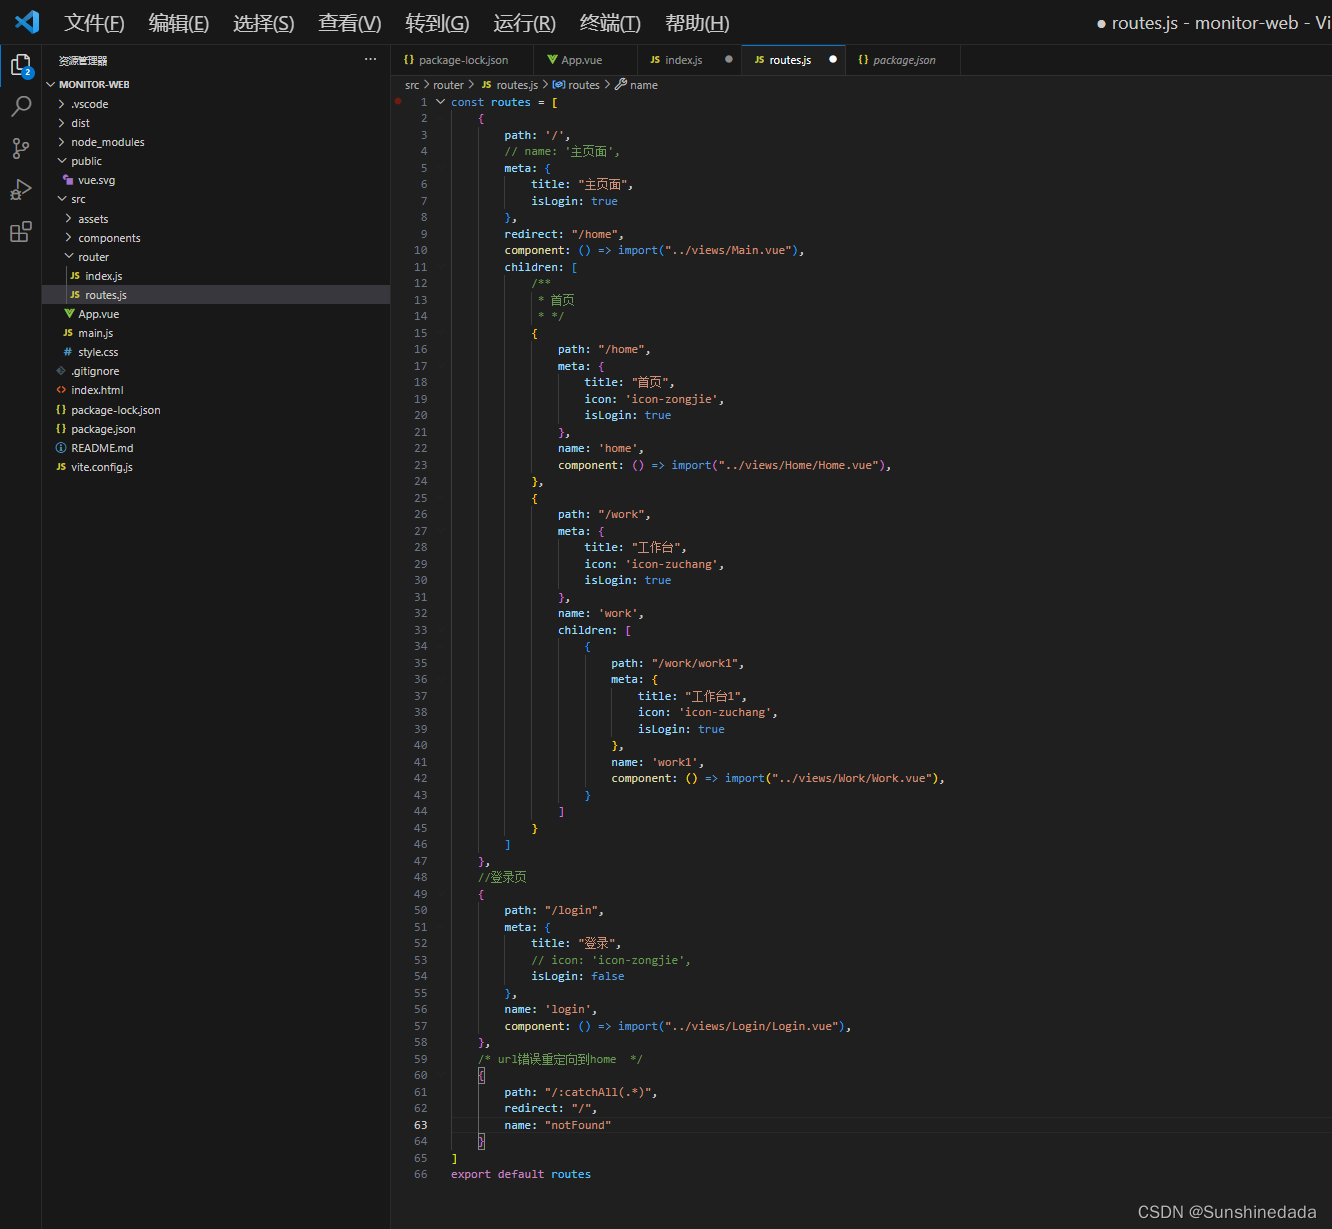
const routes = [{path: '/',// name: '主页面',meta: {title: "主页面",isLogin: true},redirect: "/home",component: () => import("../views/Main.vue"), children: [/*** 首页* */{path: "/home",meta: {title: "首页",icon: 'icon-zongjie',isLogin: true},name: 'home',component: () => import("../views/Home/Home.vue"),},{path: "/work",meta: {title: "工作台",icon: 'icon-zuchang',isLogin: true},name: 'work',children: [{path: "/work/work1",meta: {title: "工作台1",icon: 'icon-zuchang',isLogin: true},name: 'work1',component: () => import("../views/Work/Work.vue"),}]}]},//登录页{path: "/login",meta: {title: "登录",// icon: 'icon-zongjie',isLogin: false},name: 'login',component: () => import("../views/Login/Login.vue"),},/* url错误重定向到home  */{path: "/:catchAll(.*)",redirect: "/",name: "notFound"}
]
export default routes
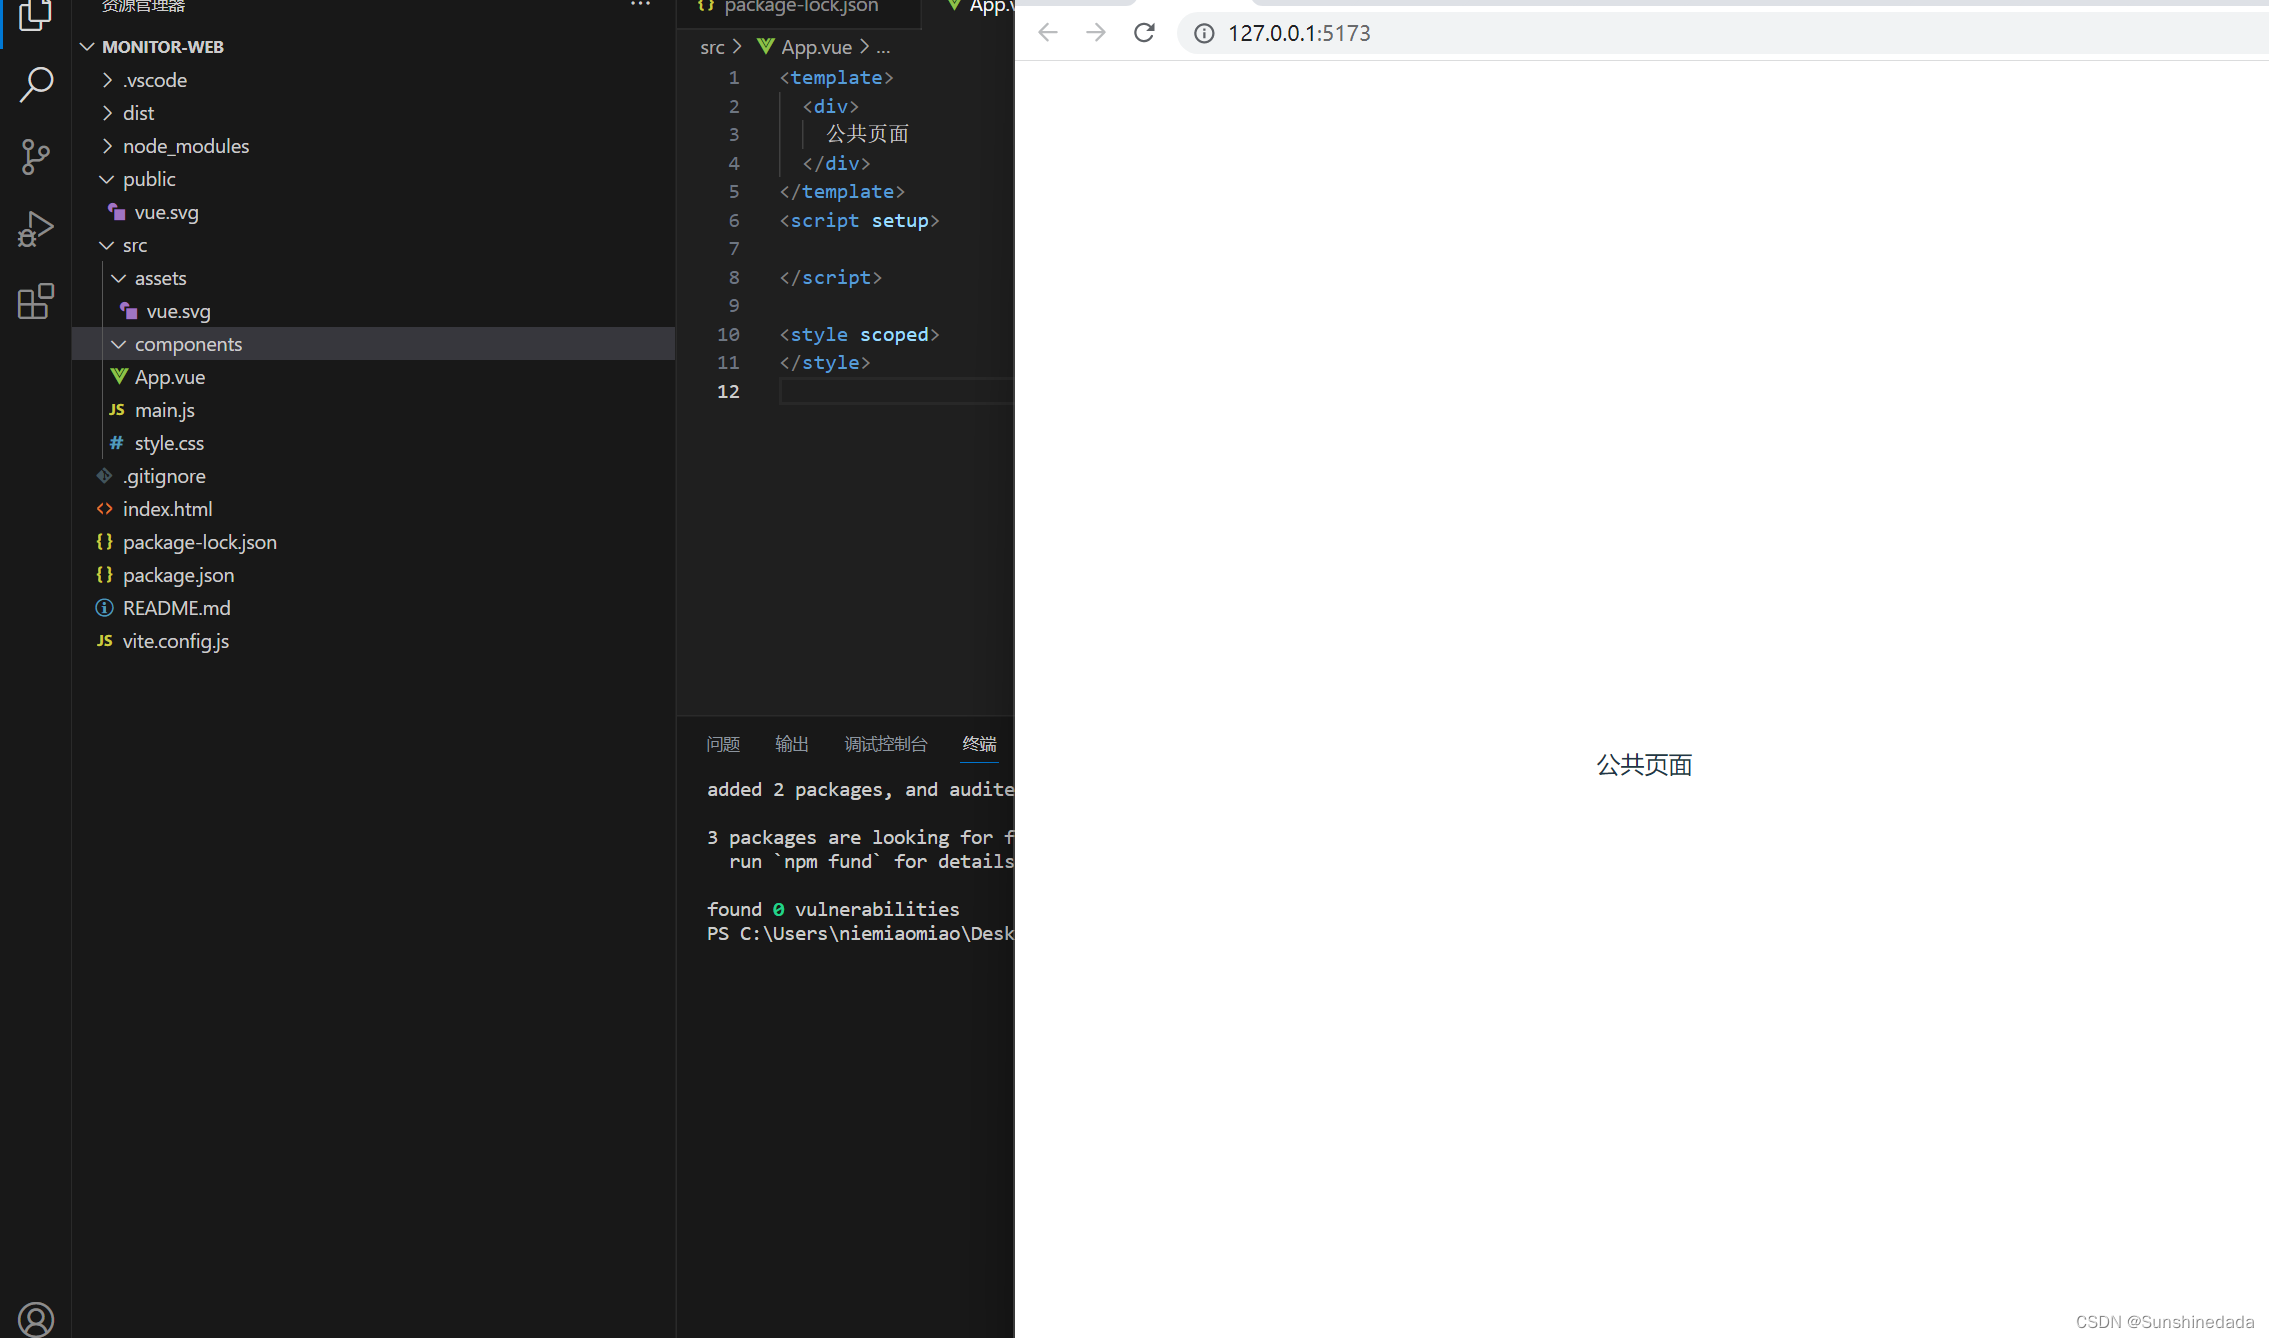
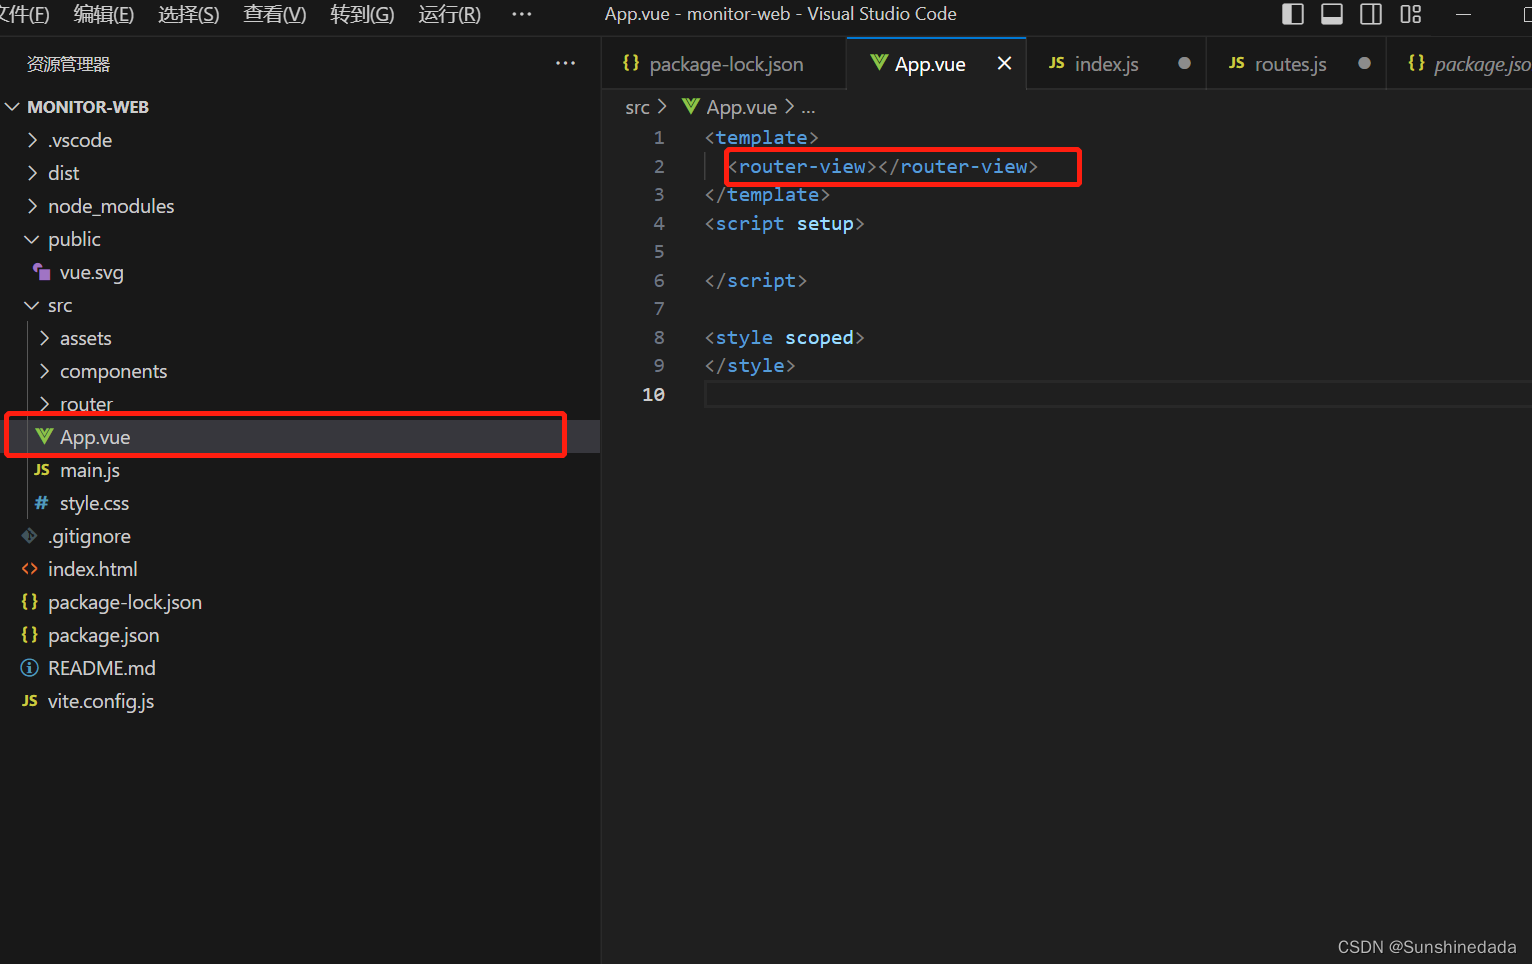
3.在App.vue公共页面中,直接去使用路由页面
<template><router-view></router-view>
</template>
<script setup></script><style scoped>
</style>
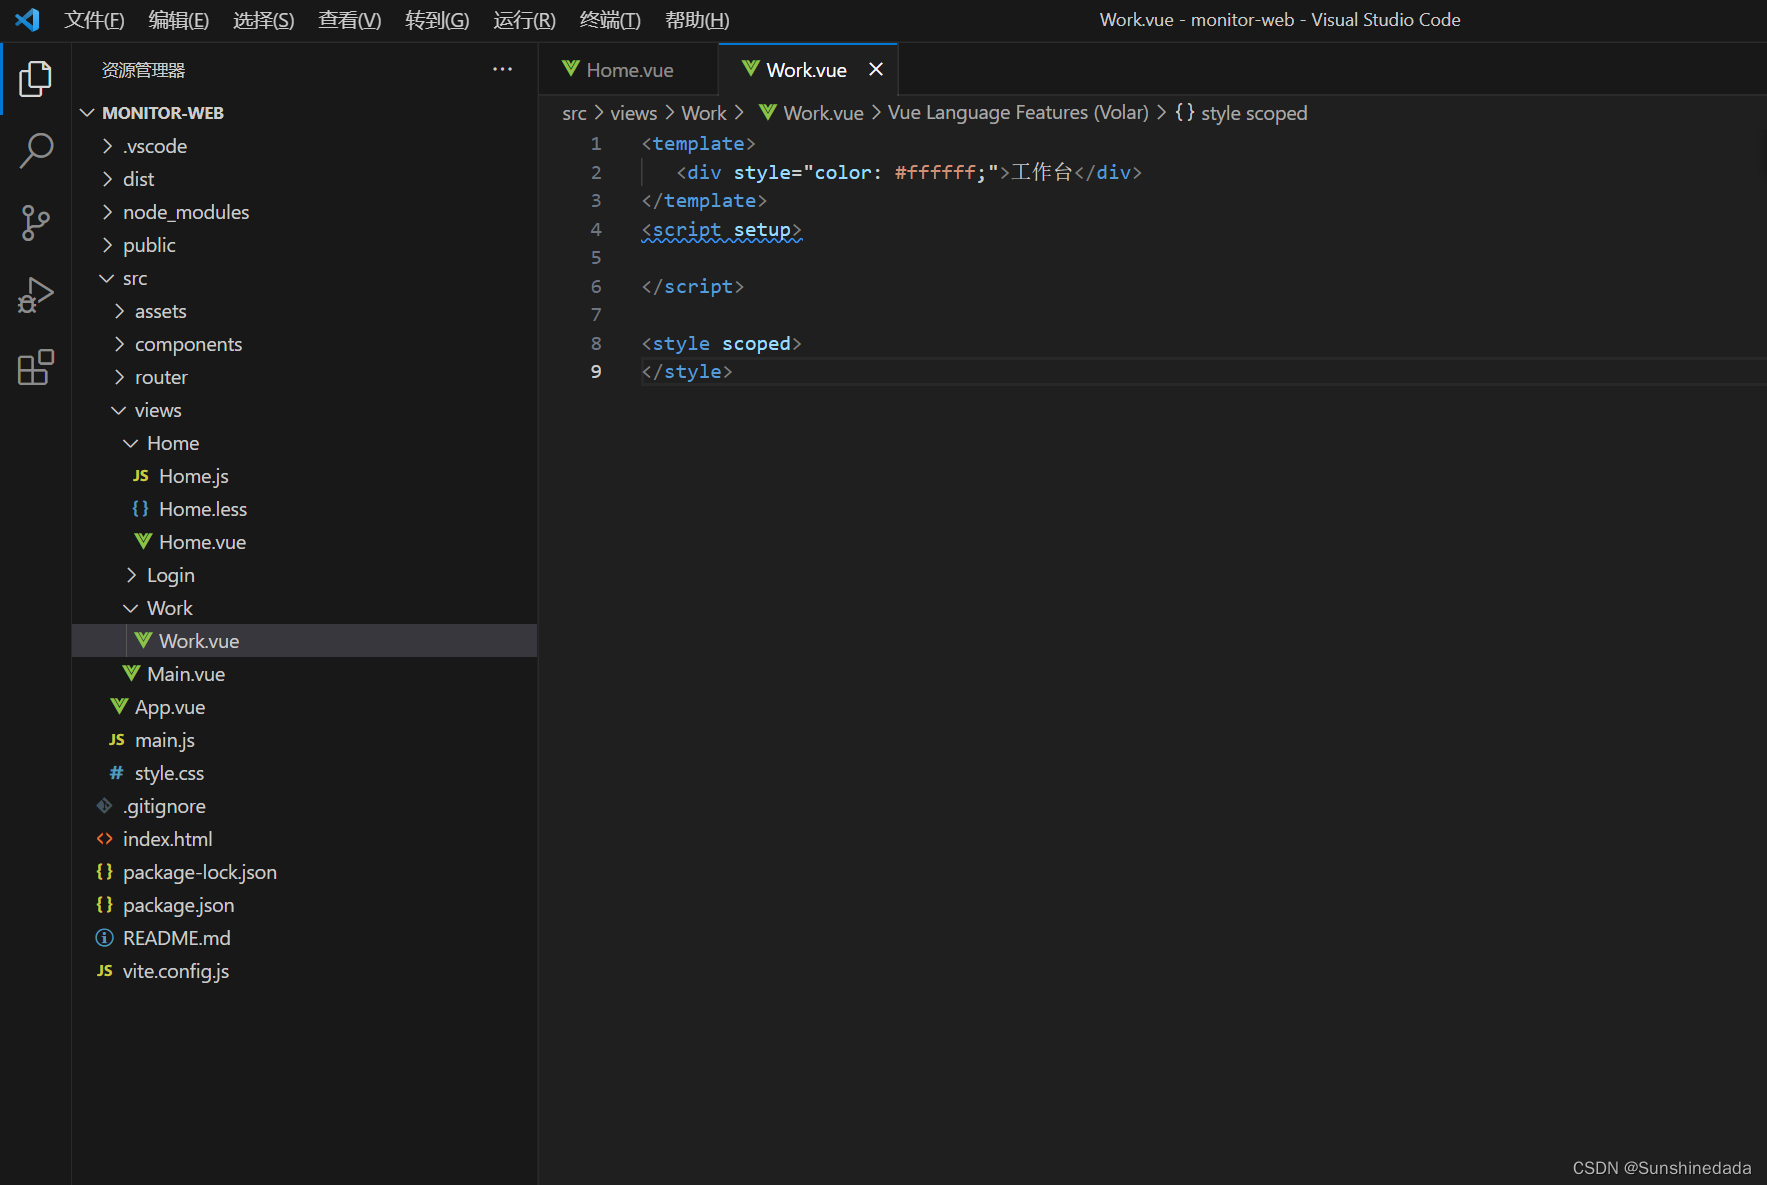
4.建路由页面
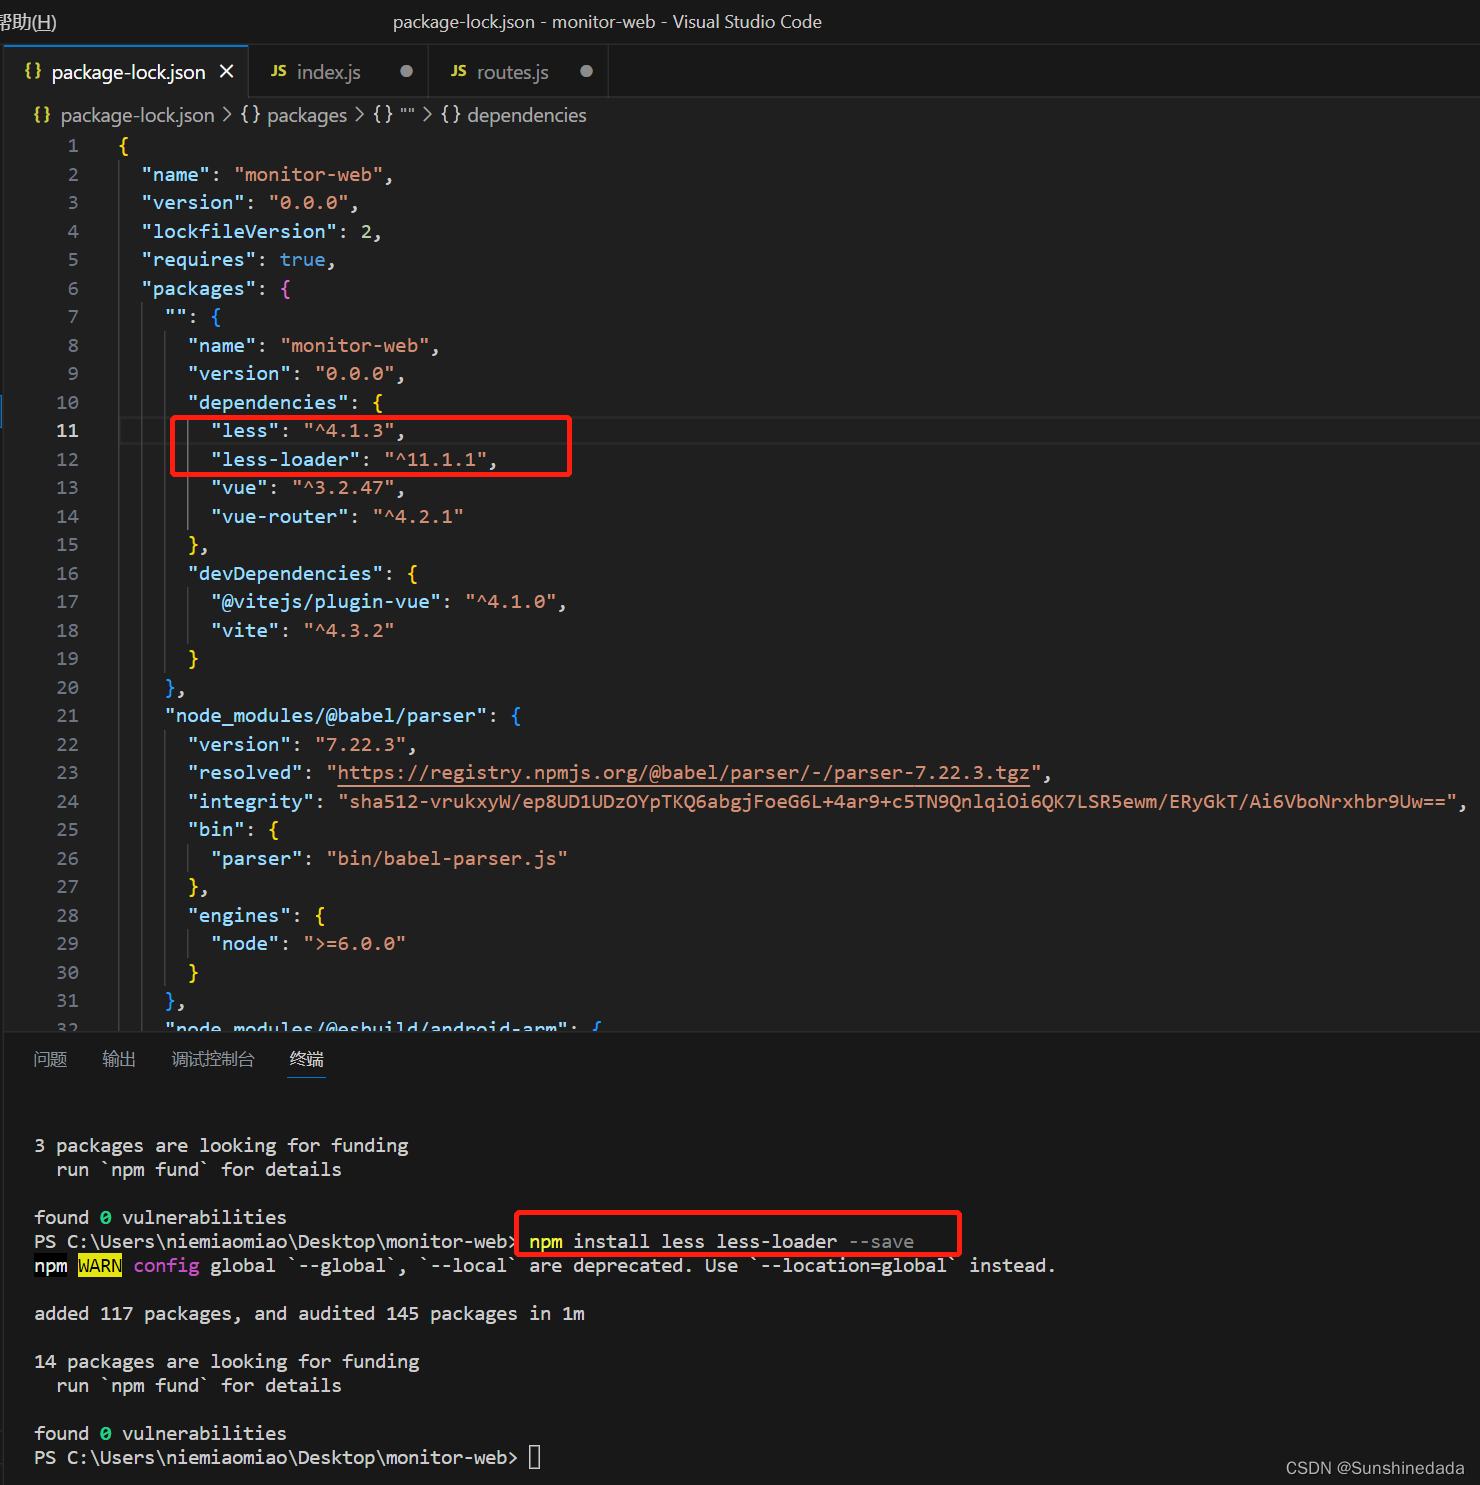
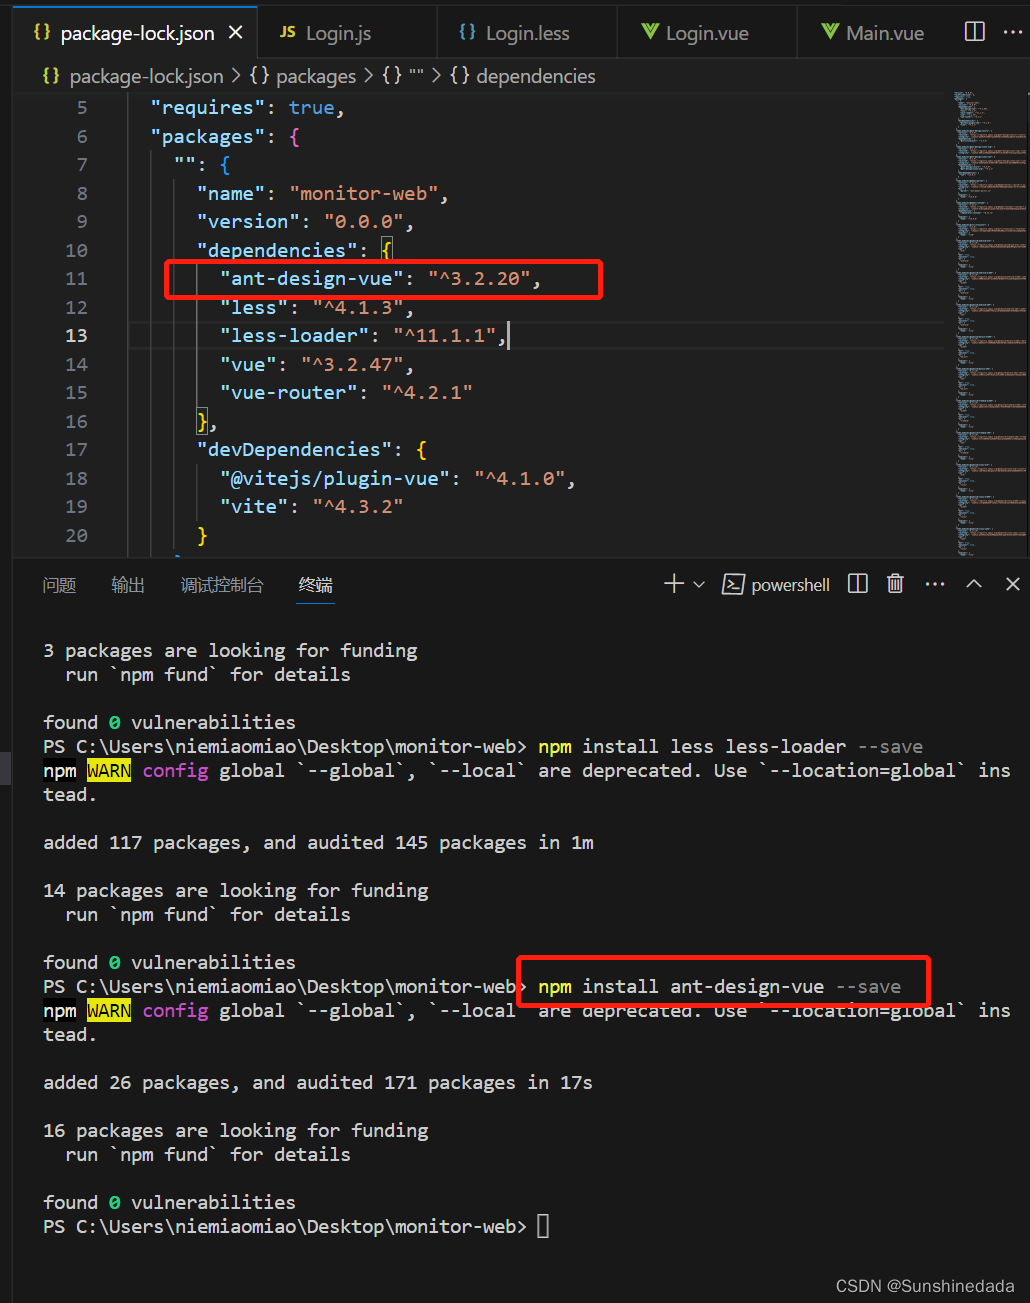
在项目中引入less
npm install less less-loader --save
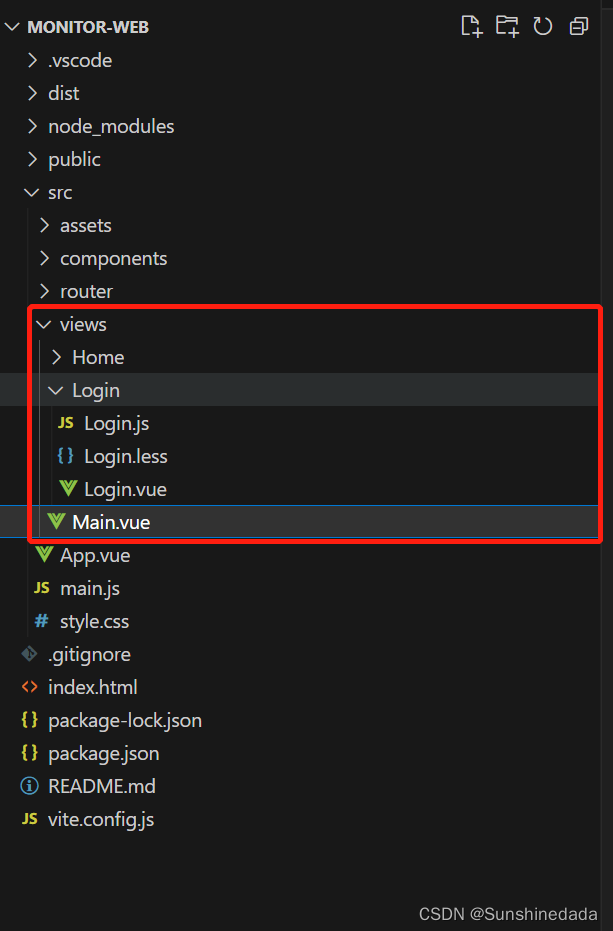
在src文件夹下面建views文件夹用来写具体路由页面。
5.引入ant-design组件库
https://www.antdv.com/components/overview-cn/
npm install ant-design-vue --save
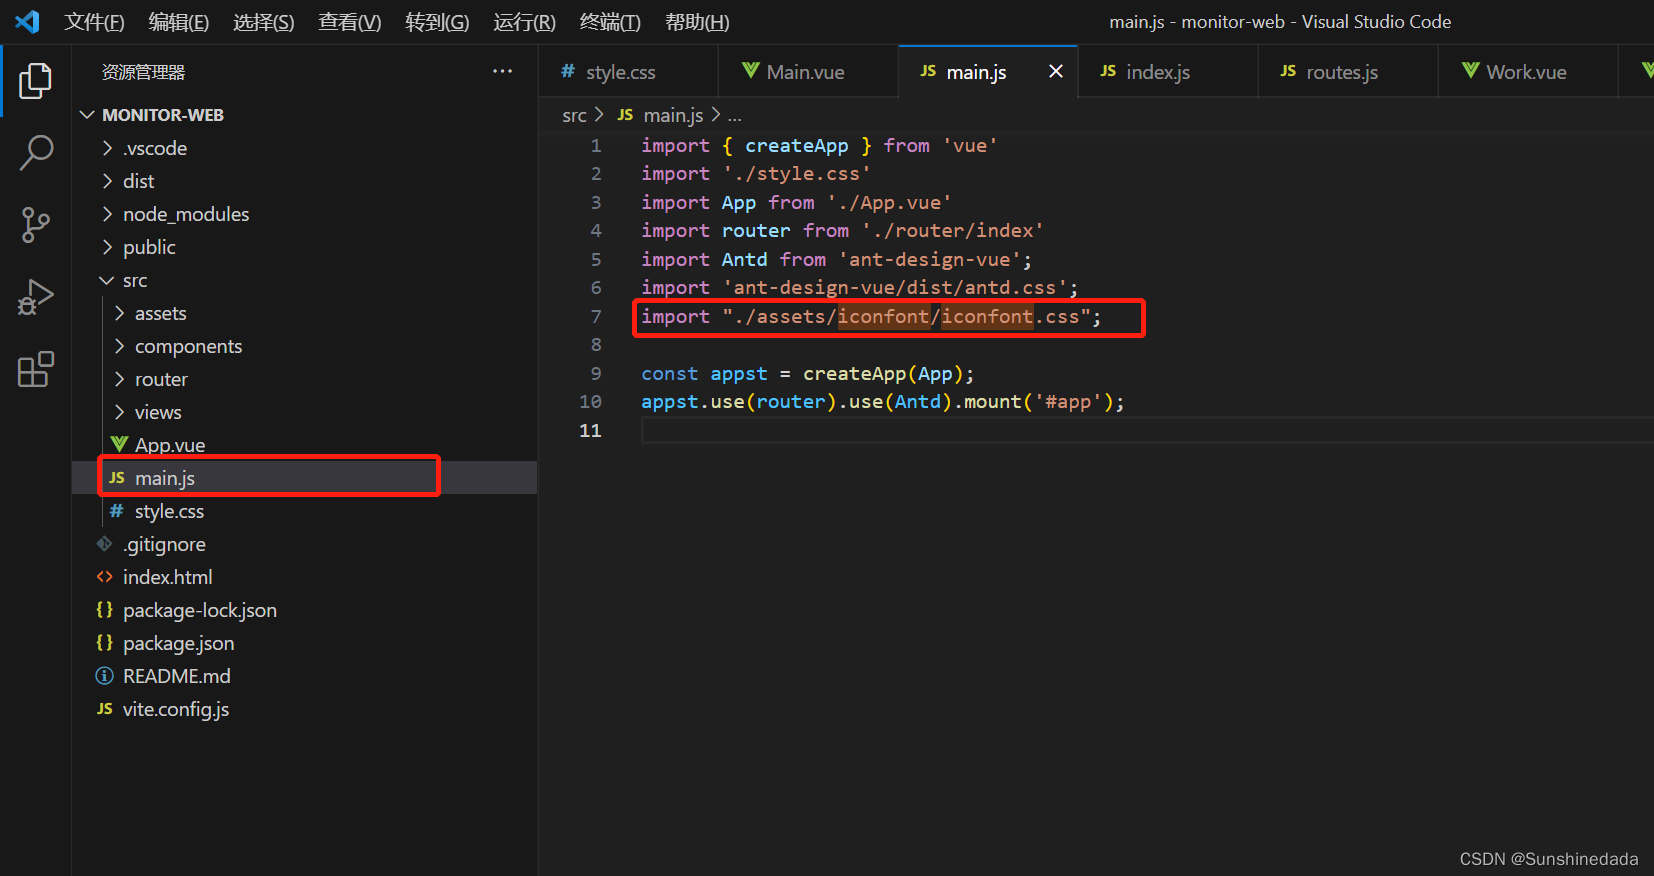
5.配置入口文件,src下的main.js,使用这些插件以及文件。

import { createApp } from 'vue'
import './style.css'
import App from './App.vue'
import router from './router/index'
import Antd from 'ant-design-vue';
import 'ant-design-vue/dist/antd.css';const appst = createApp(App);
appst.use(router).use(Antd).mount('#app');
6.写菜单,及路由页面之间的切换
在src下的views文件夹下的Main.vue中写入
选择布局:
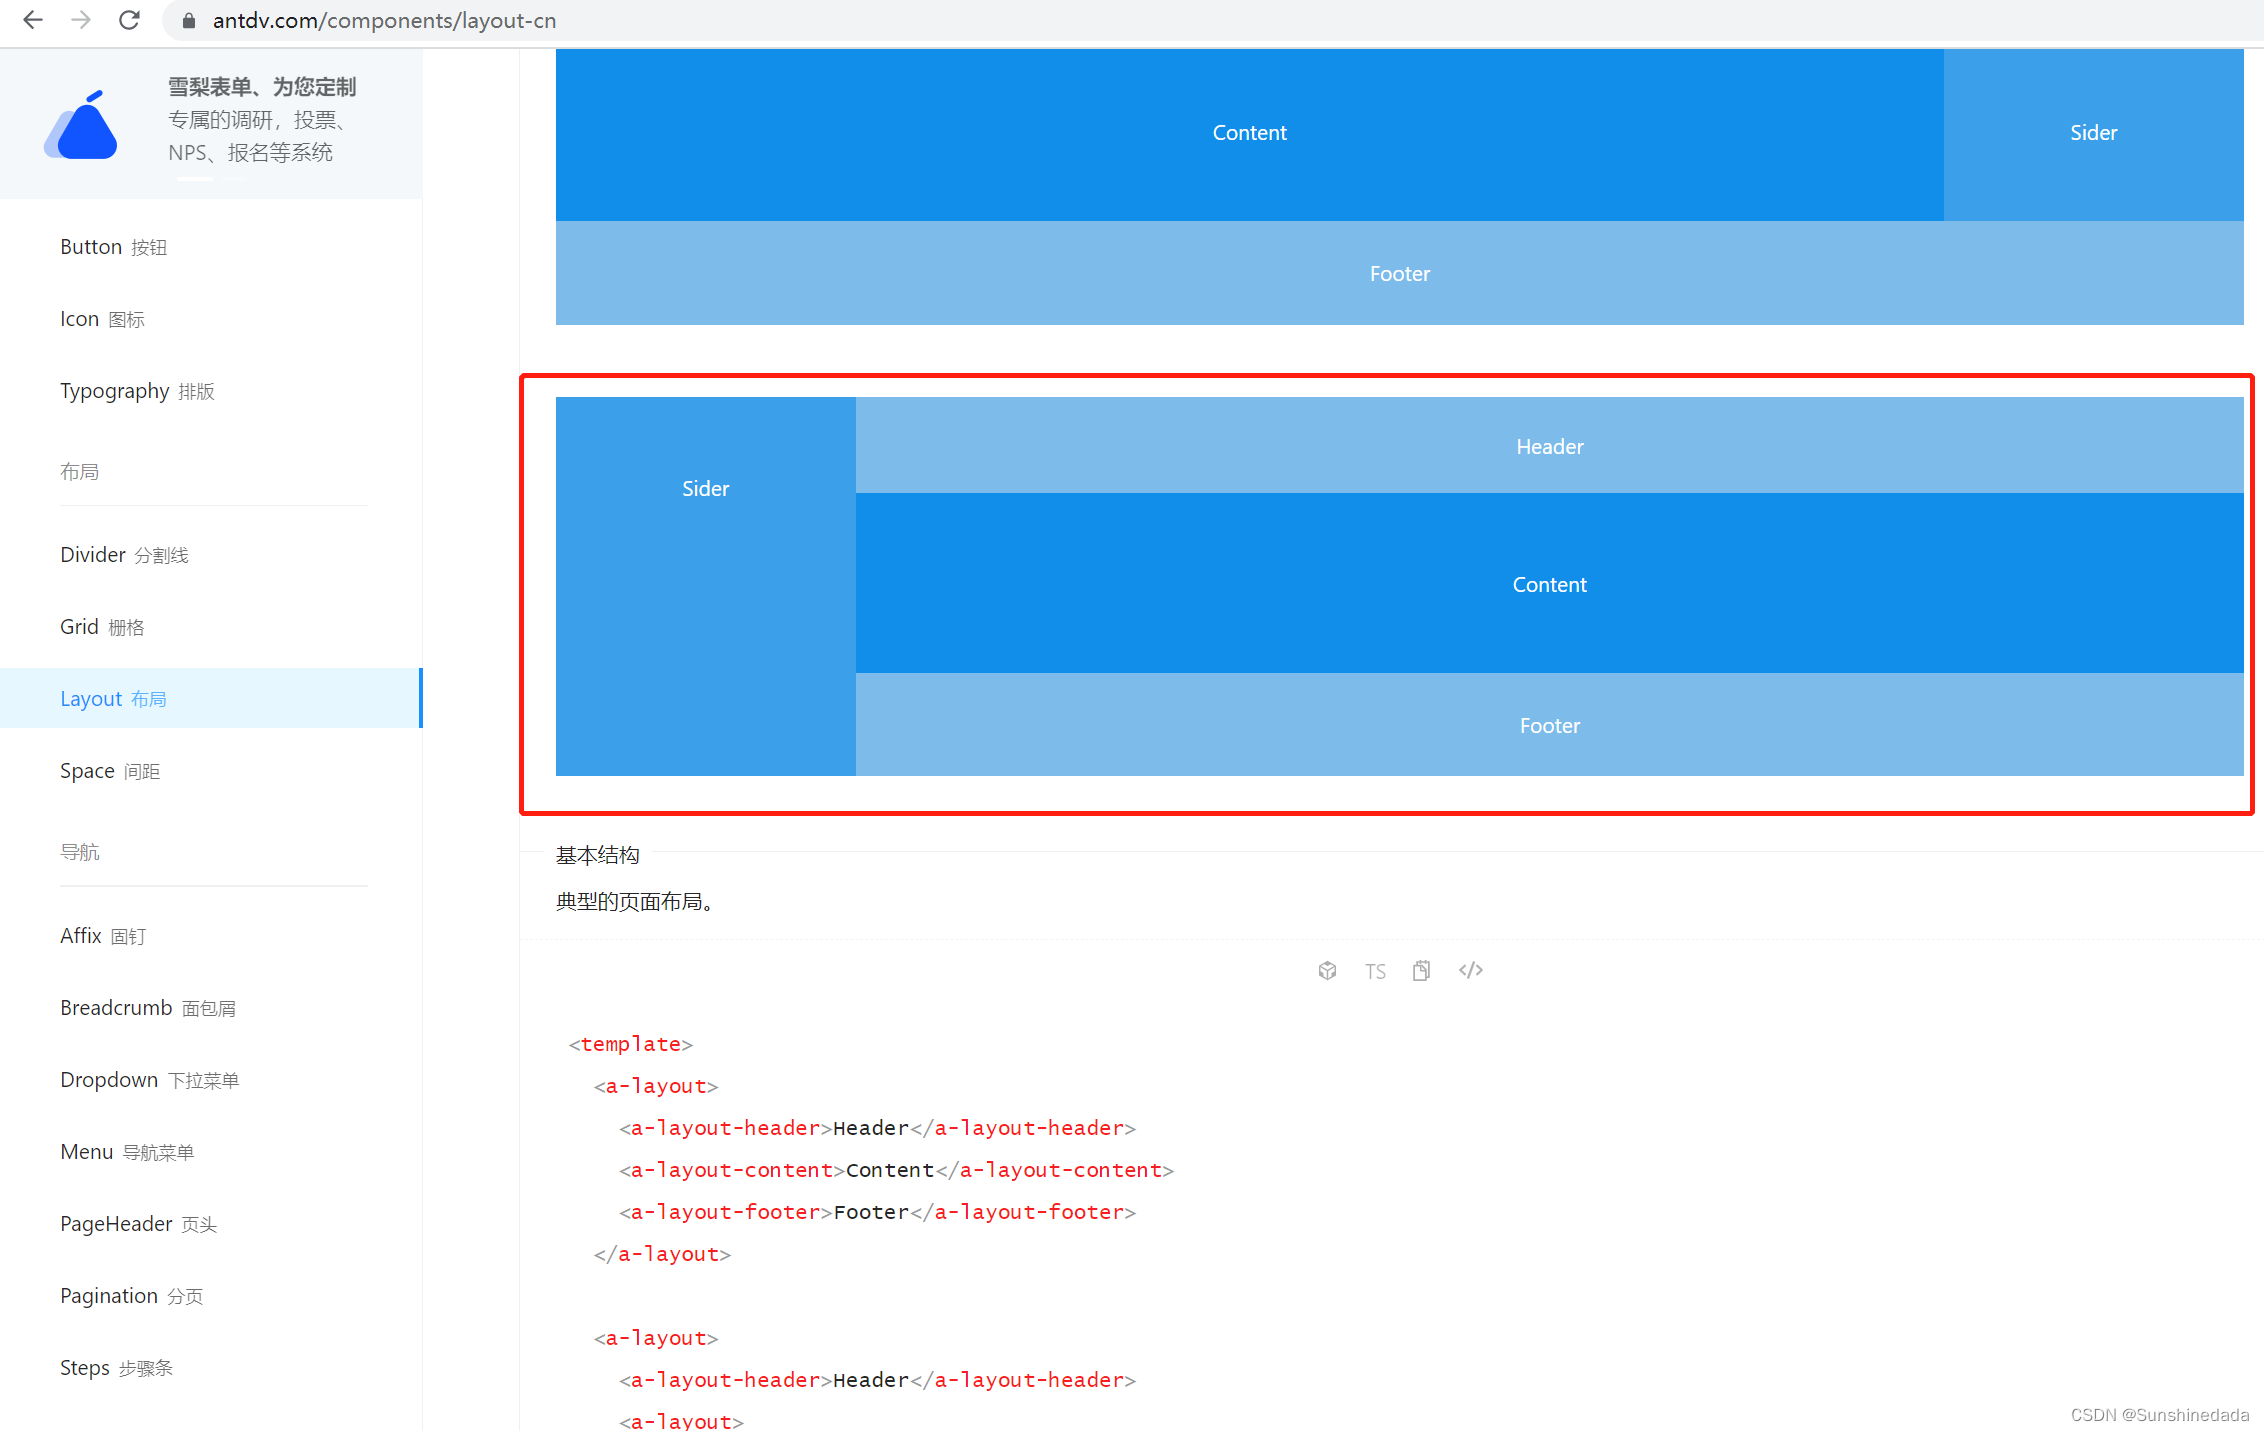

<template><a-layout has-sider class="app-layout"><a-layout-sider@collapse="collapse"v-model:collapsed="collapsed"collapsible :style="{ overflow: 'auto', height: '100%' }"class="left-layout-slider"><div class="logo"></div><a-menu v-model:selectedKeys="selectedKeys" @select="select" theme="dark" mode="inline" class="menu"><template v-for="item in routes[0].children"><a-sub-menu v-if="item?.children?.length > 0" ><template #icon><span :class="`iconfont ${item.meta.icon}`"></span></template><template #title>{{ item.meta.title }}</template><template v-for="i in item?.children" :key="i.path"><a-menu-item><span :class="`iconfont ${i.meta.icon}`"></span><span class="nav-text">{{ i.meta.title }}</span></a-menu-item></template></a-sub-menu><a-menu-item v-else :key="item.path"><span :class="`iconfont ${item.meta.icon}`"></span><span class="nav-text">{{ item.meta.title }}</span></a-menu-item></template></a-menu></a-layout-sider><a-layout :style="{height: '100%',width: collapsed ? 'calc(100% - 80px)' : 'calc(100% - 200px)',background:'#04070b' }"><a-layout-header :style="{ background: '#16252e', padding: 0 }" class="app-layout-header"><!-- <a-popconfirm placement="bottom"><div class="app-layout-nameInfo"><div><a-avatar :size="large"><template #icon><UserOutlined /></template></a-avatar></div><div style="margin-left: 10px;">admin</div></div></a-popconfirm> --><!-- <a-popover><template #content><span class="iconfont icon-yanqi" style="color:#40a9ff"></span><a-button type="link" @click="banckClick">退出登录</a-button></template><div class="app-layout-nameInfo"><div><a-avatar :size="large"><template #icon><UserOutlined /></template></a-avatar></div><div style="margin-left: 10px;color: #ffffff;">admin</div></div></a-popover> --><a-dropdown><div class="app-layout-nameInfo"><div><a-avatar size="large"><template #icon><UserOutlined /></template></a-avatar></div><div style="margin-left: 10px;color: #ffffff;">admin</div></div><template #overlay><a-menu><a-menu-item><span class="iconfont icon-yanqi" style="color:#40a9ff"></span><a-button type="link" @click="banckClick">退出登录</a-button></a-menu-item></a-menu></template></a-dropdown></a-layout-header><a-layout-content :style="{ margin: '24px 16px 0', overflow: 'initial' }"><div :style="{ background: '#16252e', textAlign: 'center',height: '100%' }"><router-view></router-view></div></a-layout-content><a-layout-footer :style="{ textAlign: 'center',background: '#04070b',color:'#fff' }">v1.1.20230524172613</a-layout-footer></a-layout></a-layout>
</template>
<script setup>
import { defineComponent, ref, watch } from 'vue';
import routes from "@/router/routes";
import { useRouter } from "vue-router";
import { UserOutlined } from '@ant-design/icons-vue';
const router = useRouter()
const selectedKeys = ref(['4']);
const collapsed = ref(false);
const select = (e) => {console.log(e)router.push(e.key);
}
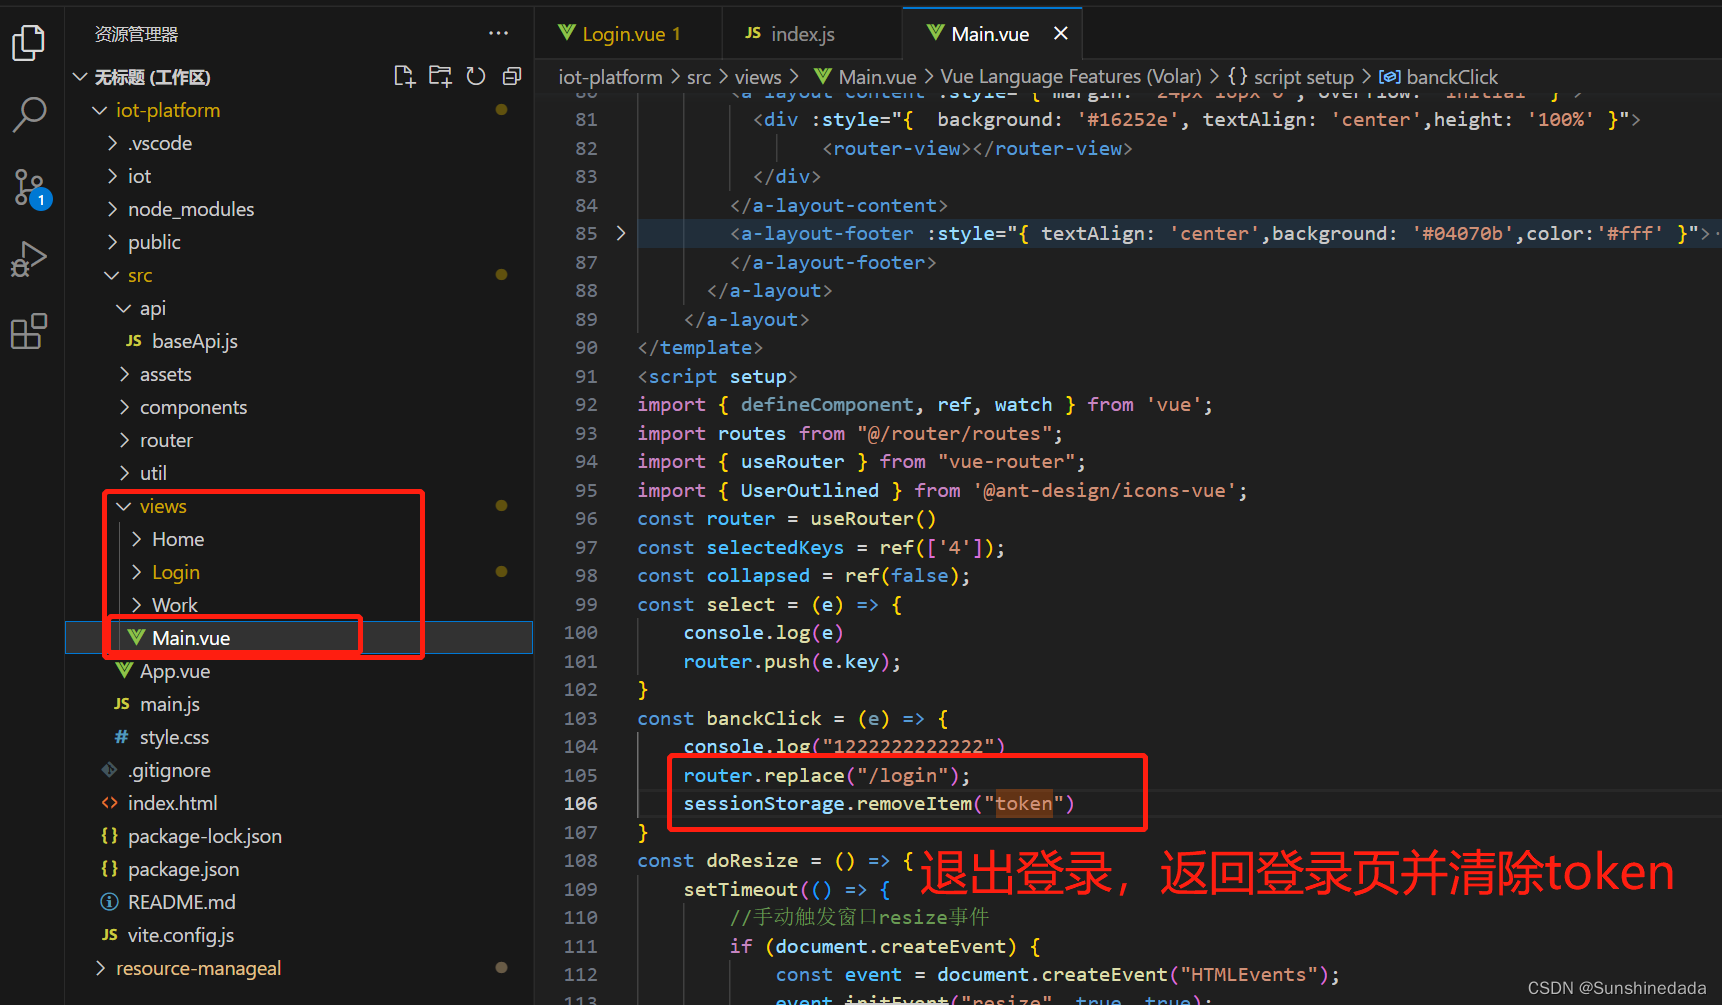
const banckClick = (e) => {console.log("1222222222222")router.replace("/login");sessionStorage.removeItem("token")
}
const doResize = () => {setTimeout(() => {//手动触发窗口resize事件if (document.createEvent) {const event = document.createEvent("HTMLEvents");event.initEvent("resize", true, true);window.dispatchEvent(event);}}, 300);
};
const collapse = () => {doResize();
}
watch(() =>router.currentRoute.value.path,(newValue,oldValue)=> {selectedKeys.value = [newValue];
},{ immediate: true })
</script>
<style lang="less" scoped>.left-layout-slider{::-webkit-scrollbar {display: none !important;}.menu{height: calc(100% - 80px);overflow-x: hidden;overflow-y: scroll;}
}
.app-layout{width: 100%;height: 100%;overflow: hidden;
}
.logo {height: 32px;background: rgba(255, 255, 255, 0.2);margin: 16px;
}
.site-layout .site-layout-background {background: #fff;
}[data-theme='dark'] .site-layout .site-layout-background {background: #141414;
}
</style>
<style lang="less">
.ant-dropdown-menu-item, .ant-dropdown-menu-submenu-title{padding: 0 6px!important;
}
.nav-text{margin-left: 10px;
}
.ant-menu-inline.ant-menu-sub{background: #001529!important;
}
.ant-menu-inline-collapsed{.nav-text{margin-left: 80px!important;}
}
.app-layout-header{position: relative;;.app-layout-nameInfo{position: absolute;right: 15px;top: 0;display: flex;}
}
</style>
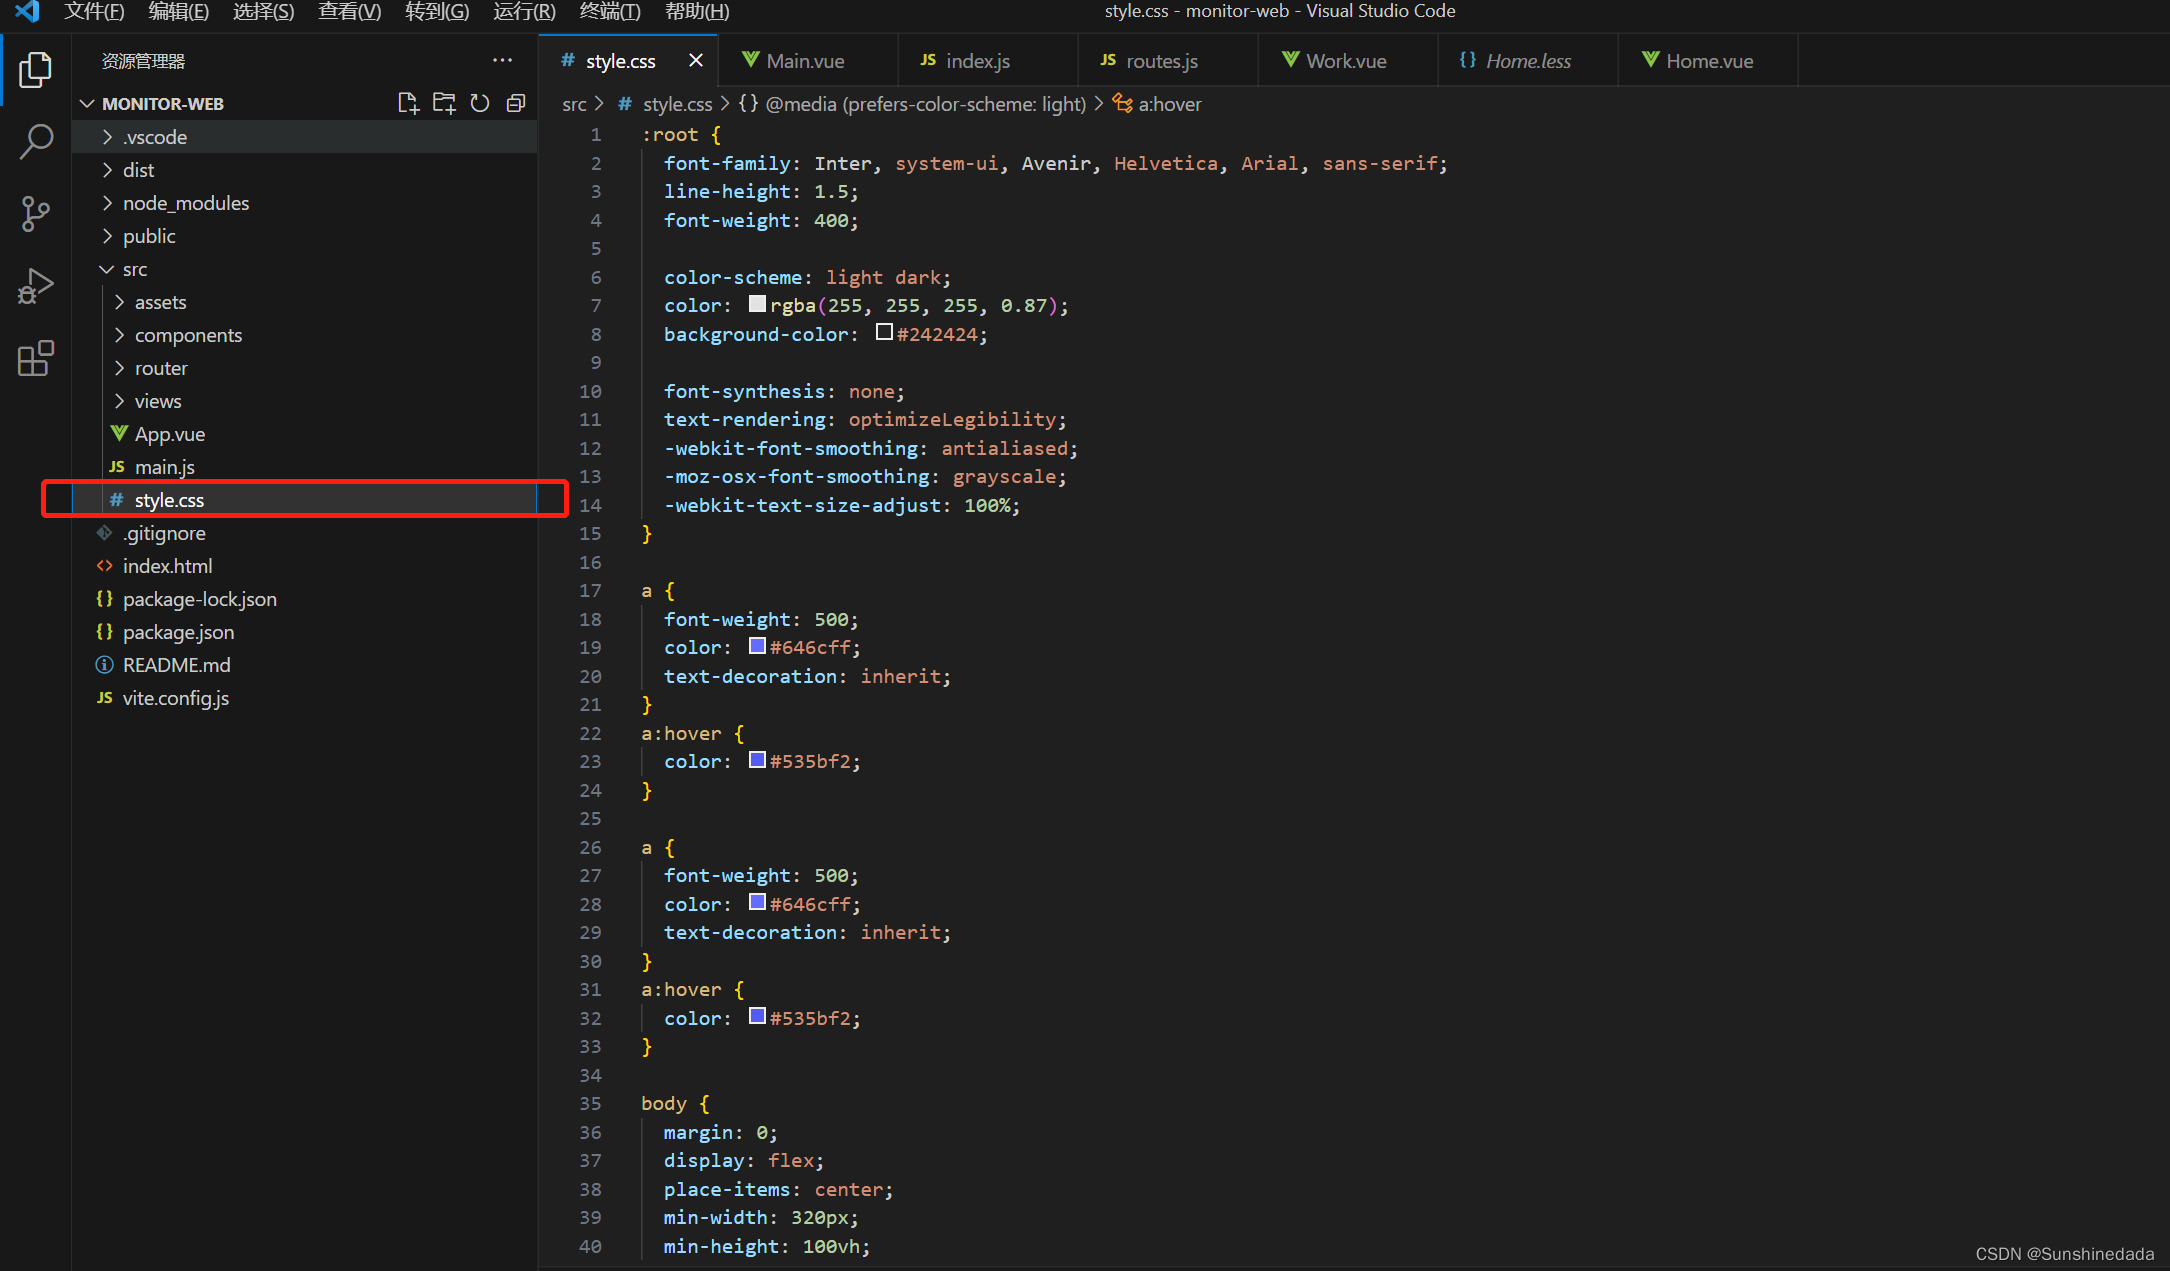
7.在style.css中配置整体的样式
:root {font-family: Inter, system-ui, Avenir, Helvetica, Arial, sans-serif;line-height: 1.5;font-weight: 400;color-scheme: light dark;color: rgba(255, 255, 255, 0.87);background-color: #242424;font-synthesis: none;text-rendering: optimizeLegibility;-webkit-font-smoothing: antialiased;-moz-osx-font-smoothing: grayscale;-webkit-text-size-adjust: 100%;
}a {font-weight: 500;color: #646cff;text-decoration: inherit;
}
a:hover {color: #535bf2;
}a {font-weight: 500;color: #646cff;text-decoration: inherit;
}
a:hover {color: #535bf2;
}body {margin: 0;display: flex;place-items: center;min-width: 320px;min-height: 100vh;
}h1 {font-size: 3.2em;line-height: 1.1;
}button {border-radius: 8px;border: 1px solid transparent;padding: 0.6em 1.2em;font-size: 1em;font-weight: 500;font-family: inherit;background-color: #1a1a1a;cursor: pointer;transition: border-color 0.25s;
}
button:hover {border-color: #646cff;
}
button:focus,
button:focus-visible {outline: 4px auto -webkit-focus-ring-color;
}.card {padding: 2em;
}#app {margin: 0 auto;/* text-align: center; */width: 100vw;height: 100vh;overflow: hidden;
}@media (prefers-color-scheme: light) {:root {color: #213547;background-color: #ffffff;}a:hover {color: #747bff;}button {background-color: #f9f9f9;}
}/* //修改滚动条样式 */
::-webkit-scrollbar {width: 8px;height: 5px;/* background: hsla(0, 0%, 100%, 0.6); */
}::-webkit-scrollbar-track {border-radius: 0;
}::-webkit-scrollbar-thumb {border-radius: 0;background-color: rgba(95, 95, 95, 0.4);transition: all 0.2s;border-radius: 5px;&:hover {background-color: rgba(95, 95, 95, 0.7);}
}
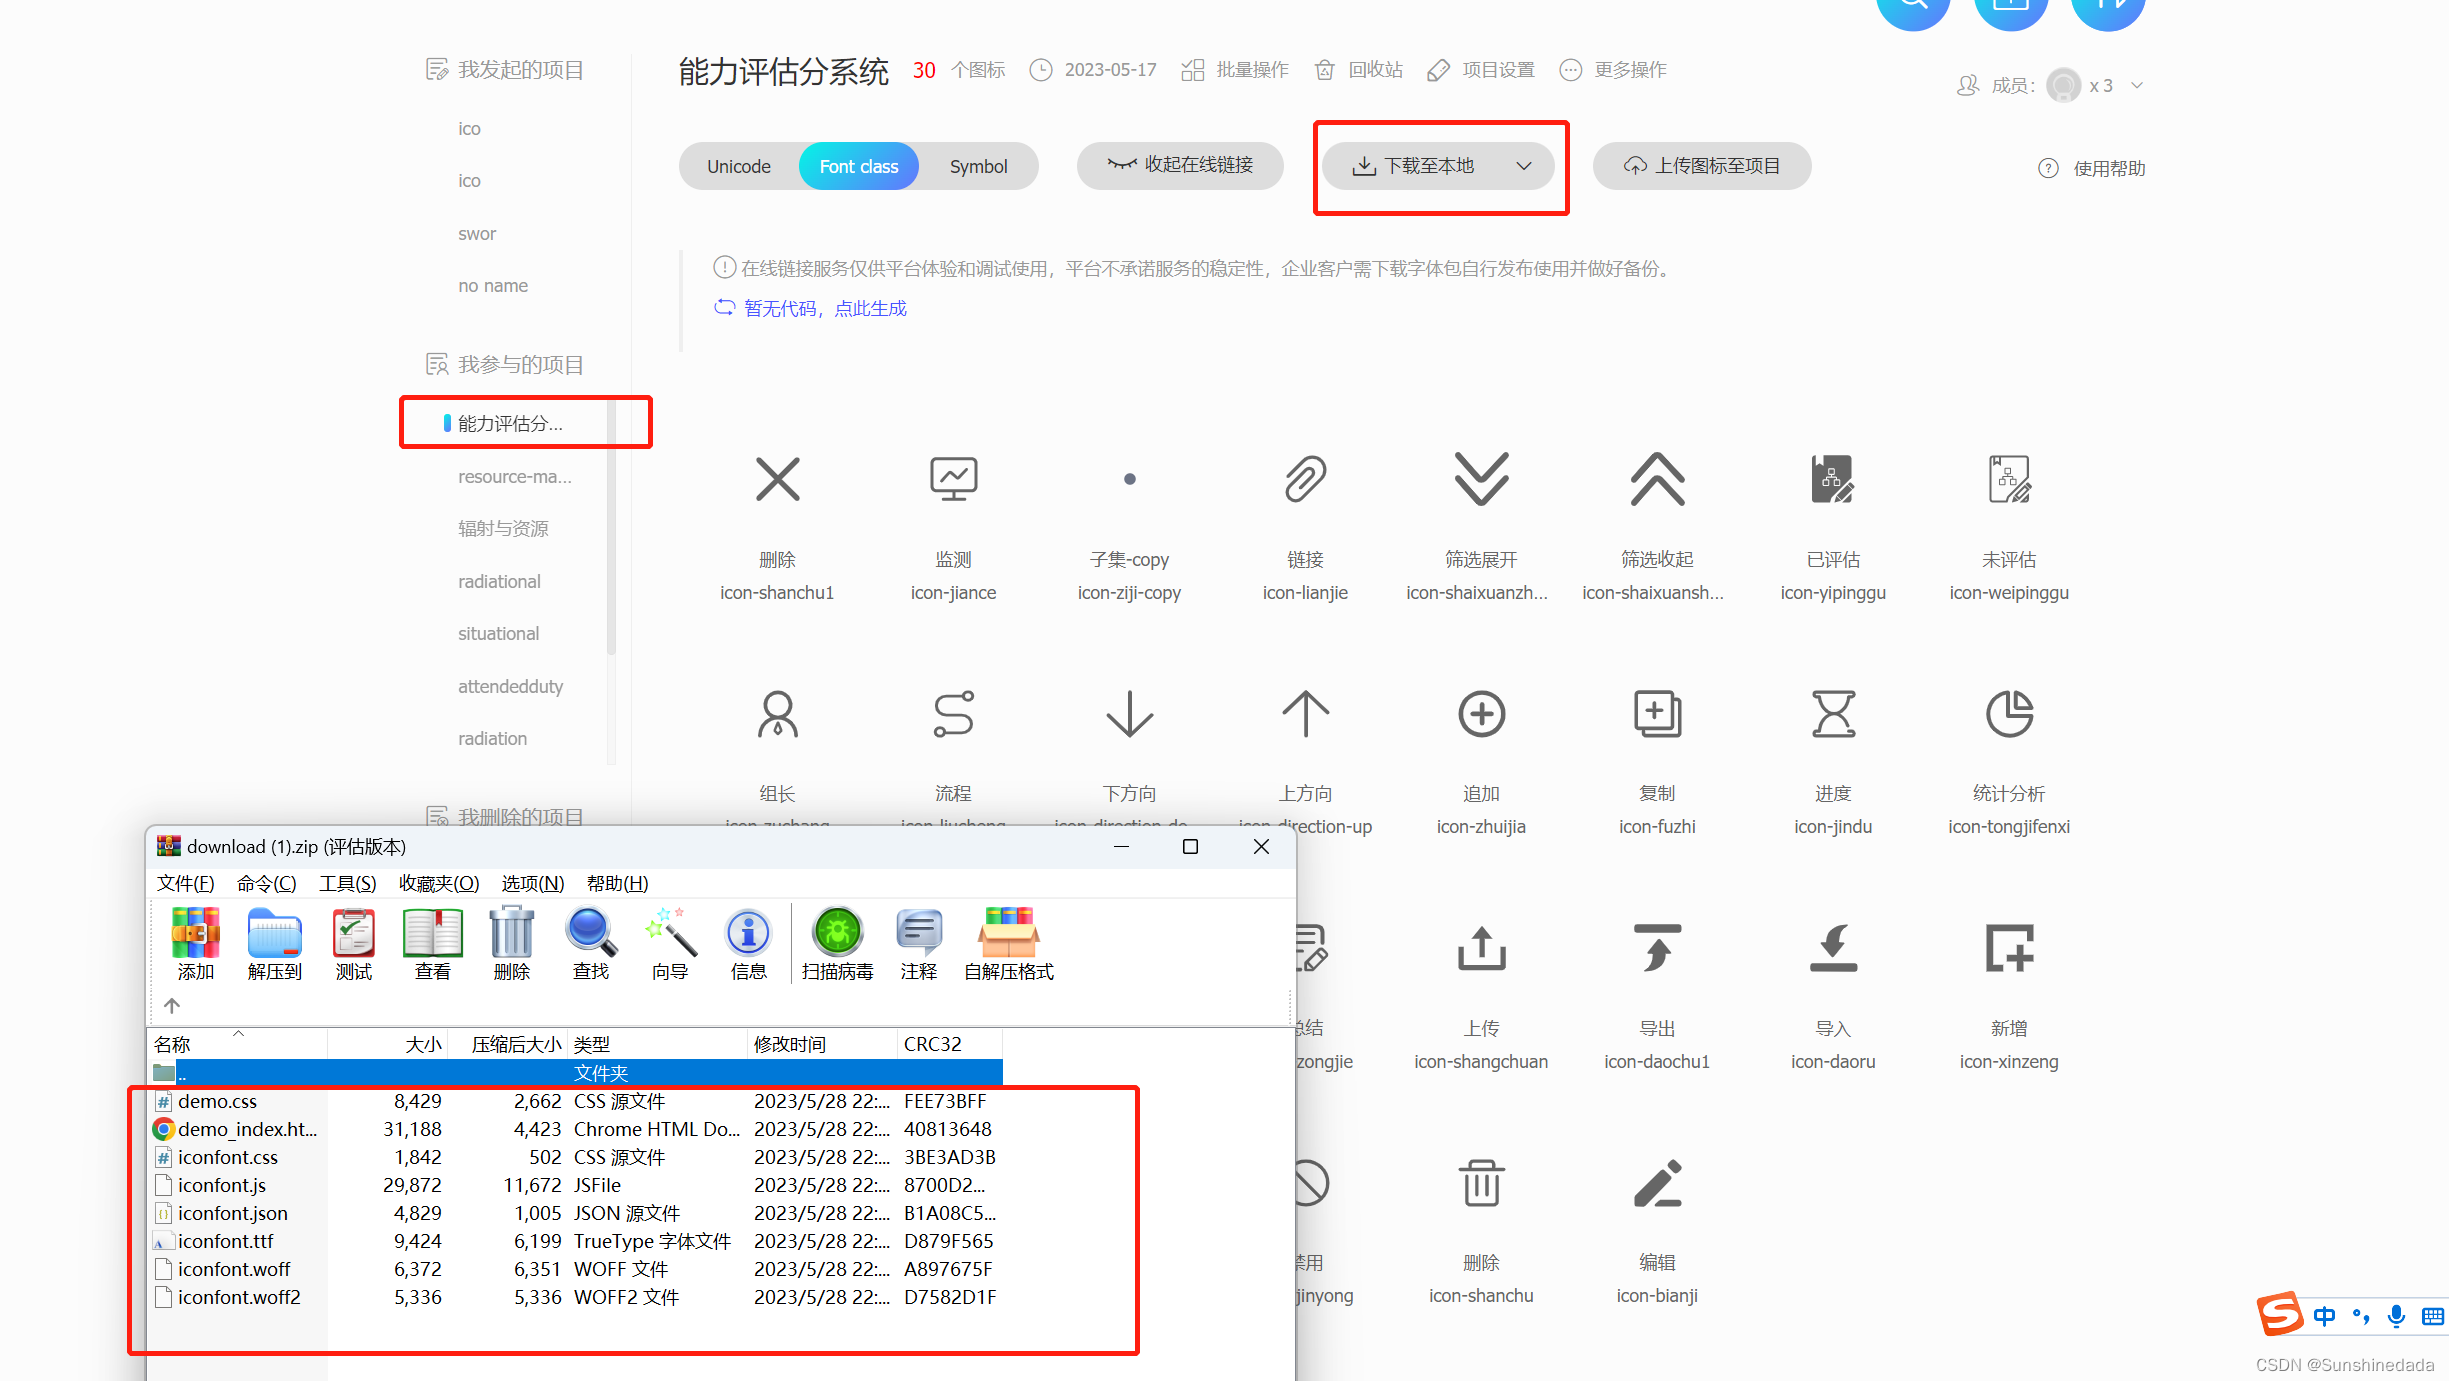
8.引入阿里巴巴矢量图标库
https://www.iconfont.cn/
把图标加入图标库的项目中,然后把包下载下来。之后在项目的src文件夹下的assets下新建一个iconfont文件夹,把刚才下载下来的包里面的内容粘到iconfont文件夹下。
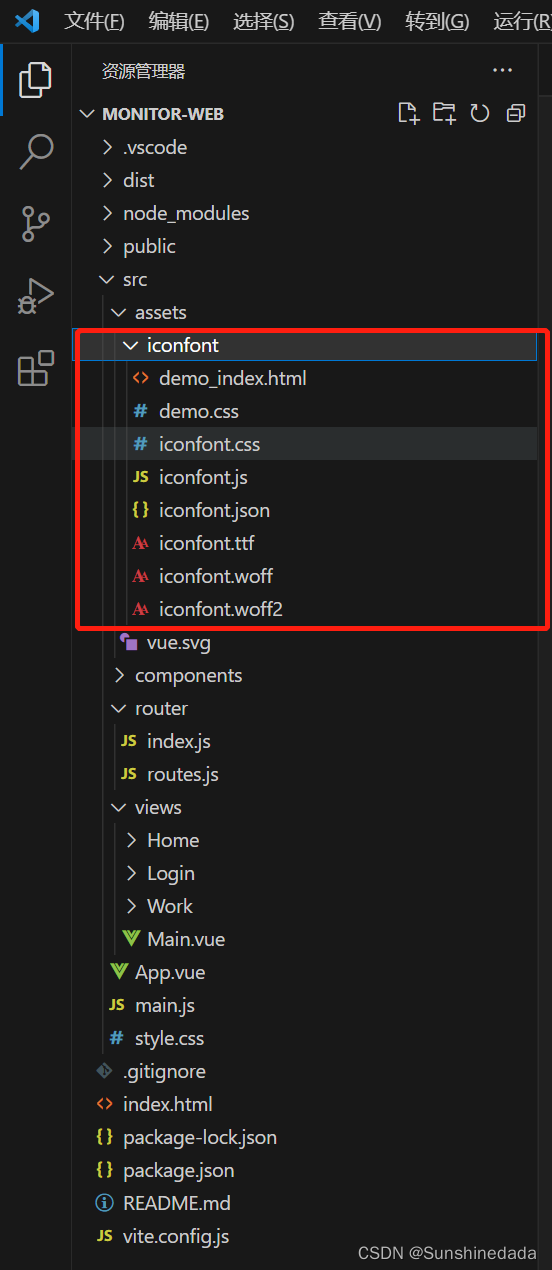
然后在入口文件中引入即可在页面中使用
import "./assets/iconfont/iconfont.css";
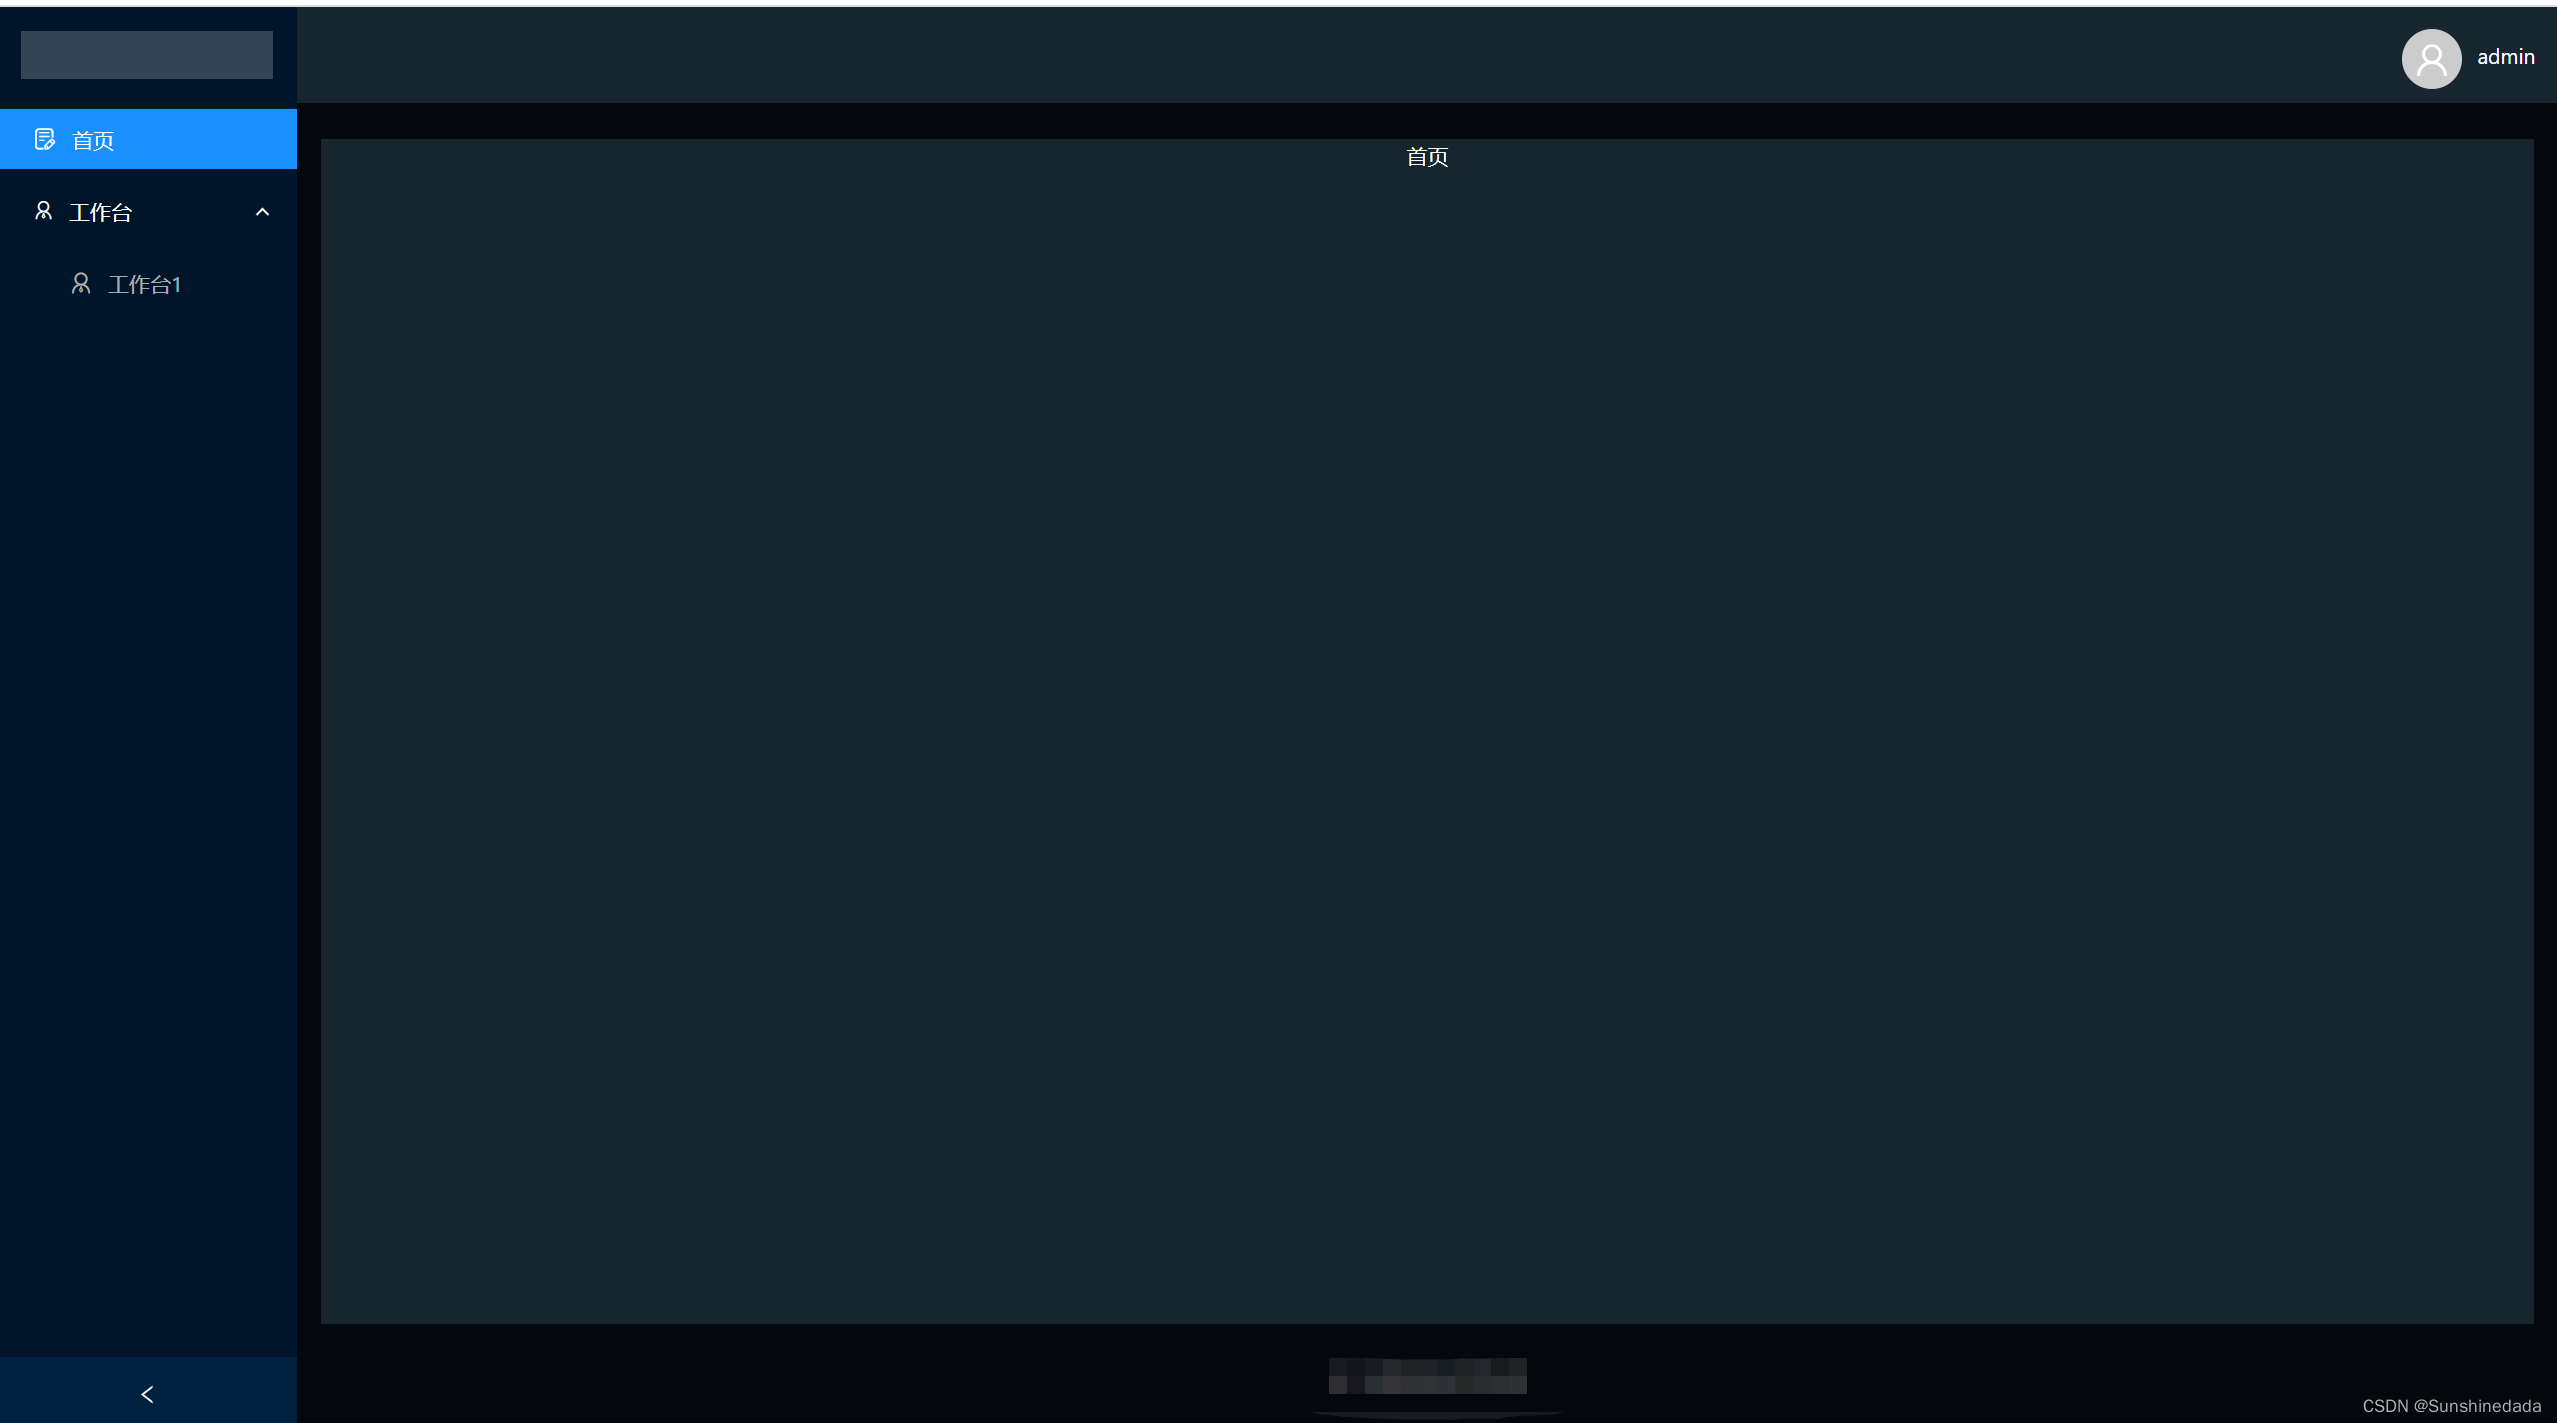
此时路由配置完成:


axios请求
https://www.axios-http.cn/docs/intro
npm install axios
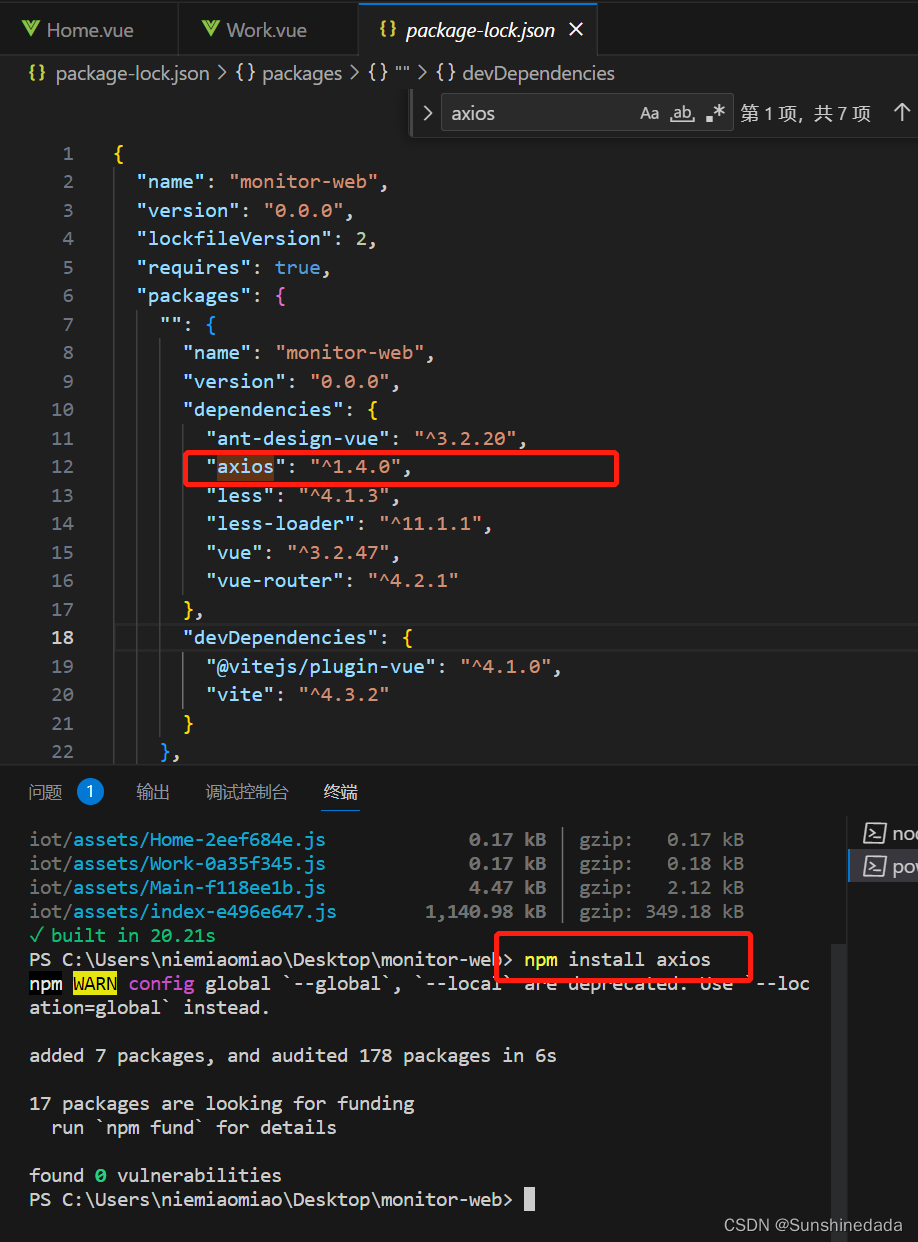
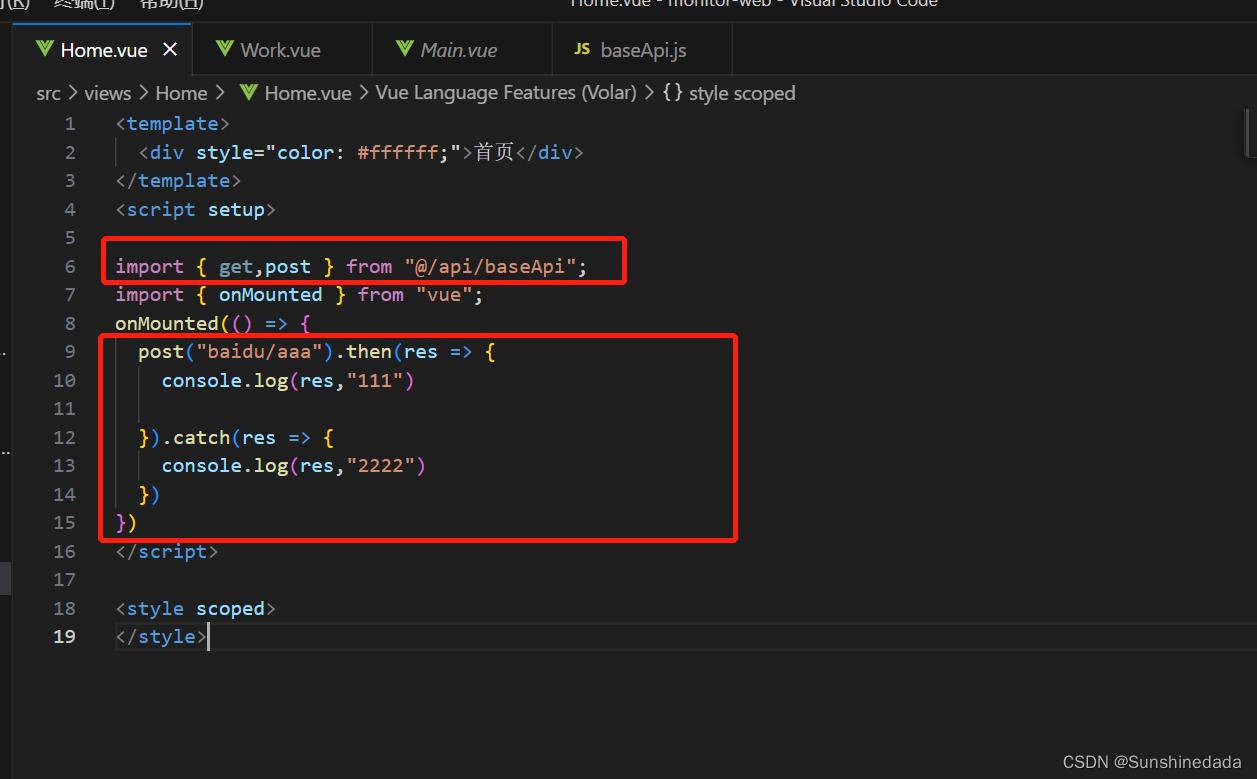
在src文件夹下新建一个api文件夹,在api文件夹下建baseApi.js文件来写封装的请求

在页面中使用请求数据,get参数直接拼到路径后面进行传参,post请求的参数就是上面的第二个参数,data。post请求时候括号里面就有俩参数,第二参数就是要传的参数。在proxy反向代码那配置好域名,请求的第一个参数是具体的请求接口地址。
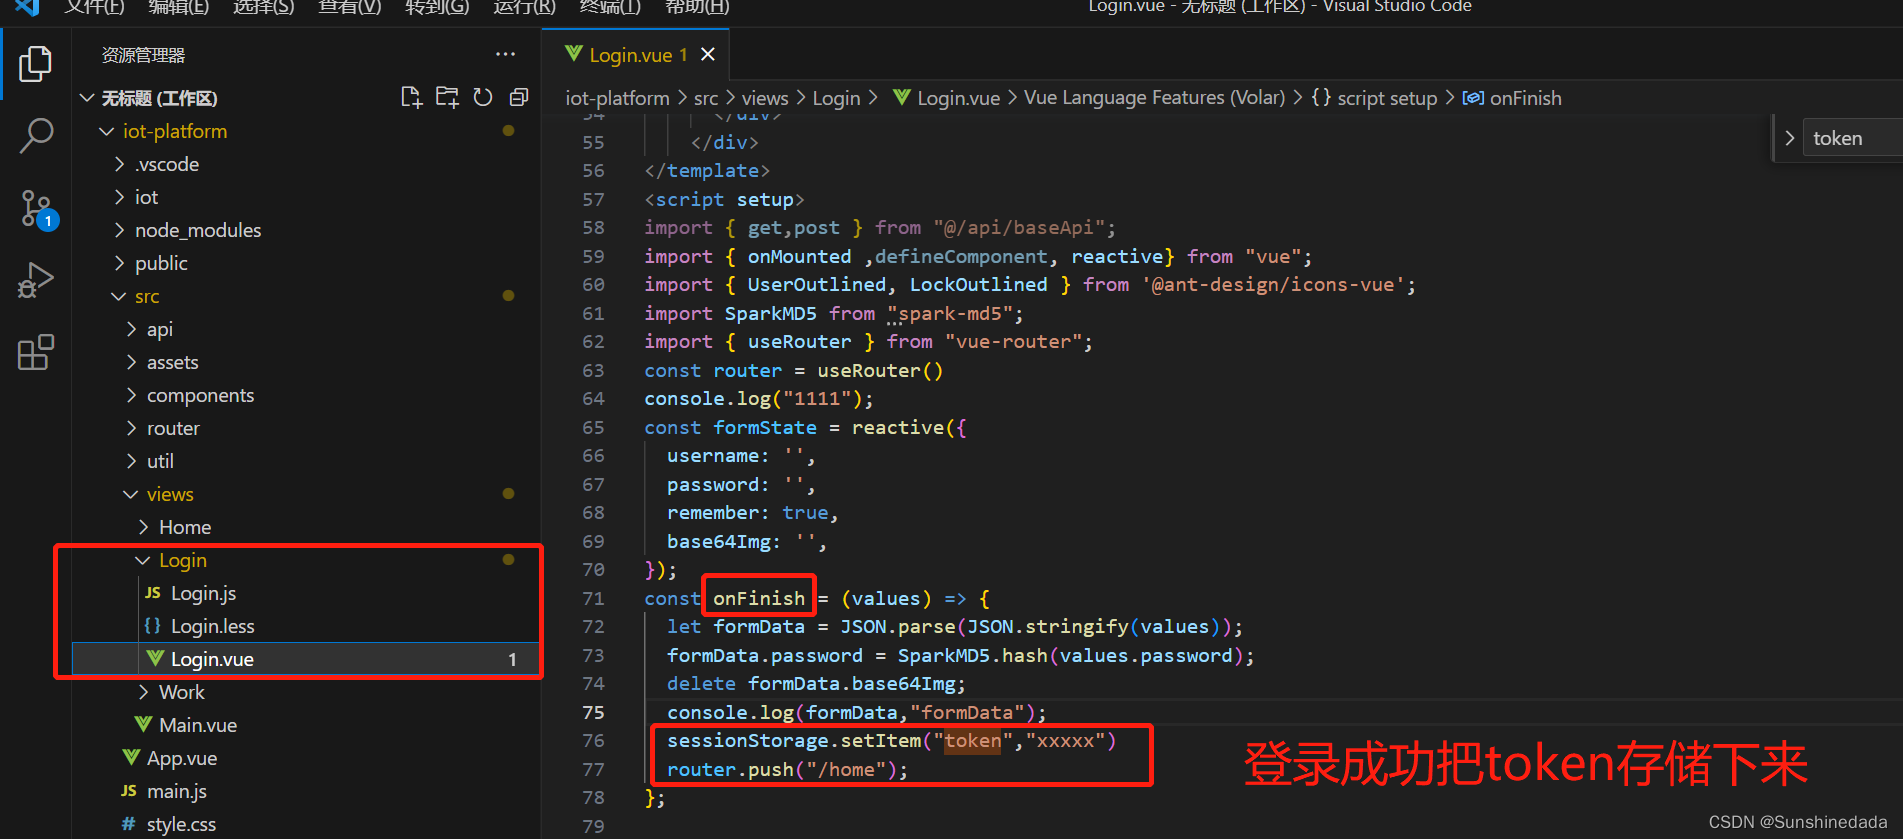
在登录的时候获取token,然后存到本地存储里面,在路由守卫那里用Token判断是否登录,如果登录了就重定向到首页,没有登录就跳转到登录页。