目录
1.编写目的
2.为什么使用TypeScript实现?
3.实现功能
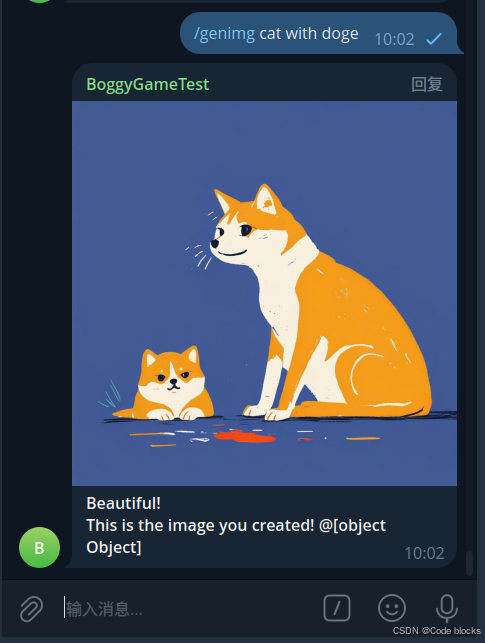
3.1 AI图片生成
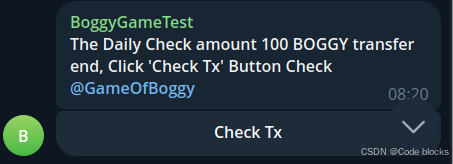
3.2 签到
3.3 邀请
3.4 WalletConnect连接
4.功能实现详解
4.1 AI图片生成
4.2 签到
4.3 邀请
4.4 WalletConnect连接
5.功能截图
6.问题整理
Welcome to Code Block's blog
本篇文章主要介绍了
1.编写目的
本篇文章是小试牛刀-Telebot区块链游戏机器人(python版本)的typescript版本开发记录,实现该版本的主要目的是为了集成walletconnect,以实现用户wallet的无存储公私钥的交互功能.
2.为什么使用TypeScript实现?
首先walletconnct对TypeScript有着良好的支持,它可以直接使用@walletconnect/sign-client中的组件对wc协议进行配对监听,方便后续的事务签名。而python几乎没有相关的组件库(也可能是我没找到).
如果没有库,替代方法可以是python直接调用js文件,但这会让整个项目显得不伦不类.或者python去做request请求,请求部署的js文件服务.但这会让项目整体的稳定性变低.
基于以上的种种考虑,所以这边将整个项目修改为TS版本.
3.实现功能
实现的功能包括在小试牛刀-Telebot区块链游戏机器人已经实现的所有功能,将其集成到TS版本中.在此基础上,我又增加了以下功能:
3.1 AI图片生成
用户可以通过输入/genimg+[描述]命令生成一张与描述相关的艺术画作图片.
3.2 签到
用户可以每天进行签到以获得代币奖励.
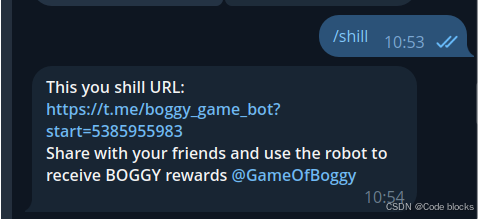
3.3 邀请
用户可以通过/shill命令生成邀请链接,并通过分享该链接在用户通过该链接使用机器人时获得代币奖励.
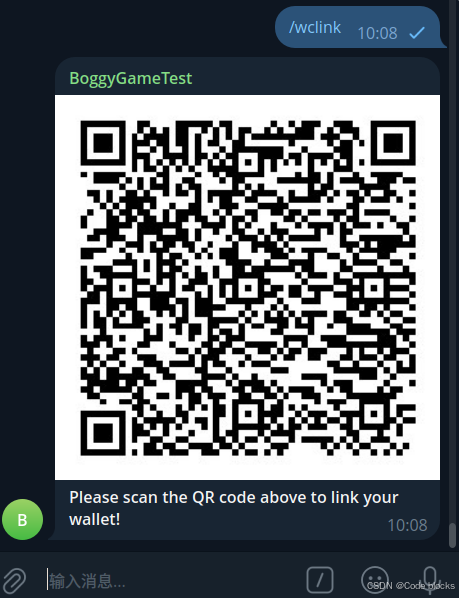
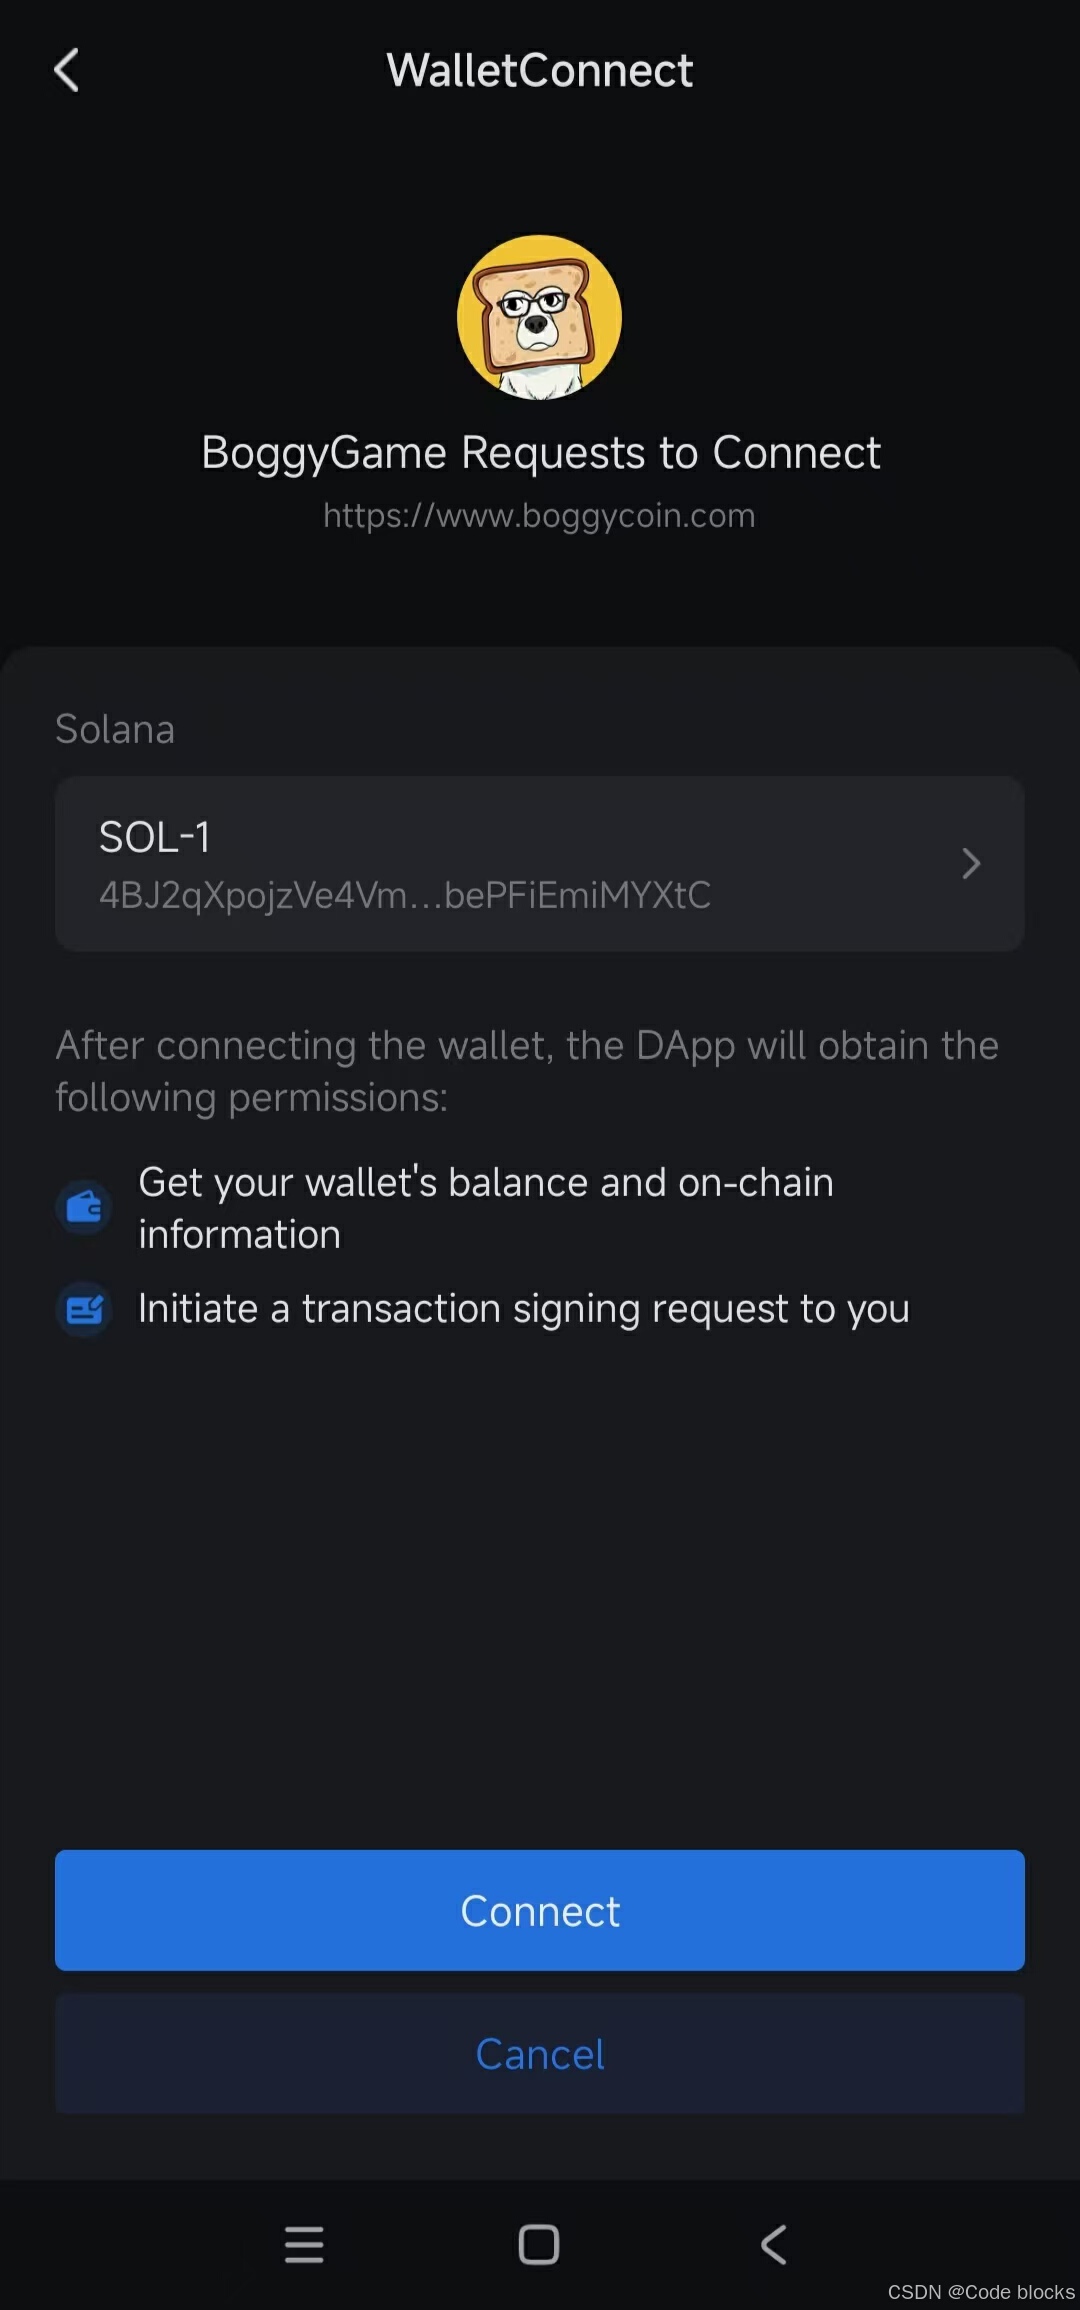
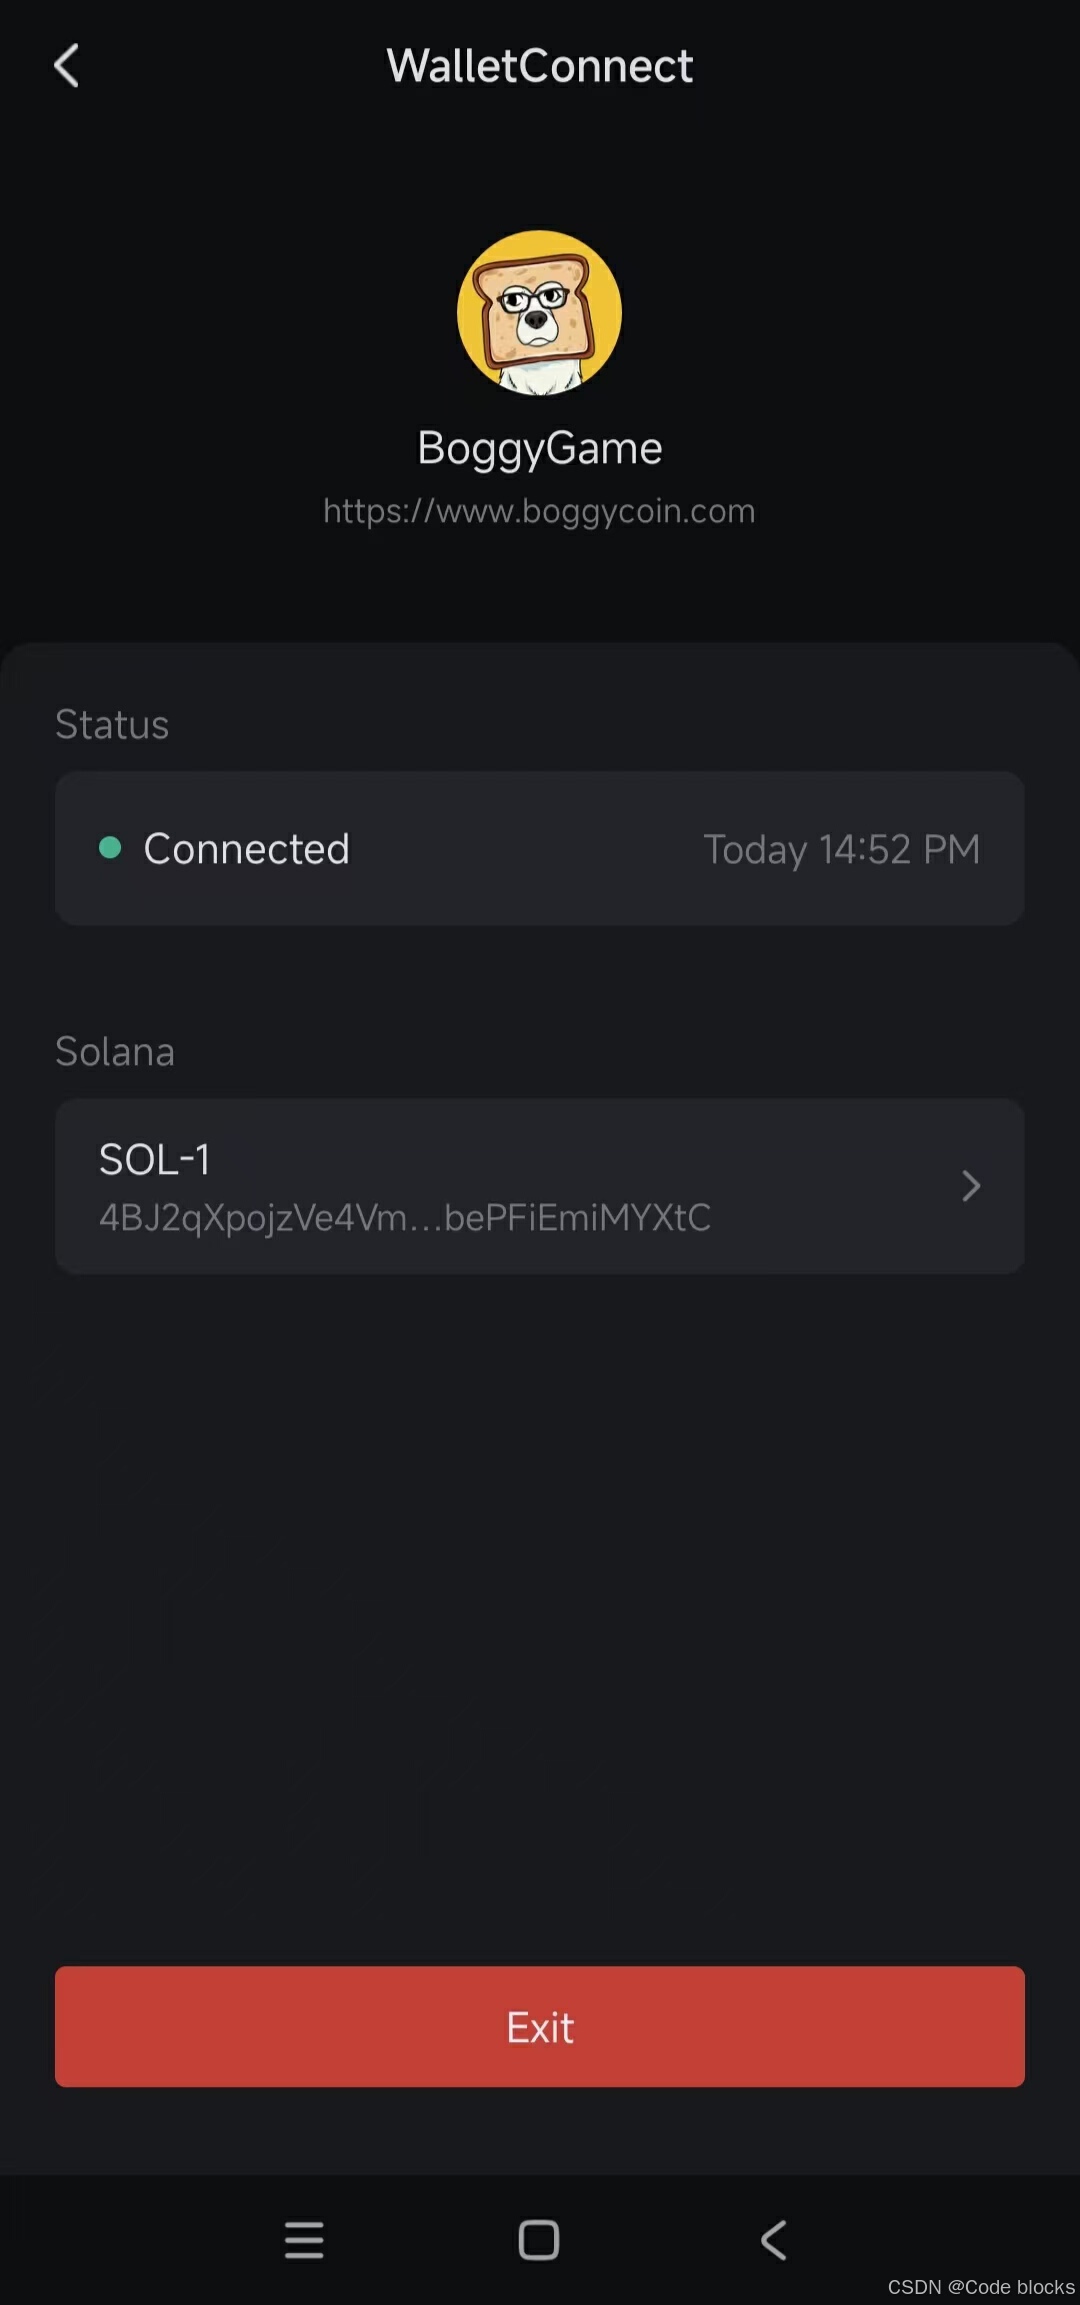
3.4 WalletConnect连接
用户可以通过输入/wclink命令,获得walletconnect二维码,当用户通过支持walletconnect协议的钱包扫码时,可以连接到机器人.
4.功能实现详解
4.1 AI图片生成
AI图片生成是通过huggingface上运行的AI模型接口实现(为什么不用国内的?答:少,且要钱).首先你需要在huggingface上注册一个token,当然如果你不想申请也可以直接用代码内的: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,然后使用post请求直接调用相关模型,具体使用方法可以在huggingface官网进行查看.
import TelegramBot from 'node-telegram-bot-api';
import { getCommandsText } from '../filter/Intercept'
import axios from 'axios';
// 定义 API_TOKEN 和数据接口
const API_TOKEN: string = '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'; // 替换为你的 API Tokeninterface QueryData {inputs: string;
}
// 处理分享链接命令
async function handleGenImg(bot:TelegramBot,message: TelegramBot.Message): Promise<void> {const inviterUserId = message.from?.id;const username = message.from?.username;const text=getCommandsText(message);query({inputs:text}).then((response) => {const helpText="<b>Beautiful!\nThis is the image you created! @"+{username}+"</b>\n"bot.sendPhoto(message.chat.id, response, {caption: helpText,parse_mode: 'HTML'});}).catch((error) => {console.error('Error:', error);});
}
// 注册命令处理程序
export function registerGenImgHandlers(bot:TelegramBot): void {bot.onText(/\/genimg/, async (msg) => {await handleGenImg(bot,msg);});
}async function query(data: any): Promise<any> {try {const response = await axios.post("https://api-inference.huggingface.co/models/alvdansen/littletinies",JSON.stringify(data),{headers: { Authorization: `Bearer ${API_TOKEN}` },responseType: 'arraybuffer'},);return response.data;} catch (error) {console.error('请求错误:', error);throw error;}
}
4.2 签到
用户签到即用户每天可点击一次按钮并获得奖励,这里注意用户点击后该用户id要进行记录,防止重复签到,实现代码如下:
async function dailyCheck(bot: TelegramBot, call: TelegramBot.CallbackQuery) {const fromUserId = call.from.id;const username = call.from.username;//防止连续点击if (!passGameTime(fromUserId)) {bot.sendMessage(call.message!.chat.id, "<b>Please do not send duplicate messages</b>", { parse_mode: 'HTML' });bot.answerCallbackQuery(call.id, { text: "", show_alert: false });return;}dailyCommandTime[fromUserId] = Date.now();if (await notHasWallet(String(fromUserId))) {bot.sendMessage(call.message!.chat.id, `<b>You not have wallet info, you need send [/create] create one game wallet! @${call.from.username}</b>`, { parse_mode: 'HTML' });bot.answerCallbackQuery(call.id, { text: "", show_alert: false });return;}//限定签到数量if (await checkDailyNumber()) {bot.sendMessage(call.message!.chat.id, `<b>There are only 50 people per day, please come again tomorrow! @${call.from.username}</b>`, { parse_mode: 'HTML' });bot.answerCallbackQuery(call.id, { text: "", show_alert: false });return;}if (await checkDaily(String(fromUserId))) {bot.sendMessage(call.message!.chat.id, `<b>You have already daily check! @${call.from.username}</b>`, { parse_mode: 'HTML' });bot.answerCallbackQuery(call.id, { text: "", show_alert: false });return;}//发送奖励const [ amount, tx ] = await drawDailyCheck(String(SEND_USER_ID), String(fromUserId));if (tx === "error") {bot.sendMessage(call.message!.chat.id, "<b>Daily Check Error!</b>", { parse_mode: 'HTML' });bot.answerCallbackQuery(call.id, { text: "", show_alert: false });return;}if (tx=="error:account"){bot.sendMessage(call.message!.chat.id, `<b>You must first send some BOGGY into the wallet before you can [DaliyCheck] and [invite] @${username}</b>`, { parse_mode: 'HTML' });bot.answerCallbackQuery(call.id, { text: "", show_alert: false });return;}//添加每日签到数据addDaily(String(fromUserId));const markup = {inline_keyboard: [[{ text: "Check Tx", url: `https://solscan.io/tx/${tx}` }]]};bot.sendMessage(call.message!.chat.id, `<b>The Daily Check amount ${amount} BOGGY transfer end, Click 'Check Tx' Button Check @${call.from.username}</b>`, { reply_markup: markup, parse_mode: 'HTML' });bot.answerCallbackQuery(call.id, { text: "", show_alert: false });
}
4.3 邀请
邀请实际是通过在机器人链接后拼接命令,格式为:https://t.me/{机器人名}?start={邀请人id},这样当邀请人点击你的链接并使用start命令启动机器人时,则可以获取到链接后的邀请人Id,然后给邀请人发消息并发送代币奖励.实现代码如下:
// 检查是否有邀请码
if (checkCommandsParams(message, "start")) {const inviterUserId = getCommandsParams(message);const fromUserId = message.from?.id??0;//连续点击监测if (!passGameTime(fromUserId)) {bot.sendMessage(message.chat.id, "<b>Please do not send duplicate messages</b>", { parse_mode: 'HTML' });return;}dailyCommandTime[fromUserId] = Date.now();//自己邀请自己检测if (Number(inviterUserId) === fromUserId) {bot.sendMessage(message.chat.id, "<b>You cannot invite yourself!</b>", { parse_mode: 'HTML' });return;}//游戏钱包检测if (await notHasWallet(inviterUserId)) {bot.sendMessage(message.chat.id, "<b>The inviter has not created a wallet and cannot receive rewards</b>", { parse_mode: 'HTML' });return;}//已被邀请检测if (await hasShildUser(String(fromUserId))) {bot.sendMessage(message.chat.id, "<b>Invited users cannot receive rewards</b>", { parse_mode: 'HTML' });return;}//发送奖励const [amount, tx ] = await drawDailyCheck(String(SEND_USER_ID), inviterUserId);if (tx === "error") {bot.sendMessage(message.chat.id, "<b>send rewards Error!</b>", { parse_mode: 'HTML' });return;}if (tx == "error:account"){bot.sendMessage(message.chat.id, `<b>You must first send some BOGGY into the wallet before you can [DaliyCheck] and [invite] @${username}</b>`, { parse_mode: 'HTML' });return;}const markup = {inline_keyboard: [[{ text: "Check Tx", url: `https://solscan.io/tx/${tx}` }]]};bot.sendMessage(message.chat.id, `<b>You have accepted the inviter's invitation and the reward ${amount} BOGGY has been sent to the inviter. Click 'Check Tx' Button Check @${message.from?.username}</b>`, { reply_markup: markup, parse_mode: 'HTML' });bot.sendMessage(inviterUserId, `<b>The Invited amount ${amount} BOGGY transfer end, Click 'Check Tx' Button Check</b>`, { reply_markup: markup, parse_mode: 'HTML' });addShildUser(String(fromUserId), inviterUserId);
4.4 WalletConnect连接
用户输入/wclink命令后,则调用initWalletConnect进行配对,并发送连接请求,同时通过传入的approval监听用户的连接情况,实现代码如下:
import Client, { SignClient } from "@walletconnect/sign-client";import TelegramBot from "node-telegram-bot-api";
const metadata={name: 'BoggyGame',description: 'BoggyGame Bot',url: 'https://www.boggycoin.com',icons: ["https://i.postimg.cc/sftPCk3M/photo-2024-07-12-14-12-43.jpg"]
}
const projectId="申请的ProjectId"
let signClient: Client | null = null;
async function getSignClient() {if (!signClient) {signClient = await SignClient.init({projectId: projectId, // 替换为你的项目IDmetadata: metadata});}return signClient;
}export async function initWalletConnect(onApproval: (approval: any,signClient:any,bot:any,message:any) => void,bot:TelegramBot,message:TelegramBot.Message):Promise<String|undefined> {const signClient = await getSignClient()// 创建会话并发送签名请求const {topic} = await signClient.core.pairing.create()const { uri,approval } = await signClient.connect({pairingTopic: topic,requiredNamespaces: {solana: {methods: ["solana_signTransaction","solana_signMessage"],chains: ["solana:5eykt4UsFv8P8NJdTREpY1vzqKqZKvdp"],events: []}}})// 调用回调函数处理 approvalif (approval) {onApproval(approval,signClient,bot,message);}return uri;}
5.功能截图
AI图片生成
签到
邀请
获取链接:
奖励发放:

walletconnect连接
6.问题整理
在集成node-telegram-bot-api组件时,出现网络问题,有时消息不回复,但是python版本运行良好.在Github上找到相关解决方法,给出的解释是要使用ipv4设置或者降低node版本,修改后代码运行良好,方法如下:
const botToken = "123123123:testAAAAA";
const telegramAPI = require("node-telegram-bot-api");
const bot = new telegramAPI(config.botToken, { polling: true, request: {agentOptions: {keepAlive: true,//ipv4family: 4}
}});
bot.on("message", async function(msg) {await bot.sendMessage(msg.chat.id, "test");
});
感谢您的关注和收藏!!!!!!