二:Hive安装
只在node01上操作
1 安装MySQL 8.0
最小化安装需要安装这个
yum install -y wget
1-1 下载MySQL的yum源
wget http://dev.mysql.com/get/mysql80-community-release-el7-7.noarch.rpm
检查是否安装成功
rpm -qpl mysql80-community-release-el7-7.noarch.rpm

1-2 用yum命令安装此rpm
yum -y install mysql80-community-release-el7-7.noarch.rpm
1-3 安装MySQL服务
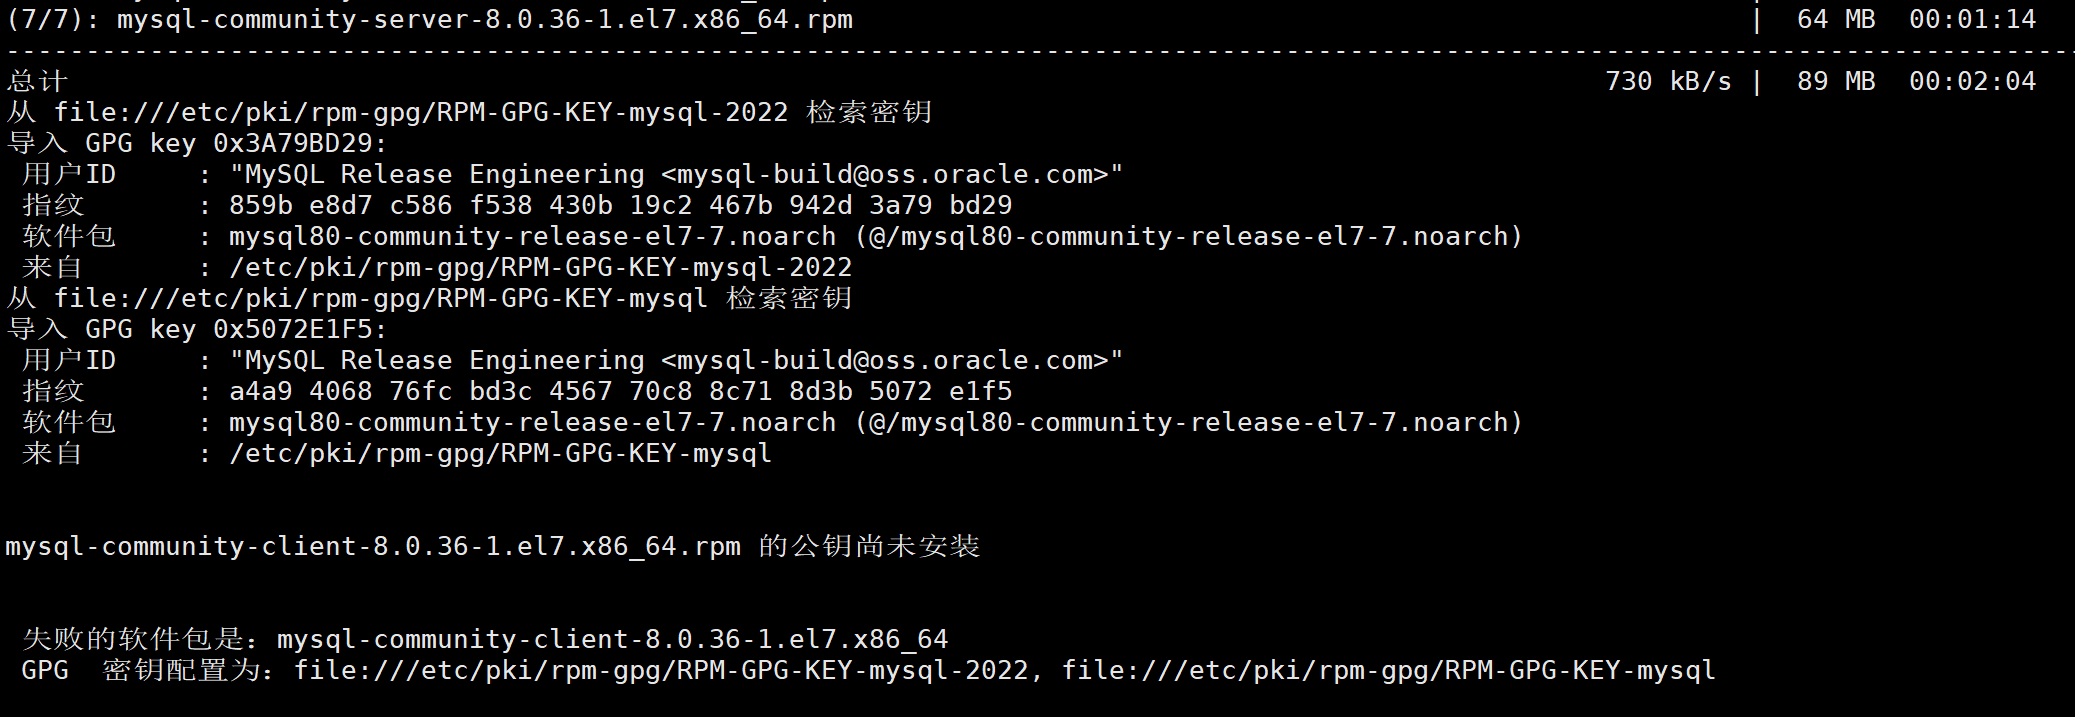
yum install -y mysql-community-server
1-4 启动服务和检查
systemctl start mysqld
如果出现not found错误,依次执行以下命令再执行启动命令:
yum module disable mysql
yum -y install mysql-community-server
yum -y install mysql-community-server --nogpgcheck
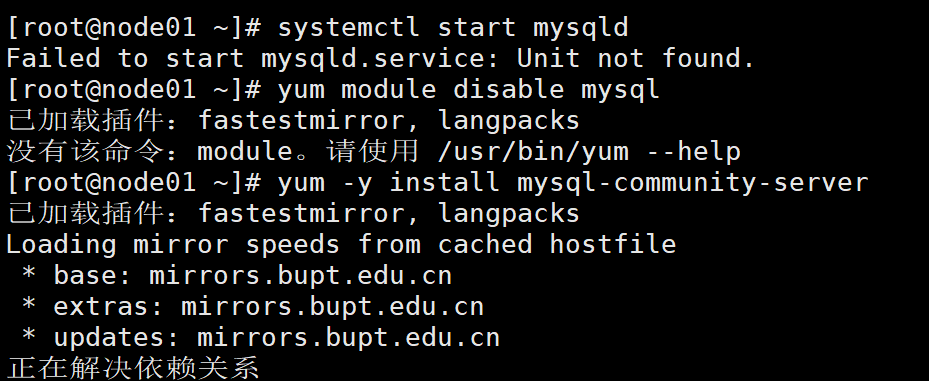
三个命令都要执行一下,不管是否能执行成功
再次启动mysql
systemctl start mysqld
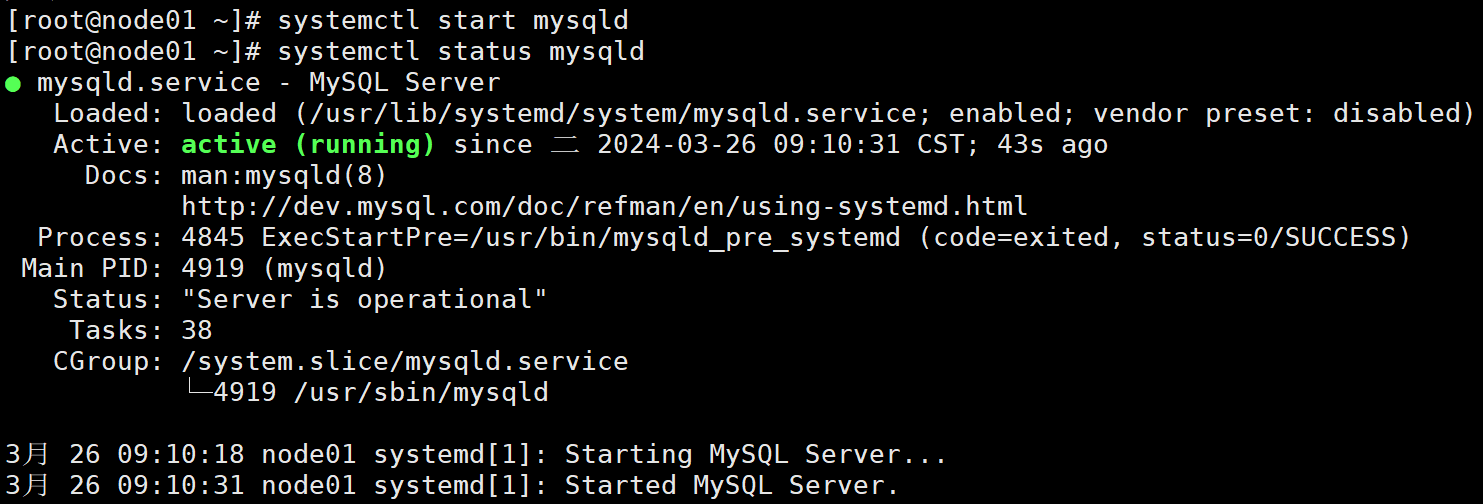
检查mysql服务是否成功启动
systemctl status mysqld
1-5 设置账号密码
查找默认密码 grep "password" /var/log/mysqld.log 记录下里面的密码

登录MySQL修改密码
mysql -uroot -p
输入上面记录的密码
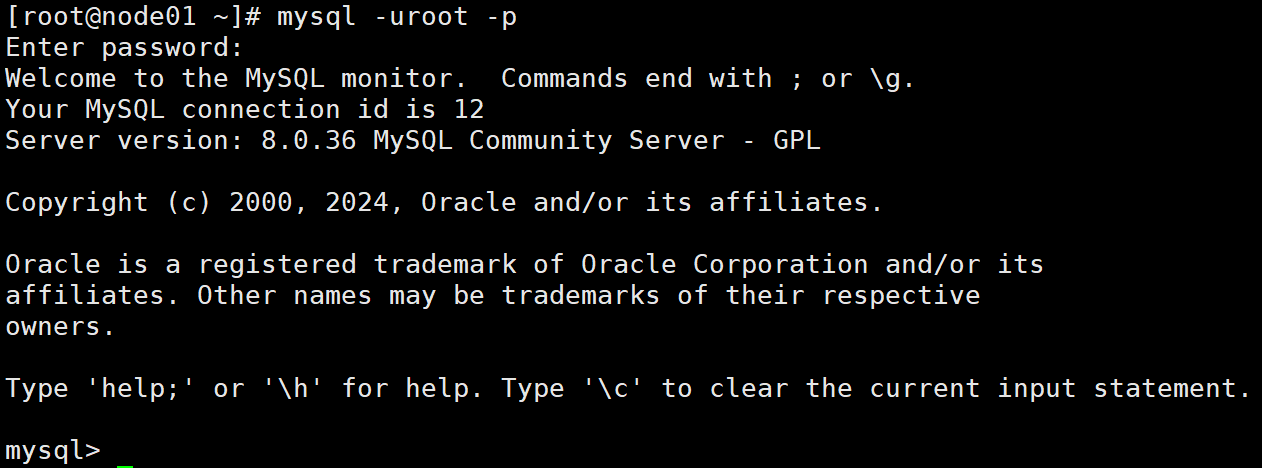
怕出错也可以直接把密码跟在-p后面,但在实际应用中是有账号密码泄露的风险的
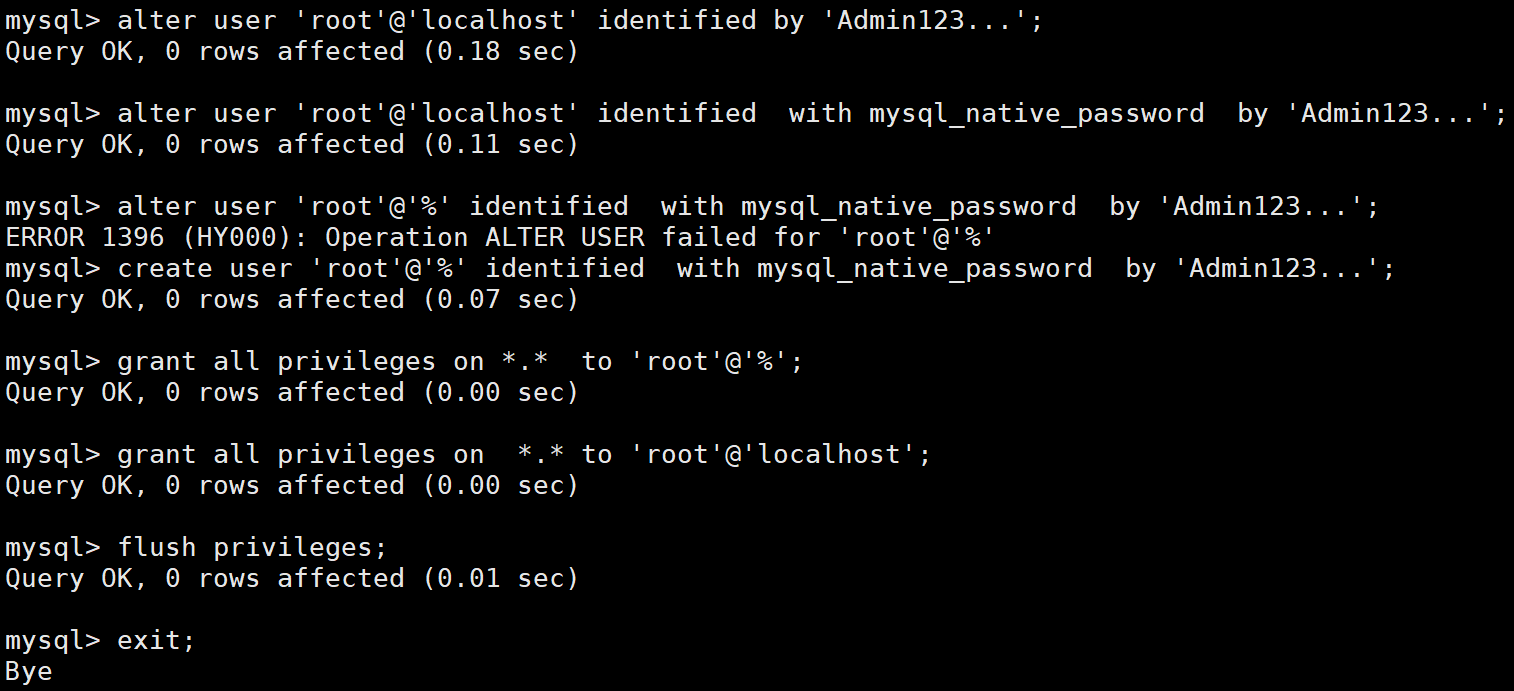
给root账号设置密码和登录权限 (密码要有大小写、数字、符号,至少8位)
alter user 'root'@'localhost' identified by 'Admin123...';
alter user 'root'@'localhost' identified with mysql_native_password by 'Admin123...';
alter user 'root'@'%' identified with mysql_native_password by 'Admin123...';
create user 'root'@'%' identified with mysql_native_password by 'Admin123...';
grant all privileges on *.* to 'root'@'%';
grant all privileges on *.* to 'root'@'localhost';
flush privileges;
注:第三条命令对因权限问题出错,先不管它,其他命令能成功执行即可
1-6 验证
退出mysql
exit;
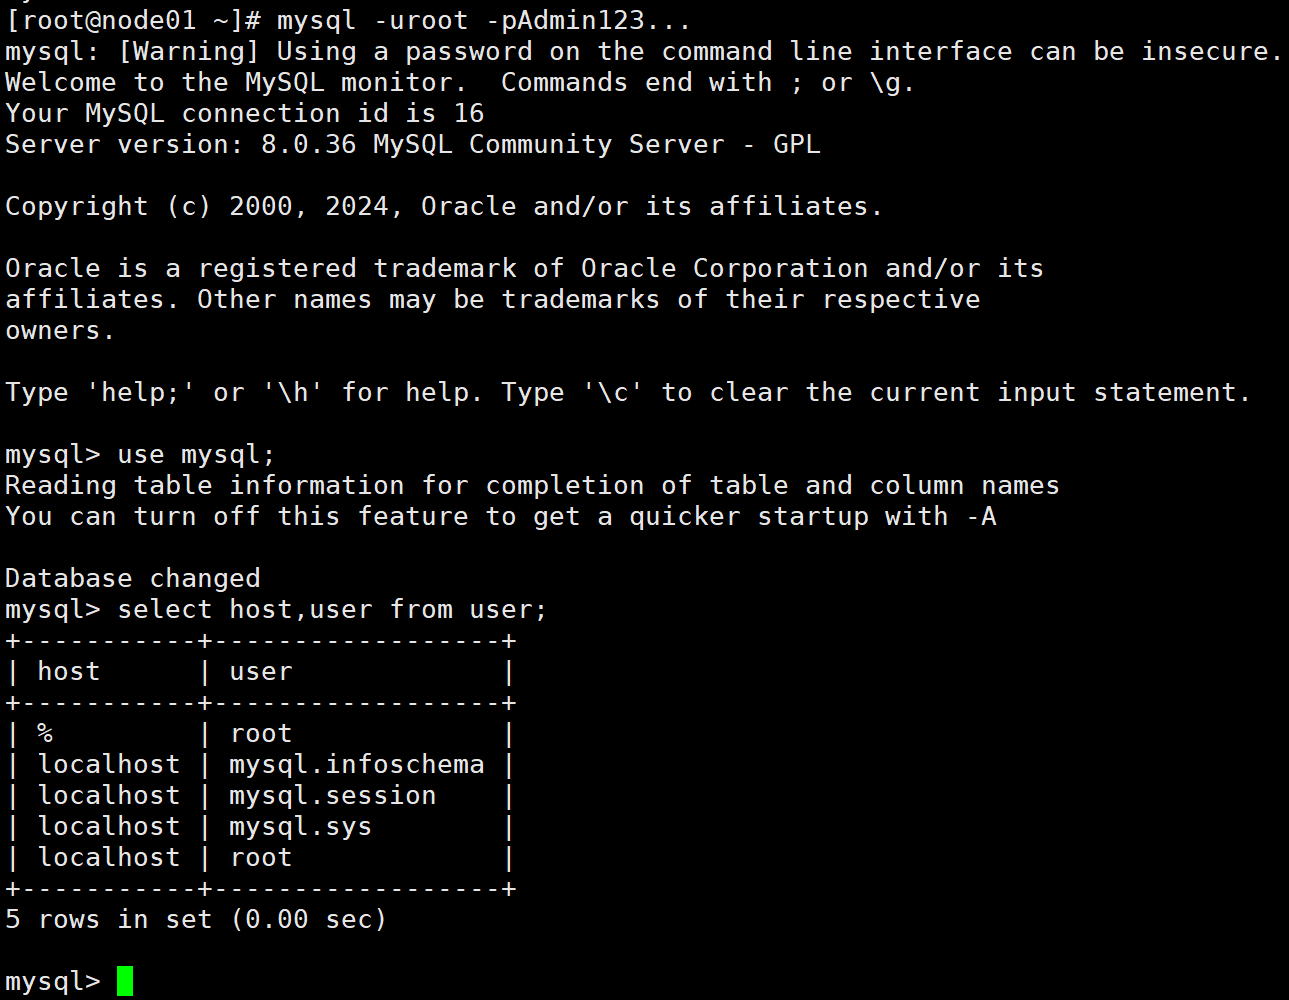
使用新密码登录
mysql -uroot -pAdmin123...
use mysql;
select host,user from user;
退出exit;
2 安装Hive(仅在node01)
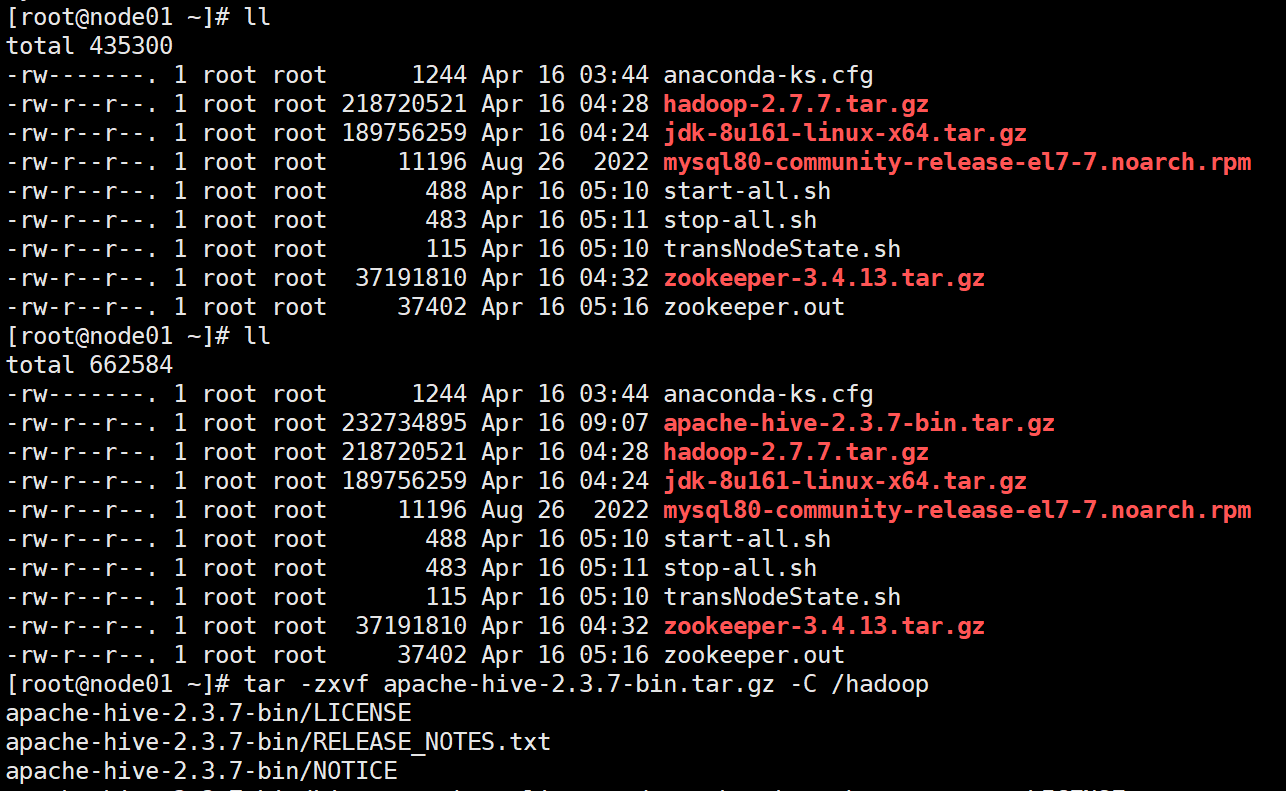
2-1 上传、解压
tar -zxvf apache-hive-2.3.7-bin.tar.gz -C /hadoop
2-2 配置环境变量
vi /etc/profile
加入
export HIVE_HOME=/hadoop/apache-hive-2.3.7-bin
export PATH=$PATH:$HIVE_HOME/bin
保存退出

source /etc/profile
2-3 在HDFS中创建Hive的工作文件夹
(需要启动hadoop即sh start-all.sh)
chmod : u 用户 ,g 用户组,o 其他用户 -R 递归,
hadoop fs -mkdir -p /hive/tmp
hadoop fs -mkdir -p /hive/warehouse
hadoop fs -chmod g+w /hive/tmp
hadoop fs -chmod g+w /hive/warehouse
hadoop fs -chmod -R 777 /hive/tmp


2-4 修改配置
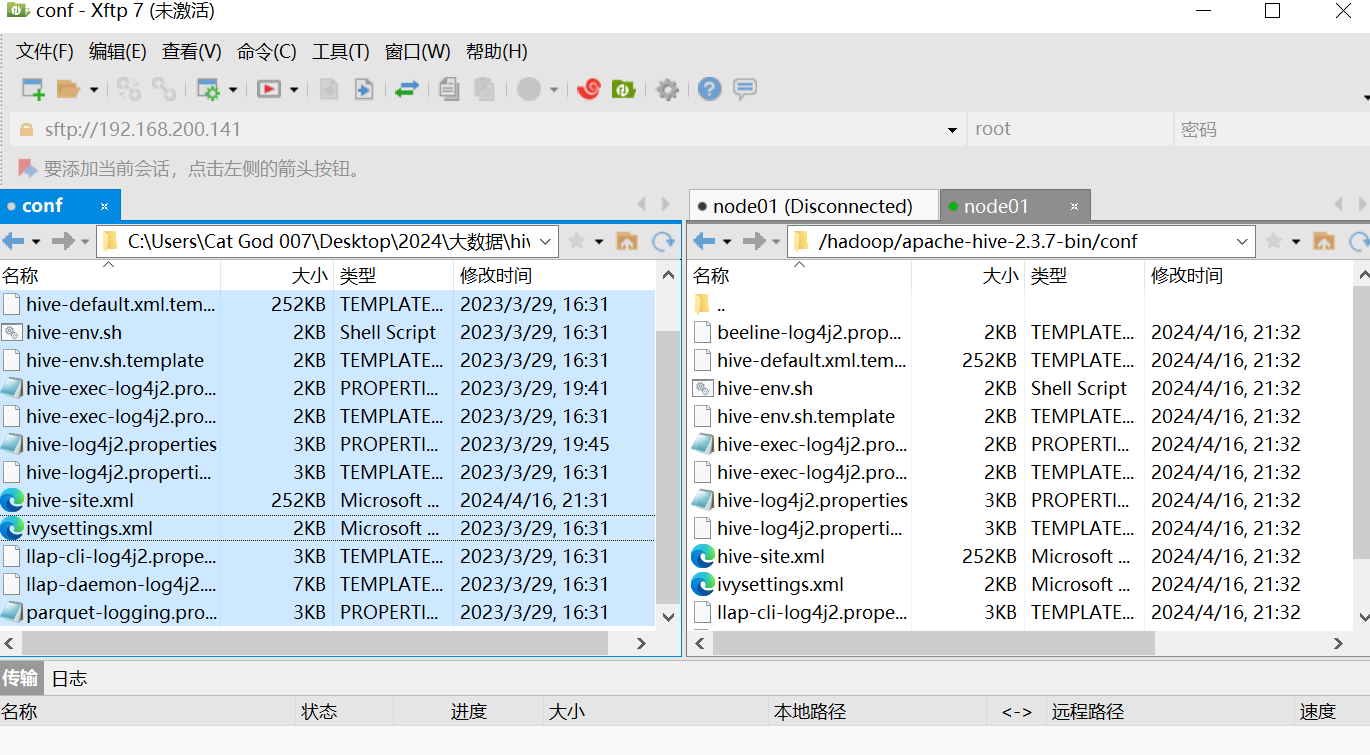
配置好的的文件在资源里
cd /hadoop/apache-hive-2.3.7-bin/conf
执行:
cp hive-env.sh.template hive-env.sh
cp hive-default.xml.template hive-site.xml
cp hive-log4j2.properties.template hive-log4j2.properties
cp hive-exec-log4j2.properties.template hive-exec-log4j2.properties
修改hive-env.sh, 添加JAVA_HOME HADOOP_HOME
export JAVA_HOME=/usr/java/jdk1.8.0_161
export HADOOP_HOME=/hadoop/hadoop-2.7.7
修改hive-site.xml
<!-- jdbc配置 -->
<property>
<name>javax.jdo.option.ConnectionURL</name>
<value>jdbc:mysql://localhost:3306/metastore?
serverTimezone=GMT%2B8&createDatabaseIfNotExist=true&characterEncoding=UTF8&useSSL=false</value>
<description>
JDBC connect string for a JDBC metastore....
</description>
</property><property>
<name>javax.jdo.option.ConnectionUserName</name>
<value>root</value>
<description>Username to use against metastore database</description>
</property><property>
<name>javax.jdo.option.ConnectionPassword</name>
<value>Admin123...</value>
<description>password to use against metastore database</description>
</property><property>
<name>javax.jdo.option.ConnectionDriverName</name>
<value>com.mysql.cj.jdbc.Driver</value>
<description>Driver class name for a JDBC metastore</description>
</property><!--hive工作路径-->
<property>
<name>hive.exec.local.scratchdir</name>
<value>/usr/local/src/hive/tmp</value>
<description>Local scratch space for Hive jobs</description>
</property><property>
<name>hive.downloaded.resources.dir</name>
<value>/usr/local/src/hive/tmp/resources</value>
<description>Temporary local directory for added resources in the remote file system.
</description>
</property><property>
<name>hive.exec.scratchdir</name>
<value>/hive/tmp</value>
<description>HDFS root scratch dir for Hive jobs which gets created with write all (733)
permission. For each connecting user, an HDFS scratch dir:
${hive.exec.scratchdir}/<username> is created, with ${hive.scratch.dir.permission}.
</description>
</property><property>
<name>hive.metastore.warehouse.dir</name>
<value>/hive/warehouse</value>
<description>location of default database for the warehouse</description>
</property>
2-5 初始化和启动
将mysql的jar放到hive的lib目录里面
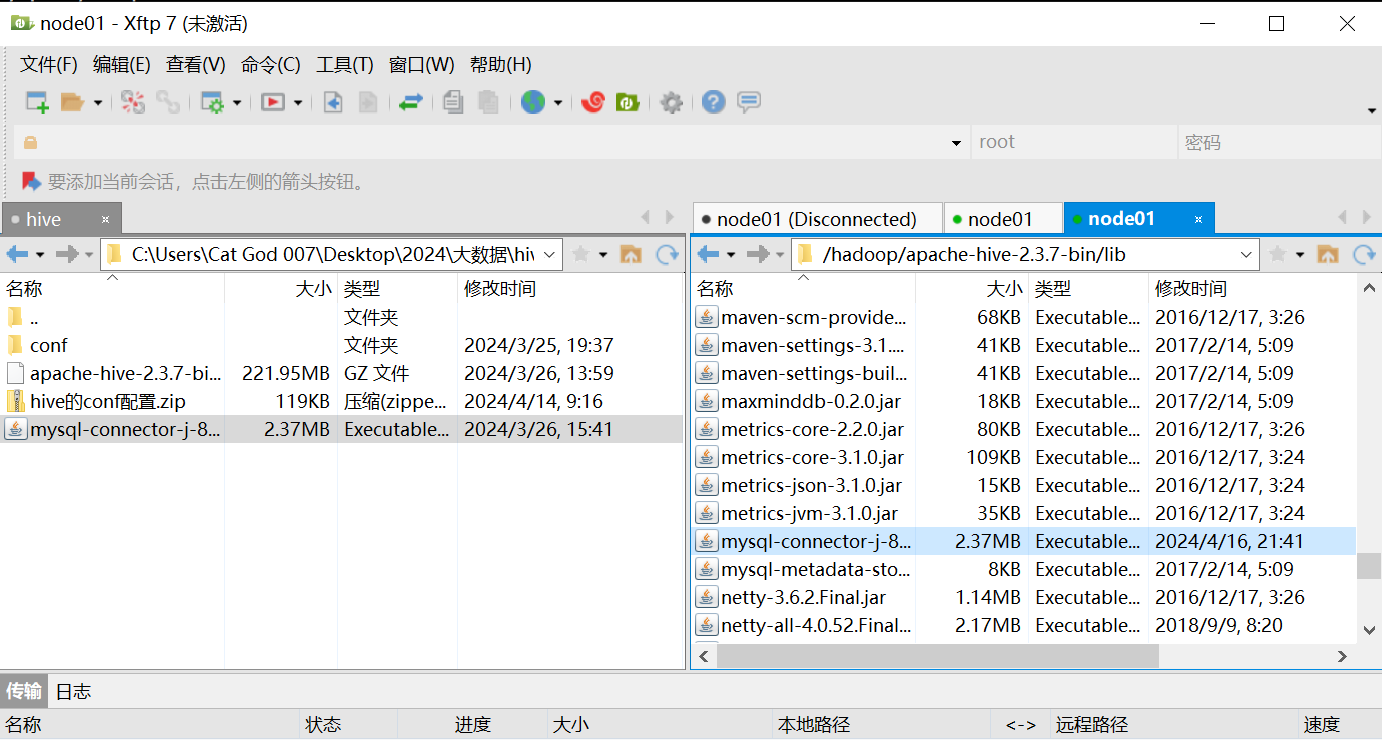
cd /hadoop/apache-hive-2.3.7-bin/bin
./schematool -dbType mysql -initSchema

启动
./hive

3 Hive测试
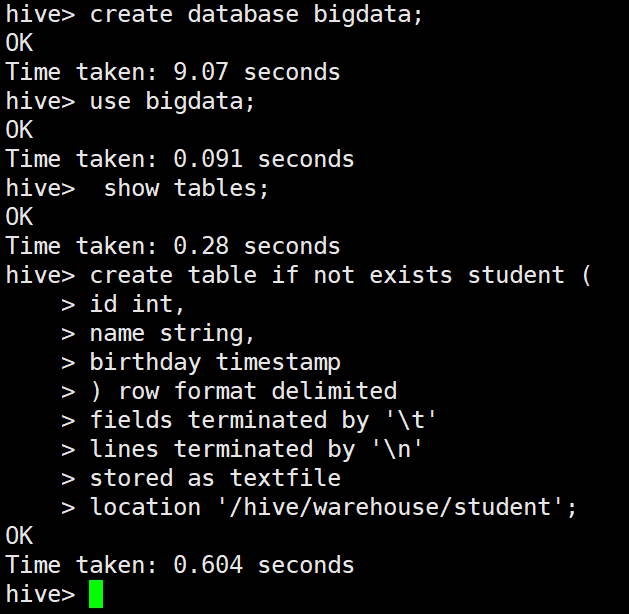
3-1 创建数据库
create database bigdata;
3-2 切换数据库
use bigdata;
3-3 查看表
show tables;
3-4 创建内部表
hive的命令行上,输入;表示语句结束,回车表示换行。
create table if not exists student (
id int,
name string,
birthday timestamp
) row format delimited
fields terminated by '\t'
lines terminated by '\n'
stored as textfile
location '/hive/warehouse/student';
3-5 创建外部表
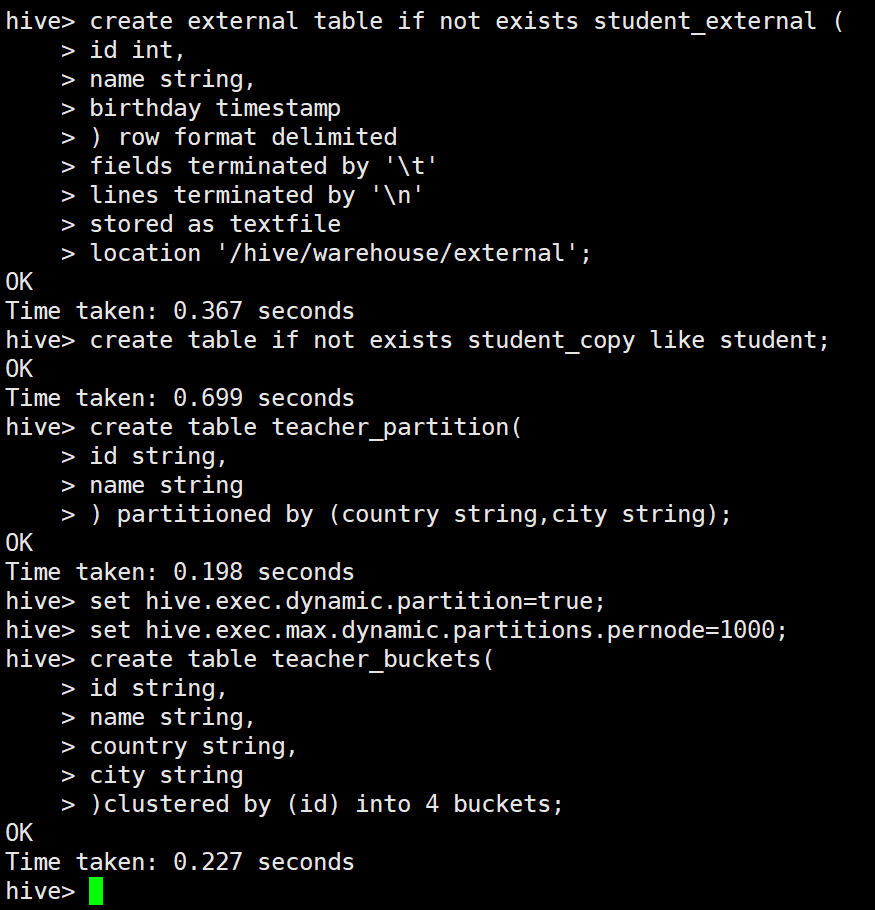
create external table if not exists student_external (
id int,
name string,
birthday timestamp
) row format delimited
fields terminated by '\t'
lines terminated by '\n'
stored as textfile
location '/hive/warehouse/external';
3-6 复制表结构
create table if not exists student_copy like student;
3-7 创建分区表
create table teacher_partition(
id string,
name string
) partitioned by (country string,city string);
可以在hive的命令行,手动修改
开启动态分区
set hive.exec.dynamic.partition=true;
每个节点动态分区的最大数量
set hive.exec.max.dynamic.partitions.pernode=1000;
3-8 创建桶表
create table teacher_buckets(
id string,
name string,
country string,
city string
)clustered by (id) into 4 buckets;
teacher_buckets的文件(或者分区)分为4个桶存放
3-9 修改表
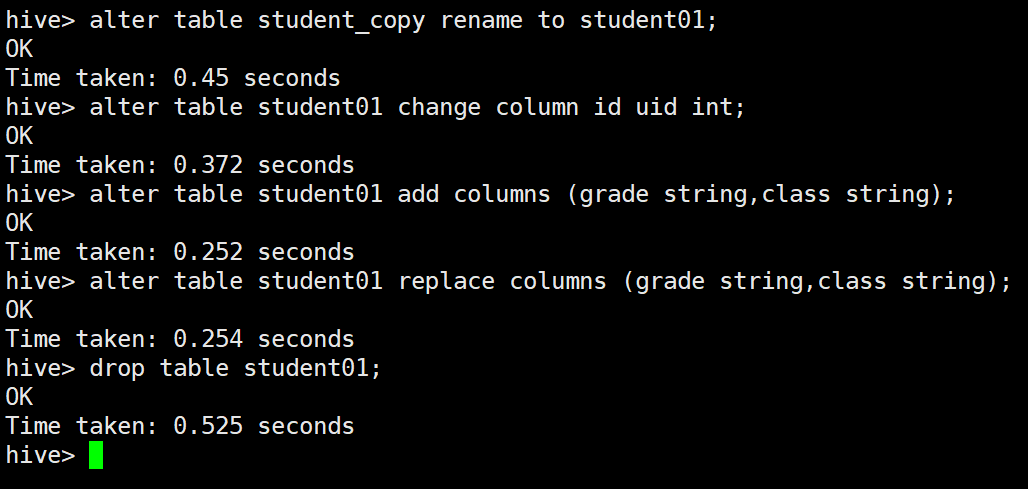
重命名 rename to
alter table student_copy rename to student01;
重命名列 change column
alter table student01 change column id uid int;
增加列 add columns
alter table student01 add columns (grade string,class string);
删除、替换列 replace columns
alter table student01 replace columns (grade string,class string);
删除表
drop table student01;
3-10 装载数据
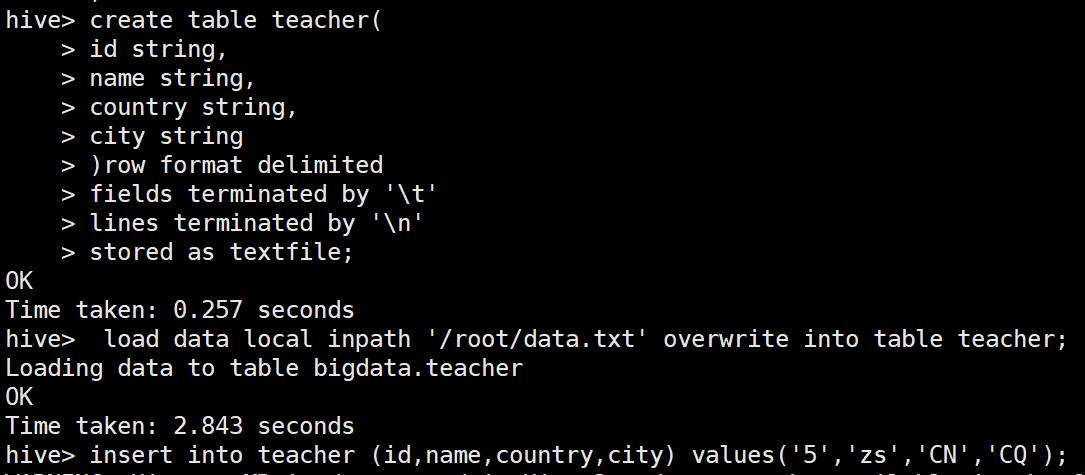
create table teacher(
id string,
name string,
country string,
city string
)row format delimited
fields terminated by '\t'
lines terminated by '\n'
stored as textfile;
从本地装载数据
load data local inpath ‘Linux的本地文件路径’ [overwrite] into table 表名;
overwrite:如果有overwrite,表示覆盖,不是追加数据
例如:
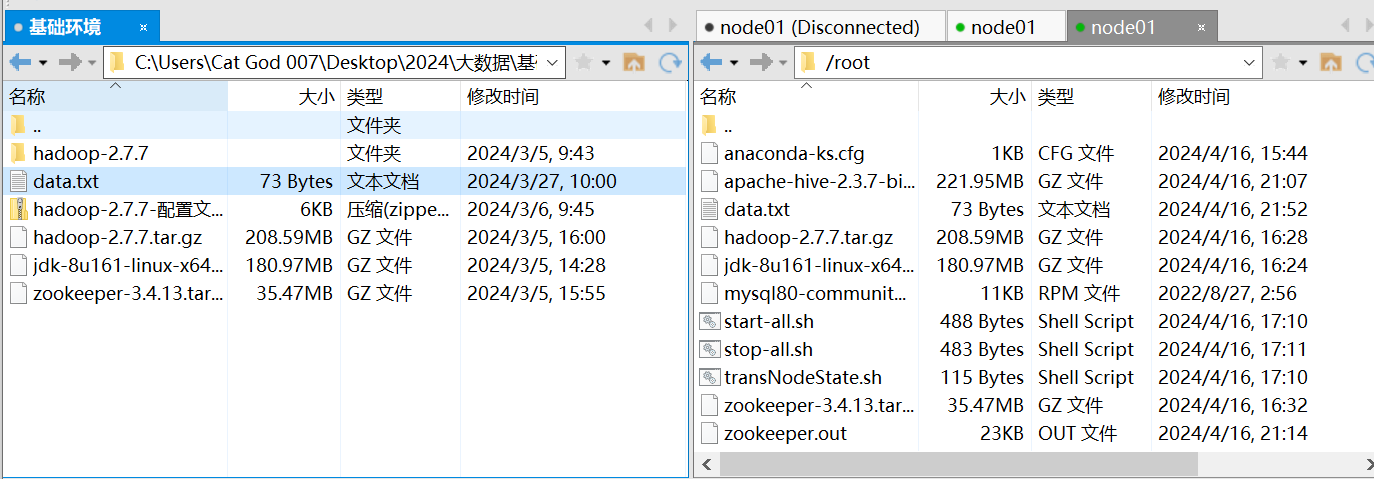

load data local inpath '/root/data.txt' overwrite into table teacher;
新增数据
insert into teacher (id,name,country,city) values('5','zs','CN','CQ');
通过查询出的数据插入数据
create table if not exists teacher01 like teacher;
insert into teacher01 select * from teacher;

导出数据
insert overwrite local directory ‘本地路径’ select * from 表;
insert overwrite local directory '/hadoop/datax.txt' select * from teacher;

删除、更新、截断
delete 、update、truncate
truncate table teacher;
聚合函数
select country,count(*) from teacher group by country having count(*)>1;

4 配置JDBC链接
实现jdbc链接要执行hive,还要执行hiveserver2
修改对应的etc/hadoop/core-site.xml 文件参考
vi /hadoop/hadoop-2.7.7/etc/hadoop/core-site.xml
在里面添加配置:
<property>
<name>hadoop.proxyuser.root.hosts</name>
<value>*</value>
</property>
<property>
<name>hadoop.proxyuser.root.groups</name>
<value>*</value>
</property>
<property>
<name>hadoop.proxyuser.hduser.hosts</name>
<value>*</value>
</property>
<property>
<name>hadoop.proxyuser.hduser.groups</name>
<value>*</value>
</property>
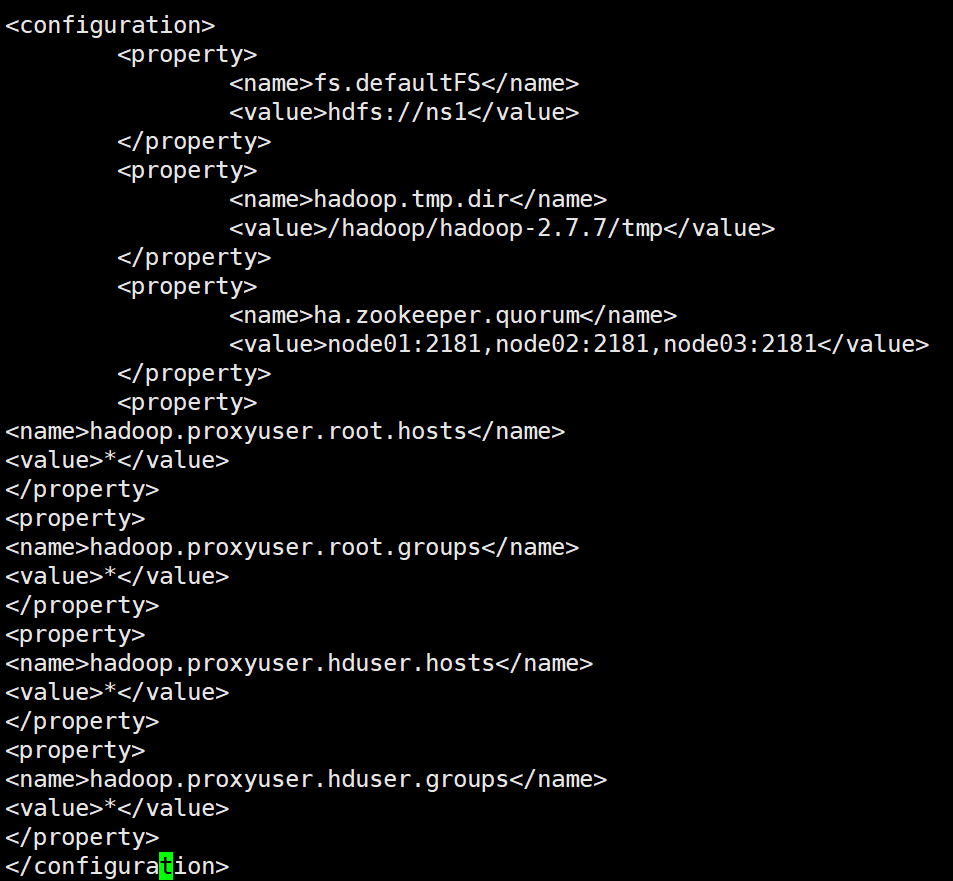
链接Hive是需要开启hive与hiveserver2即,&代表后台允许
hive &
hiveserver2 &
5 打快照
关闭所有服务
sh stop-all.sh
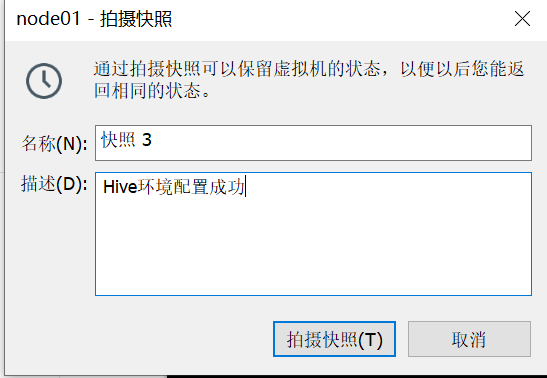
内容:Hive环境配置成功(3个节点都打快照)
据说关机,再打快照,更省空间

感谢大家的支持,关注,评论,点赞!
再见!!!

