🤗 ApiHug × {Postman|Swagger|Api...} = 快↑ 准√ 省↓
- GitHub - apihug/apihug.com: All abou the Apihug
- apihug.com: 有爱,有温度,有质量,有信任
- ApiHug - API design Copilot - IntelliJ IDEs Plugin | Marketplace

This page outlines how you can use ApiHug to create quick demos in 15 minutes.
Prerequisites
- JDK 17+ OpenJDK or Oracle's
- Gradle 8+
- IDEA 2022+
- ApiHug - API design Copilot
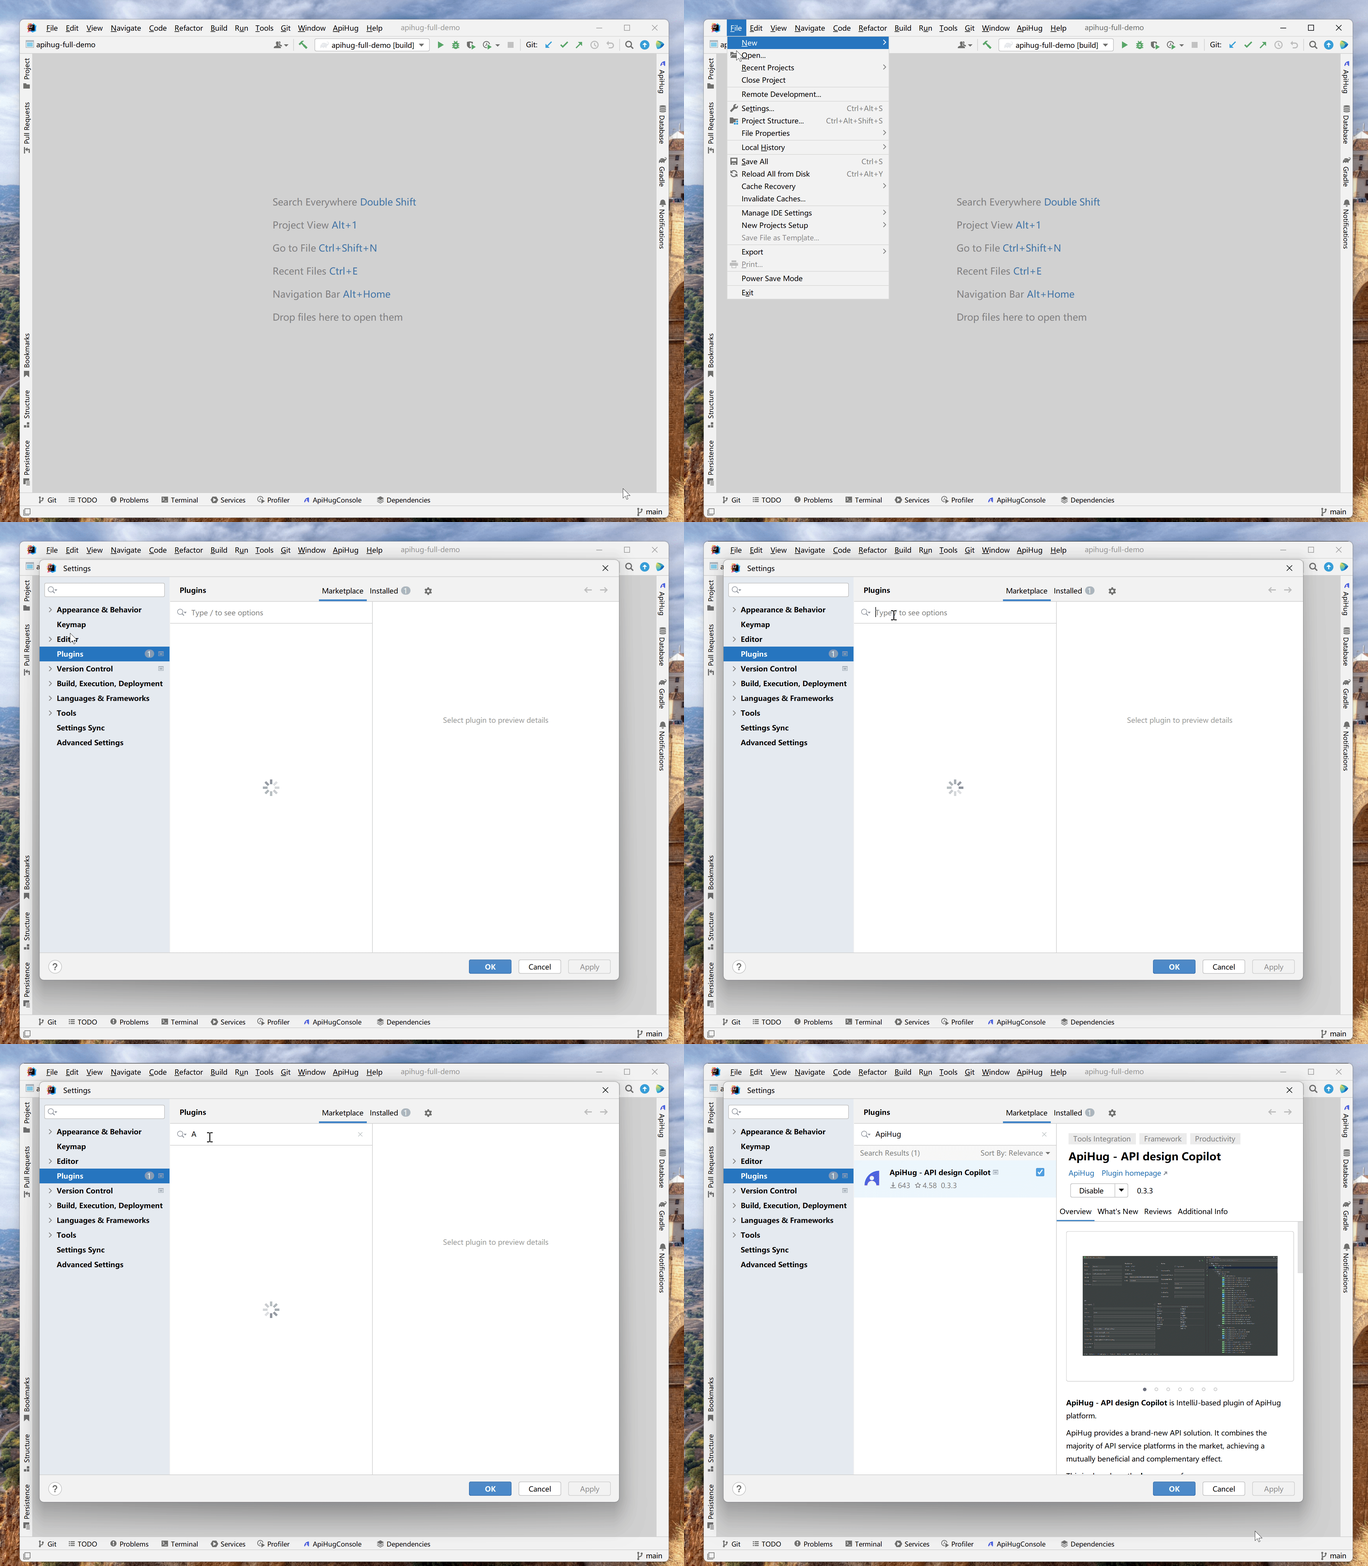
Plugin Install
- File
- Settings
- Plugin
- Search
ApiHug - Install & Restart
Project Wizard
ApiHug - API design Copilot provides a highly friendly and intuitive project template to kickstart your API development. It guides you through step-by-step creation of API projects that adhere to best practices.
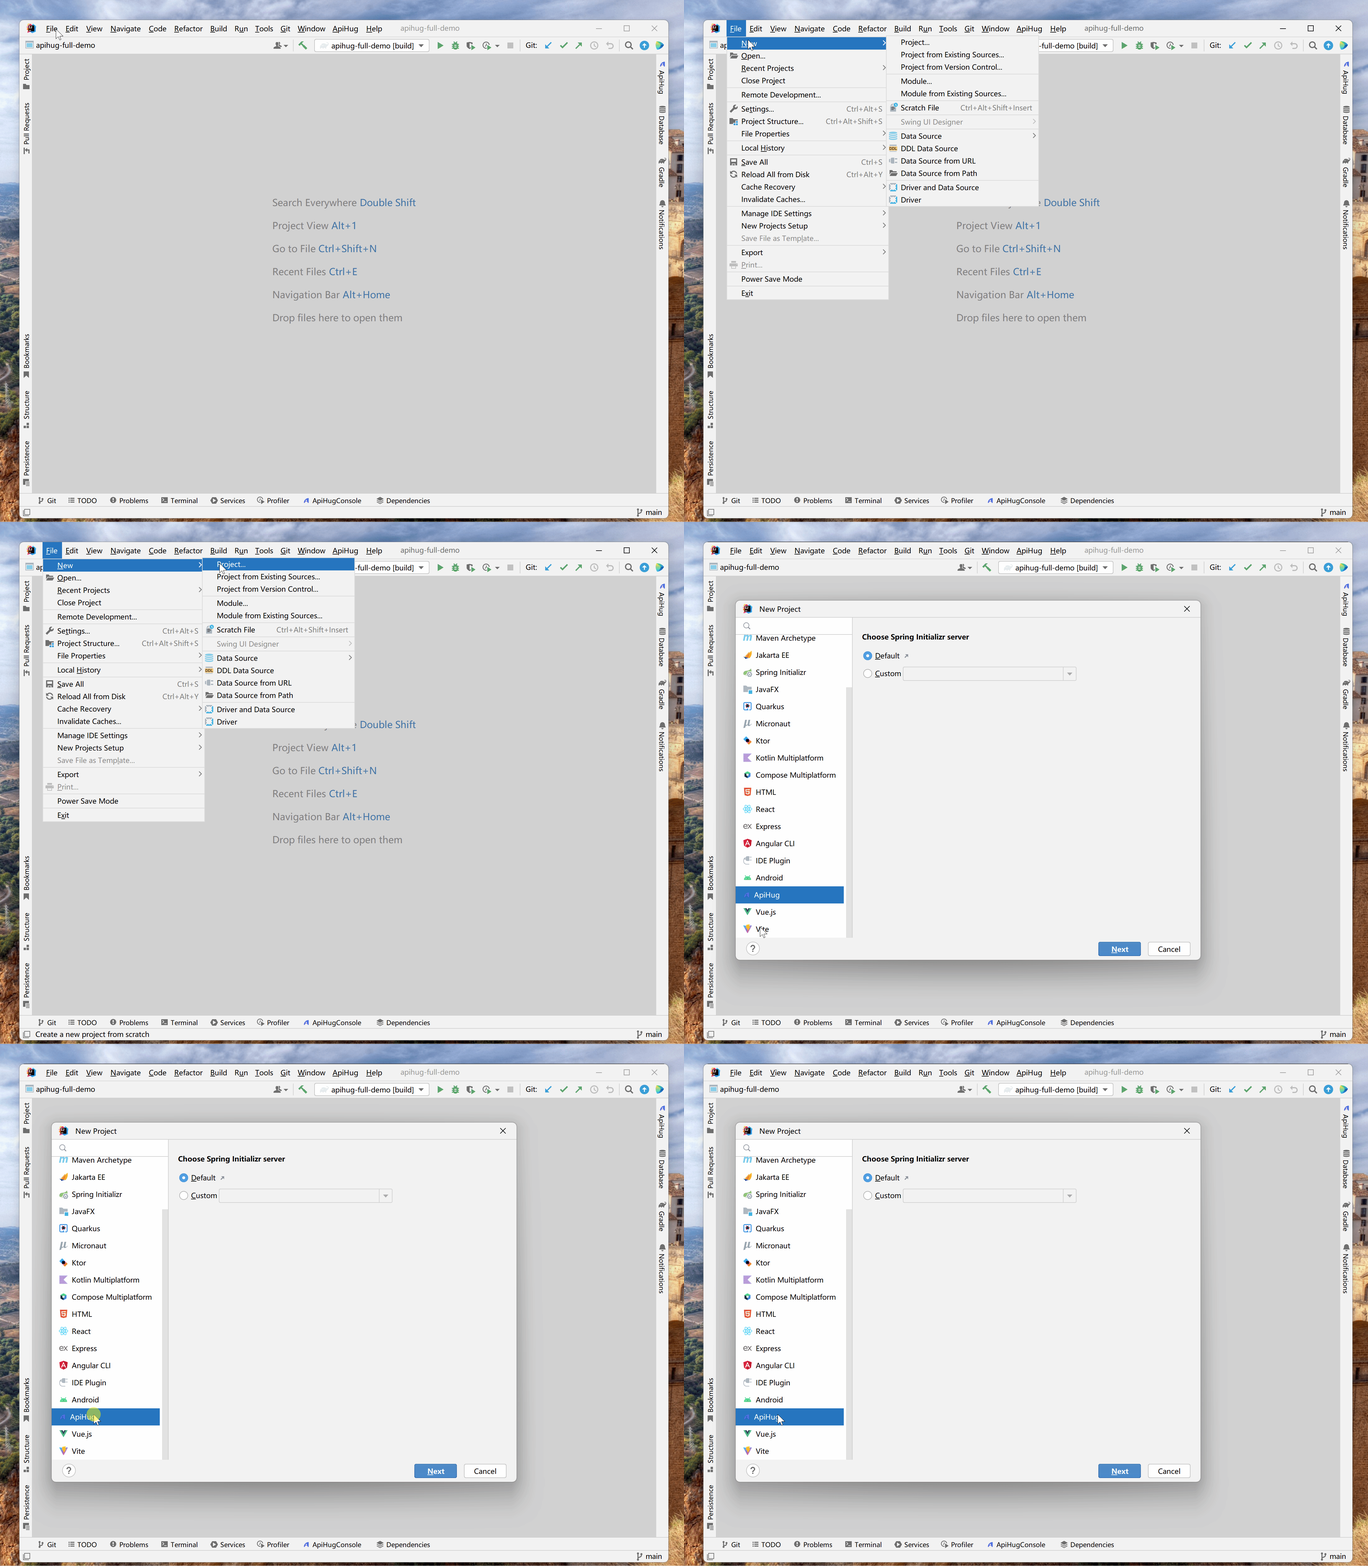
01-Start ApiHug Project
- File
- New -> Project
- ApiHug
02-Project Settings
- Project settings
- package
- name
- description
- SDK Settings
- version
- DB Vendor
- Cache
- Port

spring-settings">03-Spring Settings
This is a standard Start Spring configuration:
- Select Type
- Choice the components for example
Spring Web
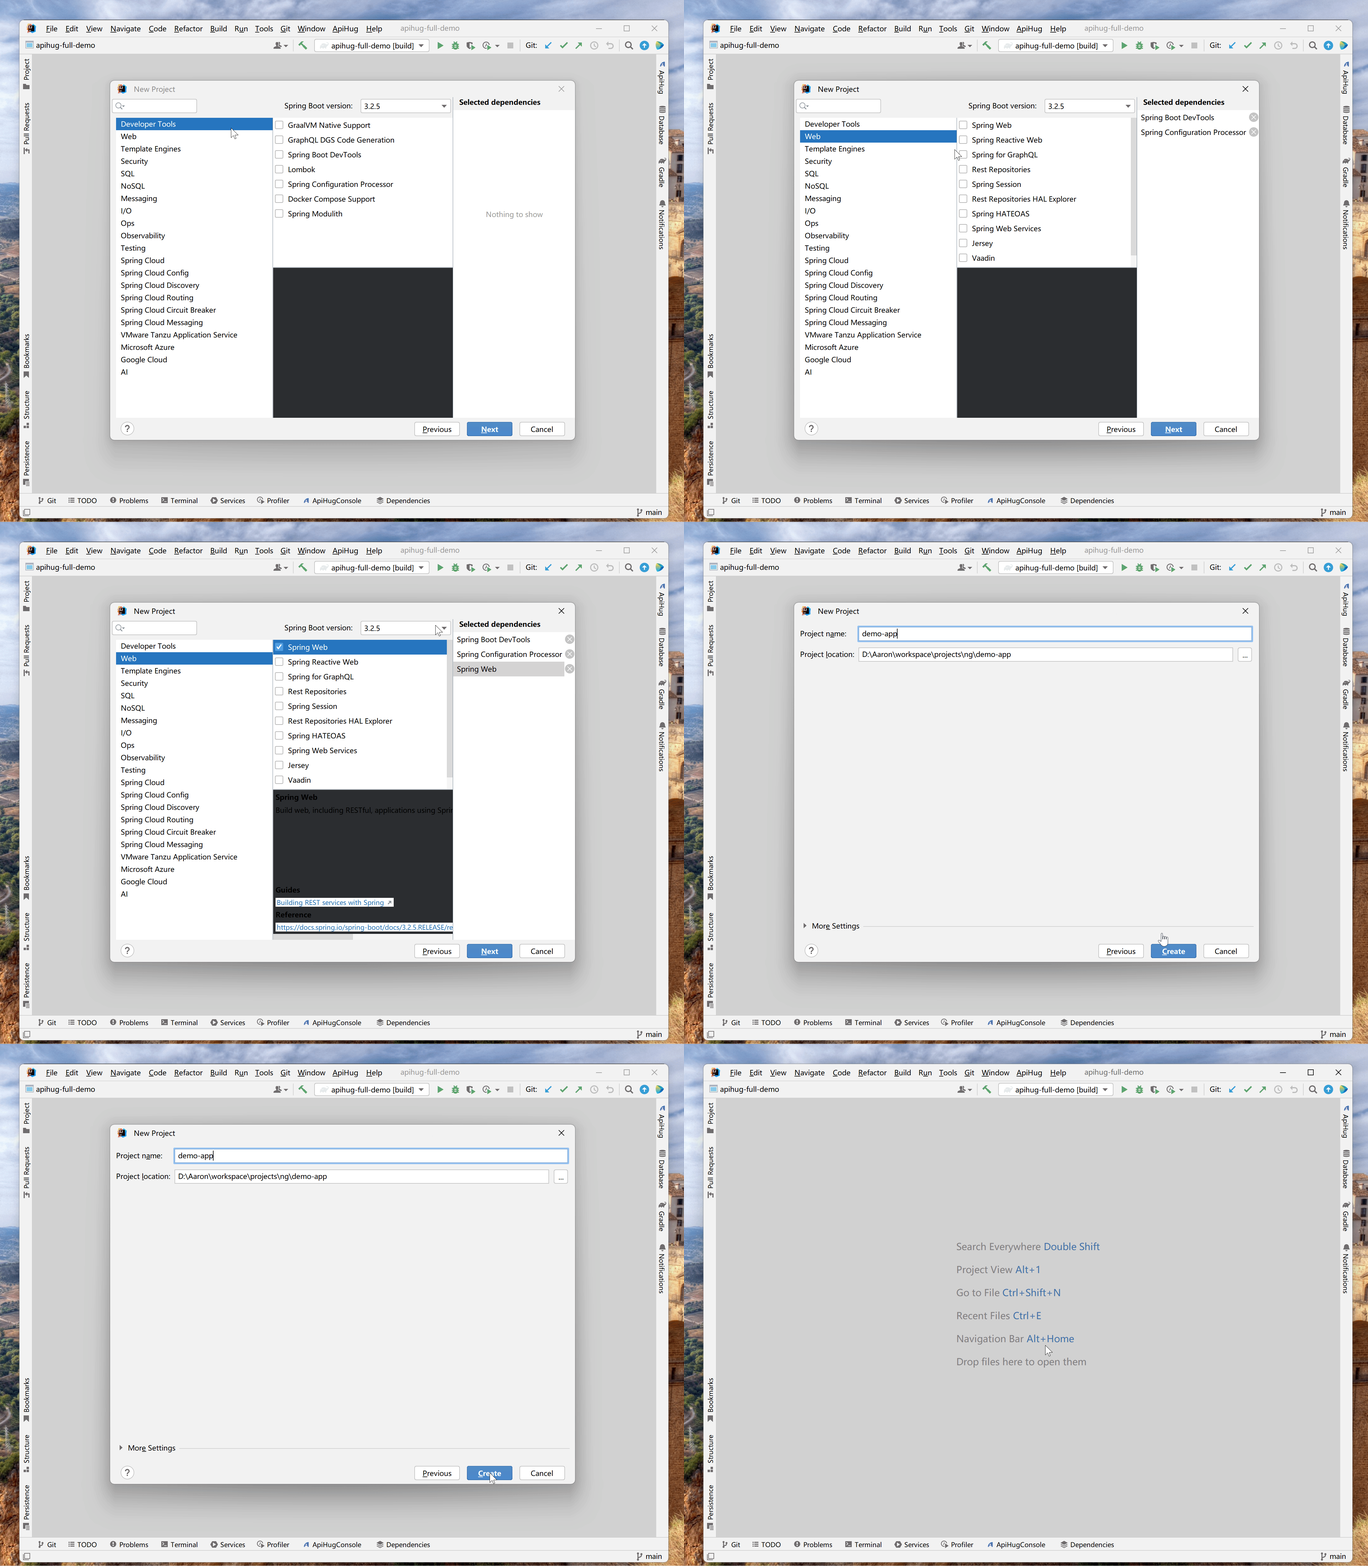
Eventually click Create -> Open Project to open the project:
04-Start Project
Tip
The SDK version may update while our project goes on. please check them on repository:

.
you can update them manually:
- YOUR_PROJECT > gradle > libs.versions.toml
apihug = "0.9.2-RELEASE"update to latest version
Follow the IDEA's instruction:
- load this project as
Gradle, if not please manually reload(check Notification) - two modules
demo-app-proto&demo-appshould be recognized
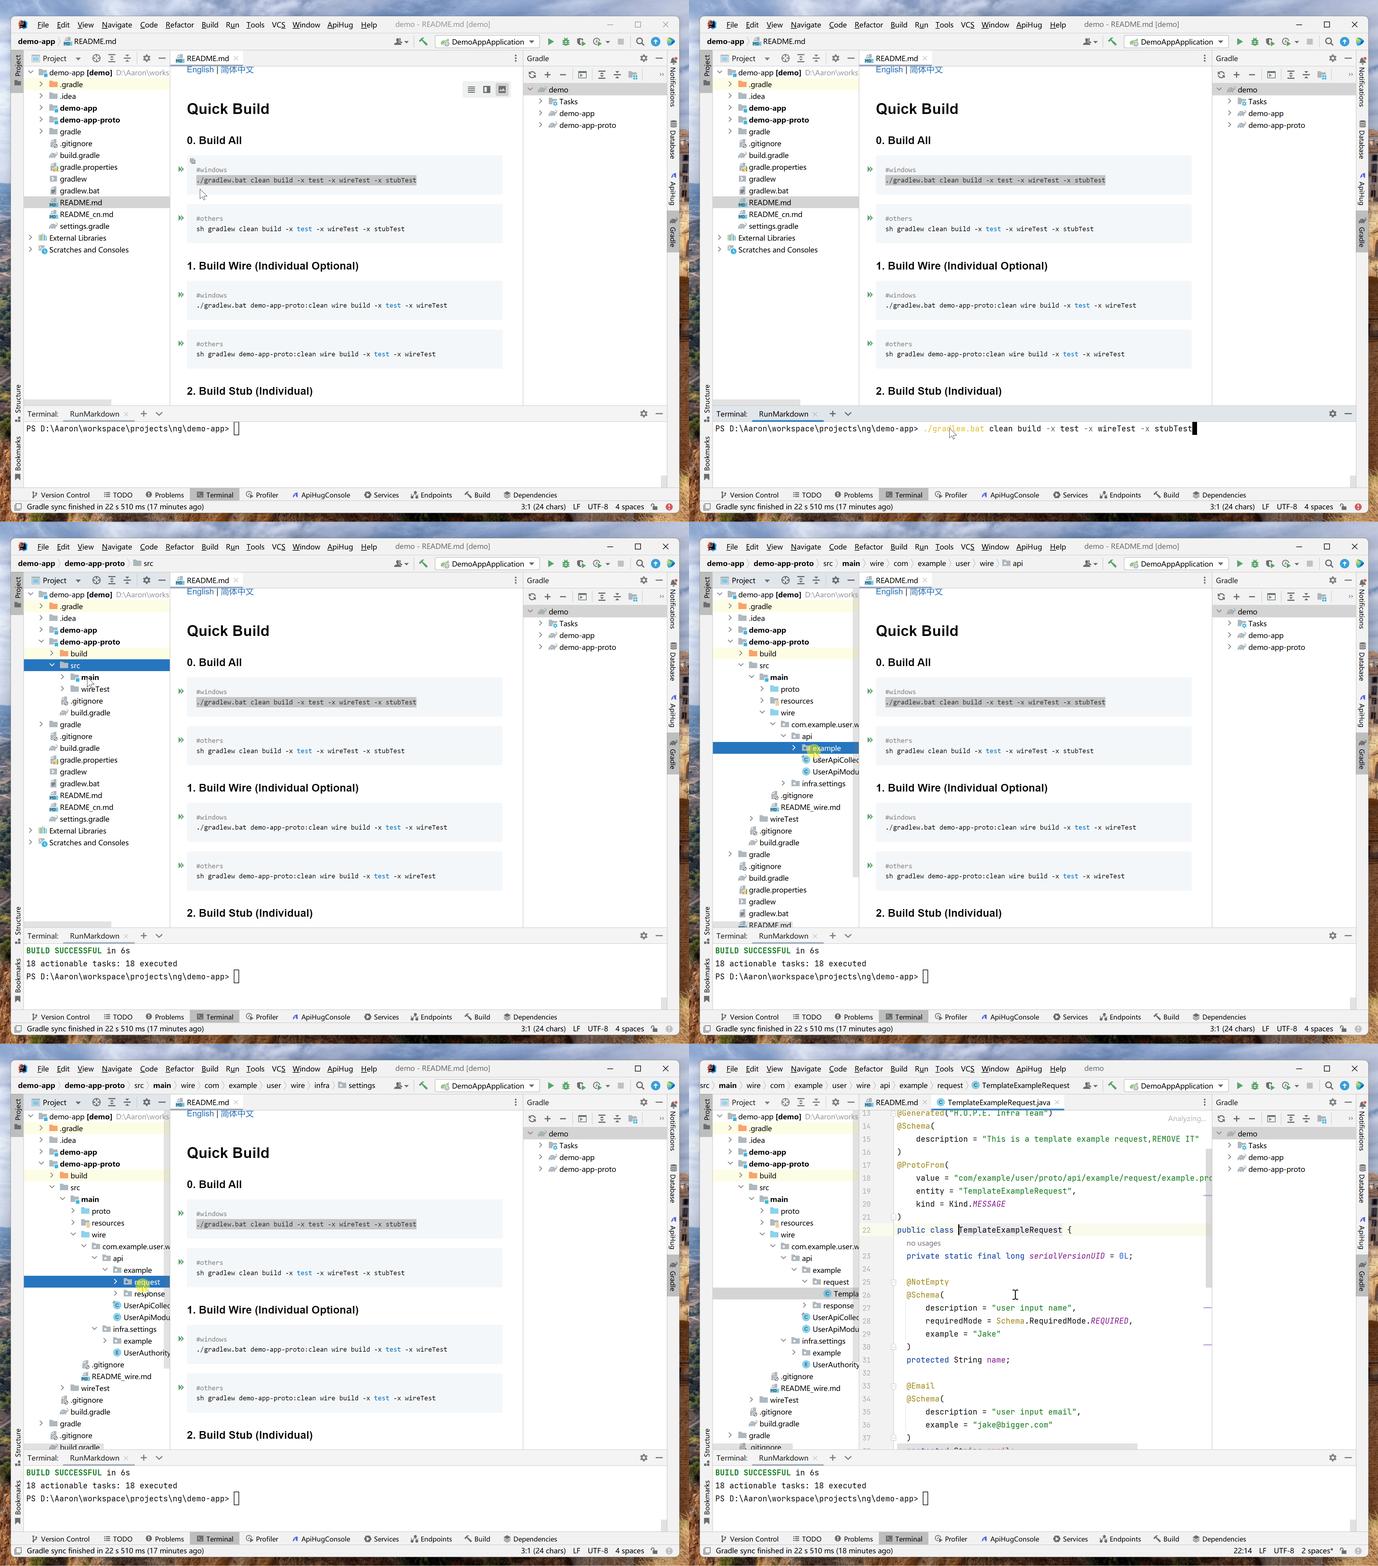
04.1-Wire
- Open
README.md>0. Build All - find the command, parse to the
Terminal - press
Enterto execute - Check the
demo-app-protopathmain > wirefor updates:
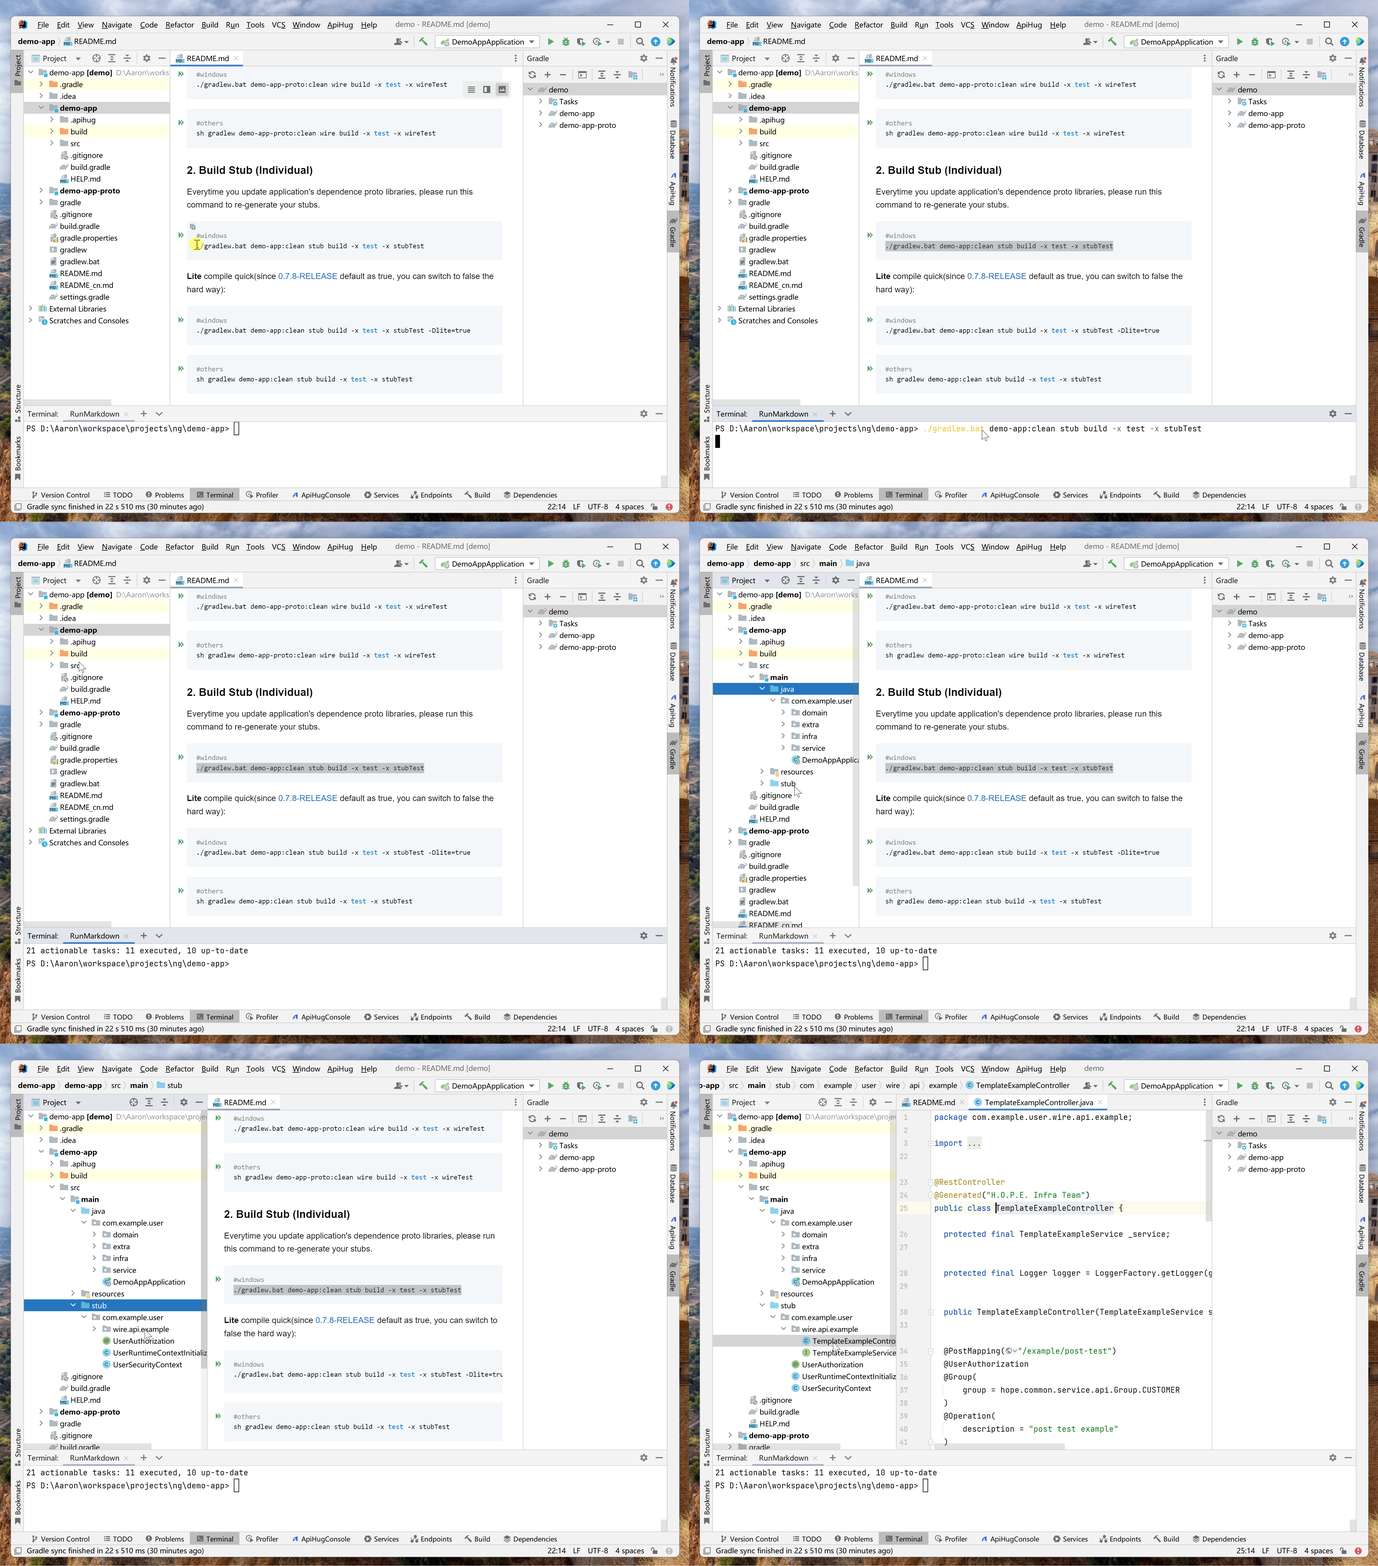
04.2-Stub
- Open
README.md>2. Build Stub (Individual) - find the command, parse to the
Terminal - press
Enterto execute - Check the
demo-apppathmain > stubfor updates:

04.3-Boot
- Open
README.md>3. Run Application - find the command, parse to the
Terminal - press
Enterto execute - Check the log print of
demo-app
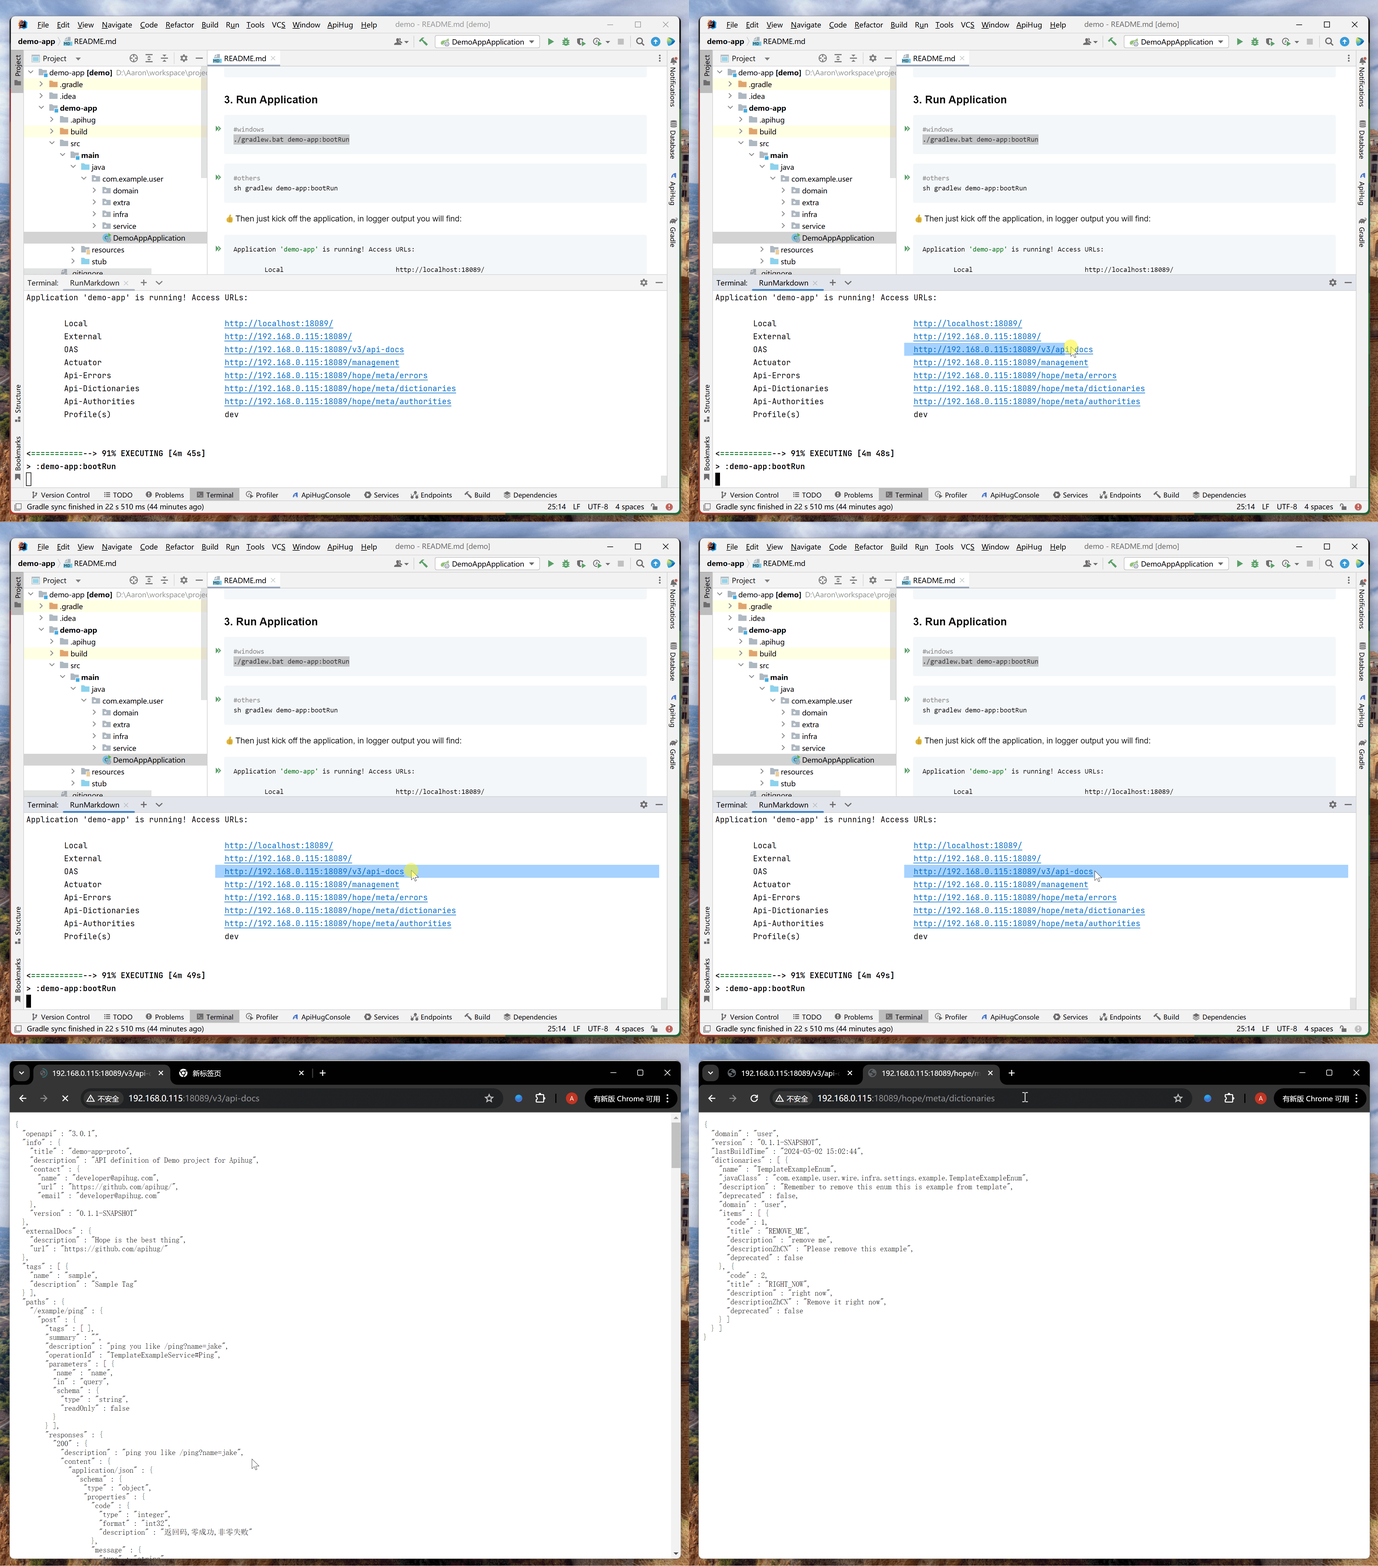
shell
----------------------------------------------------------Application 'demo-app' is running! Access URLs:Local                             http://localhost:18089/
External                          http://192.168.0.115:18089/
OAS                               http://192.168.0.115:18089/v3/api-docs
Actuator                          http://192.168.0.115:18089/management
Api-Errors                        http://192.168.0.115:18089/hope/meta/errors
Api-Dictionaries                  http://192.168.0.115:18089/hope/meta/dictionaries
Api-Authorities                   http://192.168.0.115:18089/hope/meta/authorities
Profile(s)                        dev
04.4-Check OAS
- copy the url from the console
- enter them in the Chrome
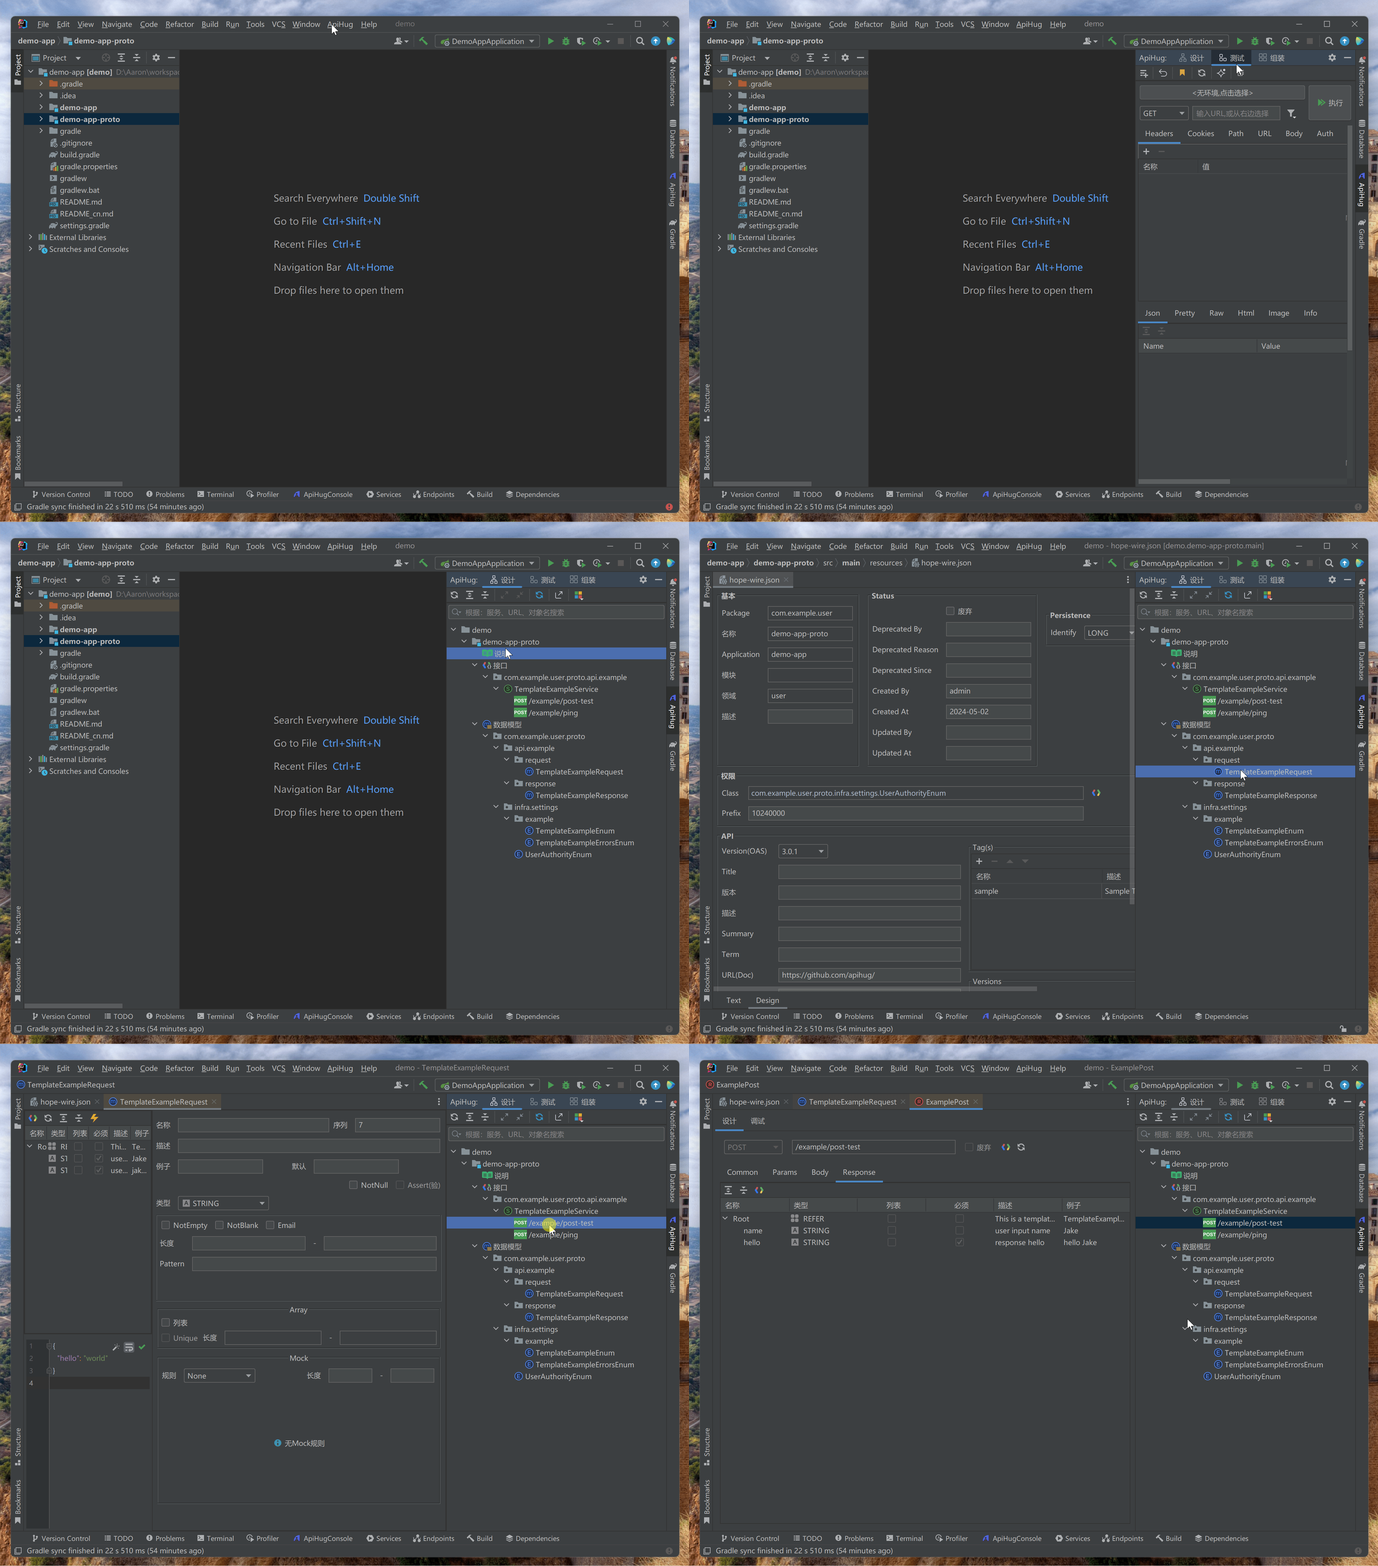
ApiHug Tool Window
ApiHug Tool Window should dock on the right side of the IDE, if not you can also bring it up from the top menu bar: ApiHug > ApiHug Designer:
🥳 Congratulations! You have successfully finished a perfect API development joinery!
Summary
During the last 15-minute demo, we went through the typical steps involved in API design and development. These steps often include various trivial tasks that distract us from focusing on the core business logic design. However, with ApiHug, you can leave behind all the tedious and troublesome steps.
ApiHug automates these tasks and generates high-quality designs with a user-friendly and easily understandable structure and code details. In the upcoming lessons, we will delve deeper into exploring the capabilities of ApiHug.
In fact, the techniques used by ApiHug are not entirely new inventions. Platforms like Jhipster, Spring Starter, Grails, and Ruby on Rails have paved the way for similar approaches.
ApiHug builds upon the best practices and lessons learned from these predecessors, making them more practical and straightforward for everyday use. We acknowledge and appreciate the contributions of these platforms in shaping the foundation of ApiHug.


