目录
- 前言
- 一、创建新项目
- 注意
- 注意点1
- 注意点2 解决方案名称和项目名称
- 二、布局
- 2.1 Grid
- 2.1.1 RowDefinitions 行分割
- 2.1.2 Row & Column 行列定位
- 区分
- 2.1.3 ColumnDefinitions 列分割
- 2.2 StackPanel
- 2.2.1 Orientation 修改方向
- 三、模板
- 水平布局【Grid中套StackPanel】
- 中间布局
- 四、例子
- 本文代码下载
- 更新时间
前言
参考文章:
参考视频:【WPF入门教程 Visual Studio 2022】WPF界面开发入门
自己的感想
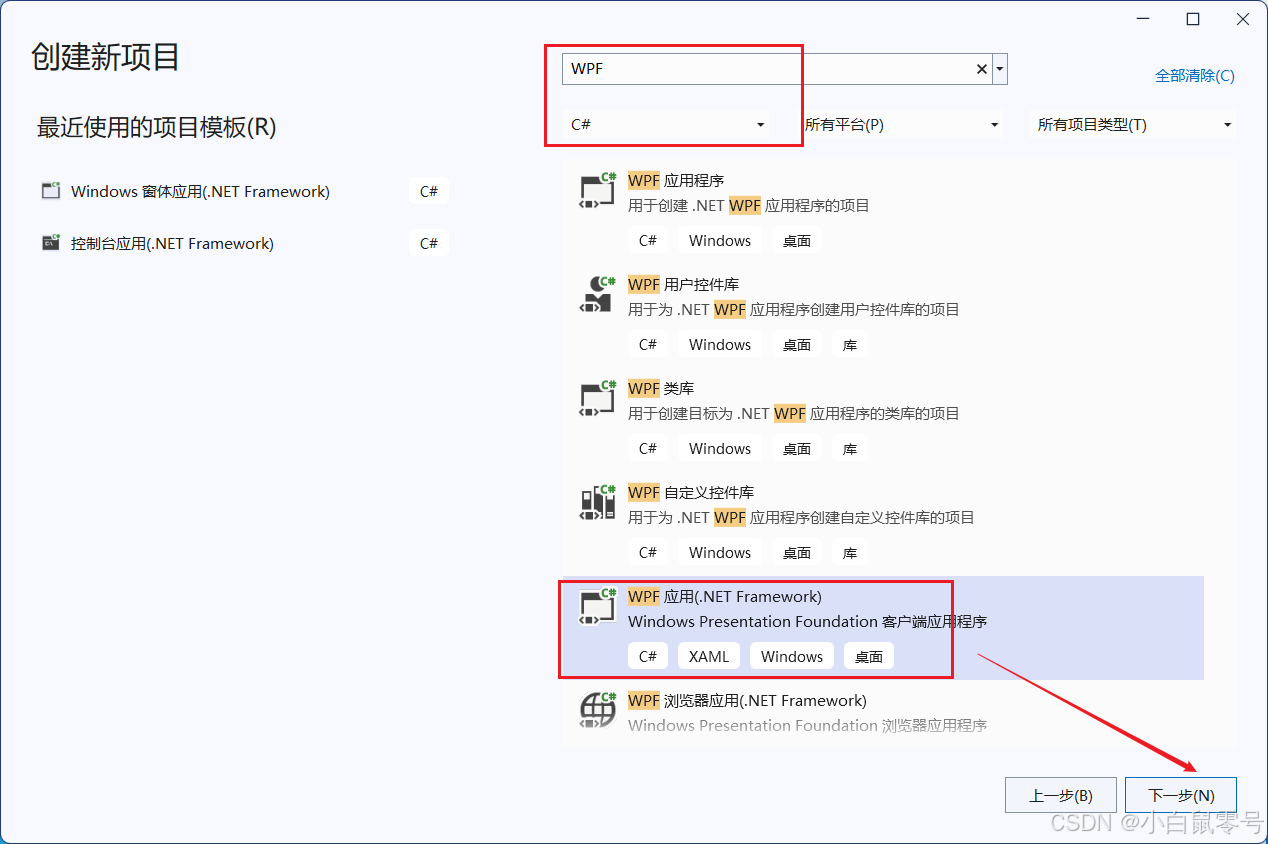
一、创建新项目
注意:WPF应用程序,指创建.NET Core平台
注意
注意点1
系统是如何区分当前的是winform还是WPF文件呢?
方式是通过记事本。
下图中可以看到sln文件需要执行哪些文件,加载哪些文件。
csproj文件中指示加载哪些配置文件等信息。


注意点2 解决方案名称和项目名称
关系:大文件夹里包含多个独立的小文件。
联想:糖果盒里有多个小糖果。
理解:针对一个问题的解决,是有多种方案(项目名称)

二、布局
2.1 Grid
表格布局。讲究:行列。
特点:里面组件创建出来就是水平居中。
例如:下图就是行列布局

2.1.1 RowDefinitions 行分割
先把界面分成2行。

2.1.2 Row & Column 行列定位
ShowGridLines显示分割线。

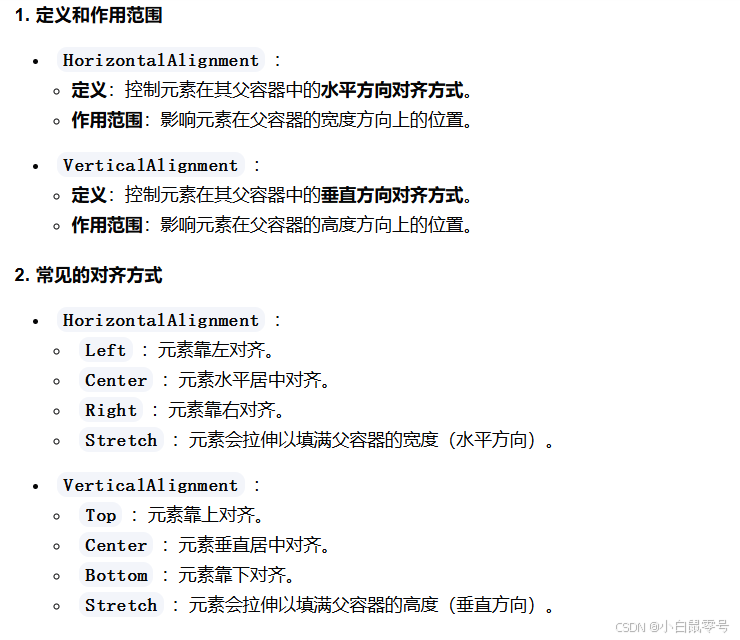
区分
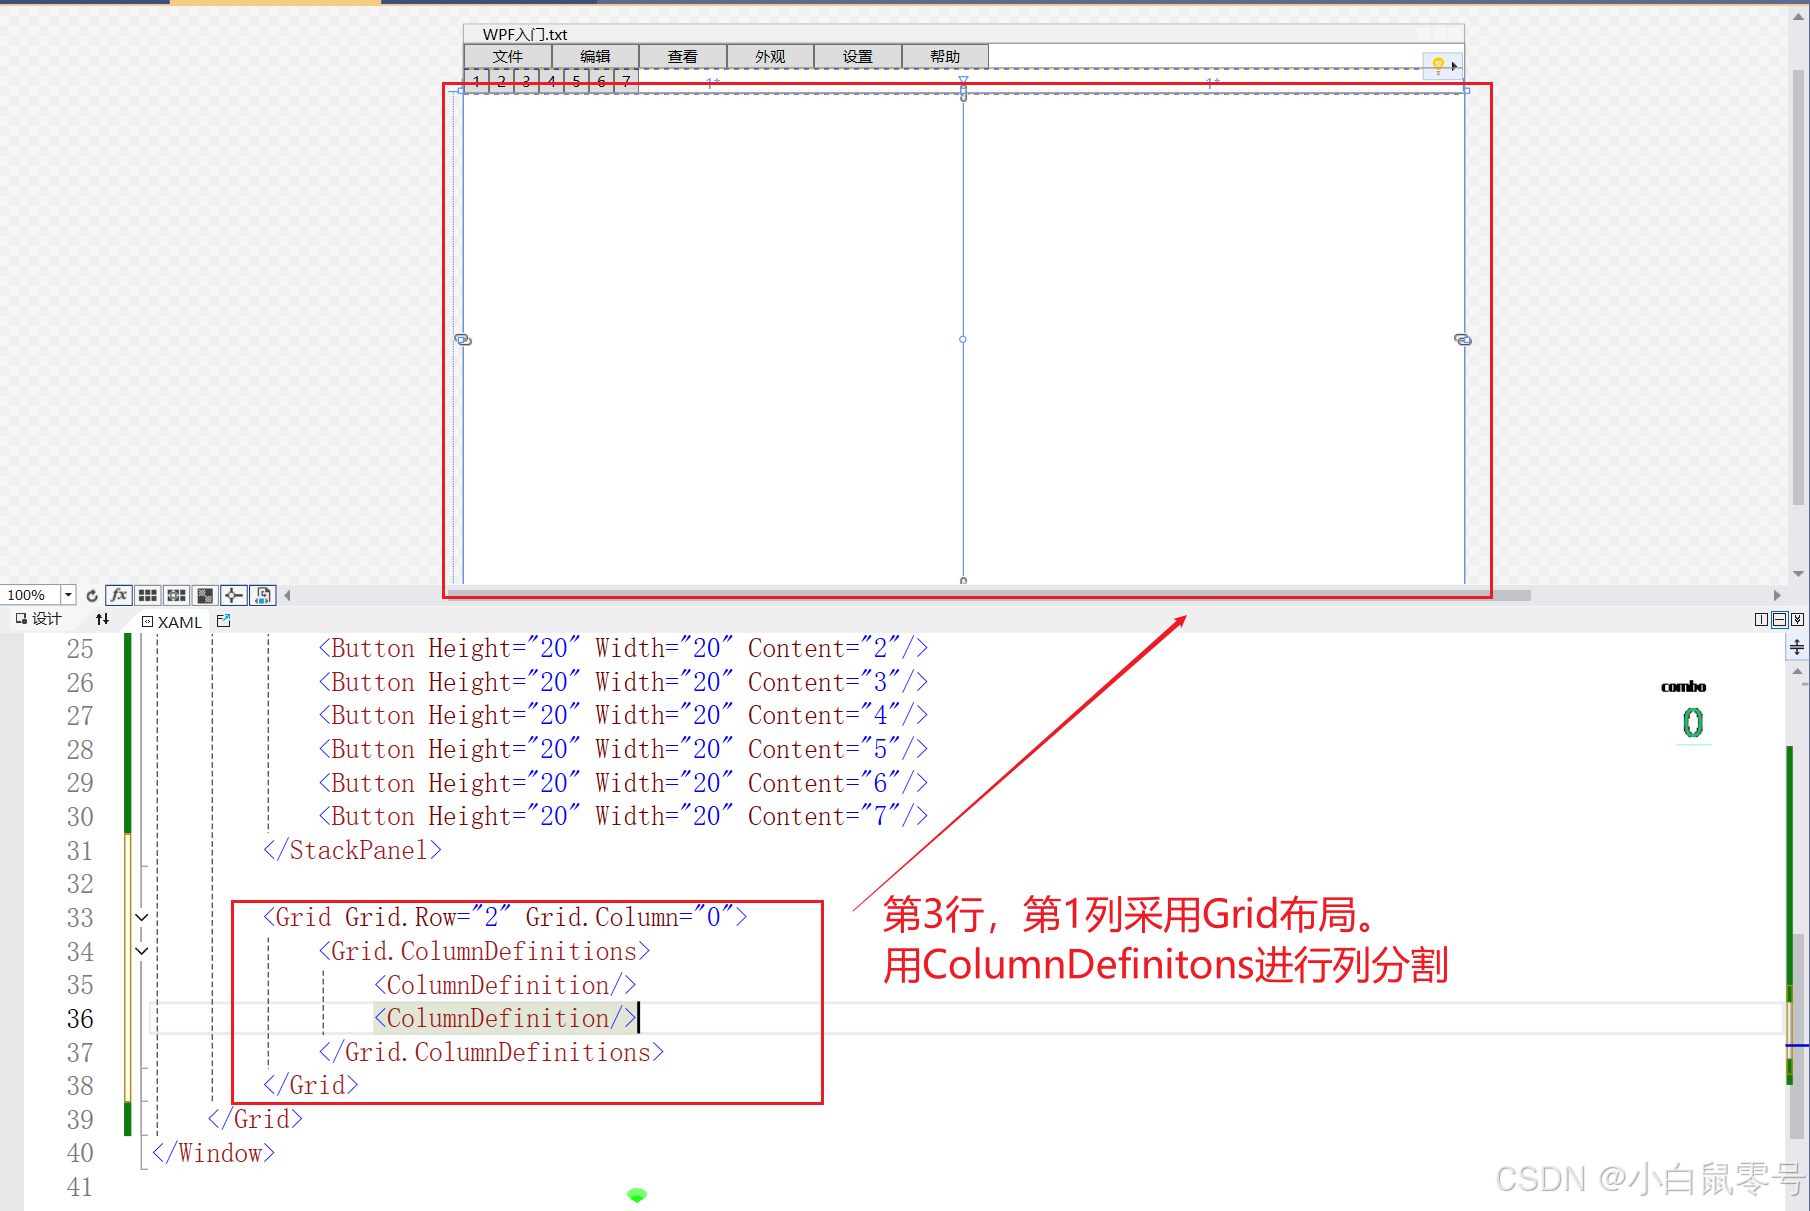
2.1.3 ColumnDefinitions 列分割
- 先指定某个区域:第3行,第1列采用Grid布局。
- 选取分割方式:用ColumnDefinitons进行列分割
2.2 StackPanel
特点:从上直下,依次填充。
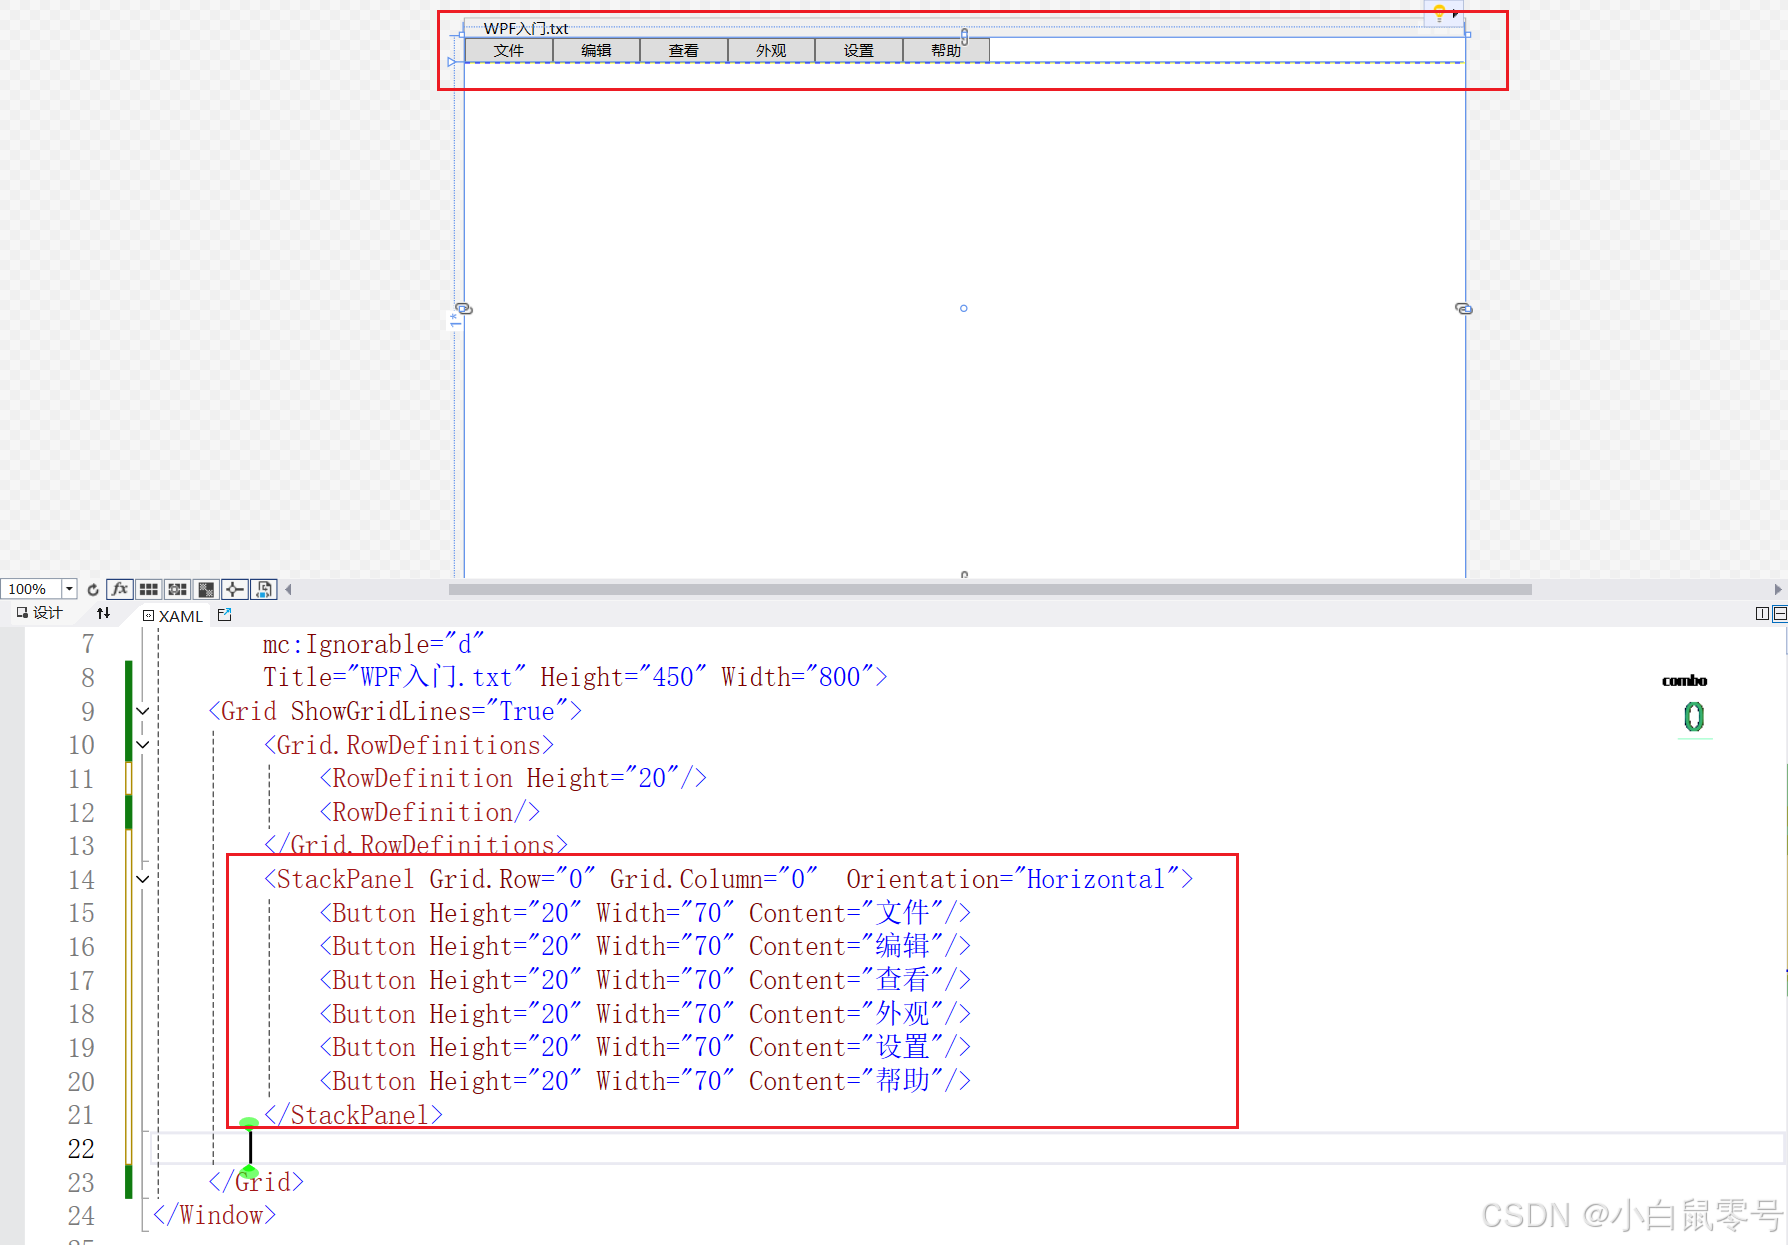
2.2.1 Orientation 修改方向
虽然可以用Margin去控制组件之间的距离,但是它还是无法自动。

在Grid中采用Stackpanel布局,用Orientation属性来修改其排列方向,可初步实现自动水平排列。【如下图所示】

三、模板
水平布局【Grid中套StackPanel】
<Grid ShowGridLines="True"><Grid.RowDefinitions><RowDefinition Height="20"/><RowDefinition/></Grid.RowDefinitions><StackPanel Grid.Row="0" Grid.Column="0" Orientation="Horizontal"><Button Height="20" Width="70" Content="文件"/><Button Height="20" Width="70" Content="编辑"/><Button Height="20" Width="70" Content="查看"/><Button Height="20" Width="70" Content="外观"/><Button Height="20" Width="70" Content="设置"/><Button Height="20" Width="70" Content="帮助"/></StackPanel></Grid>
中间布局
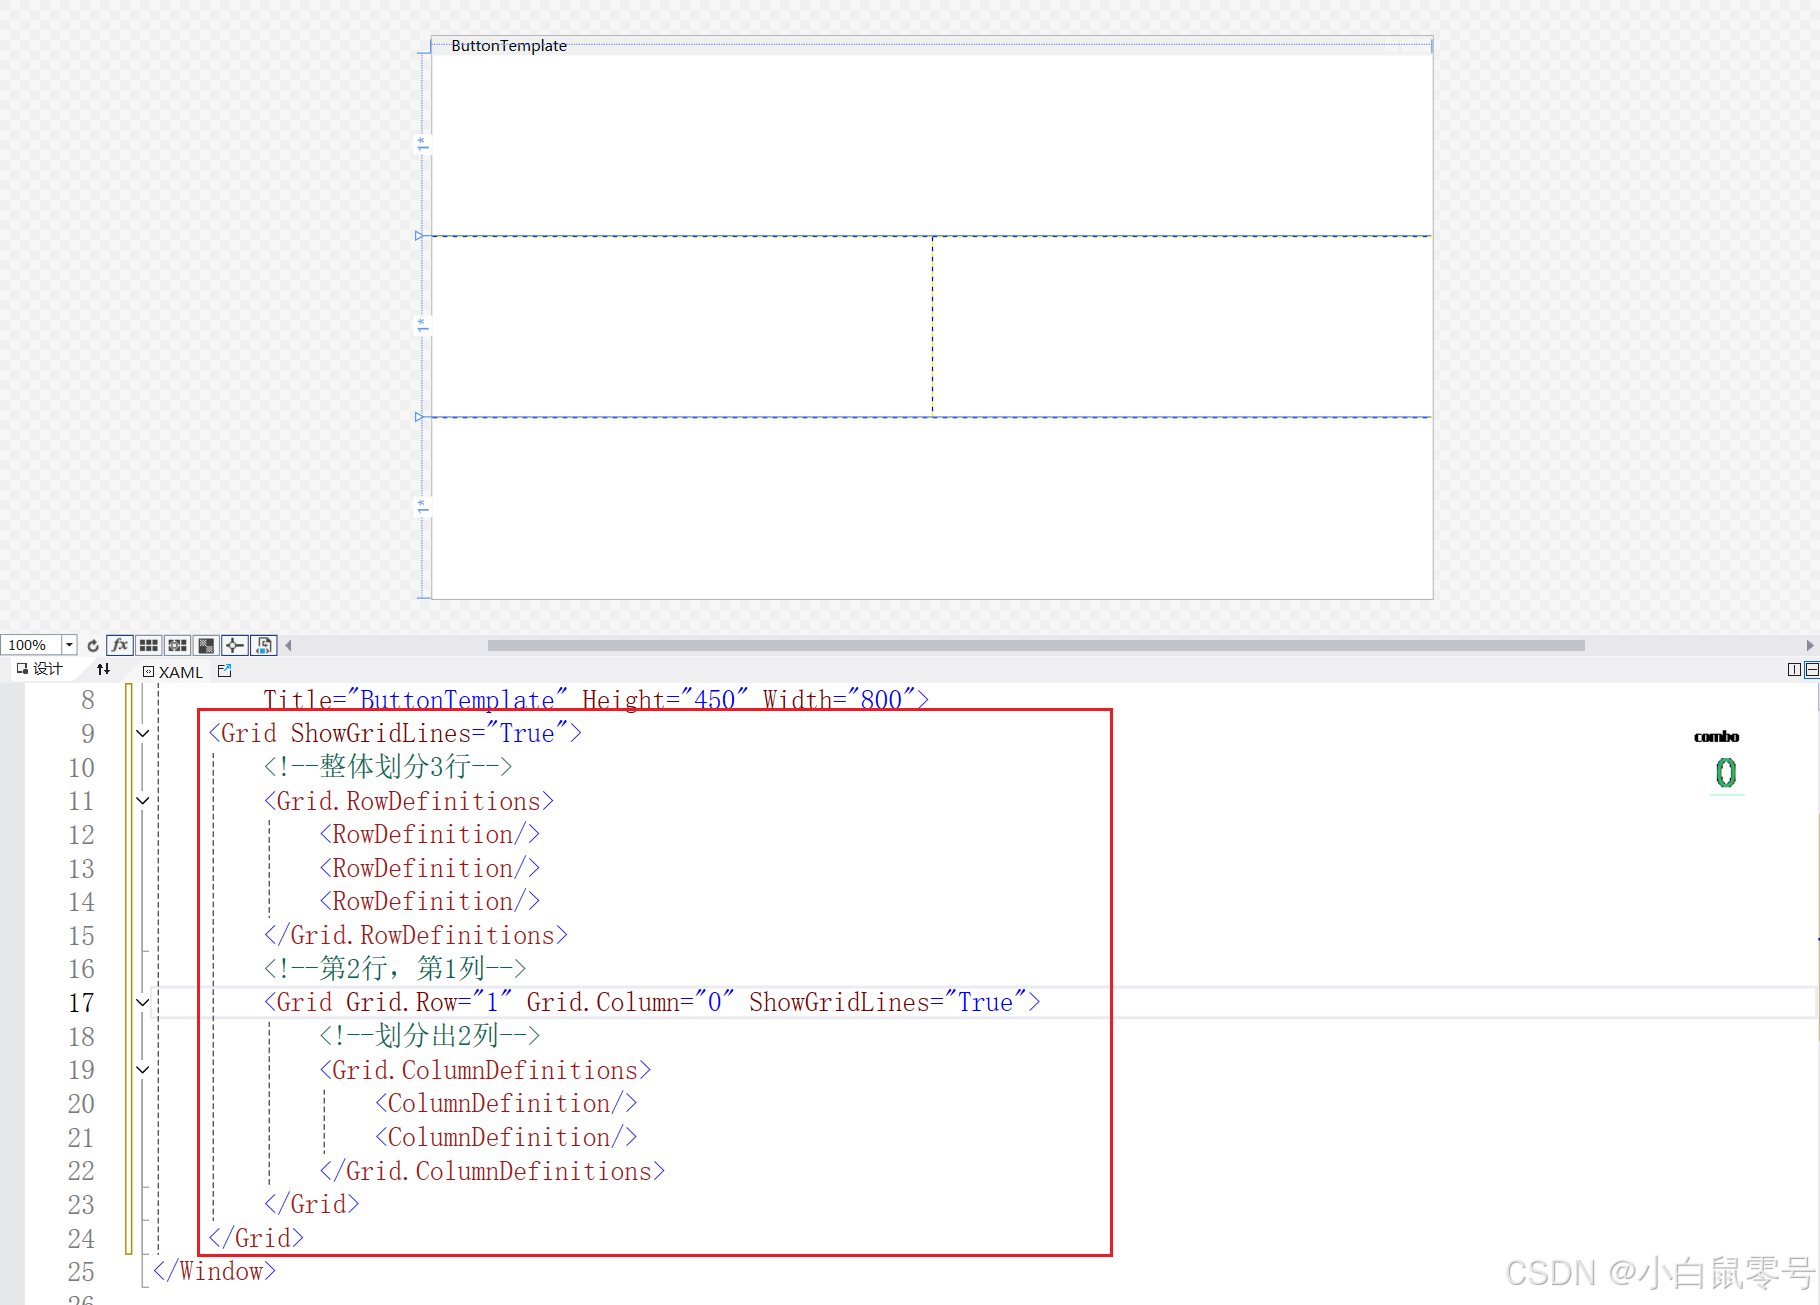
<Grid ShowGridLines="True"><!--整体划分3行--><Grid.RowDefinitions><RowDefinition/><RowDefinition/><RowDefinition/></Grid.RowDefinitions><!--第2行,第1列--><Grid Grid.Row="1" Grid.Column="0" ShowGridLines="True"><!--划分出2列--><Grid.ColumnDefinitions><ColumnDefinition/><ColumnDefinition/></Grid.ColumnDefinitions></Grid></Grid>
四、例子
简单的模仿文本文档布局

<Window x:Class="WPF_Study.MainWindow"xmlns="http://schemas.microsoft.com/winfx/2006/xaml/presentation"xmlns:x="http://schemas.microsoft.com/winfx/2006/xaml"xmlns:d="http://schemas.microsoft.com/expression/blend/2008"xmlns:mc="http://schemas.openxmlformats.org/markup-compatibility/2006"xmlns:local="clr-namespace:WPF_Study"mc:Ignorable="d"Title="WPF入门.txt" Height="600" Width="800"><Grid ShowGridLines="True"><!--整体分行,总共分4行--><Grid.RowDefinitions><RowDefinition Height="20"/><RowDefinition Height="20"/><RowDefinition/><RowDefinition Height="20"/></Grid.RowDefinitions><!--第1行,第1列--><StackPanel Grid.Row="0" Grid.Column="0"  Orientation="Horizontal"><Button Height="20" Width="70" Content="文件"/><Button Height="20" Width="70" Content="编辑"/><Button Height="20" Width="70" Content="查看"/><Button Height="20" Width="70" Content="外观"/><Button Height="20" Width="70" Content="设置"/><Button Height="20" Width="70" Content="帮助"/></StackPanel><!--第2行,第1列--><StackPanel Grid.Row="1" Grid.Column="0" Orientation="horizontal"><Button Height="20" Width="20" Content="1"/><Button Height="20" Width="20" Content="2"/><Button Height="20" Width="20" Content="3"/><Button Height="20" Width="20" Content="4"/><Button Height="20" Width="20" Content="5"/><Button Height="20" Width="20" Content="6"/><Button Height="20" Width="20" Content="7"/></StackPanel><!--第3行,第1列--><Grid Grid.Row="2" Grid.Column="0"><Grid.ColumnDefinitions><ColumnDefinition Width="70"/><ColumnDefinition/></Grid.ColumnDefinitions><!--该区域中,第1行,第1列--><StackPanel Grid.Row="0" Grid.Column="0"><Button Height="20" Width="70" Content="1"/><Button Height="20" Width="70" Content="1"/><Button Height="20" Width="70" Content="1"/><Button Height="20" Width="70" Content="1"/></StackPanel><!--该区域中,第1行,第2列--><TextBox Grid.Row="0" Grid.Column="1" TextWrapping="Wrap"/></Grid><!--第4行,第1列--><Grid Grid.Row="3" Grid.Column="0" ShowGridLines="True"><Grid.ColumnDefinitions><ColumnDefinition/><ColumnDefinition/><ColumnDefinition/><ColumnDefinition/><ColumnDefinition/><ColumnDefinition/><ColumnDefinition/><ColumnDefinition/><ColumnDefinition/><ColumnDefinition/><ColumnDefinition/><ColumnDefinition/><ColumnDefinition/><ColumnDefinition/></Grid.ColumnDefinitions><Button Grid.Row="0" Grid.Column="0" Content="行 8/11"/><Button Grid.Row="0" Grid.Column="1" Content="列 3/2"/><Button Grid.Row="0" Grid.Column="2" Content="字符 3/2"/><Button Grid.Row="0" Grid.Column="3" Content="求值 --"/><Button Grid.Row="0" Grid.Column="4" Content="选定 --"/><Button Grid.Row="0" Grid.Column="5" Content="选行 --"/><Button Grid.Row="0" Grid.Column="6" Content="匹配 --"/><Button Grid.Row="0" Grid.Column="7" Content="行 8/11"/><Button Grid.Row="0" Grid.Column="8" Content="行 8/11"/><Button Grid.Row="0" Grid.Column="9" Content="行 8/11"/><Button Grid.Row="0" Grid.Column="10" Content="行 8/11"/><Button Grid.Row="0" Grid.Column="11" Content="行 8/11"/><Button Grid.Row="0" Grid.Column="12" Content="行 8/11"/><Button Grid.Row="0" Grid.Column="13" Content="行 8/11"/></Grid></Grid>
</Window>
本文代码下载
上面的代码就是全部代码,如果需要源代码,点击进行下载
更新时间
- 2025-02-06:创建。


