大家有什么想看的可以在评论区留言,我尽量满足,感谢大家!
组件通信是vue中一个非常重要的内容,我们需要掌握好组件通信,那么让我为大家介绍几种组件通信的方式吧!
一、props
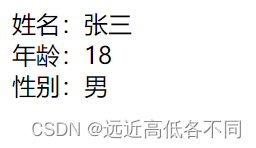
这是父传子的方式,它有三种方式去定义,让我为大家介绍一下
注意:
props是只读的,不要去修改 vue底层监视了props 如果被修改它会发出警告
代码与介绍如下:
// 父组件
<template><div><!-- 我为Student添加属性 --><!-- 传递数据 --><Student name="张三" :age="18" sex="男" /></div>
</template>
<script>javascript">
// 导入Student组件
import Student from './components/Student.vue'
export default {name:'App',components:{Student}
}
</script>// 子组件
<template><div><div>姓名:{{ name }}</div><div>年龄:{{ age }}</div><div>性别:{{ sex }}</div></div>
</template>
<script>javascript">
export default {name: 'MyStudent',// 我这里可以使用到props去接收数据// 这个数据会在哪呢? // 它会在VC 也就是这个组件实例身上// 第一种方法 只接受// props: ["name", "age", "sex"],//......................// 第二种方法 限制类型 // 限制了类型 假设我们传入了一个跟这类型不一样的值// 它会在控制台报错 但不影响数据传递 为什么呢// 它可以给操作人员做到提示的用处// props:{//     // 记得大写//     name:String,//     age:Number,//     sex:String,// },//......................// 第三种 限制类型 限制必要性 指定默认值props:{name:{type:String,required:true},age:{type:Number,default:18},sex:{type:String,required:true}}
}
</script>

二、自定义事件
配合$emit
顾名思义 自定义事件 我们自己定义的事件
可以实现子传父
// 父组件
<template><div><!-- 自定义事件 你想定义什么都行 --><Student @getStudentName="getStudentName" /><!-- 注意事项 如果我想使用原生的DOM事件 我们需要添加上native修饰符 --><Student @click.native="test" /></div>
</template><script>javascript">
// 导入Student组件
import Student from './components/Student.vue'
export default {name: 'App',components: {Student},methods: {getStudentName(value) {console.log(value) // 打印 张三},test() {console.log(1);}}
}
</script>// 子组件
<template><div><div>我是Student组件</div><button @click="sendStudentName">点击名字传给父组件</button><button @click="offStudentName">解绑</button></div>
</template><script>javascript">
export default {name: 'MyStudent',data(){return {name:'张三'}},methods:{sendStudentName(){// this.$emit(触发的事件,传入的数据)this.$emit('getStudentName',this.name)},// 解绑 offStudentName(){// off有三种写法// 解绑单个 this.$off(绑定的事件)this.$off('getStudentName')// 解绑多个 使用数组 this.$off(["事件","事件"])// 解绑全部// this.$off()}}
}
</script>

三、ref
ref也可以实现子传父
使用到$on 既然有 $on 那就有 $off
// 父组件
<template><div><!-- ref绑定一个名字 --><Student ref="student" /></div>
</template>
<script>javascript">
// 导入Student组件
import Student from './components/Student.vue'
export default {name: 'App',components: {Student},methods: {getStudentName(value) {console.log(value) // 打印 张三}},// 最好写在 mounted中mounted(){// $on 绑定事件 最好写成箭头函数 不然this指向student这个组件,不指向App组件// this.$refs.student.$on('getStudentName',(value)=>{//   console.log(value) // 张三// })// 通常是如下写法this.$refs.student.$on('getStudentName',this.getStudentName)}
}
</script>// 子组件
<template><div><div>我是Student组件</div><button @click="sendStudentName">点击名字传给父组件</button></div>
</template>
<script>javascript">
export default {name: 'MyStudent',data(){return {name:'张三'}},methods:{sendStudentName(){// this.$emit(触发的事件,传入的数据)this.$emit('getStudentName',this.name)}}
}
</script>

四、v-model
咦,这不是双向数据绑定吗?它怎么会出现在咋们的组件通信里?
好,接下来大家要知道v-model的原理
其实他还是借助了自定义事件,与props,当一个扩展知识吧!
原理: v-model本质上是一个语法糖例如应用在输入框上,就是 value属性 和 input事件 的合写
就是下面这段代码,假设我在data中有数据,我使用双向数据绑定
<Student :value="age" @input="age = $event.target.value"></Student>
父组件代码:
<template><div><!-- 我们使用v-model v-model的原理采用了:value + @input="?=$event.target.value" --><BaseSelect v-model="selectId"></BaseSelect></div>
</template>
<script>javascript">
import BaseSelect from "./components/BaseSelect.vue"
export default {name: 'VueApp',data() {return {selectId: '2',};},components: {BaseSelect}
};
</script>
<style scoped></style>
子组件代码:
<template><div><!-- 我们不能直接使用v-model去绑定 --><!-- 我们使用change事件监听 --><select :value="value" @change="handleChange"><option value="1">北京</option><option value="2">上海</option><option value="3">广州</option><option value="4">深圳</option></select></div>
</template>
<script>javascript">
export default {name: 'VueBaseSelect',props: {// 我们直接使用value去接收父组件中的selectIdvalue: String},methods: {handleChange(e) {// 子传父 用到this.$emit() input事件 因为我们父组件的事件是inputthis.$emit("input", e.target.value)}}
};
</script>
<style scoped></style>

五、sync
其实这跟上面的v-model有异曲同工之处
作用:可以实现 子组件 与 组件数据的 双向绑定,简化代码
特点: prop属性名,可以自定义,非固定为 value
场景:封装弹框类的基础组件,visible属性 true显示false隐藏
本质:就是 :属性名 和 @update:属性名 合写
<BaseDialog :visible.sync="isShow" />
-----------------------------------
<BaseDialog :visible="isShow" @update:visible="isShow=$event" />
上代码
父组件:
<template><div><button @click="isShow=true">点击退出登录</button><BaseDialog :visible.sync="isShow" /><!-- <BaseDialog :visible="isShow" @update:visible="isShow=$event" /> --></div>
</template><script>javascript">
import BaseDialog from './components/BaseDialog.vue';
export default {name:'App',data() {return {isShow:false}},components:{BaseDialog}}
</script><style lang='scss' scoped></style>
子组件:
<template><div v-show="visible" class="box"><div class="contentBox"><h1 class="outText">你确定确定退出吗?</h1><div class="button"><button @click="confirm">确定</button><button @click="close">取消</button></div></div></div>
</template><script>javascript">
export default {name: 'MyBaseDialog',props:{visible:Boolean},data() {return {}},methods:{confirm(){this.$emit('update:visible',false)},close(){this.$emit('update:visible',false)}}
}
</script><style scoped>
.box {position: absolute;top: 0;left: 0;width: 100vw;height: 100vh;background-color: rgba(0, 0, 0, 0.1);
}.contentBox {position: absolute;top: 50%;left: 50%;transform: translate(-50%, -50%);width: 500px;height: 400px;background-color: #fff;
}.outText {text-align: center;
}
.button {display: flex;justify-content: space-around;
}
.button button{font-size: 40px;
}
</style>

六、全局事件总线
一看这个名字就觉得,全局,那我是不是在哪个组件都可以使用呀,没错,是的
首先要有一个概念,既然是全局下的,我如何在别的组件中看见这个方法,并且我们需要用到$on 与 $emit,它们只有在vm上才会存在,所有我们可以在vue的原型对象上声明一个方法,好,废话不多说,上操作
我们找到main.js
javascript">new Vue({render: h => h(App),beforeCreate() {// 使用全局事件总线 最好在beforeCreate中写Vue.prototype.$bus = this},
}).$mount('#app')
组件
// 父组件
<template><div><Student></Student></div>
</template>
<script>javascript">import Student from './components/Student.vue'
export default {name:'MyApp',data() {return {name:''}},components:{Student},mounted() {this.$bus.$on("getStudentName",(data)=>{console.log(data);})}
}
</script><style lang='scss' scoped></style>// 子组件
<template><div><div>我是Student组件</div><button @click="sendStudentName">点击名字传给父组件</button></div>
</template><script>javascript">
export default {name: 'MyStudent',data(){return {name:'张三'}},methods:{sendStudentName(){// this..$bus.$emit(触发的事件,传入的数据)this.$bus.$emit('getStudentName',this.name)}}
}
</script>

七、provide & inject
跨组件共享数据
子孙后代都可以收到
我认为这种方法挺方便的
来,为大家展示一下
父组件
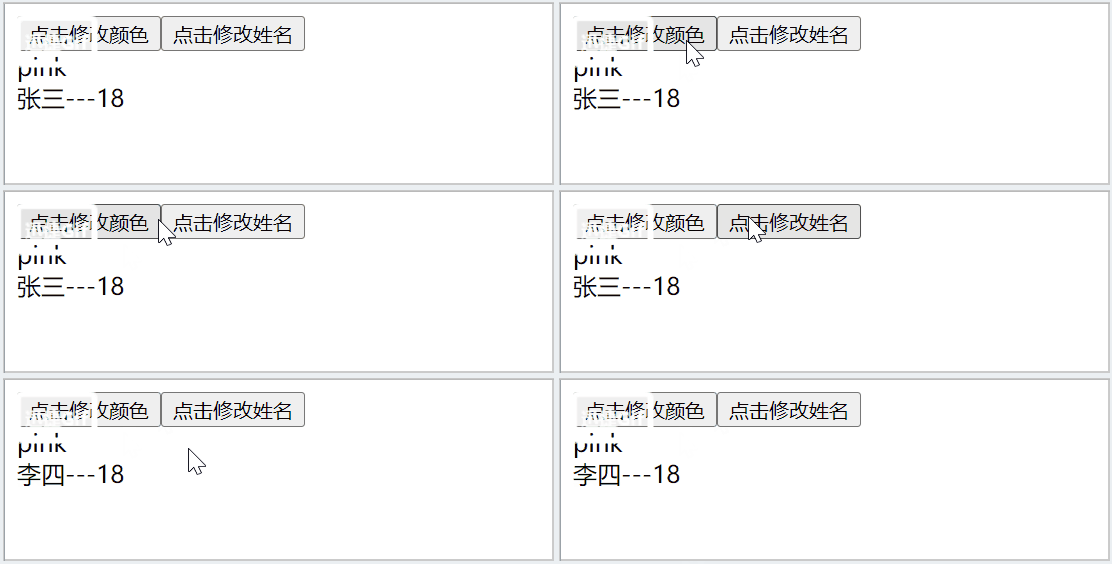
<template><div><button @click="updateColor">点击修改颜色</button><button @click="updateName">点击修改姓名</button><Home></Home></div>
</template><script>javascript">
import Home from './components/Home.vue';
export default {name: 'App',// 来我们使用一下provideprovide() {return {color: this.color,info: this.info}},components: {Home},data() {return {// 普通数据类型 非响应式color: 'pink',// 复杂数据类型 响应式info: {name: '张三',age: 18}}},methods: {updateColor() {this.color = 'red'},updateName() {this.info.name = '李四'}}
}
</script><style lang='scss' scoped></style>
子组件
<template><div><div>{{ color }}</div><div>{{ info.name }}---{{ info.age }}</div></div>
</template><script>javascript">
export default {name: 'MyHome',// 我们使用inject去做接收inject:['color','info'],
}
</script><style lang='scss' scoped></style>

八、消息订阅与发布
定阅消息:消息名
发布消息:消息内容
通俗易懂的例子
订阅报纸:地址
邮递员送报纸:报纸
我们需要使用到第三方组件库
javascript">npm i pubsub-js
父组件:
<template><div><Student></Student></div>
</template><script>javascript">
// 引入pubsub
import pubsub from 'pubsub-js'
import Student from './components/Student.vue'
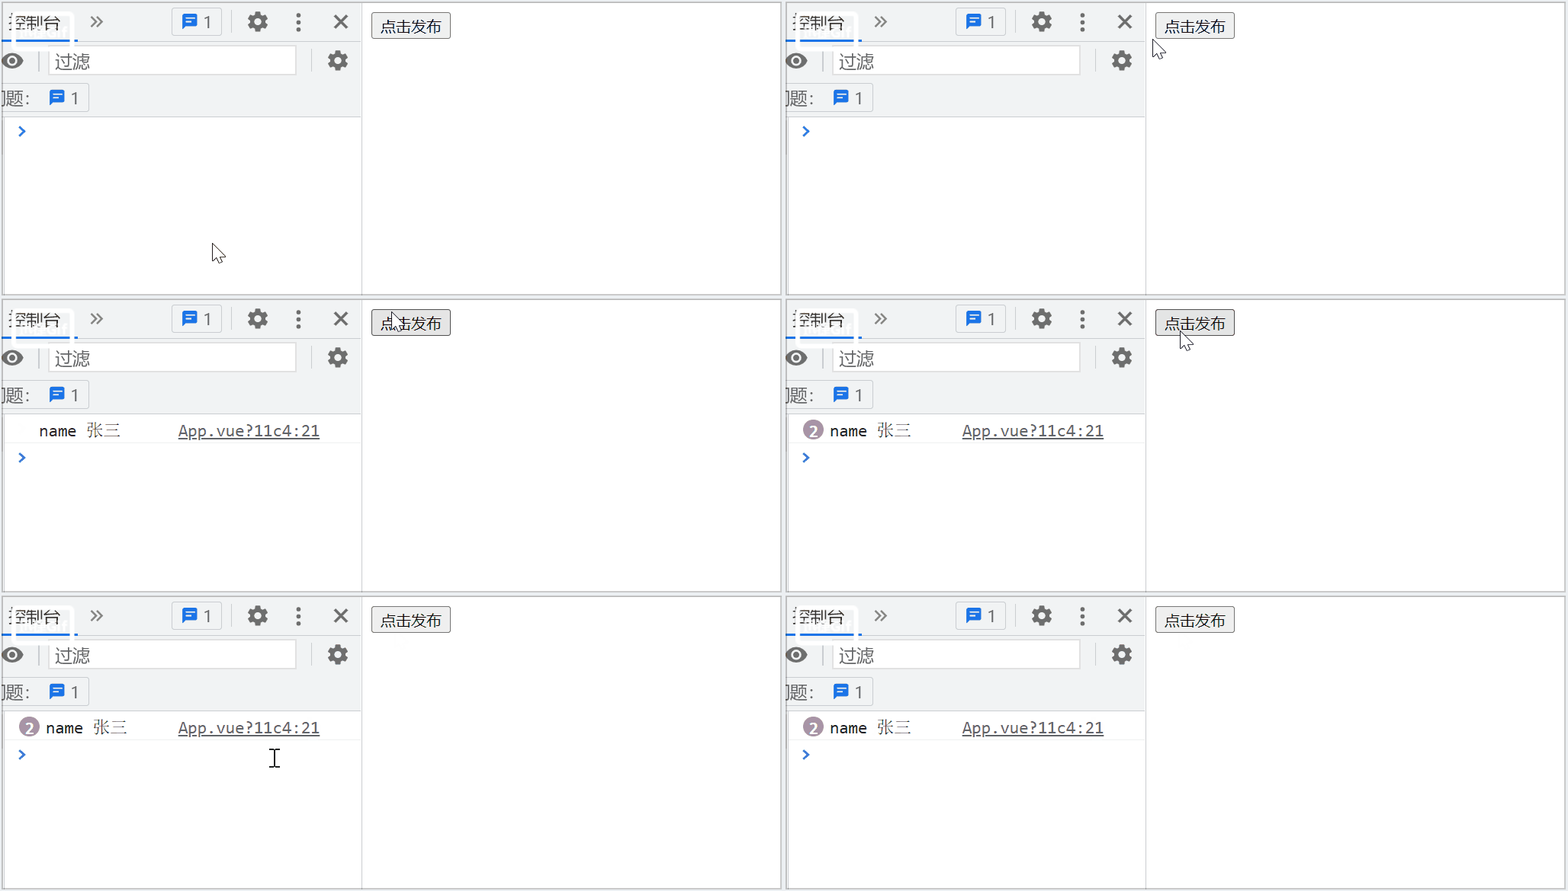
export default {name:'App',components:{Student},mounted(){// 订阅消息 第一个参数订阅的消息名 第二个回调函数// 最好写成箭头函数 要不然this指向会有问题// 回调函数有两个参数 第一个消息名 第二个订阅的数据this.pubId = pubsub.subscribe("name",(msgName,data)=>{console.log(msgName,data);})}
}
</script><style lang='scss' scoped></style>
子组件
<template><div><button @click="sendData">点击发布</button></div>
</template><script>javascript">
// 引入pubsub
import pubsub from 'pubsub-js'
export default {name:'MyStudent',data() {return {name:'张三'}},methods:{sendData(){pubsub.publish('name',this.name)}}
}
</script><style lang='scss' scoped></style>

九、$parent 与 $children
大家一看,这不就是父子吗?没错确实是父子,哈哈
$children 可以有多个,所以是数组,如果父组件中没有子组件,children就是空数组
$parent是个对象,如在#app上拿parent得到的是new Vue()的实例,在这实例上再拿 parent得到的是undefined
父组件
<template><div><div>{{ name }}</div><div>{{ msg }}</div><Student :msg="msg"></Student><button @click="getChildren">点击获取子组件的name</button></div>
</template><script>javascript">
import Student from './components/Student.vue';
export default {name: 'App',components: {Student},data() {return {name:'',msg: '码字中.....'}},methods: {getChildren() {this.name = this.$children[0].name}}
}
</script><style lang='scss' scoped></style>
子组件
<template><div><button @click="updateParent">点击修改父组件的msg</button></div>
</template><script>javascript">
export default {name:'MyStudent',props:["msg"],data() {return {name:'张三'}},methods:{updateParent(){this.$parent.msg = '疯狂码字中'}}
}
</script><style lang='scss' scoped></style>

还有几种方式,日后补全,感谢大家的阅读
最值得欣的景,是自己奋斗的足迹,加油!


