htmledit_views">
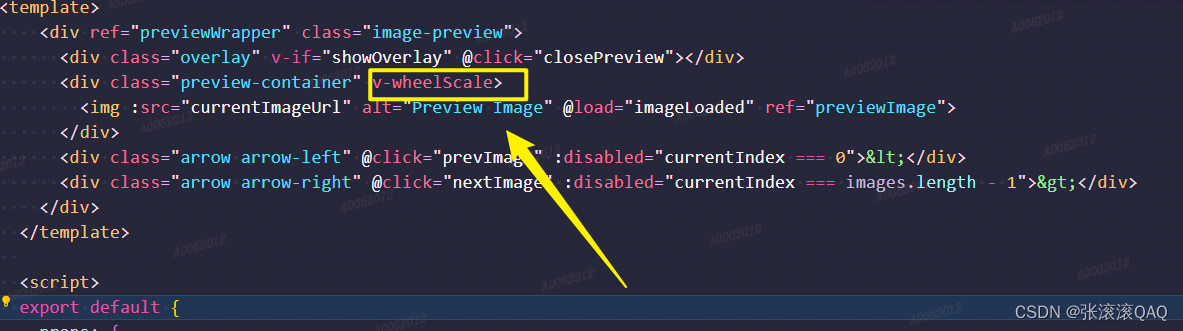
封装图片预览组件:
<template><div ref="previewWrapper" class="image-preview"><div class="overlay" v-if="showOverlay" @click="closePreview"></div><div class="preview-container" v-wheelScale><img :src="currentImageUrl" alt="Preview Image" @load="imageLoaded" ref="previewImage"></div><div class="arrow arrow-left" @click="prevImage" :disabled="currentIndex === 0"><</div><div class="arrow arrow-right" @click="nextImage" :disabled="currentIndex === images.length - 1">></div></div></template><script>export default {props: {images: {type: Array,required: true,},},data() {return {showOverlay: false,currentIndex: 0,currentImageUrl: '',scale: 1,initialMouseX: 0,initialScale: 1,isDragging: false,};},methods: {openPreview() {this.showOverlay = true;this.currentImageUrl = this.images[this.currentIndex];this.$refs.previewWrapper.style.display = 'flex';setTimeout(() => {this.$refs.previewWrapper.style.opacity = 1;}, 10);},closePreview() {this.showOverlay = false;setTimeout(() => {this.$refs.previewWrapper.style.opacity = 0;setTimeout(() => {this.$refs.previewWrapper.style.display = 'none';}, 0);}, 0);},nextImage() {this.currentIndex = (this.currentIndex + 1) % this.images.length;this.currentImageUrl = this.images[this.currentIndex];},prevImage() {this.currentIndex = (this.currentIndex - 1 + this.images.length) % this.images.length;this.currentImageUrl = this.images[this.currentIndex];},imageLoaded() {// 可以在此处调整图片的居中或其它布局逻辑},},mounted() {// 初始化时隐藏预览层this.$refs.previewWrapper.style.display = 'none';},};</script><style scoped>.image-preview {position: fixed;top: 0;left: 0;right: 0;bottom: 0;z-index: 999;display: none;justify-content: center;align-items: center;opacity: 0;transition: opacity 0.7s ease-in-out;}.overlay {position: absolute;top: 0;left: 0;width: 100%;height: 100%;background-color: rgba(0, 0, 0, 0.8);cursor: pointer;}.preview-container {position: relative;text-align: center;overflow: hidden;max-width: 90%;max-height: 90vh;}.arrow {width: 50px;height: 50px;position: absolute;top: 50%;transform: translateY(-50%);background: rgba(255, 255, 255, 0.8);padding: 10px;border-radius: 50%;cursor: pointer;z-index: 1;opacity: 0.5;transition: opacity 0.3s;border: none;font-size: 20px;line-height: 50px;}.arrow:hover {opacity: 1;}.arrow-left {left: 10px;}.arrow-right {right: 10px;}</style>图片放大缩小依靠自定义指令实现:
自定义指定代码:src/utils/scale.js
export const initVWheelScale = (Vue) => {Vue.directive("wheelScale", (el, binding) => {const {maxScale = 5,minScale = 0.5,initScale = 1,cssVarName = "--scale",} = binding.arg || {}let currentScale = initScale || el.style.getPropertyValue(cssVarName) || 1setWheelScale(binding, {el,cssVarName,currentScale,minScale,maxScale,})if (el) {el.onwheel = (e) => {currentScale = el.style.getPropertyValue(cssVarName) || 1if (e.wheelDelta > 0) {currentScale = currentScale * 1 + 0.1} else {currentScale = currentScale * 1 - 0.1}setWheelScale(binding, {el,cssVarName,currentScale,minScale,maxScale,})}}})}// 设置 --scale 变量 缩放比例const setVarScale = (el, cssVarName, currentScale, minScale, maxScale) => {// 现在缩放范围if (currentScale > maxScale) {currentScale = maxScale} else if (currentScale < minScale) {currentScale = minScale}let cssText = el.style.cssTextlet cssTextList = cssText.split(";")let isExist = falselet isExistIndex = -1for (let index = 0; index < cssTextList.length; index++) {const element = cssTextList[index]if (element.includes(cssVarName + ":")) {isExist = trueisExistIndex = indexbreak}}if (isExist) {cssTextList[isExistIndex] = `--scale: ${currentScale}`} else {cssTextList.push(`--scale: ${currentScale}`)// el.setAttribute("style", `--scale: ${currentScale}`)}cssText = cssTextList.join(";")el.style.cssText = cssTextreturn currentScale}// 设置 style.transformconst setTransformCss = (el, cssVarName) => {let transformCssString = el.style.transformlet regScaleGlobal = /scale\(.*?[ )]*[)]+[ ]*/g //匹配 Scale属性 全局if (regScaleGlobal.test(transformCssString)) {transformCssString = transformCssString.replace(regScaleGlobal,` scale(var(${cssVarName})) `)} else {transformCssString += " " + `scale(var(${cssVarName}))`}el.style.transform = transformCssString}export const setWheelScale = (binding = {}, options) => {const { el, cssVarName, currentScale, minScale, maxScale } = optionsconst nowScale = setVarScale(el, cssVarName, currentScale, minScale, maxScale)setTransformCss(el, cssVarName)// 缩放改变回调函数const wheelScaleHandle = binding.value || nullif (wheelScaleHandle instanceof Function) {wheelScaleHandle({el,cssVarName,maxScale,minScale,currentScale: nowScale,setScale: (_scale) => {setWheelScale(binding, { ...options, currentScale: _scale })},binding,})}}main.js中全局注册自定义指令:
import { initVWheelScale} from "@/utils/scale.js"
initVWheelScale(Vue)
在图片预览组件中使用:
组件的使用:
<template><div><!-- ...其他内容 --><button @click="openPreview">预览图片</button><image-preview :images="imageList" ref="imagePreview"></image-preview></div>
</template><script>
import ImagePreview from '@/components/ImagePreview.vue'; // 引入你的图片预览组件export default {components: {ImagePreview,},data() {return {imageList: ['https://img1.baidu.com/it/u=582697934,2565184993&fm=253&fmt=auto&app=120&f=JPEG?w=500&h=539','https://img2.baidu.com/it/u=3519181745,2349627299&fm=253&fmt=auto&app=120&f=JPEG?w=750&h=500',// 更多图片路径],};},methods: {openPreview() {this.$refs.imagePreview.openPreview();},},
};
</script>
效果: