大家好,我是小黄。
今天分享一下如何0基础实现electron自动检测更新功能。
electron-updater%20%E5%AE%9E%E7%8E%B0%E8%87%AA%E5%8A%A8%E6%9B%B4%E6%96%B0">一. 安装 electron-updater 实现自动更新
安装依赖 electron-updater
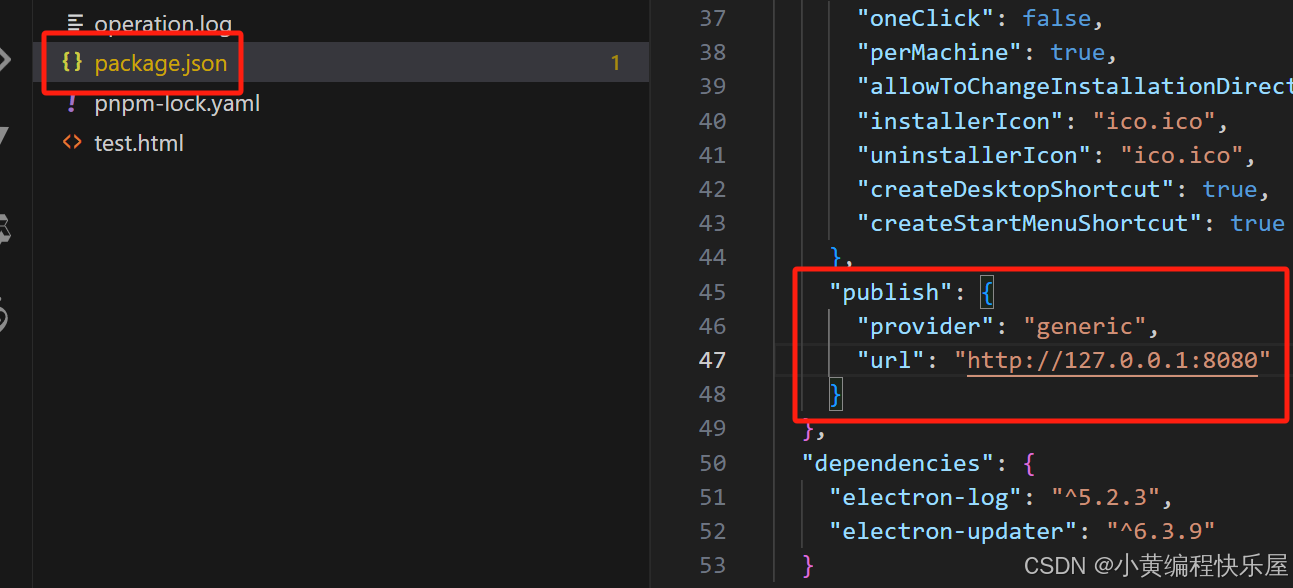
npm install electron-updater二. 修改package.josn

"publish": {"provider": "generic","url": "http://127.0.0.1:8080" }url为你的服务器地址。
三.修改main.js
注:代码不完整(完整版请关注小黄回复关键字:electron打包 获取)
const { app, BrowserWindow, ipcMain, dialog } = require('electron');
const { autoUpdater } = require('electron-updater');
const logger = require('electron-log');// 设置日志记录
logger.transports.file.maxSize = 1002430; // 10M
logger.transports.file.format = '[{y}-{m}-{d} {h}:{i}:{s}.{ms}] [{level}]{scope} {text}';
logger.transports.file.resolvePath = () => './operation.log';
autoUpdater.autoDownload = false; // 设置为 false,防止自动下载let progressWin = null;function createWindow() {let mainWin = new BrowserWindow({show: false,width: 1200,height: 1000,autoHideMenuBar: true,resizable: true,minHeight: 200,minWidth: 300,title: 'test',webPreferences: {enableWebSQL: false,webSecurity: false,spellcheck: false,nativeWindowOpen: true,nodeIntegration: true,contextIsolation: false,},});mainWin.loadFile('./test.html');// 调试窗口// mainWin.webContents.openDevTools();// 延迟 1 秒后检查更新setTimeout(() => {checkForUpdates(mainWin);}, 1000);function checkForUpdates(win) {const updateUrl = 'http://127.0.0.1:8080';autoUpdater.setFeedURL(updateUrl);// 检查更新autoUpdater.checkForUpdates();// 更新错误事件autoUpdater.on('error', (error) => {console.error('检查更新出错:', error);});// 检查更新事件autoUpdater.on('checking-for-update', () => {console.log('正在检查更新...');});// 发现新版本autoUpdater.on('update-available', (info) => {const choice = dialog.showMessageBoxSync(win, {type: 'info',buttons: ['更新', '稍后'],title: '发现新版本',message: `检测到新版本 ${info.version},是否立即更新?`,});if (choice === 0) {// 用户选择更新,创建进度弹窗createProgressWindow();autoUpdater.downloadUpdate();}});// 当前版本为最新版本autoUpdater.on('update-not-available', () => {console.log('当前版本已经是最新版本。');});// 下载进度事件autoUpdater.on('download-progress', (progress) => {const message = `已下载 ${Math.round(progress.percent)}% (${progress.transferred}/${progress.total})`;console.log(message);if (progressWin) {progressWin.webContents.send('progress', progress.percent);}});// 下载完成事件autoUpdater.on('update-downloaded', () => {if (progressWin) {progressWin.close();progressWin = null;}const choice = dialog.showMessageBoxSync(win, {type: 'info',buttons: ['立即安装', '稍后安装'],title: '更新完成',message: '更新包已下载完成,是否立即安装并重启应用?',});if (choice === 0) {autoUpdater.quitAndInstall(); // 安装并退出应用}});}mainWin.once('ready-to-show', () => {mainWin.show();});mainWin.on('close', (e) => {e.preventDefault();const choice = dialog.showMessageBoxSync(mainWin, {type: 'question',buttons: ['取消', '关闭'],title: '确认关闭',message: '确定要关闭应用吗?',});if (choice === 1) {mainWin.destroy();}});
}
四. 打包

注:--publish always 表示生成 latest.yml 文件并上传到指定的发布服务器。不然打包后可能没有latest.yml
五. 本地搭建测试的服务器
安装依赖http-server
pnpm install -g http-server修改版本version为1.0.1再次打包
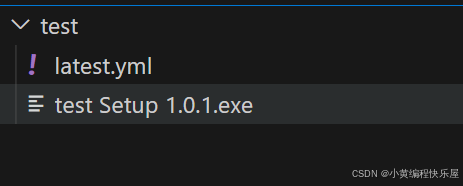
新建一个文件夹test
在文件夹下面存放打包后的exe和latest.yml

使用命令行启动服务
http-server ./test -p 8080启动成功后我们在浏览器访问一下
http://localhost:8080/latest.yml出现下面的就代表成功了。

六. 实际测试
注:更新无法再调试阶段测试,需要打包安装后进行测试。
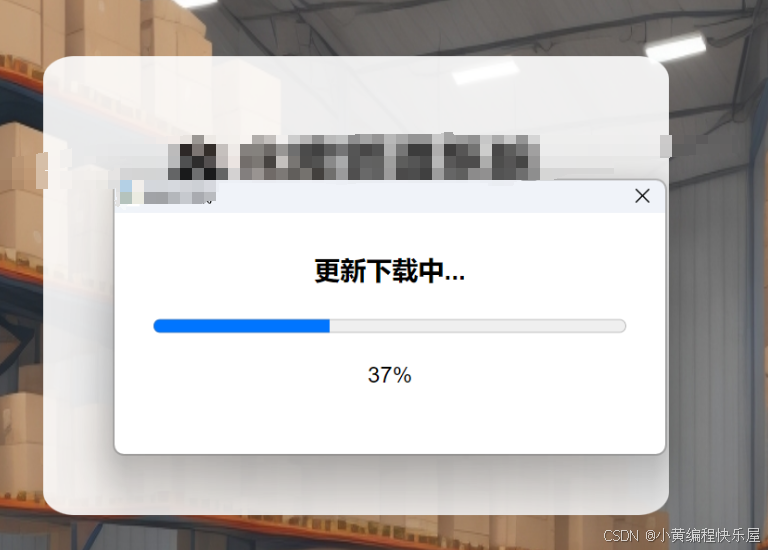
我们直接打开1.0.0版本的安装包,这样只要读取到有更高的版本electron就会提示更新。

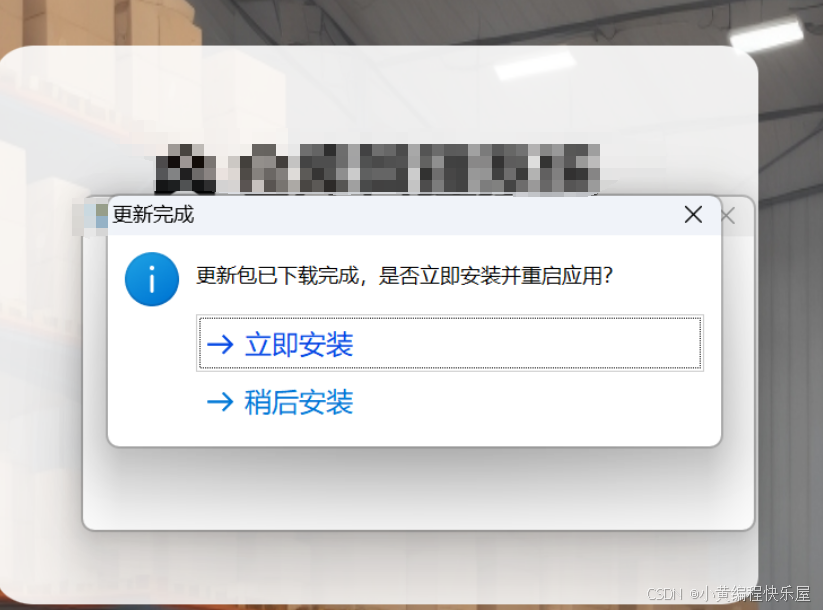
下载成功后就会提示是否安装了。

七.总结
常用用 API 和事件
-
autoUpdater.setFeedURL(url):设置远程更新服务器的 URL,URL 指向包含更新文件的服务器。 -
autoUpdater.checkForUpdates():启动更新检查流程,自动检测是否有新版本。 -
autoUpdater.on('checking-for-update'):当检查更新时触发,通常用于显示“正在检查更新...”的提示。 -
autoUpdater.on('update-available'):当发现新版本时触发,通常会弹出更新对话框,询问用户是否进行更新。 -
autoUpdater.on('update-not-available'):当当前版本已是最新时触发。 -
autoUpdater.on('download-progress'):当更新下载进度发生变化时触发,可以获取下载进度信息,用于更新进度条。 -
autoUpdater.on('update-downloaded'):当更新包下载完成时触发,通常会提示用户安装更新。 -
autoUpdater.quitAndInstall():下载完成后,可以调用此方法退出应用并安装新版本。
各位小伙伴还在BOSS直聘hr已读不回?!试试这个宝藏小程序!大家快看这里。
创作不易,各位帅气漂亮的小伙伴点个关注再走呗!!


