文章目录
- 一、实验场景
- 二、实验目标
- 三、实验架构图
- 四、涉及到AWS服务
- 五、演示操作
- 5.1 创建EC2实例
- 5.2 创建映像
- 5.3 备份AMI至Global S3
- 5.4 复制AMI从Global S3至 CN S3
- 5.5 还原AMI
- 5.6 测试AMI
- 六、参考链接
一、实验场景
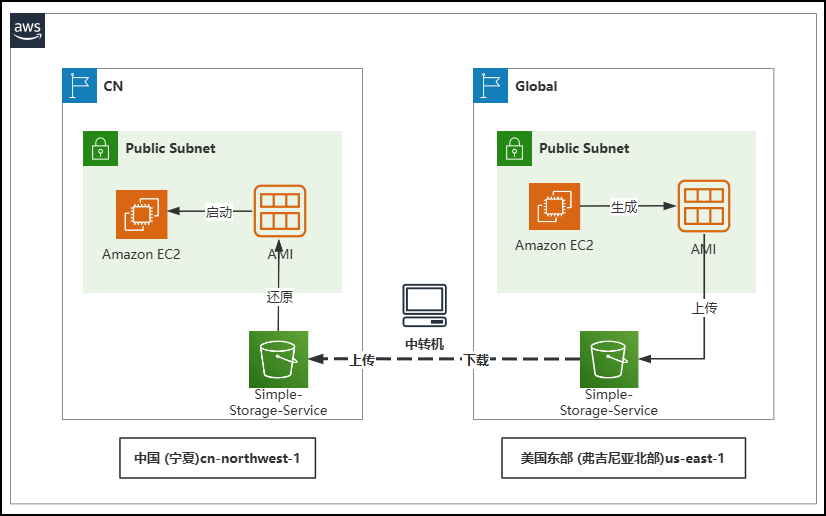
将 AWS Global区域的EC2实例备份至 AWS CN区域。
备份方式:通过 AMI 镜像的方式;
备份频率:2次/月;
备份镜像:可能涉及镜像许可问题;
二、实验目标
- 跨境备份和还原所需要的AMI镜像(包括但不限于Windows、Linux等映像);
- 利用S3 存储的生命周期管理功能,每周备份一次 AMI 镜像至CN区的 S3 指定的存储桶中;
- 还原S3中备份的AMI镜像,查看该 AMI 是否能够正常使用;
三、实验架构图
四、涉及到AWS服务
S3、EC2、AWS CLI2
五、演示操作
5.1 创建EC2实例
1️⃣以美国东部 (弗吉尼亚北部) us-east-1为例;
2️⃣EC2名称:EC2-AMI-Backup;
3️⃣Amazon Machine Image (AMI) 名称:Amazon Linux 2023 AMI;
Amazon Linux 2023 是基于 Linux 的现代化通用操作系统,提供 5 年的长期支持。它针对 AWS 进行了优化,旨在提供一个安全、稳定和高性能的执行环境来开发和运行您的云应用程序。
4️⃣Amazon Machine Image (AMI) ID:ami-06b21ccaeff8cd686 (64 位(x86), uefi-preferred) / ami-02801556a781a4499 (64 位(ARM), uefi)


- 安装Docker
Step 1: Update AL2023 Packages
sudo dnf updateStep 2. Installing Docker on Amazon Linux 2023
sudo dnf install dockerStep 3: Start and Enable its Service
sudo systemctl start docker && sudo systemctl enable docker && sudo systemctl status dockerStep 4: Allow docker to run without sudo
sudo usermod -aG docker $USERStep 5: Docker Uninstallation (optional)
sudo dnf remove docker
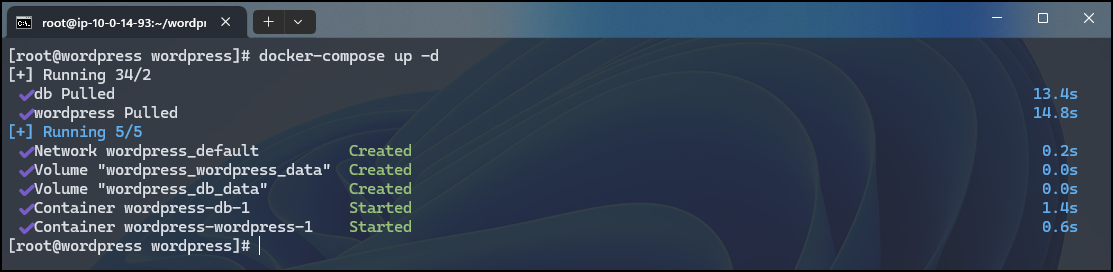
- 安装Docker-Compose
Step 1: To download and install Compose standalone, run:
curl -SL https://github.com/docker/compose/releases/download/v2.29.6/docker-compose-linux-x86_64 -o /usr/local/bin/docker-composeStep 2: Apply executable permissions to the standalone binary in the target path for the installation.
cd /usr/local/bin/docker-compose
chmod +x docker-composeStep 3: Test and execute compose commands using docker-compose.
sudo ln -s /usr/local/bin/docker-compose /usr/bin/docker-compose
- 安装WordPress
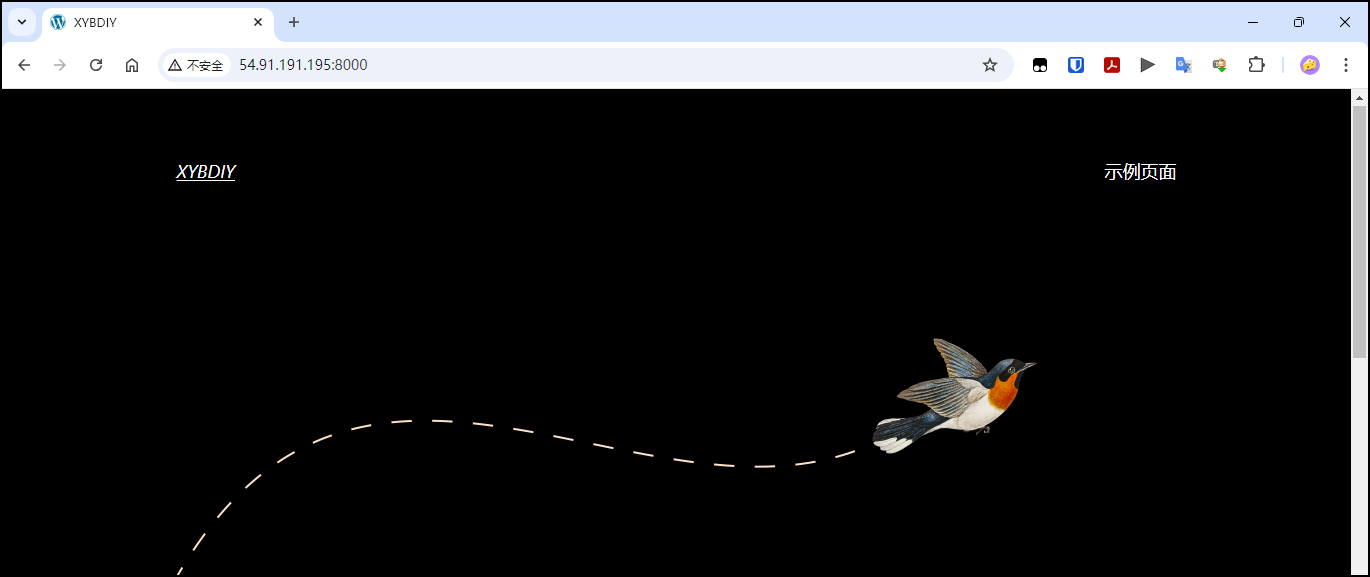
- 访问WordPress
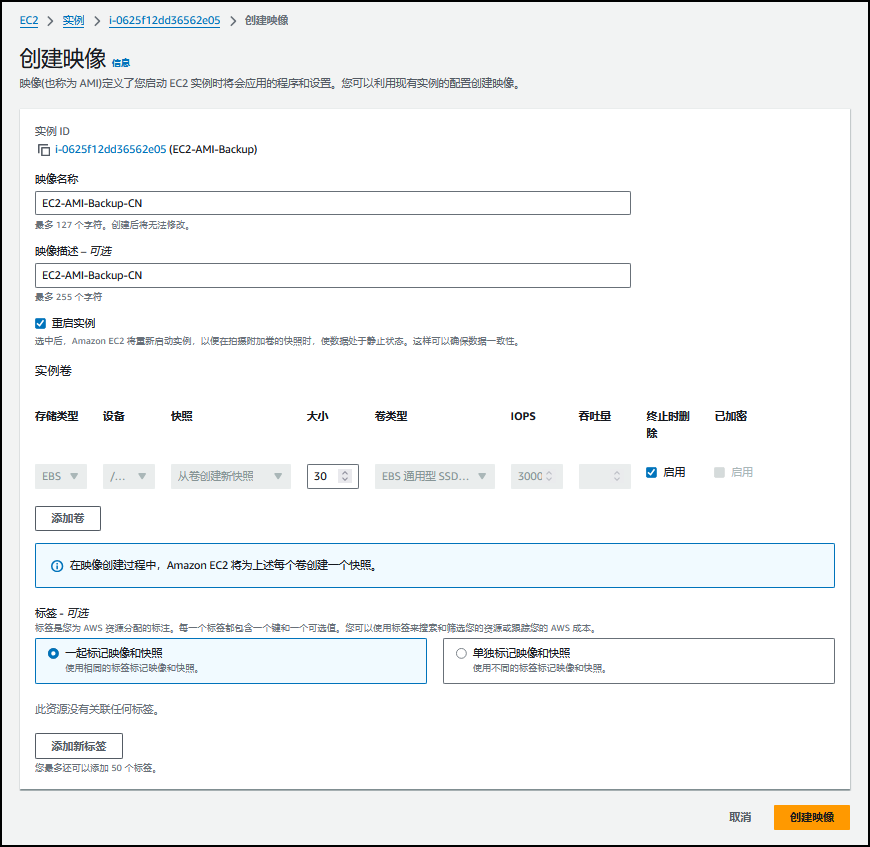
5.2 创建映像
依次点击
操作——映像和模板——创建映像。

填写映像名称。
查看确认AMI状态,是否是“
可用”。
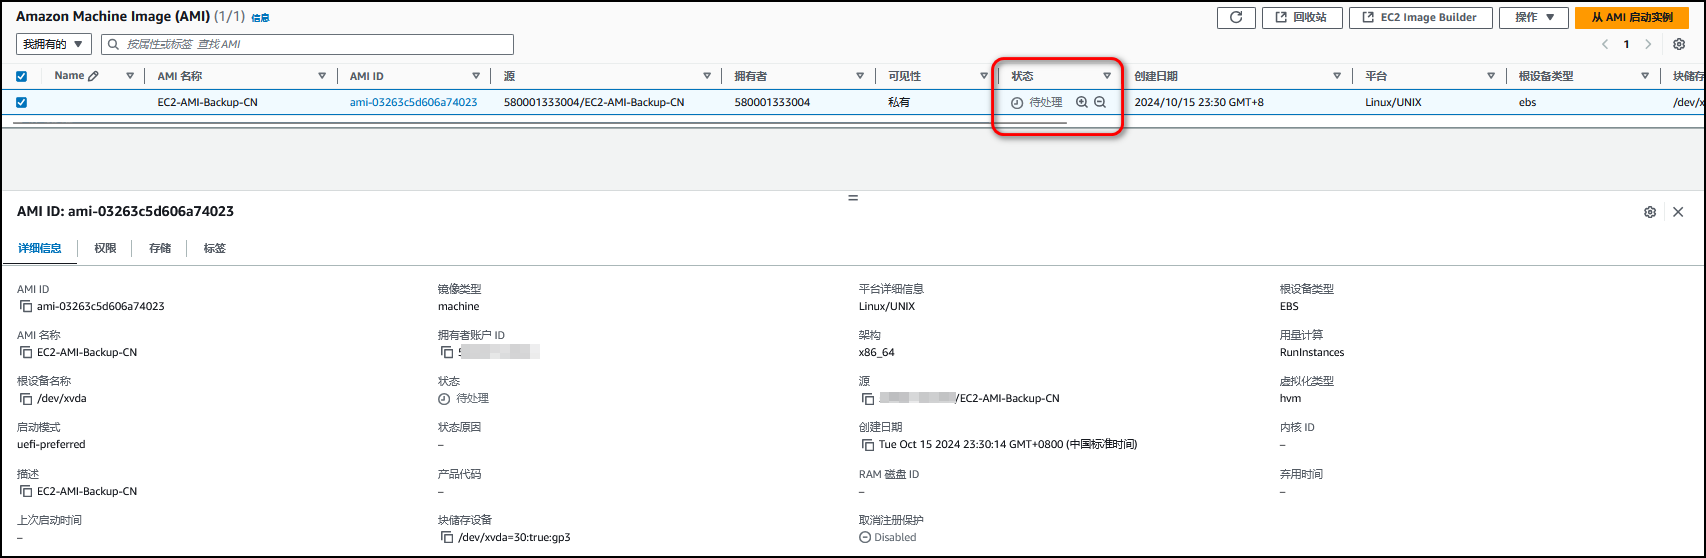
确认该状态已经变为
可用。

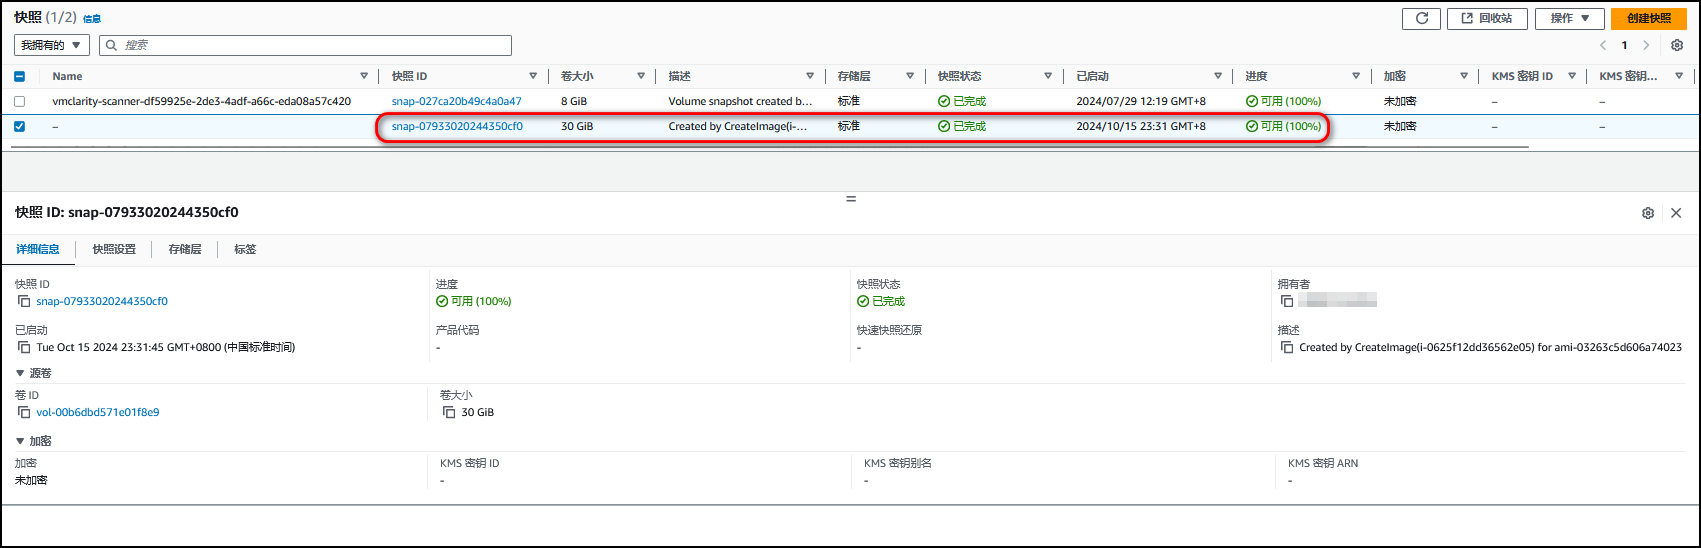
在快照一栏中,我们也可以发现该EC2快照。
以下是使用CLI命令进行操作:
注意:需要提前在运行环境中配置好AWS CLI命令运行配置信息。
aws ec2 create-image --instance-id <id> --name <name>C:\Users\xyb>aws ec2 create-image --instance-id i-0625f12dd36562e05 --name EC2-AMI-Backup-CLI
{"ImageId": "ami-0d3ffbc792ff21ba9"
}

5.3 备份AMI至Global S3
# 创建s3存储桶
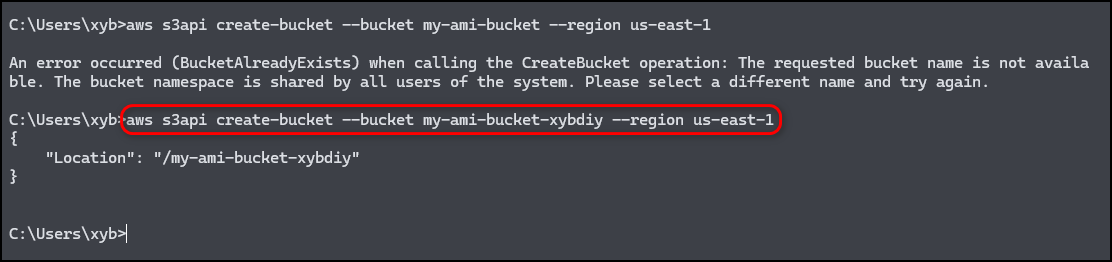
aws s3api create-bucket \--bucket my-bucket \--region us-east-1# 备份镜像至S3存储桶🪣中
aws ec2 create-store-image-task \--image-id ami-1234567890abcdef0 \--bucket my-ami-bucket
aws s3api create-bucket --bucket my-ami-bucket-xybdiy --region us-east-1aws ec2 create-store-image-task --image-id ami-03263c5d606a74023 --bucket my-ami-bucket-xybdiy
报错提示:提示该存储桶名称已存在,需要重新选择新的存储桶名称进行尝试。
- 执行如下命令,备份AMI镜像至Globa区域的指定的S3存储桶里。
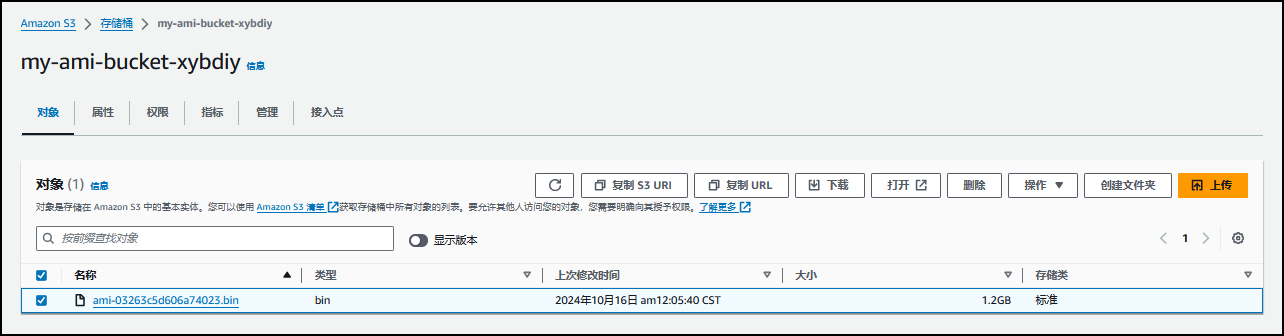
C:\Users\xyb>aws ec2 create-store-image-task --image-id ami-03263c5d606a74023 --bucket my-ami-bucket-xybdiy
{"ObjectKey": "ami-03263c5d606a74023.bin"
}
截图示例:

- 执行命令,查看该AMI镜像任务进度。
aws ec2 describe-store-image-tasks
C:\Users\xyb>aws ec2 describe-store-image-tasks
{"StoreImageTaskResults": [{"AmiId": "ami-03263c5d606a74023","TaskStartTime": "2024-10-15T16:05:39.813000+00:00","Bucket": "my-ami-bucket-xybdiy","S3objectKey": "ami-03263c5d606a74023.bin","ProgressPercentage": 100,"StoreTaskState": "Completed","StoreTaskFailureReason": ""}]
}
查看该镜像已经打包上传至存储桶中。

5.4 复制AMI从Global S3至 CN S3
# 登录AWS境内账号,创建存储桶。
aws s3api create-bucket --bucket my-bucket-cn-xybdiy --region cn-northwest-1 --create-bucket-configuration LocationConstraint=cn-northwest-1
{"Location": "http://my-bucket-cn-xybdiy.s3.cn-northwest-1.amazonaws.com.cn/"
}
Global 区域存储桶:
- 执行如下命令,上传.bin至CN区域存储桶。
aws s3 cp ami-03263c5d606a74023.bin s3://my-bucket-cn-xybdiy
截图示例:
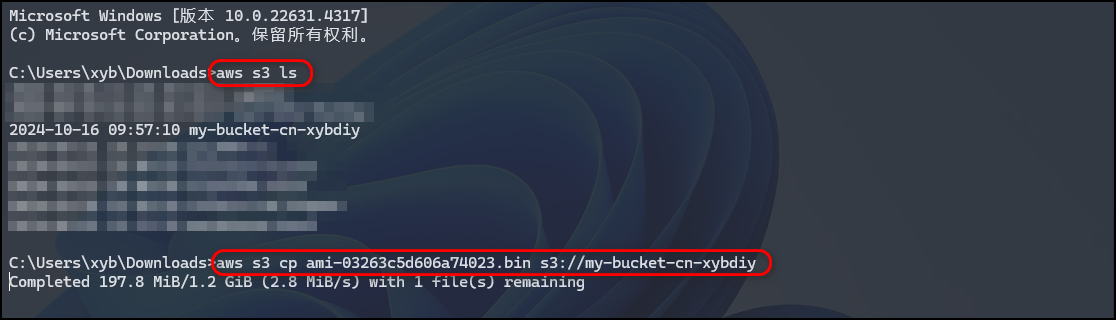
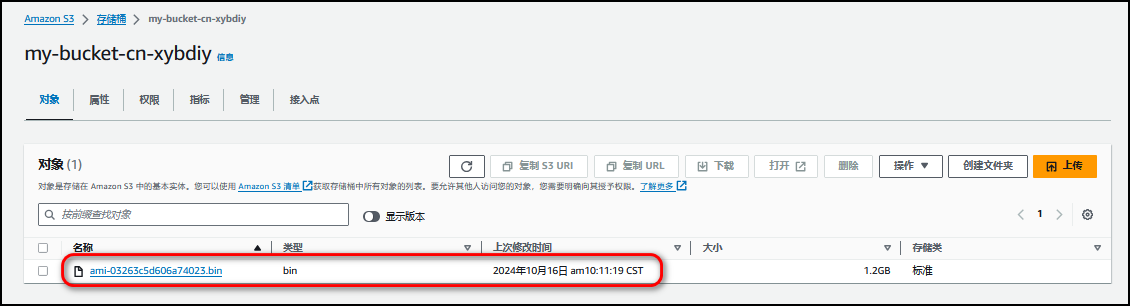
- 上传完成。

CN 区域存储桶:
5.5 还原AMI
# 示例
aws ec2 create-restore-image-task \--object-key ami-03263c5d606a74023.bin   \--bucket my-ami-bucket-xybdiy \--name "AMI-CN"
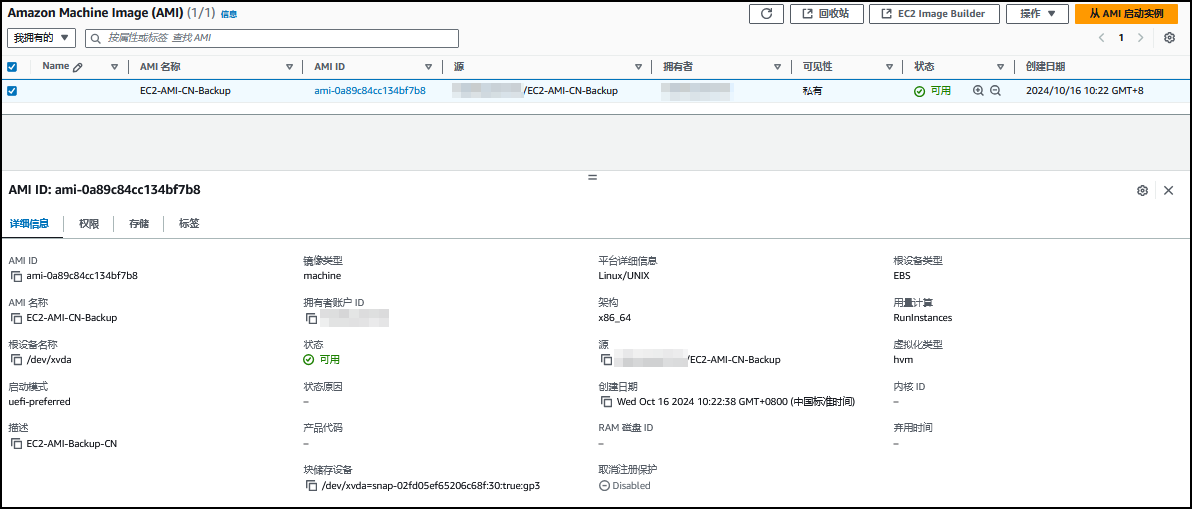
- 执行如下命令,还原AMI。
aws ec2 create-restore-image-task --object-key ami-03263c5d606a74023.bin --bucket my-bucket-cn-xybdiy --name EC2-AMI-CN-Backup

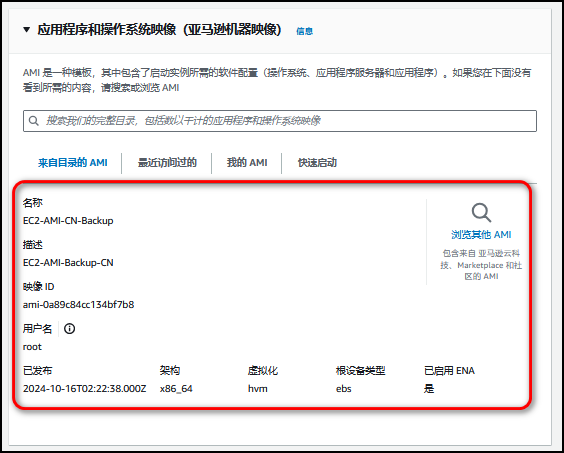
- 在控制台中,我们可以查看到AMI镜像。
5.6 测试AMI
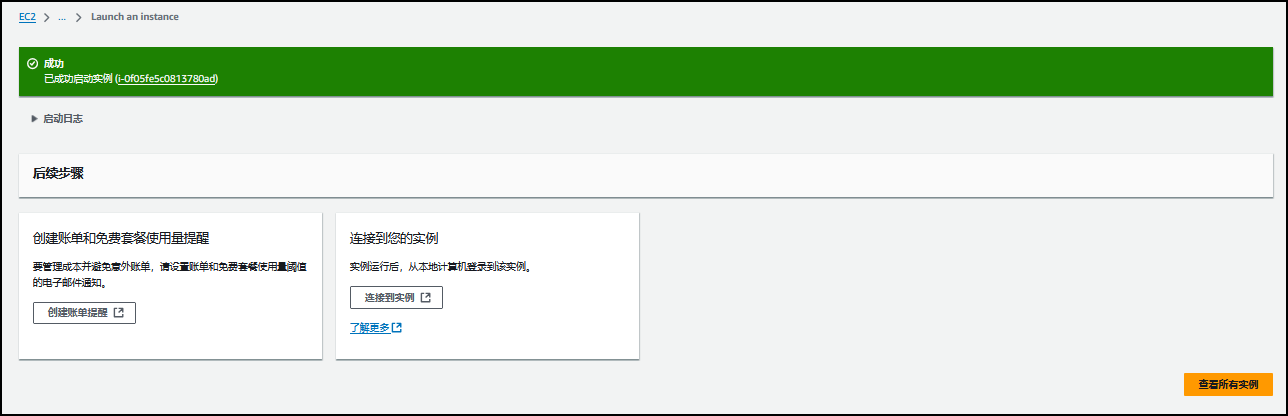
- 选择
从 AMI 启动实例。


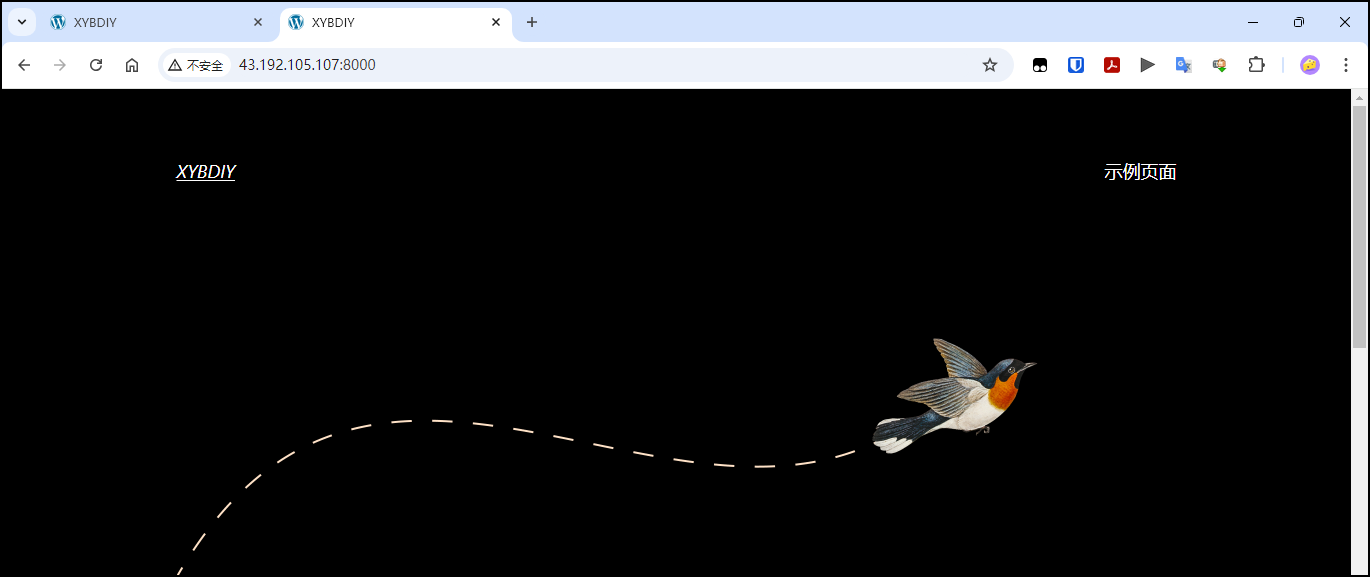
测试WordPress服务是否能够正常访问。
六、参考链接
💻 https://docs.aws.amazon.com/zh_cn/AWSEC2/latest/UserGuide/ami-store-restore.html
🔆 AWS CLI Command Reference — AWS CLI 2.18.7 Command Reference
📍 https://megazone.com/cn/ec2-instance-migration/