学习目标:
熟悉wait和notify的线程休眠和启动
熟悉多线程的基本案例
1.单例模式的两种设置模式:懒汉模式和饿汉模式
2.阻塞队列(生产者消费者模型)
3.线程池
4.定时器
1.wait和notify
wait() / wait(long timeout): 让当前线程进⼊等待状态notify() / notifyAll(): 唤醒在当前对象上等待的线程
注意: wait, notify, notifyAll 都是 Object 类的⽅法。
1.1 wait()⽅法
wait方法的三步:
1.使当前执⾏代码的线程进⾏等待. (把线程放到等待队列中)2.释放当前的锁3.满⾜⼀定条件时被唤醒, 重新尝试获取这个锁.
wait 要搭配 synchronized 来使⽤. 脱离 synchronized 使⽤ wait 会直接抛出异常.
wait 结束等待的条件:
1.其他线程调⽤该对象的 notify ⽅法.2.wait 等待时间超时 (wait ⽅法提供⼀个带有 timeout 参数的版本, 来指定等待时间).3.其他线程调⽤该等待线程的 interrupted ⽅法, 导致 wait 抛出 InterruptedException 异常.这一点跟sheep相似。
代码⽰例: 观察wait()⽅法使⽤
1.2 notify()⽅法
public static Object locker = new Object();public static void main(String[] args) {Thread t1 = new Thread(() -> {synchronized(locker) {try {System.out.println("wait之前");locker.wait();//让线程进入等待System.out.println("wait之后");} catch (InterruptedException e) {e.printStackTrace();}}});Thread t2 = new Thread(() -> {synchronized(locker) {try {Thread.sleep(1000);//保证t1线程进入wiat方法} catch (InterruptedException e) {e.printStackTrace();}System.out.println("notify之前");locker.notify();System.out.println("notify之后");}});t1.start();t2.start();}注意:notify()方法也要放在synchronized里面
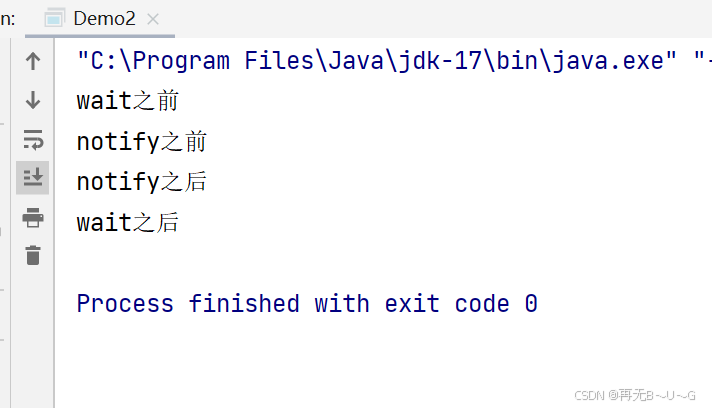
但是notify方法只能唤醒一个wiat方法。
代码如下:
public static Object locker = new Object();public static void main(String[] args) throws InterruptedException {Thread t1 = new Thread(() -> {synchronized(locker) {try {System.out.println("t1之前");locker.wait();//让线程进入等待System.out.println("t1之后");} catch (InterruptedException e) {e.printStackTrace();}}});Thread t2 = new Thread(() -> {synchronized(locker) {try {System.out.println("t2之前");locker.wait();//让线程进入等待System.out.println("t2之后");} catch (InterruptedException e) {e.printStackTrace();}}});Thread t3 = new Thread(() -> {synchronized(locker) {try {System.out.println("t3之前");locker.wait();//让线程进入等待System.out.println("t3之后");} catch (InterruptedException e) {e.printStackTrace();}}});t1.start();t2.start();t3.start();Thread.sleep(1000);synchronized (locker) {System.out.println("notify之前");locker.notify();System.out.println("notify之后");}输出结果:

1.3 notifyAll()⽅法
notify⽅法只是唤醒某⼀个等待线程. 使⽤notifyAll⽅法可以⼀次唤醒所有的等待线程.
范例:使⽤notifyAll()⽅法唤醒所有等待线程, 在上⾯的代码基础上做出修改.
public static Object locker = new Object();public static void main(String[] args) throws InterruptedException {Thread t1 = new Thread(() -> {synchronized(locker) {try {System.out.println("t1之前");locker.wait();//让线程进入等待System.out.println("t1之后");} catch (InterruptedException e) {e.printStackTrace();}}});Thread t2 = new Thread(() -> {synchronized(locker) {try {System.out.println("t2之前");locker.wait();//让线程进入等待System.out.println("t2之后");} catch (InterruptedException e) {e.printStackTrace();}}});Thread t3 = new Thread(() -> {synchronized(locker) {try {System.out.println("t3之前");locker.wait();//让线程进入等待System.out.println("t3之后");} catch (InterruptedException e) {e.printStackTrace();}}});t1.start();t2.start();t3.start();Thread.sleep(1000);synchronized (locker) {System.out.println("notifyAll之前");locker.notifyAll();System.out.println("notifyAll之后");}}输出结果:

wiat方法和notify方法总结:

1.4 wait 和 sleep 的对⽐(⾯试题)
唯⼀的相同点就是都可以让线程放弃执⾏⼀段时间.
1. wait 需要搭配 synchronized 使⽤. sleep 不需要.
2.wait 是 Object 的⽅法 sleep 是 Thread 的静态⽅法.
2.多线程案例
2.1 单例模式
单例模式是校招中最常考的设计模式之⼀.
啥是设计模式?
单例模式能保证某个类在程序中只存在唯⼀⼀份实例, ⽽不会创建出多个实例.
单例模式具体的实现⽅式有很多. 最常⻅的是 "饿汉" 和 "懒汉" 两种.
饿汉模式
class Singleton {private static Singleton instance = new Singleton();private Singleton() {}public static Singleton getInstance() {return instance;}
}
使用的时候SingLeton.getInstance()获取实例
懒汉模式-单线程版
类加载的时候不创建实例. 第⼀次使⽤的时候才创建实例.
代码:
 class Singleton {private static Singleton instance = null;private Singleton() {}//防止使用new出来实例所以设置为私有的public static Singleton getInstance() {if (instance == null) {instance = new Singleton();}return instance;}
}
但是是存在线程安全问题的
懒汉模式-多线程版
上⾯的懒汉模式的实现是线程不安全的.
线程安全问题发⽣在⾸次创建实例时. 如果在多个线程中同时调⽤ getInstance ⽅法, 就可能导致创建 出多个实例.⼀旦实例已经创建好了, 后⾯再多线程环境调⽤ getInstance 就不再有线程安全问题了(不再修改instance 了)

这时候我们选择给写加锁

这个时候,我们选择在加一个if判断


这里我们引出了volatile的另一个用法:禁止指令重排序

3.阻塞队列
当队列满的时候, 继续⼊队列就会阻塞, 直到有其他线程从队列中取⾛元素.当队列空的时候, 继续出队列也会阻塞, 直到有其他线程往队列中插⼊元素.
阻塞队列的⼀个典型应⽤场景就是 "⽣产者消费者模型". 这是⼀种⾮常典型的开发模型.
3.1⽣产者消费者模型

两大作用:
1.阻塞队列就相当于⼀个缓冲区,平衡了⽣产者和消费者的处理能⼒. (削峰填⾕)
2.阻塞队列也能使⽣产者和消费者之间 解耦.
标准库中的阻塞队列
- BlockingQueue 是⼀个接⼝. 真正实现的类是 LinkedBlockingQueue.
- put ⽅法⽤于阻塞式的⼊队列, take ⽤于阻塞式的出队列.
- BlockingQueue 也有 offer, poll, peek 等⽅法, 但是这些⽅法不带有阻塞特性.
4个实例让你了解BlokingQueue的特性
实例1:
BlockingQueue<String> queue = new LinkedBlockingQueue<>();
// ⼊队列
queue.put("abc");
// 出队列. 如果没有 put 直接 take, 就会阻塞.
String elem = queue.take();
实例2:
public static void main(String[] args) throws InterruptedException {BlockingQueue<Integer> queue = new ArrayBlockingQueue<Integer>(3);queue.put(1);queue.put(2);queue.take();queue.take();queue.take();//出第三个的时候因为队列里面没有东西一直在堵塞}输出结果:

实例3:
public static void main(String[] args) throws InterruptedException {BlockingQueue<Integer> queue = new ArrayBlockingQueue<Integer>(2);queue.put(1);queue.put(2);queue.put(3);}输出结果:

实例4:
public static void main(String[] args) throws InterruptedException {BlockingQueue<Integer> queue = new ArrayBlockingQueue<Integer>(2);//生产者Thread t1 = new Thread(() -> {for(int i = 0; i <= 100; i++) {try {System.out.println("生产"+ i);queue.put(i);} catch (InterruptedException e) {e.printStackTrace();}}});//消费者Thread t2 = new Thread(() -> {while(true) {try {int value = queue.take();System.out.println("消费" + value);} catch (InterruptedException e) {e.printStackTrace();}}});t1.start();t2.start();}输出结果:

⽣产者消费者模型实现
代码:
public class MyBlockingQueue {private String[] data = null;private volatile int head = 0;private volatile int tail = 0;private volatile int size = 0;public MyBlockingQueue(int capacity) {data = new String[capacity];}public void put(String s) throws InterruptedException {synchronized (this) {//满队列if(size == data.length) {this.wait();}data[tail] = s;tail++;if(tail == data.length) {tail = 0;}size++;this.notify();}}public String take() throws InterruptedException {String ret = "";synchronized (this) {if(size == 0) {this.wait();}ret = data[head];head++;if(head >= data.length) {head = 0;}size--;this.notify();return ret;}}
}
解释为什么可以使用相同的锁:

但是还有一个问题:

怎么解决:

修改后的代码:
public class MyBlockingQueue {private String[] data = null;private int head = 0;private int tail = 0;private int size = 0;public MyBlockingQueue(int capacity) {data = new String[capacity];}public void put(String s) throws InterruptedException {synchronized (this) {//满队列while(size == data.length) {this.wait();}data[tail] = s;tail++;if(tail == data.length) {tail = 0;}size++;this.notify();}}public String take() throws InterruptedException {String ret = "";synchronized (this) {while(size == 0) {this.wait();}ret = data[head];head++;if(head >= data.length) {head = 0;}size--;this.notify();return ret;}}
}
4.线程池
纸面意思就是用来装线程的池。
线程池最⼤的好处就是减少每次启动、销毁线程的损耗。
比如说:
ExecutorService pool = Executors.newFixedThreadPool(10);
pool.submit(new Runnable() {@Overridepublic void run() {System.out.println("hello");}
});
- newFixedThreadPool: 创建固定线程数的线程池
- newCachedThreadPool: 创建线程数⽬动态增⻓的线程池.
- newSingleThreadExecutor: 创建只包含单个线程的线程池.
- newScheduledThreadPool: 设定 延迟时间后执⾏命令,或者定期执⾏命令. 是进阶版的 Timer. Executors 本质上是 ThreadPoolExecutor 类的封装.
ThreadPoolExecutor 提供了更多的可选参数, 可以进⼀步细化线程池⾏为的设定.
这里我们学习最后一个,学会最后一个其他的都不成问题。

参数解释:


4.1线程池的使用

全部代码:
public static void main(String[] args) {ExecutorService service = Executors.newFixedThreadPool(4);for (int i = 0; i < 100; i++) {int id = i;service.submit(new Runnable() {@Overridepublic void run() {Thread t = Thread.currentThread();//获取当前线程System.out.println("Runnable" + id + " " + t.getName());}});}service.shutdown();}4.2简单模拟实现
public class MyThreadPool {private BlockingQueue<Runnable> queue = new ArrayBlockingQueue<>(1000);public MyThreadPool(int n) {//创建n个线程for (int i = 0; i < n; i++) {Thread t = new Thread(() ->{while(true) {try {Runnable runnable = queue.take();//执行任务runnable.run();} catch (InterruptedException e) {e.printStackTrace();}}});t.start();}}public  void submit(Runnable runnable) {try {queue.put(runnable);//添加任务} catch (InterruptedException e) {e.printStackTrace();}}
}
class Demo4 {public static void main(String[] args) {MyThreadPool pool = new MyThreadPool(4);for (int i = 0; i < 1000; i++) {int id = i;pool.submit(() -> {Thread t = Thread.currentThread();//获取当前线程System.out.println("Runnable" + id + "  " + t.getName());});}}
}
输出效果:

5.定时器
- ⼀个带优先级队列(不要使⽤ PriorityBlockingQueue, 容易死锁!)
- 队列中的每个元素是⼀个 Task 对象.
- Task 中带有⼀个时间属性, 队⾸元素就是即将要执⾏的任务
- 同时有⼀个 worker 线程⼀直扫描队⾸元素, 看队⾸元素是否需要执⾏
基本使用:
public static void main(String[] args) {Timer timer = new Timer();System.out.println("开始执行");timer.schedule(new TimerTask() {@Overridepublic void run() {System.out.println("执行结束");}}, 3000);//经过3s后面才执行run里面的内容}基本模拟代码:
import java.util.PriorityQueue;class MyTimerTask implements Comparable<MyTimerTask> {private Runnable runnable;private long time;//表示什么时候执行public MyTimerTask(Runnable runnable, Long delay) {this.runnable = runnable;this.time = System.currentTimeMillis() + delay;}public void run() {runnable.run();}public long getTime() {return time;}@Overridepublic int compareTo(MyTimerTask o) {return (int) (this.time - o.time);}
}class MyTimer {Object locker = new Object();private PriorityQueue<MyTimerTask> queue = new PriorityQueue<>();public MyTimer() {Thread t = new Thread(() -> {try {while (true) {synchronized (locker) {if (queue.isEmpty()) {continue;}MyTimerTask current = queue.peek();if (System.currentTimeMillis() >= current.getTime()) {current.run();queue.poll();//执行完删除} else {continue;}}}} catch (InterruptedException e) {e.printStackTrace();}});t.start();}public void schedule(Runnable runnable, long delay) {synchronized (locker) {MyTimerTask myTimerTask = new MyTimerTask(runnable, delay);queue.offer(myTimerTask);locker.notify();}}
}public class Demo6 {public static void main(String[] args) {MyTimer myTimer = new MyTimer();myTimer.schedule(() -> {System.out.println("hello3");}, 300);myTimer.schedule(() -> {System.out.println("hello2");}, 200);}
}
但是一些问题:

还有:

最终代码:
import java.util.PriorityQueue;class MyTimerTask implements Comparable<MyTimerTask> {private Runnable runnable;private long time;//表示什么时候执行public MyTimerTask(Runnable runnable, Long delay) {this.runnable = runnable;this.time = System.currentTimeMillis() + delay;}public void run() {runnable.run();}public long getTime() {return time;}@Overridepublic int compareTo(MyTimerTask o) {return (int) (this.time - o.time);}
}class MyTimer {Object locker = new Object();private PriorityQueue<MyTimerTask> queue = new PriorityQueue<>();public MyTimer() {Thread t = new Thread(() -> {try {while (true) {synchronized (locker) {if (queue.isEmpty()) {locker.wait();}MyTimerTask current = queue.peek();if (System.currentTimeMillis() >= current.getTime()) {current.run();queue.poll();//执行完删除} else {//还有多久时间到执行堆头locker.wait(current.getTime() - System.currentTimeMillis());//Thread.sleep(current.getTime() - System.currentTimeMillis());//固定时间,如果在这一段时间添加时间更短的任务,就出bug了}}}} catch (InterruptedException e) {e.printStackTrace();}});t.start();}public void schedule(Runnable runnable, long delay) {synchronized (locker) {MyTimerTask myTimerTask = new MyTimerTask(runnable, delay);queue.offer(myTimerTask);locker.notify();}}
}
好了今天就到这里了。